
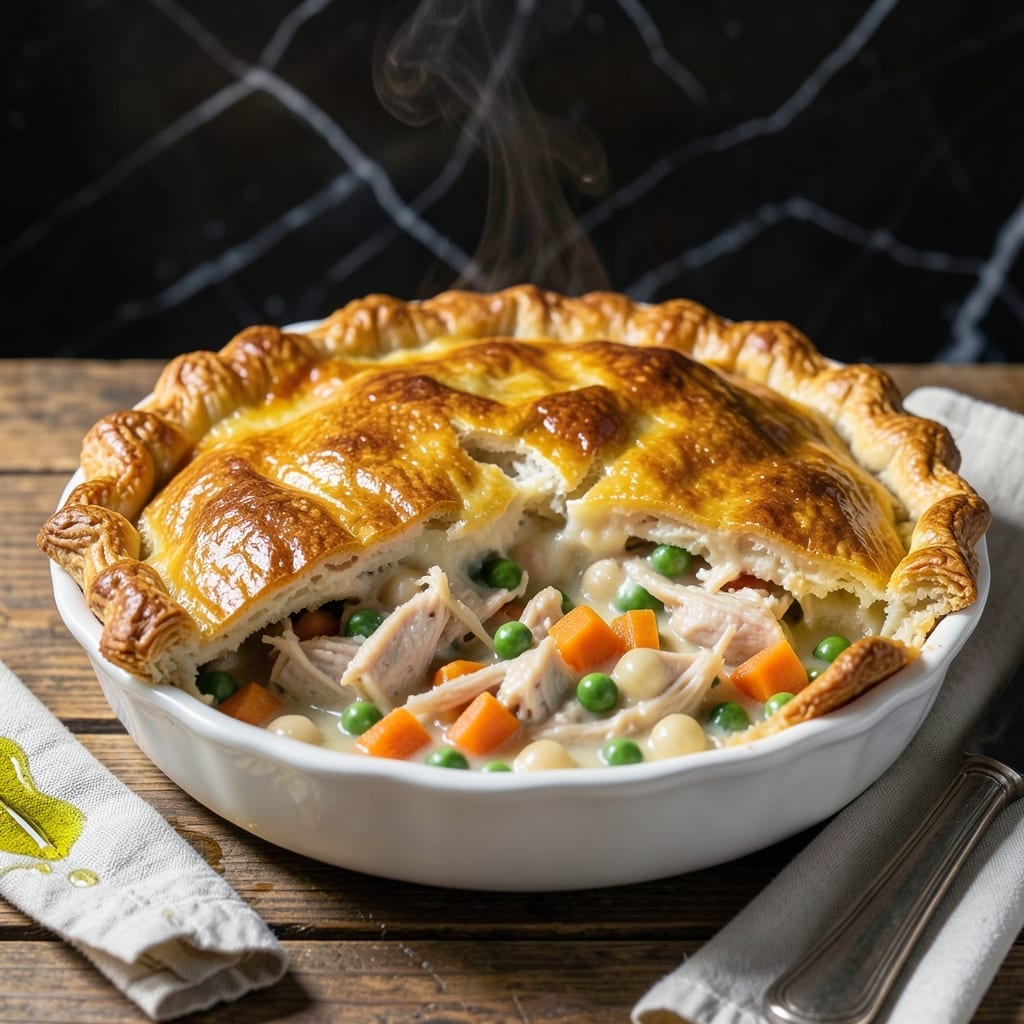
Canned chicken transforms this classic pot pie into a quick, reliable meal without sacrificing flavor. The filling comes together with a creamy, savory base that highlights the chicken’s simplicity.
What makes this dish stand out is the flaky crust—achieved with a few key techniques and store-bought dough. It bakes to golden perfection, encasing the rich, hearty filling inside.
This recipe proves that convenience doesn’t mean compromise. The chicken stays tender, the vegetables hold their texture, and the sauce delivers comfort in every bite.
Serve it fresh from the oven for a meal that feels homemade, even on the busiest nights.
Ingredients for Kirkland Canned Chicken Pot Pie
Pantry staples and Kirkland chicken create this comforting classic with minimal effort
| Ingredient | Amount | Notes |
|---|---|---|
| Kirkland Signature Canned Chicken Breast 🍗 | 2 cans | Drained and shredded |
| Refrigerated Pie Crust 🥧 | 2 sheets | Store-bought, thawed |
| Unsalted Butter 🧈 | ½ cup | For roux and filling |
| All-Purpose Flour 🌾 | ½ cup | For thickening sauce |
| Whole Milk 🥛 | 1 ½ cups | Full-fat for creaminess |
| Chicken Broth 🍲 | 1 ½ cups | Low-sodium preferred |
| Frozen Mixed Vegetables 🥕 | 2 cups | Peas, carrots, corn, green beans |
| Yellow Onion 🧅 | 1 whole | Medium, finely diced |
| Garlic Cloves 🧄 | 3 cloves | Minced for depth |
| Dried Thyme 🌿 | 1 tsp | For earthy aroma |
| Dried Rosemary 🍃 | 1 tsp | Crushed between fingers |
| Salt 🧂 | 1 tsp | Diamond Crystal kosher |
| Black Pepper 🌶️ | ½ tsp | Freshly ground preferred |
| Egg 🥚 | 1 whole | For egg wash |
The Kirkland Signature Canned Chicken is the shortcut hero here—canned chicken retains moisture surprisingly well, especially when drained and shredded. Costco carries it in multipacks, making this recipe both budget-friendly and shelf-stable. For the pie crust, Pillsbury refrigerated dough delivers consistent flakiness without the fuss of homemade. Look for the all-butter version if available (the good stuff, not the pre-shredded kind).
No canned chicken? Rotisserie chicken at double the amount works beautifully—just shred it finely. Fresh thyme or rosemary can replace the dried at one-third the quantity. For a richer sauce, swap whole milk for half-and-half or heavy cream. Want more veg? Add diced celery or mushrooms (about 1 cup total). The frozen veg blend can be fresh, but frozen holds up better during baking.
Assemble the pie just before baking—no soggy crust. Leftovers keep for 3-4 days refrigerated, though the crust softens. Freeze unbaked pies for up to 2 months (wrap tightly in foil). Reheat individual slices in a toaster oven to revive the flake.
Why You’ll Love This Recipe
- No-Fuss Assembly: I just dump the Kirkland chicken in—no cooking or shredding—and roll out the pie crust. Honestly, it’s the closest thing to homemade without the hassle.
- Creamy Comfort: The butter, flour, and whole milk make this silky filling that clings to every bite of chicken and crust. That first forkful? Pure cozy.
- Weeknight Hero: I’ve served this for lazy Sundays and last-minute dinner guests. Between us, no one guesses it started with canned chicken.
- Budget-Friendly Feast: One can of Kirkland chicken stretches into a full pie that feeds four. I’ll be real: it’s my go-to when I need to eat well without overspending.
Step-by-Step Instructions for Kirkland Canned Chicken Pot Pie
Achieve perfect flakiness and a rich, creamy filling with this proven method.
Step 1: Prepare the Filling Base
Drain and shred the 2 cans Kirkland Signature Canned Chicken Breast. In a large skillet over medium heat, melt the 0.5 cup Unsalted Butter. Add the finely diced Yellow Onion and cook for 4-5 minutes until translucent and soft.
Stir in the minced 3 cloves Garlic Cloves, 1 tsp Dried Thyme, and 1 tsp Dried Rosemary, cooking for an additional 1 minute until fragrant. This builds the aromatic foundation for your filling.
Step 2: Create the Creamy Roux Sauce
Sprinkle the 0.5 cup All-Purpose Flour over the onion mixture, stirring constantly for 2 minutes to cook out the raw flour taste. Gradually whisk in the 1.5 cups Chicken Broth and 1.5 cups Whole Milk, ensuring no lumps form.
Bring the mixture to a gentle simmer, then reduce heat to medium-low. Cook for 5-7 minutes, stirring frequently, until the sauce thickens enough to coat the back of a spoon. Season with 1 tsp Salt and 0.5 tsp Black Pepper.
Step 3: Combine Filling Ingredients
Add the shredded chicken and 2 cups Frozen Mixed Vegetables to the sauce. Stir well to combine, then cook for an additional 3-4 minutes until the vegetables are heated through and the filling is bubbling gently.
Remove from heat and let the filling cool slightly for 10 minutes. This prevents the bottom crust from becoming soggy when assembled.
Step 4: Assemble and Bake the Pot Pie
Preheat your oven to 375°F. Unroll 1 sheet Refrigerated Pie Crust and fit it into a 9-inch pie dish, pressing gently into the bottom and sides. Pour the cooled filling into the crust.
Unroll the second Refrigerated Pie Crust and place it over the filling. Crimp the edges to seal, then cut 4-5 small slits in the top crust to allow steam to escape. Brush the top with a beaten 1 whole Egg for a golden finish.
Bake for 40-45 minutes until the crust is deep golden brown and the filling is bubbling through the slits. Let cool for 10 minutes before serving to allow the filling to set.
Pro Tips For Making Kirkland Canned Chicken Pot Pie
- Drain the Chicken: Rinse and thoroughly drain the Kirkland canned chicken—extra moisture makes the filling watery and the crust soggy. I learned this the hard way after my first three pies turned into soup.
- Chill the Crust: Let the refrigerated pie crust sit out for 10-15 minutes before rolling—it’s easier to work with and less likely to crack. Sounds weird, but it works.
- Thicken the Filling: Cook the flour-butter roux for at least 2 minutes before adding milk to remove the raw flour taste. After burning one batch, I finally figured out patience pays off here.
- Vent the Top: Cut 3-4 small slits in the top crust before baking so steam can escape. My grandmother swore by this, and she was right—no one wants a collapsed pie.
Common Mistakes When Making Great kirkland canned chicken pot pie
Overworking the Dough
Store-bought pie crust is designed for convenience, but it still needs gentle handling. Avoid stretching or rerolling the dough, as this can make it tough. Simply unroll, press into your dish, and trim the edges. 💡
Skipping the Cooling Step
Pouring hot filling directly onto the crust creates a soggy bottom. Always let your filling cool for at least 10 minutes before assembling. This small wait makes a big difference in texture.
Under-Seasoning the Filling
Canned chicken can taste bland if not properly seasoned. Taste your sauce before adding the chicken and adjust with 1 tsp Salt and 0.5 tsp Black Pepper. I often add an extra pinch of Dried Thyme for depth.
Overfilling the Pie
A 9-inch pie dish should hold about 4-5 cups of filling max. Overfilling causes spills and prevents proper crust browning. If you have extra, bake it in a ramekin as a mini pot pie.
Forgetting Steam Vents
Without vents, steam builds up and can make your top crust soggy. Cut 4-5 small slits before baking. I use a sharp knife to make clean cuts that seal nicely during cooking.
Rushing the Bake
A golden crust doesn’t always mean it’s done. Bake for the full 40-45 minutes at 375°F until the filling bubbles through the vents. This ensures the bottom crust is fully cooked too. 🔥
Nutrition Facts
Frequently Asked Questions
Can I use fresh chicken instead of canned?
Use 3 cups cooked, shredded chicken breast as a substitute. Canned chicken works well for convenience, but fresh will give you a slightly firmer texture. Just ensure it’s fully cooked before adding to the filling.
How do I prevent a soggy bottom crust?
Let the filling cool for 10 minutes before assembling. Also, pre-bake the bottom crust for 8-10 minutes at 375°F to create a barrier. This keeps it crisp even with the moist filling.
Can I make this ahead of time?
Yes! Assemble the pie, cover tightly, and refrigerate for up to 24 hours before baking. For longer storage, freeze unbaked pies for up to 2 months. Add 5-10 minutes to bake time if cooking from frozen.
What should I serve with this pot pie?
A simple green salad or steamed vegetables pair perfectly with the rich filling. For a heartier meal, add mashed potatoes or buttered noodles. The flaky crust stands up well to these classic sides.

- 6 Oz Chocolate Chip Cookie Recipe: Perfectly Balanced Crispy Edges and Chewy Hearts - September 25, 2026
- 6-Inch Coffee Cake Recipe: Vanilla Bean Swirls and Buttery Streusel Topping - September 25, 2026
- 1 Hour Soup Recipe: Velvety Richness Without the Wait - September 25, 2026