
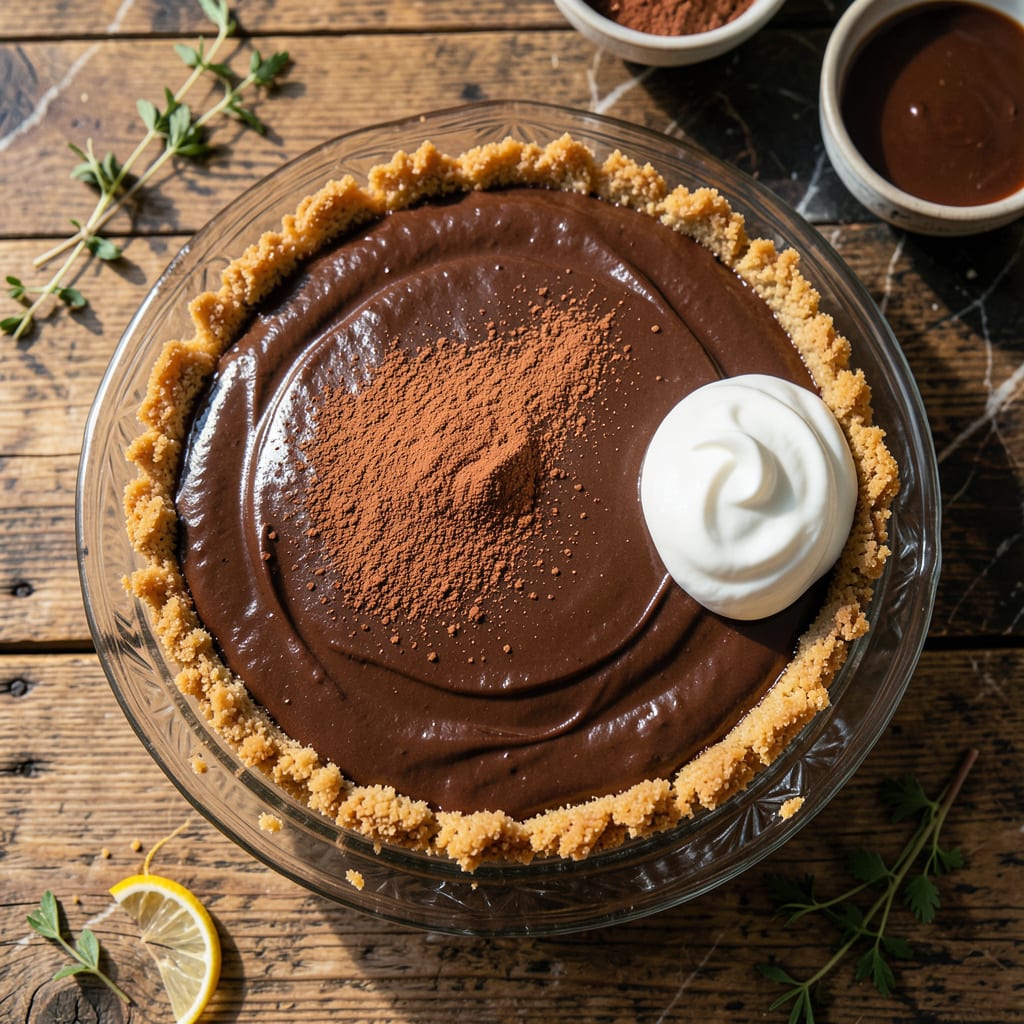
I’ve cracked the code for a decadent chocolate pie that’s surprisingly light yet still delivers that signature velvety smooth texture you crave. The secret lies in clever ingredient swaps that don’t compromise on richness or flavor.
This version features a delicate, low-fat crust paired with a luscious filling that’s just as satisfying as the classic. It’s the perfect way to indulge without the guilt, and it’s easier to make than you’d think.
Ingredients for Low Fat Chocolate Pie
Lightened-up ingredients that still deliver that rich, velvety chocolate pie experience you love.
| Ingredient | Amount | Notes |
|---|---|---|
| Graham Cracker Crumbs 🍪 | 1 ½ cups | Low-fat or whole wheat variety |
| Granulated Sugar 🍚 | ¼ cup | Or sugar substitute for less sweetness |
| Unsweetened Cocoa Powder 🍫 | ½ cup | Dutch-processed for smoother taste |
| Cornstarch 🌾 | ¼ cup | For thickening the filling |
| Egg Whites 🥚 | 4 whole | From large eggs, lightly beaten |
| Non-Fat Greek Yogurt 🥛 | 1 cup | Plain, for creaminess without fat |
| Skim Milk 🥛 | ½ cup | Or any low-fat milk alternative |
| Vanilla Extract 🌿 | 1 tsp | Pure extract for best flavor |
| Salt 🧂 | ¼ tsp | Fine grain for even distribution |
| Unsalted Butter 🧈 | 2 tbsp | Melted, for crust binding |
| Semi-Sweet Chocolate Chips 🍫 | ½ cup | For rich chocolate flavor |
| Low-Fat Whipped Topping 🍦 | 1 cup | Optional, for serving |
[recipeingredientscaler]
The crust is where the magic starts. Whole wheat graham crumbs from Trader Joe’s or Kroger work great—look for the low-fat label if you want to go all in. The cocoa powder needs to be Dutch-processed (like Hershey’s Special Dark) for that smooth, deep flavor. For the Greek yogurt, Fage 0% is my go-to (thick, tangy, no fat). Skip anything labeled ‘light’—it’s too watery.
No Dutch-process cocoa? Regular cocoa plus a pinch of baking soda gets you close. Out of egg whites? Aquafaba (chickpea brine) whips up surprisingly well at 3 tbsp per egg white. Greek yogurt can be swapped for low-fat sour cream if that’s what’s in your fridge. The chocolate chips? Enjoy Life brand are vegan and still melt beautifully.
The filling sets up best after 4 hours in the fridge, but overnight is even better. Leftovers keep for 3 days (if they last that long). Freeze slices for up to 1 month—thaw in the fridge before serving. Always press the crust firmly into the pan for that crisp base.
Why You’ll Love This Recipe
- No Fuss Mixing: I just dump the graham crumbs, cocoa, and sugar in one bowl—no fancy steps.
- Rich Without Guilt: The cocoa and egg whites make it taste decadent, but it’s light enough for seconds.
- Potluck Hero: I bring this to book club and watch it disappear first.
- Stays Fresh: Honestly, it tastes even better the next day straight from the fridge.
Step-by-Step Instructions for Low Fat Chocolate Pie
Here’s how I create this luscious dessert with a light, crispy base and rich filling.
Step 1: Press the Crust and Pre-Bake
Combine the 1.5 cups Graham Cracker Crumbs, 0.25 cup Granulated Sugar, and 2 tbsp Unsalted Butter in a bowl until the mixture resembles wet sand. The melted butter should coat every crumb evenly—this ensures a cohesive crust that holds its shape.
Press the mixture firmly into a pie dish, working it up the sides with your fingers. I use the bottom of a glass to compact the base evenly. Pre-bake at 375°F for 8-10 minutes until the edges turn light golden brown. Watch closely—it can go from perfect to overdone in seconds.
Step 2: Whisk the Filling Base
In a saucepan, whisk together the 0.5 cup Unsweetened Cocoa Powder, 0.25 cup Granulated Sugar, 0.25 cup Cornstarch, and 0.25 tsp Salt. Gradually whisk in the 0.5 cup Skim Milk until no lumps remain. This step is critical for a smooth, lump-free filling.
Cook over medium heat, stirring constantly, until the mixture thickens to a pudding-like consistency. This usually takes 5-7 minutes. You’ll know it’s ready when it coats the back of a spoon and leaves a clean line when you run your finger through it.
Step 3: Temper and Combine the Egg Whites
Slowly pour about ½ cup of the hot cocoa mixture into the 4 whole Egg Whites while whisking vigorously. This tempers the eggs, preventing them from scrambling when added to the hot mixture. Pour the tempered eggs back into the saucepan and continue cooking for 2 minutes, stirring constantly.
Remove from heat and stir in the 1 cup Non-Fat Greek Yogurt, 1 tsp Vanilla Extract, and 0.5 cup Semi-Sweet Chocolate Chips. The chocolate chips will melt from the residual heat, creating ribbons of gooey chocolate throughout the filling.
Step 4: Assemble and Chill
Pour the filling into the pre-baked crust and smooth the top with a spatula. The filling should be thick but still pourable. Tap the dish gently on the counter to remove any air bubbles for a silky finish.
Refrigerate for at least 4 hours (or overnight) until the filling is completely set. This chilling time is non-negotiable for clean slices. Serve each piece with a dollop of 1 cup Low-Fat Whipped Topping for a light, airy contrast to the rich chocolate filling.
Pro Tips For Making Low Fat Chocolate Pie
- Whip Egg Whites Stiff: Beat the egg whites to stiff peaks before folding them in—I learned this the hard way after a few flat pies. They need to hold their shape to give the filling structure.
- Toast the Crumbs: Lightly toast the graham cracker crumbs in a dry pan for 3-4 minutes. Sounds weird, but it works: it deepens the flavor and prevents a soggy crust.
- Skip the Overmixing: Resist the urge to overmix once the cocoa and cornstarch are added. Stir just until combined to avoid a dense, gummy filling.
- Chill Before Serving: Give it a solid 2 hours in the fridge—yes, even if you’re impatient like me. The filling sets properly and slices cleanly when fully chilled.
Make-Ahead Tips for This low fat chocolate pie
Prep the Crust Early
The crust can be pressed into your pie dish up to 2 days ahead and stored wrapped tightly in plastic wrap at room temperature. I often do this first thing in the morning so it’s ready when I make the filling later. 💡
Make the Filling Ahead
The filling itself can be prepared 1 day in advance and stored in an airtight container in the fridge. Just give it a good stir before pouring it into the crust to redistribute any settled ingredients.
Fully Assemble in Advance
For maximum convenience, assemble the entire pie the night before. After pouring the filling into the crust, cover it with plastic wrap pressed directly onto the surface to prevent a skin from forming. Refrigerate for up to 24 hours before serving.
Freeze for Later
This pie freezes beautifully for up to 1 month. Wrap individual slices in plastic wrap and aluminum foil, then thaw in the fridge overnight before serving. The texture remains creamy and smooth.
Chilling Time Tips
If you’re in a rush, place the assembled pie in the freezer for 1 hour before transferring to the fridge. This speeds up the setting process. Just don’t skip the full 4-hour chill—it’s essential for clean slices.
Topping Prep
Whip your low-fat topping up to 2 days ahead and store it in a sealed container in the fridge. Give it a quick re-whisk before serving to restore its fluffy texture. ❄️
Nutrition Facts
Frequently Asked Questions
Can I use regular milk instead of skim?
Yes, but skim milk keeps the recipe lighter. Regular milk adds richness but increases fat content slightly. For best results, stick with skim milk or a low-fat alternative.
Why use egg whites instead of whole eggs?
Egg whites provide structure without the fat from yolks. They help the filling set properly while keeping it light yet creamy. Four whites equal about ½ cup for easy measuring.
What if my filling doesn’t thicken?
Cook it longer over medium heat while stirring constantly. If needed, mix 1 tbsp cornstarch with 1 tbsp cold water and stir in. It should thicken within 2-3 minutes.
Can I make this pie dairy-free?
Swap skim milk for almond milk and use dairy-free chocolate chips. For the crust, use vegan butter. The texture remains smooth and delicious.

- 8 Bean Soup Recipe Crock Pot: Hearty Vegetable Medley in One Pot - September 25, 2026
- 4C Bread Crumbs Meatballs Recipe: Crispy Crust and Juicy Centers - September 25, 2026
- 6 Oz Chocolate Chip Cookie Recipe: Perfectly Balanced Crispy Edges and Chewy Hearts - September 25, 2026