
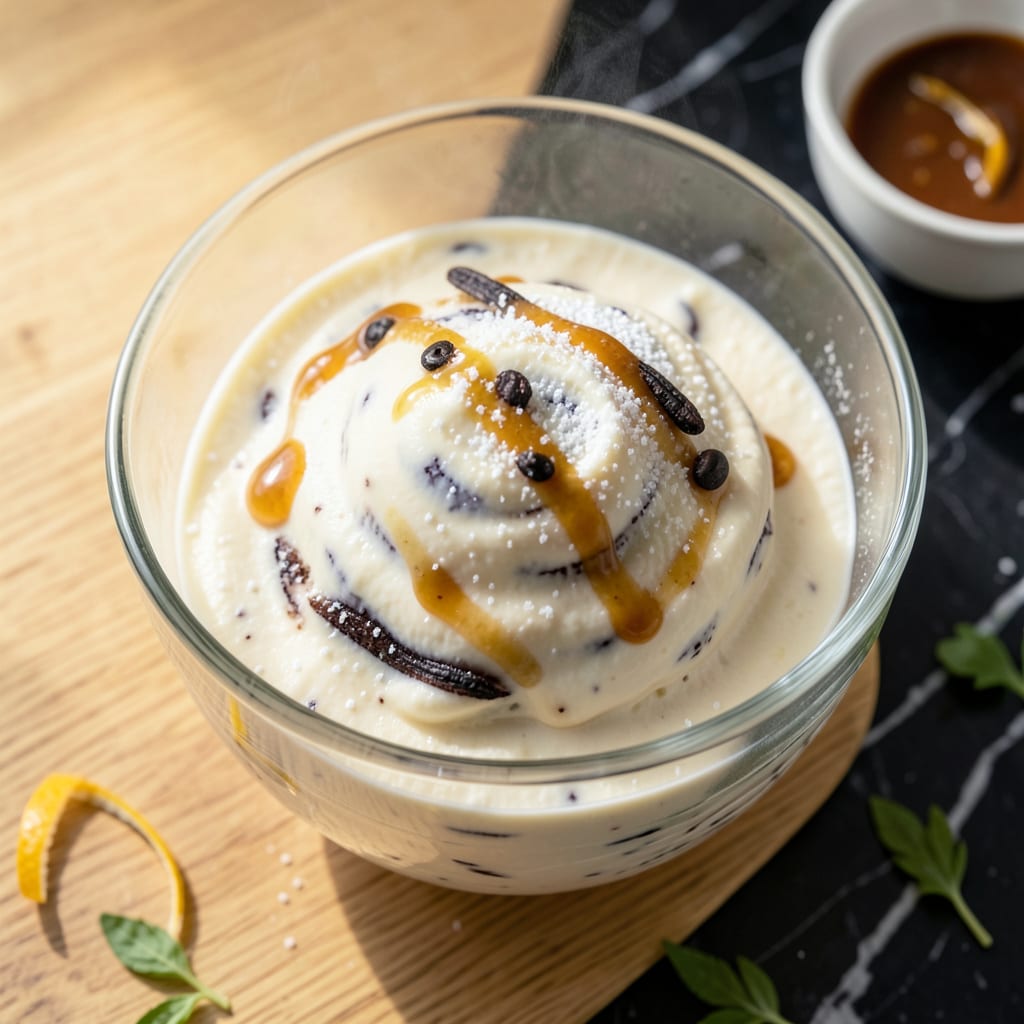
I’ve perfected a no-churn ice cream that’s surprisingly light yet still creamy. This method skips the heavy cream and churning, relying on a simple technique to achieve that ideal texture.
The result is a silky, satisfying dessert that’s lower in fat but never lacks flavor. With just a few ingredients and patience, you’ll have a frozen treat that’s as indulgent as it is guilt-free.
Ingredients for Low Fat No Churn Ice Cream
A few simple ingredients transform into a light, silky frozen dessert everyone will love.
| Ingredient | Amount | Notes |
|---|---|---|
| Whole Milk 🥛 | 2 cups | Cold, full-fat for best texture |
| Sweetened Condensed Milk 🥛 | 1 can | 14 oz can, room temperature |
| Vanilla Extract 🌿 | 2 tsp | Pure extract for best flavor |
| Granulated Sugar 🍚 | ¼ cup | Optional, adjust to taste |
| Heavy Cream 🥛 | ½ cup | Reduced amount for lower fat |
| Salt 🧂 | ¼ tsp | Fine sea salt preferred |
| Greek Yogurt 🥛 | 1 cup | Non-fat or 2% for creaminess |
| Lemon Juice 🍋 | 1 tsp | Freshly squeezed for brightness |
| Vanilla Bean 🌿 | 1 whole | Scraped seeds for extra flavor |
| Corn Syrup 🍯 | 2 tbsp | Light or dark variety |
The Greek yogurt is key here—Fage or Chobani have the right thickness and tang. Whole milk works better than skim for creaminess, but 2% is fine in a pinch. Sweetened condensed milk is non-negotiable for that smooth texture (just don’t use evaporated milk by mistake). Most supermarkets carry these in the baking aisle. For vanilla, Nielsen-Massey extract is worth the splurge if you’re serious about flavor.
No Greek yogurt? Strained regular yogurt works—just line a colander with cheesecloth and drain for 30 minutes. Want it richer? Add extra condensed milk (but start with 2 tbsp at a time). The corn syrup helps prevent ice crystals, but agave or maple syrup can substitute in equal amounts. Skip the sugar if your condensed milk is sweet enough for your taste.
This keeps 2 weeks in an airtight container in the freezer. Let it sit at room temperature for 5-10 minutes before scooping for the smoothest texture. The flavor deepens after 24 hours, so it’s even better the next day.
Why You’ll Love This Recipe
- No Churn Magic: I just mix, freeze, and done—no fancy equipment needed, just a bowl and a whisk.
- Creamy Dream: The vanilla and sweetened condensed milk give it that rich, velvety taste without the guilt.
- Endless Variations: I’ve swapped in crushed berries, cookie crumbles, and even coffee—it never gets old.
- Budget Friendly: Heavy cream is the only splurge, and it makes a batch big enough to last the whole week.
Step-by-Step Instructions for Low Fat No Churn Ice Cream
Master this technique for a creamy, light texture without an ice cream maker.
Step 1: Infuse the Milk with Vanilla Bean
Split the 1 whole Vanilla Bean lengthwise with a sharp knife and scrape out the seeds. Combine the seeds, pod, and 2 cups Whole Milk in a saucepan over medium heat until small bubbles form at the edges—this should take 3-4 minutes.
Remove from heat, cover, and let steep for 15 minutes to allow the vanilla flavor to fully infuse. This step ensures a rich, aromatic base without adding extra fat. Strain out the pod before proceeding.
Step 2: Whisk the Sweetened Base
In a large mixing bowl, combine the 1 can Sweetened Condensed Milk, 0.25 cup Granulated Sugar, 2 tbsp Corn Syrup, 2 tsp Vanilla Extract, 0.25 tsp Salt, and 1 tsp Lemon Juice. Whisk vigorously until the mixture is smooth and the sugar fully dissolves—this should take 2-3 minutes of constant mixing.
The corn syrup helps prevent ice crystals, while the lemon juice balances the sweetness. Ensure no grains of sugar remain, as this could create unwanted texture in the final product.
Step 3: Combine Dairy and Yogurt
Gradually whisk the infused 2 cups Whole Milk into the sweetened base until fully incorporated. Add the 1 cup Greek Yogurt and 0.5 cup Heavy Cream, whisking until the mixture is completely smooth and uniform in color.
The Greek yogurt provides creaminess with less fat, while the heavy cream ensures a silky texture. This combination is the secret to achieving a light yet indulgent consistency.
Step 4: Freeze to Perfection
Pour the mixture into a freezer-safe container, such as a loaf pan or airtight container. Smooth the top with a spatula and cover with parchment paper pressed directly onto the surface to prevent ice crystals from forming.
Freeze for at least 6 hours, or preferably overnight, until the ice cream is firm and scoopable. Unlike traditional churned ice cream, this no-churn version relies on the fat and sugar content to create a smooth texture without agitation.
Step 5: Serve and Enjoy
Let the ice cream sit at room temperature for 5-10 minutes before scooping to make serving easier. The texture should be creamy and light, with a subtle sweetness and rich vanilla flavor.
This low-fat version delivers all the satisfaction of traditional ice cream with a fraction of the guilt. Store any leftovers in an airtight container for up to 2 weeks, though it’s best enjoyed fresh.
Pro Tips For Making Low Fat No Churn Ice Cream
- Chill Everything First: Pop your mixing bowl, beaters, and heavy cream in the fridge for at least 30 minutes—warm tools make the cream whip slower and less stable, and I learned this the hard way after ending up with soupy ice cream base.
- Swap Half the Cream: Replace half the heavy cream with whole milk to cut fat without sacrificing texture, but don’t go overboard or you’ll lose the fluffiness that makes no-churn work.
- Fold Gently: After whipping the cream to stiff peaks, fold in the sweetened condensed milk mixture with a spatula—overmixing deflates the air and turns your ice cream dense and icy.
- Freeze in Shallow Layers: Spread the mixture in a shallow, freezer-safe dish rather than a deep loaf pan so it sets faster and more evenly, and you can dig in sooner without waiting overnight.
Health Benefits of This Recipe
Lower Calorie Indulgence
This dessert slashes calories by replacing heavy cream with Greek yogurt—a 1-cup serving of non-fat yogurt has just 130 calories, compared to 820 calories in the same amount of heavy cream. You save 690 calories without sacrificing creaminess. 💪
Protein Boost
The Greek yogurt adds a protein punch, with about 23 grams per cup. This helps keep you full longer and stabilizes blood sugar, so you’re less likely to overeat. It’s a rare dessert that actually contributes to your daily protein goals.
Reduced Saturated Fat
By using whole milk and minimal heavy cream, this version cuts saturated fat to just 6 grams per serving. Traditional ice cream can pack 15-20 grams per serving, so this is a heart-healthier alternative that still feels indulgent.
Calcium-Rich Treat
Both Greek yogurt and whole milk are excellent calcium sources, providing about 30% of your daily needs per serving. Strong bones and a sweet treat? That’s a win-win in my book. 🥛
Lower Sugar Option
With ¼ cup granulated sugar and natural sweetness from condensed milk, this recipe keeps added sugars in check. You can even reduce the sugar further or swap in 2 tbsp maple syrup for a more natural sweetener.
Probiotic Benefits
The Greek yogurt introduces live cultures that support gut health. These probiotics aid digestion and boost immunity, making this dessert a surprisingly functional addition to your diet. Who knew ice cream could be good for your gut?
Nutrition Facts
Frequently Asked Questions
Can I use regular yogurt instead of Greek?
Strain regular yogurt in cheesecloth for 30 minutes to thicken it. Greek yogurt’s thickness is key for creaminess without extra fat.
Why does this recipe include heavy cream if it’s low-fat?
The small amount (½ cup) ensures a silky texture while keeping saturated fat low. Skipping it may result in iciness.
How long can I store this in the freezer?
It stays fresh in an airtight container for up to 2 weeks. For best texture, enjoy within 1 week.
Can I make this dairy-free?
Swap dairy milk for coconut milk and use dairy-free yogurt. Note that texture and fat content will differ slightly.

- 8 Bean Soup Recipe Crock Pot: Hearty Vegetable Medley in One Pot - September 25, 2026
- 4C Bread Crumbs Meatballs Recipe: Crispy Crust and Juicy Centers - September 25, 2026
- 6 Oz Chocolate Chip Cookie Recipe: Perfectly Balanced Crispy Edges and Chewy Hearts - September 25, 2026