
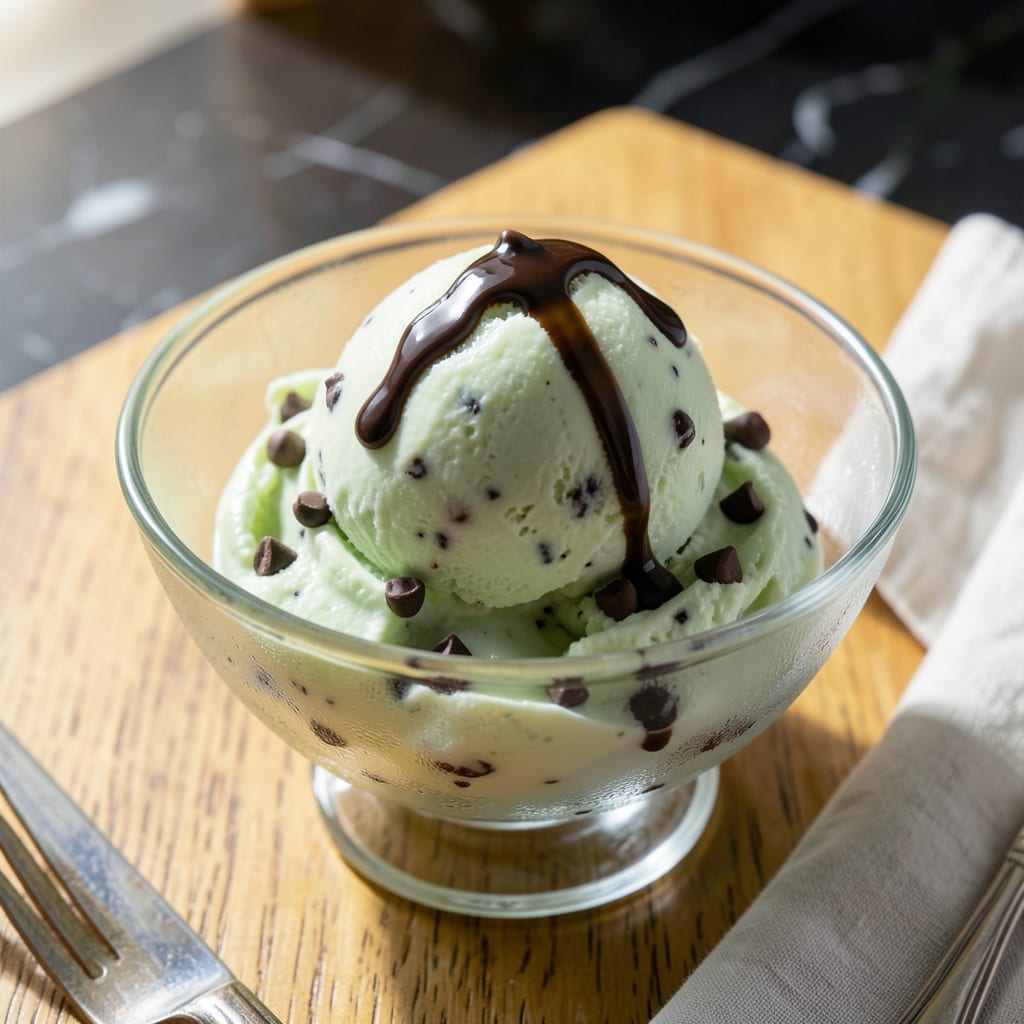
This lightened-up version delivers all the classic mint chocolate chip flavor without the heavy cream. I’ve perfected a base using low-fat dairy that still churns into a smooth, scoopable texture.
Fresh mint extract gives it that bright, authentic taste, while mini chocolate chips add just the right amount of sweetness and crunch. It’s the perfect guilt-free treat for warm days.
Ingredients for Low Fat Mint Chocolate Chip Ice Cream
Light dairy, mint extract, and mini chips create this creamy frozen treat.
| Ingredient | Amount | Notes |
|---|---|---|
| Whole Milk 🥛 | 2 cups | Low-fat or 2% preferred |
| Light Cream 🥛 | 1 cup | Half-and-half works too |
| Granulated Sugar 🍚 | ¾ cup | Or substitute honey |
| Fresh Mint Extract 🌿 | 1 tsp | Not peppermint extract |
| Vanilla Extract 🌿 | 1 tsp | Pure extract recommended |
| Salt 🧂 | ¼ tsp | Balances sweetness |
| Mini Chocolate Chips 🍫 | ¾ cup | Or regular chips chopped |
| Green Food Coloring 🎨 | ¼ tsp | Optional for color |
| Egg Whites 🥚 | 2 whole | Lightly beaten |
| Corn Syrup 🧈 | 2 tbsp | Light or dark |
The dairy base is key here. Whole milk and light cream give you that creamy texture without the heavy calories. I grab mine from Whole Foods—they’ve got great organic options. The mint extract must be fresh (not peppermint) for that authentic flavor. If you’re unsure, smell it first—should be bright and herby, not medicinal.
No mint extract? Crush fresh mint leaves (about 1/4 cup) and steep in warm milk for 30 minutes, then strain. Swap mini chips for chopped chocolate bars if that’s what you’ve got. The corn syrup helps with scoopability—agave or honey works too but may freeze harder. Egg whites add structure; no substitute needed if you skip them, but texture will be slightly icier.
This keeps 1 week in an airtight container. Press plastic wrap directly on the surface to prevent ice crystals. For longer storage, freeze in portions for up to 2 months—just thaw 10 minutes before scooping.
Why You’ll Love This Recipe
- No Churn Needed: I just mix the whole milk, light cream, and sugar—no fancy equipment, no fuss.
- Fresh Mint Pop: The fresh mint extract gives it that bright, garden-fresh taste that store-bought can’t touch.
- Crowd Pleaser: Honestly, it’s my go-to for summer barbecues and birthday parties—everyone loves mint chip.
- Budget Friendly: Light cream and whole milk keep the cost down, but it still tastes indulgent.
Step-by-Step Instructions for Low Fat Mint Chocolate Chip Ice Cream
Here’s the method. Straightforward, tested, works every time.
Step 1: Heat and Sweeten the Dairy Base
In a medium saucepan, combine the 2 cups Whole Milk, 1 cup Light Cream, 0.75 cup Granulated Sugar, and 2 tbsp Corn Syrup over medium heat. Stir frequently with a silicone spatula until the sugar fully dissolves—this usually takes 5-7 minutes.
You’ll know it’s ready when the mixture looks smooth and slightly thickened, with tiny bubbles forming at the edges. Don’t let it boil. This gentle heating ensures the sugar integrates completely without scorching the dairy.
Step 2: Infuse Flavor and Temper the Egg Whites
Remove the saucepan from heat and stir in the 1 tsp Fresh Mint Extract, 1 tsp Vanilla Extract, and 0.25 tsp Salt. Add the 0.25 tsp Green Food Coloring now if using—it’ll distribute evenly in the warm liquid.
In a separate bowl, lightly beat the 2 whole Egg Whites. Slowly whisk about ½ cup of the warm milk mixture into the egg whites to temper them. This prevents curdling when you combine everything. Then, whisk the tempered egg whites back into the saucepan.
Step 3: Thicken the Custard Base
Return the saucepan to low heat and cook, stirring constantly, for 8-10 minutes until the mixture thickens enough to coat the back of a spoon. You’re aiming for a consistency similar to heavy cream—thick but still pourable.
Watch for steam rising from the surface and a slight sheen developing on the custard. If it starts to bubble, reduce the heat immediately. This step develops the creamy texture without the extra fat.
Step 4: Chill and Churn the Ice Cream
Pour the custard into a clean bowl and press plastic wrap directly onto the surface to prevent a skin from forming. Refrigerate for at least 4 hours or preferably overnight until completely cold—40°F or below.
Once chilled, pour the custard into your ice cream maker and churn according to manufacturer’s instructions, usually 20-25 minutes. The ice cream should look thick and creamy, like soft-serve, when it’s ready.
Step 5: Add Chocolate Chips and Freeze
During the last 2 minutes of churning, slowly add the 0.75 cup Mini Chocolate Chips so they distribute evenly. The chips should be well incorporated but still visible as distinct flecks.
Transfer the ice cream to a lidded container and freeze for at least 4 hours. The texture should be firm but scoopable when ready. For best results, let it sit at room temperature for 5-10 minutes before serving to soften slightly.
Pro Tips For Making Low Fat Mint Chocolate Chip Ice Cream
- Chill the Base: Always refrigerate your milk-cream-sugar mixture for at least 4 hours before churning—I learned this the hard way after ending up with soupy ice cream that refused to set.
- Use Real Mint: Skip the artificial extract and infuse the warm milk with fresh mint leaves for 30 minutes, then strain. Sounds like extra work, but it makes a real difference in flavor depth.
- Skip the Overmixing: Once you add the chocolate chips, fold them in gently with a spatula instead of letting the machine mix them in completely. I lost too many chips to the bottom of the bowl before I figured this out.
- Freeze the Bowl: Pop your ice cream maker bowl in the freezer for a full 24 hours before churning—yes, even if the manual says 12. After burning out my first batch, I finally realized the extra time guarantees a smooth, firm texture.
Storing and Reheating low fat mint chocolate chip ice cream
Freezer Storage
Press plastic wrap directly onto the ice cream surface before sealing with an airtight lid. This prevents ice crystals from forming. I store mine in a glass loaf pan for easy scooping. It stays fresh for up to 2 months at 0°F. ❄️
Fridge Thawing
For softer texture, move the container to the fridge 10-15 minutes before serving. This makes scooping much easier without sacrificing structure. Avoid microwaving, as it can create hot spots that melt the ice cream unevenly.
Portion Control
I portion mine into individual serving containers before freezing. This lets me grab just what I need without exposing the whole batch to air. 4-ounce jars work perfectly for single servings.
Reviving Texture
If your ice cream gets too hard, let it sit at room temperature for 5-10 minutes. For a quick fix, place the sealed container in a bowl of cold water for 5 minutes. Stir gently to restore creaminess.
Avoiding Freezer Burn
Double-wrap your ice cream for long storage. First with plastic wrap, then with heavy-duty foil. This extra barrier protects against freezer burn and off-flavors. I’ve kept batches this way for 3 months with no quality loss.
Nutrition Facts
Frequently Asked Questions
Can I use regular milk instead of whole milk?
Yes, but whole milk gives the creamiest texture. Skim milk may result in icier ice cream. For best results, stick with 2% or whole milk to maintain that smooth consistency.
Why does my ice cream get icy?
Iciness usually means the base wasn’t cold enough before churning. Chill your custard to 40°F or below. Also, alcohol in extracts can lower freezing point—use just 1 tsp of mint extract.
Can I make this without an ice cream maker?
Yes! Freeze the custard in a shallow dish, stirring vigorously with a fork every 30 minutes for 3-4 hours. This breaks up ice crystals for a creamier result.
How do I make it dairy-free?
Swap the dairy for full-fat coconut milk and use 1 tbsp cornstarch as a thickener instead of egg whites. The flavor will differ slightly but still be delicious.

- 8 Bean Soup Recipe Crock Pot: Hearty Vegetable Medley in One Pot - September 25, 2026
- 4C Bread Crumbs Meatballs Recipe: Crispy Crust and Juicy Centers - September 25, 2026
- 6 Oz Chocolate Chip Cookie Recipe: Perfectly Balanced Crispy Edges and Chewy Hearts - September 25, 2026