
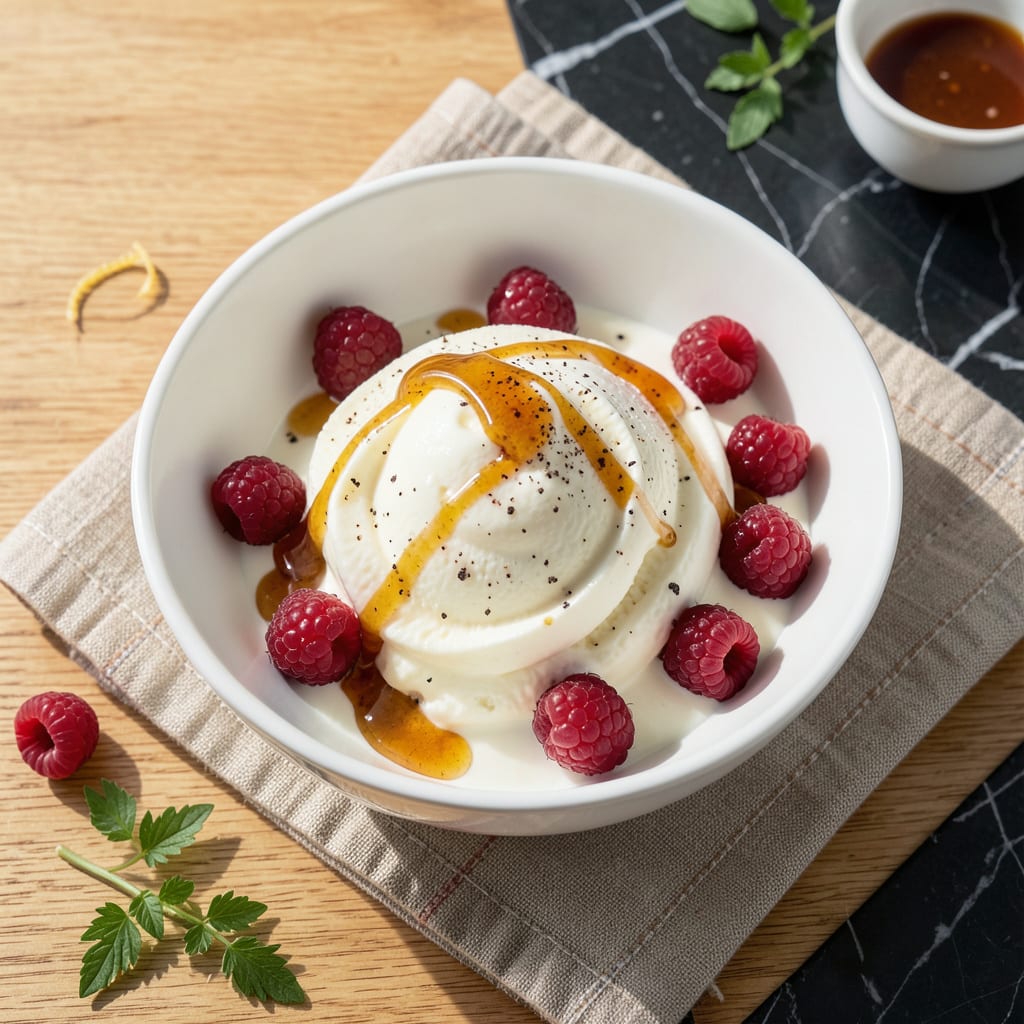
Achieving ultra creamy vanilla ice cream with reduced fat is absolutely possible with the right technique. This method delivers rich flavor and smooth texture without the usual guilt.
Using an ice cream maker, I’ve perfected a version that relies on smart ingredient choices and precise churning. The result is a dessert that satisfies every craving while keeping it light.
Ingredients for Low Fat Vanilla Ice Cream Recipe for Ice Cream Maker
These carefully selected ingredients create a lighter yet luxurious frozen treat in your machine.
| Ingredient | Amount | Notes |
|---|---|---|
| Whole Milk 🥛 | 2 cups | 2% or skim for lower fat |
| Heavy Cream 🥛 | ½ cup | Light cream for even less fat |
| Granulated Sugar 🍚 | ¾ cup | Adjust to taste preference |
| Pure Vanilla Extract 🌿 | 2 tsp | High-quality for best flavor |
| Egg Yolks 🥚 | 3 whole | Large eggs, room temperature |
| Nonfat Greek Yogurt 🥛 | ½ cup | Thick, plain variety for creaminess |
| Corn Syrup 🧈 | 2 tbsp | Light or dark corn syrup |
| Salt 🧂 | ¼ tsp | Enhances all flavors |
| Vanilla Bean 🌿 | 1 whole | Split and scraped, optional |
| Almond Extract 🌰 | ¼ tsp | Optional, for depth of flavor |
The dairy base is crucial here. Whole Foods 365 organic milk and cream offer consistent quality, and their Greek yogurt has the perfect thickness. For the vanilla, Nielsen-Massey extract is worth the splurge—its complex flavor shines in low-fat recipes where every note counts. Avoid ultra-pasteurized dairy as it can affect texture negatively.
Swapping the heavy cream for half-and-half reduces fat further without sacrificing mouthfeel. No Greek yogurt? Nonfat sour cream works at a 1:1 ratio. The corn syrup helps prevent iciness, but light agave can substitute in a pinch. For a truly fat-free version, use egg whites only (4 whites replace 3 yolks), though the texture will be less rich.
The custard base keeps in the fridge for 24 hours before churning. Once churned, it’s best fresh but holds for 1 week in an airtight container. If freezing longer, let it sit at room temperature for 10 minutes before scooping for easier serving.
Why You’ll Love This Recipe
- I’ll be real: it’s even better the next day after the flavors deepen. And it keeps well for up to a week in the freezer.
- Set and Forget: I just mix the ingredients, pour into the machine, and let it do the work. No constant stirring or babysitting required.
- Vanilla Dream: The combo of pure vanilla extract and creamy custard base gives that rich, classic flavor without being overly sweet.
- Crowd Pleaser: Honestly, everyone from my picky nephew to my health-conscious sister asks for seconds. Works for birthdays or just a Tuesday night treat.
Step-by-Step Instructions for Low Fat Vanilla Ice Cream for Ice Cream Maker
Here’s the method. Straightforward, tested, works every time.
Step 1: Infuse the Milk Mixture with Vanilla
In a medium saucepan, combine the 2 cups Whole Milk, 0.5 cup Heavy Cream, and 0.75 cup Granulated Sugar. Heat over medium heat until the sugar fully dissolves and the mixture reaches 170°F—you’ll see small bubbles forming at the edges.
If using the 1 whole Vanilla Bean, split it lengthwise, scrape the seeds into the mixture, and add the pod. This infuses the liquid with rich vanilla flavor. Remove from heat and let steep for 15 minutes to deepen the flavor profile.
Step 2: Temper and Thicken the Egg Yolks
In a separate bowl, whisk the 3 whole Egg Yolks until smooth and pale yellow. Slowly ladle about 1 cup of the warm milk mixture into the yolks while whisking constantly—this prevents curdling and ensures a smooth custard base.
Return the tempered yolk mixture to the saucepan and cook over medium-low heat, stirring constantly with a wooden spoon, until the mixture thickens enough to coat the back of the spoon. This should take 5-7 minutes—remove from heat immediately if it begins to bubble.
Step 3: Incorporate Remaining Ingredients
Strain the custard through a fine-mesh sieve into a clean bowl to remove the vanilla pod and any cooked bits of egg. Stir in the 2 tbsp Corn Syrup, 0.25 tsp Salt, 2 tsp Pure Vanilla Extract, and 0.25 tsp Almond Extract (if using).
Allow the mixture to cool to room temperature, then whisk in the 0.5 cup Nonfat Greek Yogurt. The yogurt adds creaminess without excess fat, a key trick for this low-fat version. This ensures a velvety texture once churned.
Step 4: Chill and Churn in the Ice Cream Maker
Cover the bowl and refrigerate the mixture until completely chilled, at least 4 hours or overnight. Cold is critical—if it’s not thoroughly chilled, the ice cream won’t set properly in the machine.
Pour the chilled mixture into your ice cream maker and churn according to the manufacturer’s instructions, typically 20-25 minutes. You’ll know it’s ready when the ice cream reaches a soft-serve consistency and holds its shape when tested with a spoon.
Step 5: Freeze to Perfection
Transfer the churned ice cream to a freezer-safe container, pressing parchment paper directly against the surface to prevent ice crystals from forming. Freeze for at least 4 hours to firm up, but overnight yields the best texture.
The finished product should be smooth, creamy, and scoopable, with a rich vanilla flavor that belies its lower fat content. Serve slightly softened for the creamiest experience.
Pro Tips For Making Low Fat Vanilla Ice Cream Recipe For Ice Cream Maker
- Temper the Yolks: Slowly whisk a ladle of hot milk mixture into the egg yolks before combining—this prevents scrambled eggs. I learned this the hard way after ruining two batches with curdled yolks.
- Use Real Vanilla: Skip the imitation stuff and splash out on pure vanilla extract, about 1-2 teaspoons. Sounds pricey, but it actually changes the outcome with that deep, floral flavor.
- Chill Thoroughly: Give your custard base at least 4 hours in the fridge before churning. Resist the urge to rush—lukewarm mix turns to icy sludge in the machine.
- Swap Half the Cream: Replace half the heavy cream with whole milk to cut fat without sacrificing texture. After burning three batches trying to go fat-free, I finally figured out this balance works.
Make-Ahead Tips for low fat vanilla ice cream recipe for ice cream maker
Prep Ahead Custard
The custard base can be made 1-2 days in advance. After straining and cooling, cover tightly with plastic wrap pressed directly onto the surface to prevent a skin from forming. Refrigerate until ready to churn. 💡
Churning Timing
Churn the ice cream 20-25 minutes in your machine, but always check the manufacturer’s guidelines. My Cuisinart ICE-21 takes exactly 22 minutes for this recipe. Start checking at 18 minutes for the perfect soft-serve consistency.
Freezer Storage
Once churned, transfer to an airtight container and freeze for up to 1 week. For best texture, consume within 3 days. Always press parchment paper against the surface to minimize ice crystals.
Room Temp Trick
Before serving, let the ice cream sit at room temperature for 5-10 minutes. This makes scooping easier and enhances the creamy texture. I set my timer for 7 minutes—just enough to soften without melting.
Flavor Infusion
For deeper vanilla flavor, let the milk mixture steep with the vanilla bean for 30 minutes instead of 15. This extra time extracts more of those beautiful vanilla compounds, making every bite more aromatic.
Batch Doubling
You can easily double this recipe for larger gatherings. My 2-quart ice cream maker handles a double batch perfectly. Just ensure your freezer has space for the larger container during the final freeze. ❄️
Nutrition Facts
Frequently Asked Questions
Can I use skim milk instead of whole?
Yes, skim milk works fine and reduces fat further. The texture will be slightly less creamy, but adding an extra 2 tablespoons of Greek yogurt compensates nicely.
Why add corn syrup?
Corn syrup lowers the freezing point, preventing iciness. It also adds sweetness and helps achieve that smooth, scoopable texture. 2 tablespoons is the perfect amount.
What if my mixture doesn’t thicken?
If it doesn’t coat the spoon after 7 minutes, keep cooking on medium-low heat and stir constantly. Avoid boiling, or the eggs may curdle. Patience is key here.
How long can I store the finished ice cream?
It keeps well in an airtight container for up to 1 week. For best texture, enjoy within 3 days and always press parchment paper on the surface.

- 8 Bean Soup Recipe Crock Pot: Hearty Vegetable Medley in One Pot - September 25, 2026
- 4C Bread Crumbs Meatballs Recipe: Crispy Crust and Juicy Centers - September 25, 2026
- 6 Oz Chocolate Chip Cookie Recipe: Perfectly Balanced Crispy Edges and Chewy Hearts - September 25, 2026