
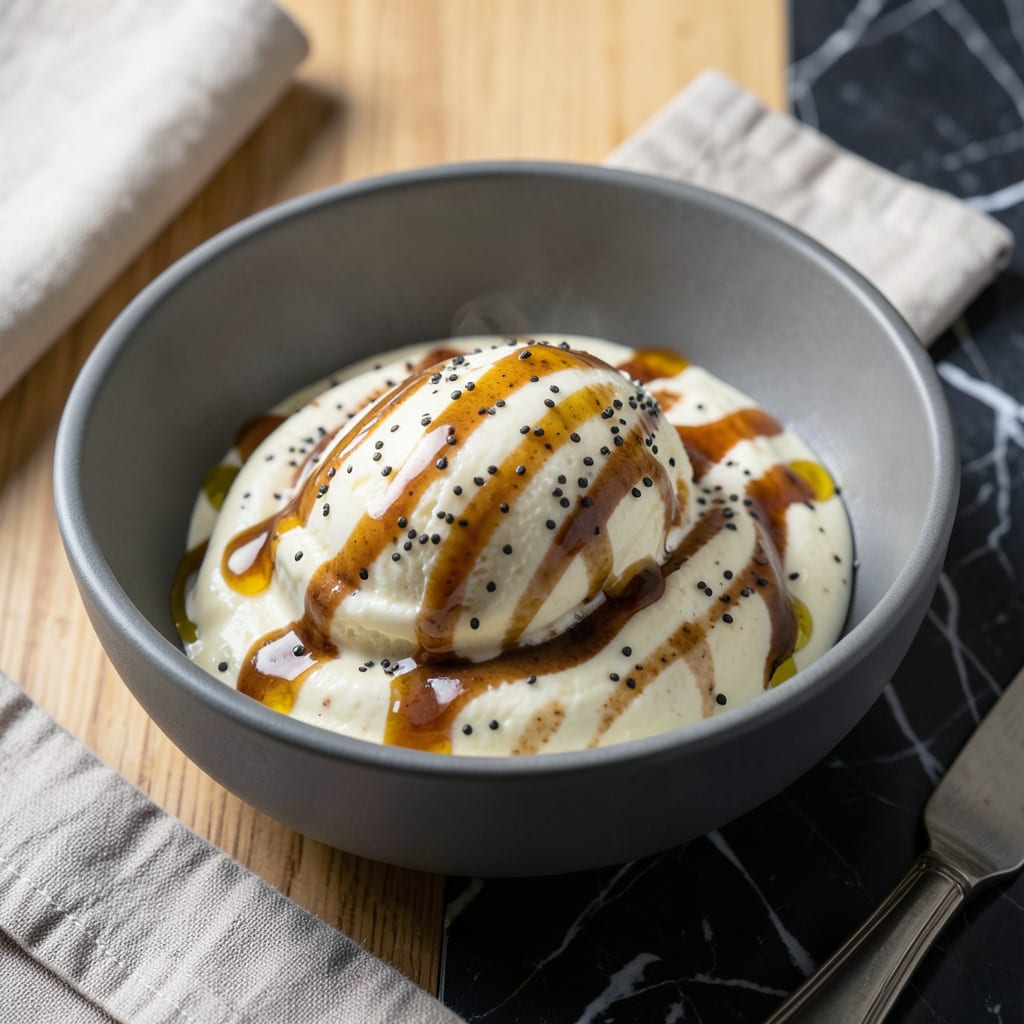
This vegan ice cream delivers rich flavor without dairy or excess fat. I’ve refined the process to create a smooth, creamy texture using simple, plant-based ingredients.
What emerges is a satisfying dessert that’s both indulgent and light. The method ensures a velvety finish, proving you can enjoy decadent swirls guilt-free.
Ingredients for Low Fat Vegan Ice Cream
Simple plant-based ingredients blend into creamy, dreamy frozen goodness. No dairy, no guilt.
| Ingredient | Amount | Notes |
|---|---|---|
| Full-Fat Coconut Milk 🥥 | 2 cups | Canned, well-shaken for creaminess |
| Bananas 🍌 | 3 whole | Ripe, frozen for texture |
| Vanilla Extract 🌿 | 1 tsp | Pure, not imitation |
| Maple Syrup 🍁 | ¼ cup | Grade A or B for sweetness |
| Almond Butter 🥜 | 2 tbsp | Creamy, unsweetened variety |
| Chia Seeds 🌱 | 1 tbsp | For thickening and texture |
| Lemon Juice 🍋 | 1 tbsp | Freshly squeezed for brightness |
| Pinch of Salt 🧂 | 1 pinch | Balances sweetness |
| Cocoa Powder 🍫 | 2 tbsp | Unsweetened for chocolate flavor |
| Oat Milk 🥛 | ¼ cup | Splashes as needed for blending |
| Frozen Berries 🍓 | 1 cup | For swirls or mixing in |
The coconut milk is non-negotiable here—Thai Kitchen or Native Forest brands are my go-tos for that ultra-creamy base (avoid the light versions, they’re watery). Bananas need to be spotty and frozen solid for that perfect soft-serve texture. I grab mine from Trader Joe’s when they’re on sale, peel and freeze in bags. The almond butter adds richness without the fat of dairy—Justin’s or Crazy Richard’s are solid picks.
No bananas? Mango or avocado can step in for creaminess, but they’ll change the flavor. Maple syrup is swap-friendly—agave or date syrup work at a one-to-one ratio. If you’re nut-free, sunflower seed butter replaces almond butter nicely. For a chocolate swirl, melt some vegan chocolate chips (I like Enjoy Life) and ripple it through before freezing.
This keeps beautifully in an airtight container for up to 2 weeks—though it’s never lasted that long in my freezer. Let it sit at room temp for 5-10 minutes before scooping for easiest serving. Best texture fresh, but still delicious after a few days.
Why You’ll Love This Recipe
- Five Ingredients Only: I just dump coconut milk, bananas, vanilla, maple syrup, and almond butter in the blender—no measuring cups beyond that.
- Creamy Without Guilt: The coconut milk and bananas blend into this rich, velvety texture that tastes indulgent but skips the dairy and excess fat.
- Breakfast or Dessert: Honestly, I’ve eaten this straight from the freezer at 7 a.m. and served it at dinner parties with zero regrets.
- Freezer Friendly: One batch lasts me a week, and it keeps beautifully—no ice crystals, just scoop and enjoy whenever the craving hits.
Step-by-Step Instructions for Low Fat Vegan Ice Cream
Here’s the method. Straightforward, tested, works every time.
Step 1: Blend the Banana and Coconut Base
In a high-speed blender, combine the 3 whole Bananas, 2 cups Full-Fat Coconut Milk, 0.25 cup Maple Syrup, 1 tsp Vanilla Extract, and 1 pinch Pinch of Salt. Blend until completely smooth—this usually takes 1-2 minutes depending on your blender’s power.
The mixture should look thick and creamy, like a milkshake. If it’s too thick to blend, add a splash of the 0.25 cup Oat Milk to help it along. I always scrape down the sides halfway through to ensure everything gets incorporated evenly.
Step 2: Incorporate the Thickeners and Flavor Boosters
Add the 2 tbsp Almond Butter, 1 tbsp Chia Seeds, 1 tbsp Lemon Juice, and 2 tbsp Cocoa Powder to the blender. Blend again for another 30-60 seconds until the chia seeds are fully broken down and the mixture is ultra-smooth.
The chia seeds will start to thicken the mixture almost immediately. The almond butter adds richness while the cocoa powder gives it that deep chocolate flavor. Here’s the thing—the lemon juice might seem odd, but it brightens all the flavors and cuts through the sweetness perfectly.
Step 3: Adjust Consistency and Chill the Base
Check the consistency of your base. It should be pourable but thick, like a very liquid soft-serve. If it’s too thick, add the remaining Oat Milk, 1 tablespoon at a time, blending briefly after each addition.
Transfer the mixture to a shallow container and refrigerate for at least 2 hours or until completely chilled. This step is crucial—chilling ensures the ice cream churns properly and prevents ice crystals from forming. I’ve found that overnight chilling gives the best texture, but 2 hours is the minimum.
Step 4: Churn and Add the Berry Swirl
Pour the chilled base into your ice cream maker and churn according to the manufacturer’s instructions, typically 20-25 minutes. The mixture should look like soft-serve when it’s ready.
While it churns, quickly blend the 1 cup Frozen Berries with 1 tablespoon of the Maple Syrup until smooth. About 5 minutes before the ice cream is done, slowly drizzle in the berry puree. This creates beautiful swirls throughout. Don’t overmix—you want distinct ribbons of berry, not a uniform pink color.
Step 5: Freeze to Perfection
Transfer the ice cream to a freezer-safe container and smooth the top with a spatula. Press a piece of parchment paper directly against the surface to prevent ice crystals from forming.
Freeze for at least 4 hours or until firm. For the creamiest texture, let it sit at room temperature for 5-10 minutes before scooping. The result should be smooth, creamy, and packed with chocolate-berry flavor in every bite.
Pro Tips For Making Low Fat Vegan Ice Cream
- Chill the Base: After blending, refrigerate the mixture for at least 4 hours—I learned this the hard way when my first batch turned into a sad, soupy mess.
- Use Ripe Bananas: The spottier the bananas, the sweeter and creamier your ice cream will be. I skip the green ones now after tasting the difference.
- Skip the Overmixing: Blend just until smooth, about 30-45 seconds. Overdoing it incorporates too much air, and you’ll end up with a fluffy, icy texture instead of rich, creamy scoops.
- Swap Almond Butter: Sounds weird, but it works: if you’re out of almond butter, cashew butter gives the same creaminess without changing the flavor profile.
Creative Variations of This Dish
Chocolate Peanut Butter
Swap the almond butter for 2 tbsp creamy peanut butter and add 1 tbsp cocoa powder extra. This creates a rich, Reese’s-inspired flavor. I love using Crazy Richard’s for its clean taste. 💛
Tropical Twist
Replace the frozen berries with 1 cup frozen mango chunks for a bright, tropical flavor. Add ½ tsp lime zest to the base for extra zing. The mango swirls beautifully through the creamy coconut base.
Coffee Lover’s
Add 1 tbsp instant espresso powder to the blender with the liquid ingredients. This creates a mocha-like depth that pairs perfectly with the chocolate. I use Medaglia d’Oro for its robust flavor.
Mint Chip
Add ½ tsp peppermint extract to the base and fold in ¼ cup mini vegan chocolate chips after churning. The mint should be subtle—start with less and adjust to taste. Enjoy Life makes great dairy-free chips.
Protein Boost
Blend in 1 scoop vanilla plant-based protein powder with the liquids. This adds a nutritional punch while keeping it creamy. I recommend Orgain or Vega for their smooth texture. It thickens the base, so add 2-3 tbsp extra oat milk.
Nut-Free Version
Replace almond butter with 2 tbsp sunflower seed butter and use oat milk as your only liquid. This keeps it creamy without any nut allergens. SunButter works perfectly here.
Frequently Asked Questions
Can I make this without an ice cream maker?
Yes! Pour the base into a shallow container and freeze, stirring vigorously with a fork every 30 minutes for 3-4 hours to break up ice crystals.
Why use both coconut milk and almond butter?
The coconut milk provides creaminess while almond butter adds richness without dairy fat. Together they create the perfect texture.
How long does it keep in the freezer?
Store in an airtight container for up to 2 weeks. Let sit at room temperature for 5-10 minutes before scooping for best texture.
Can I use fresh bananas instead of frozen?
Frozen bananas are essential for texture. Fresh ones make the mixture too watery. Freeze ripe bananas for at least 4 hours beforehand.

- 8 Bean Soup Recipe Crock Pot: Hearty Vegetable Medley in One Pot - September 25, 2026
- 4C Bread Crumbs Meatballs Recipe: Crispy Crust and Juicy Centers - September 25, 2026
- 6 Oz Chocolate Chip Cookie Recipe: Perfectly Balanced Crispy Edges and Chewy Hearts - September 25, 2026