
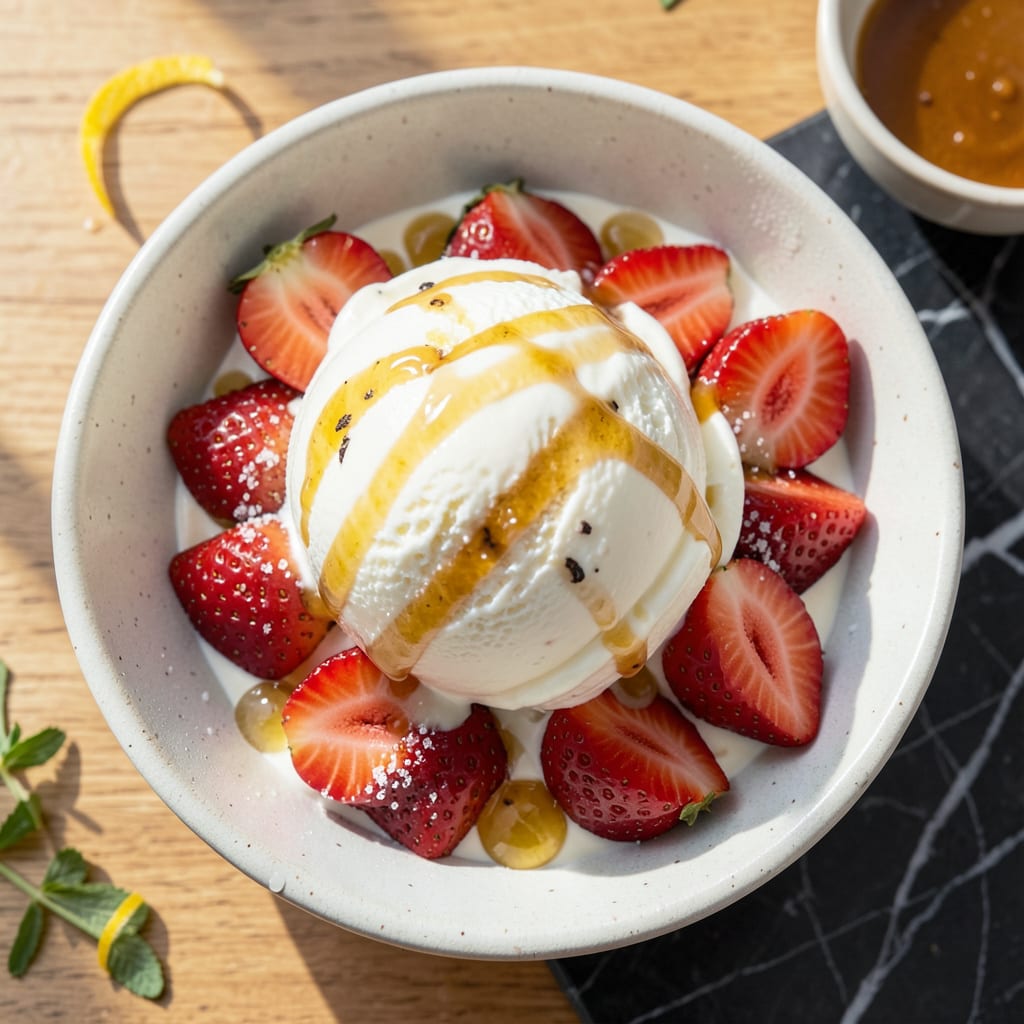
This recipe transforms simple low-fat yogurt into a silky, dreamy frozen treat that rivals traditional ice cream. The secret lies in balancing the tang of yogurt with natural sweetness.
You’ll achieve a creamy texture without heavy cream, and fresh fruit swirls add vibrant flavor. It’s surprisingly easy to make with just a few ingredients and an ice cream maker.
Ingredients for Low Fat Yogurt Ice Cream
Transform simple yogurt into a silky frozen treat with these quality ingredients.
| Ingredient | Amount | Notes |
|---|---|---|
| Low-Fat Plain Greek Yogurt 🥛 | 4 cups | Full-fat works too for creamier texture |
| Granulated Sugar 🍚 | ¾ cup | Adjust to taste preference |
| Pure Vanilla Extract 🌿 | 2 tsp | Use high-quality for best flavor |
| Fresh Lemon Juice 🍋 | 1 tbsp | Brightens the yogurt tang |
| Fresh Strawberries 🍓 | 2 cups | Diced for swirl, or other berries |
| Honey 🍯 | 2 tbsp | For fruit swirl sweetness |
| Heavy Cream 🥛 | ¼ cup | Optional for extra creaminess |
| Pinch of Salt 🧂 | 1 pinch | Enhances all flavors |
| Fresh Mint Leaves 🌿 | ¼ cup | Chopped, for garnish |
| Cornstarch 🌾 | 1 tbsp | Prevents ice crystals |
| Almond Extract 🌰 | ¼ tsp | Optional for depth of flavor |
The yogurt is the foundation here. Greek yogurt with high protein content (like Fage or Chobani) gives the creamiest texture without heavy cream. Choose low-fat plain—flavored versions add unnecessary sugar. For the fruit, peak-season berries or stone fruits work best. I always grab mine from local farmers markets for maximum flavor.
No strawberries? Blueberries, raspberries, or peaches make excellent swirls. Want it sweeter? Maple syrup at one-to-one ratio works instead of honey. The cornstarch is key for that smooth texture—arrowroot powder at the same amount also works. Skip the almond extract if you prefer a purer vanilla flavor.
Churn immediately after mixing for best texture. Stores in an airtight container for up to 1 week—though it’s best within 3 days. Freeze leftovers in portioned containers for quick treats. Always let it sit at room temperature for 5-10 minutes before scooping.
Why You’ll Love This Recipe
- No Churn Needed: I just mix, freeze, and serve—no fancy equipment or constant stirring.
- Bright & Tangy: The strawberries and lemon juice cut the sweetness perfectly, making it refreshingly light.
- Breakfast to Dessert: Honestly, I’ve eaten this for breakfast, a snack, and after dinner—it’s that versatile.
- Budget Friendly: A tub of Greek yogurt and seasonal strawberries cost less than store-bought ice cream.
Step-by-Step Instructions for Low Fat Yogurt Ice Cream
Master this technique for a smooth, creamy texture that rivals full-fat versions every time.
Step 1: Stabilize the Yogurt Base
In a medium bowl, whisk together the 4 cups Low-Fat Plain Greek Yogurt, 0.75 cup Granulated Sugar, 1 tbsp Cornstarch, and 1 pinch Pinch of Salt until the sugar and cornstarch fully dissolve. I use a fine-mesh whisk to eliminate lumps—this is critical for silky results.
The cornstarch acts as a stabilizer, preventing ice crystals from forming during freezing. You’ll notice the mixture thickens slightly as you whisk. Don’t skip this step; it’s what allows you to achieve that luxurious mouthfeel without excess fat.
Step 2: Infuse Flavor into the Base
Stir in the 2 tsp Pure Vanilla Extract, 1 tbsp Fresh Lemon Juice, and 0.25 tsp Almond Extract until fully incorporated. The lemon juice brightens the yogurt’s natural tang while the almond extract adds depth.
Taste the base now—it should be sweet but not cloying, with a pleasant tang. If you prefer a more pronounced vanilla flavor, this is your moment to adjust. The flavors will concentrate slightly during freezing, so err on the side of subtle.
Step 3: Prepare the Strawberry Swirl
In a small saucepan, combine the 2 cups Fresh Strawberries (diced) and 2 tbsp Honey. Cook over medium heat for 8-10 minutes, stirring frequently, until the strawberries break down and the mixture thickens to a jam-like consistency.
Mash any large pieces with the back of a spoon for a uniform texture. Remove from heat and let cool completely. The swirl should be thick enough to hold its shape when spooned onto the ice cream base—this prevents it from bleeding into the yogurt mixture.
Step 4: Incorporate Cream and Chill
Gently fold the 0.25 cup Heavy Cream into the yogurt base. I do this by hand with a silicone spatula to avoid overmixing. The cream adds just enough fat to ensure a velvety texture without compromising the low-fat profile.
Cover the mixture and refrigerate for at least 4 hours or overnight. Chilling is essential—it allows the flavors to meld and ensures your ice cream freezes evenly. The mixture should be cold to the touch before proceeding to the next step.
Step 5: Churn and Swirl for Perfect Texture
Pour the chilled base into your ice cream maker and churn according to manufacturer’s instructions, typically 20-25 minutes. The mixture should resemble soft-serve when finished. Transfer to a freezer-safe container in layers, alternating with spoonfuls of the cooled strawberry swirl.
Use a knife to gently swirl the strawberry mixture into the ice cream for a marbled effect. Freeze for at least 4 hours until firm. Garnish with 0.25 cup Fresh Mint Leaves (chopped) before serving for a fresh, vibrant finish.
Pro Tips For Making Low Fat Yogurt Ice Cream
- Chill the Base: Always refrigerate your yogurt-sugar mixture for at least 2 hours before churning—I learned this the hard way when my first batch turned out soupy and took forever to set.
- Strain the Yogurt: After burning through two batches that tasted watery, I started straining the Greek yogurt in a cheesecloth for 30 minutes to remove excess liquid. Sounds tedious, but it works.
- Skip the Overmixing: Fold in the strawberries and vanilla just until combined—overmixing incorporates too much air and makes the texture icy rather than creamy.
- Use Cold Ingredients: Pull your yogurt, lemon juice, and even the mixing bowl from the fridge beforehand. My grandmother swore by this, and she was right: it helps the mixture freeze faster and more evenly.
Pro Cooking Tips for This Recipe
Chilling Time Matters
Always chill your yogurt base for at least 4 hours before churning. I use my Cuisinart ice cream maker and find the texture suffers if the base isn’t ice-cold. This step prevents ice crystals and ensures a smooth finish. 🌡️
Cornstarch Secret
The 1 tbsp cornstarch is non-negotiable for that silky texture. Whisk it thoroughly with the sugar to avoid lumps. Arrowroot powder works equally well if that’s what you have on hand.
Swirl Technique
For perfect swirls, let your fruit mixture cool completely. I layer it in the container, then use a butter knife to create gentle marbling. Press too hard and you’ll lose the distinct ribbons of fruit.
Machine Temperature
Pre-freeze your ice cream maker bowl for at least 12 hours. I keep mine in the freezer permanently. If your machine struggles, the base won’t freeze properly, resulting in a sad, soupy mess.
Add Mix-ins Last
Fold in any extras like nuts or chocolate chips during the final 5 minutes of churning. This prevents them from sinking to the bottom. I love adding ¼ cup chopped dark chocolate for a treat.
Patience Pays Off
Resist scooping straight from the machine. The ice cream needs those 4 hours in the freezer to firm up completely. Trust me, the wait is worth it for that perfect scoop. 💫
Nutrition Facts
Frequently Asked Questions
Can I use regular yogurt instead of Greek?
Regular yogurt will work but may yield a less creamy texture. Greek yogurt’s higher protein content gives better structure. For best results, strain regular yogurt in a cheesecloth for 2 hours to thicken it first.
How long does this last in the freezer?
It stays fresh for up to 1 week in an airtight container. For best texture, enjoy within 3 days. Let it sit at room temperature for 10 minutes before scooping.
Why did my ice cream turn icy?
Icy texture usually means the base wasn’t cold enough before churning or the cornstarch wasn’t fully dissolved. Always chill for 4 hours and whisk the cornstarch thoroughly.
Can I make this without an ice cream maker?
Yes! Freeze the base in a shallow dish, stirring vigorously every 30 minutes for 3-4 hours to break up ice crystals. It won’t be as smooth but still delicious.

- 8 Bean Soup Recipe Crock Pot: Hearty Vegetable Medley in One Pot - September 25, 2026
- 4C Bread Crumbs Meatballs Recipe: Crispy Crust and Juicy Centers - September 25, 2026
- 6 Oz Chocolate Chip Cookie Recipe: Perfectly Balanced Crispy Edges and Chewy Hearts - September 25, 2026