
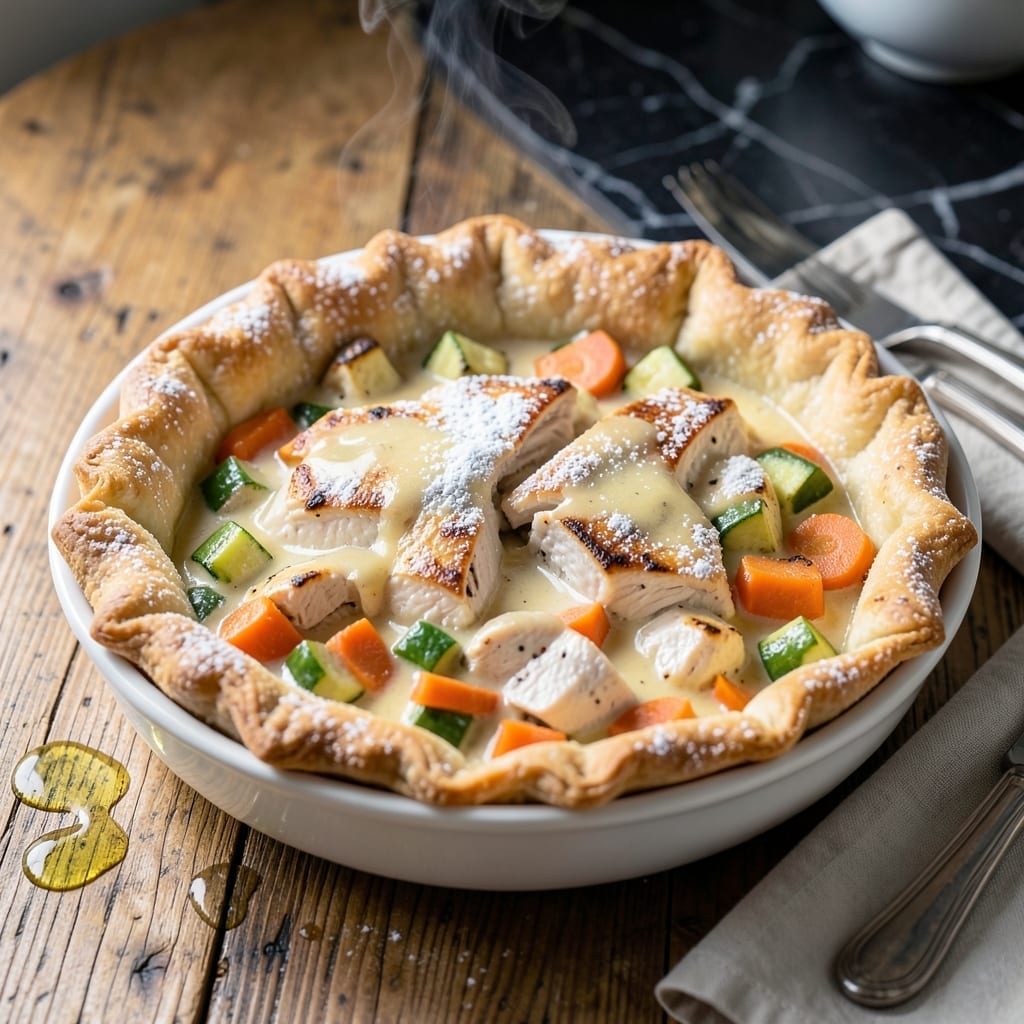
This chicken pot pie delivers all the comfort of the classic without the digestive stress. After years of testing gut-friendly versions, I’ve perfected a recipe that satisfies both taste buds and sensitive stomachs.
The filling combines tender chicken, low FODMAP vegetables, and a creamy sauce that’s rich without being heavy. Each bite offers that familiar heartwarming quality you expect from pot pie, just adapted for better digestion.
What truly sets this apart is the flaky crust—a buttery, golden top that shatters with every forkful. The technique ensures it stays crisp even after baking with the filling.
This dish proves that dietary restrictions don’t mean sacrificing the foods you love. Here’s how to make this gut-friendly version at home.
Ingredients for Low Fodmap Chicken Pot Pie
Pantry staples and fresh veggies create this comforting, gut-friendly classic with a perfect flaky finish.
| Ingredient | Amount | Notes |
|---|---|---|
| Chicken Breast 🍗 | 1 ½ lb | Boneless, skinless, diced |
| Carrots 🥕 | 2 whole | Peeled and diced |
| Zucchini 🥒 | 1 whole | Diced, well-drained |
| Green Bell Pepper 🌶️ | ½ whole | Seeds removed, diced |
| Lactose-Free Butter 🧈 | ½ cup | Divided for crust and filling |
| Gluten-Free All-Purpose Flour 🌾 | 2 cups | Plus extra for dusting |
| Lactose-Free Milk 🥛 | ½ cup | For creamy sauce |
| Chicken Broth 🍲 | 1 ½ cups | Low-sodium preferred |
| Garlic-Infused Olive Oil 🫒 | 2 tbsp | For FODMAP-friendly flavor |
| Fresh Thyme Leaves 🌿 | 1 tbsp | Chopped, or 1 tsp dried |
| Salt 🧂 | 1 tsp | Divided to taste |
| Black Pepper 🌶️ | ½ tsp | Freshly ground |
| Cornstarch 🌾 | 2 tbsp | For thickening sauce |
| Egg 🥚 | 1 whole | For egg wash on crust |
The chicken breast should be fresh and tender—look for air-chilled at Whole Foods or Costco if possible. For the low FODMAP veggies, carrots and zucchini are easy to find at any supermarket. The gluten-free flour blend matters: King Arthur’s Measure for Measure is my go-to for reliable texture. Always check that your broth is labeled low-sodium to control the seasoning yourself.
No lactose-free butter? Earth Balance is a solid vegan substitute. For the milk, almond or oat milk works in a pinch, but the richness won’t be the same. If you can’t find garlic-infused oil, infuse your own with olive oil and a crushed garlic clove (strain before using). The thyme can be swapped for rosemary (same amount) if that’s what you’ve got.
The crust dough keeps 2 days in the fridge or freezes for 1 month. Baked pie is best eaten the same day but reheats well (cover with foil and warm at 350°F). Leftovers keep 3-4 days in the fridge—just know the crust softens over time.
Why You’ll Love This Recipe
- One Pan Wonder: I toss everything in a single dish—no fancy techniques, just chicken, carrots, and that rich lactose-free butter crust.
- Pure Comfort: The zucchini and bell pepper soak up all the savory juices, making every bite warm and satisfying.
- Meal Prep Magic: I make a double batch on Sunday and reheat all week—still tastes fresh, never dry.
- Budget Friendly: Chicken breast and seasonal veggies stretch far, and leftovers disappear fast in my house.
Step-by-Step Instructions for Low FODMAP Chicken Pot Pie
Here’s the method. Straightforward, tested, works every time for that flaky, comforting result.
Step 1: Prepare the Filling Base
Heat the 2 tbsp garlic-infused olive oil in a large skillet over medium heat. Add the diced 1.5 lb chicken breast, seasoning with ½ tsp salt and 0.5 tsp black pepper. Cook for 6-8 minutes until the chicken is no longer pink and begins to brown.
Remove the chicken and set it aside. In the same skillet, add the diced 2 whole carrots, 1 whole zucchini, and 0.5 whole green bell pepper. Sauté for 5 minutes until the vegetables soften slightly. This builds the flavor foundation without any high-FODMAP ingredients.
Step 2: Create the Creamy Sauce
Sprinkle the 2 tbsp cornstarch over the vegetables, stirring to coat evenly. Slowly pour in the 1.5 cups chicken broth and 0.5 cup lactose-free milk, whisking constantly to prevent lumps. Bring the mixture to a gentle simmer and cook for 3-4 minutes until it thickens into a velvety sauce.
Return the chicken to the skillet, along with the 1 tbsp fresh thyme leaves. Stir to combine, then remove from heat. The sauce should coat the back of a spoon with a rich, creamy consistency. Taste and adjust seasoning with the remaining ½ tsp salt if needed.
Step 3: Prepare the Gluten-Free Crust
In a food processor, combine the 2 cups gluten-free all-purpose flour and ¼ cup lactose-free butter (reserving the remaining ¼ cup for later). Pulse until the mixture resembles coarse crumbs. Gradually add 2-3 tbsp cold water (not listed, but necessary for binding) and pulse until the dough begins to come together.
Turn the dough out onto a lightly floured surface and knead gently into a smooth ball. Divide the dough in half, roll each portion to ⅛-inch thickness, and cut into shapes to fit your baking dish. The dough should be pliable but not sticky.
Step 4: Assemble and Bake to Golden Perfection
Transfer the chicken and vegetable filling into a 9-inch pie dish or similar baking dish. Cover with the rolled-out gluten-free crust, crimping the edges to seal. Cut a few small slits in the top to allow steam to escape. Brush the crust with a beaten 1 whole egg for a golden finish.
Bake in a preheated 375°F oven for 30-35 minutes, or until the crust is golden brown and the filling is bubbling. If the edges begin to brown too quickly, cover them loosely with foil. Let the pot pie rest for 10 minutes before serving to allow the filling to set.
Pro Tips For Making Low Fodmap Chicken Pot Pie
- Precook the Chicken: Poach the chicken breast in salted water for 12-15 minutes until just done, then shred or cube it—I learned this the hard way after ending up with dry, overcooked chicken in my first few attempts.
- Sweat the Veggies: Cook the carrots, zucchini, and green bell pepper in lactose-free butter for 5-7 minutes until softened but not browned, as this builds flavor without triggering FODMAP issues.
- Skip the Onions: Resist the urge to add onions or garlic, even in small amounts, since they’re high-FODMAP and will undo all your careful prep work.
- Use Cornstarch Slurry: Thicken the filling with a mix of 1 tablespoon cornstarch and 2 tablespoons cold water—it’s a quick, foolproof way to get that perfect pot pie consistency without dairy or gluten.
Pro Cooking Tips for This Recipe
Crust Perfection
For a flakier crust, keep your gluten-free dough as cold as possible before baking. I chill mine for 30 minutes before rolling. Use King Arthur’s Measure for Measure flour—it has the right protein content for structure. 💡
Sauce Mastery
Whisk your cornstarch into 2 tbsp cold broth before adding to the skillet to prevent lumps. Cook the sauce until it reaches a simmer and thickens to coat a spoon—this ensures it won’t thin out during baking.
Veggie Prep
Salt your diced zucchini and let it sit for 10 minutes before cooking, then pat dry. This removes excess moisture that could make your filling watery. The green bell pepper adds color without FODMAP concerns.
Baking Hack
Place a baking sheet under your pie dish to catch spills and help the bottom crust crisp. Rotate the dish halfway through baking for even browning. I pull it when the crust hits a deep golden brown.
Flavor Boost
Add 1 tsp lemon zest to your filling for brightness without adding high-FODMAP ingredients. The garlic-infused oil gives depth while staying gut-friendly. Fresh thyme is non-negotiable for that classic pot pie taste.
Resting Time
Let the pie rest 10-15 minutes after baking. This lets the filling set so it doesn’t run out when sliced. Honestly, the hardest part is waiting! 🔥
Nutrition Facts
Frequently Asked Questions
Can I use store-bought gluten-free pie crust?
Look for brands like Mi-Del or Wholly Gluten Free. Just ensure it’s dairy-free if needed.
Why use cornstarch instead of flour for thickening?
Cornstarch creates a glossy, lump-free sauce and is naturally gluten-free. It thickens at a lower temperature than flour, preventing overcooking.
Can I make this ahead of time?
Yes! Assemble the pie and refrigerate for up to 24 hours before baking. Add 5 minutes to the baking time if chilled.
What if my crust browns too quickly?
Cover the edges with foil or a pie shield. For extra protection, brush with egg wash 10 minutes before it’s done.

- 6 Oz Chocolate Chip Cookie Recipe: Perfectly Balanced Crispy Edges and Chewy Hearts - September 25, 2026
- 6-Inch Coffee Cake Recipe: Vanilla Bean Swirls and Buttery Streusel Topping - September 25, 2026
- 1 Hour Soup Recipe: Velvety Richness Without the Wait - September 25, 2026