
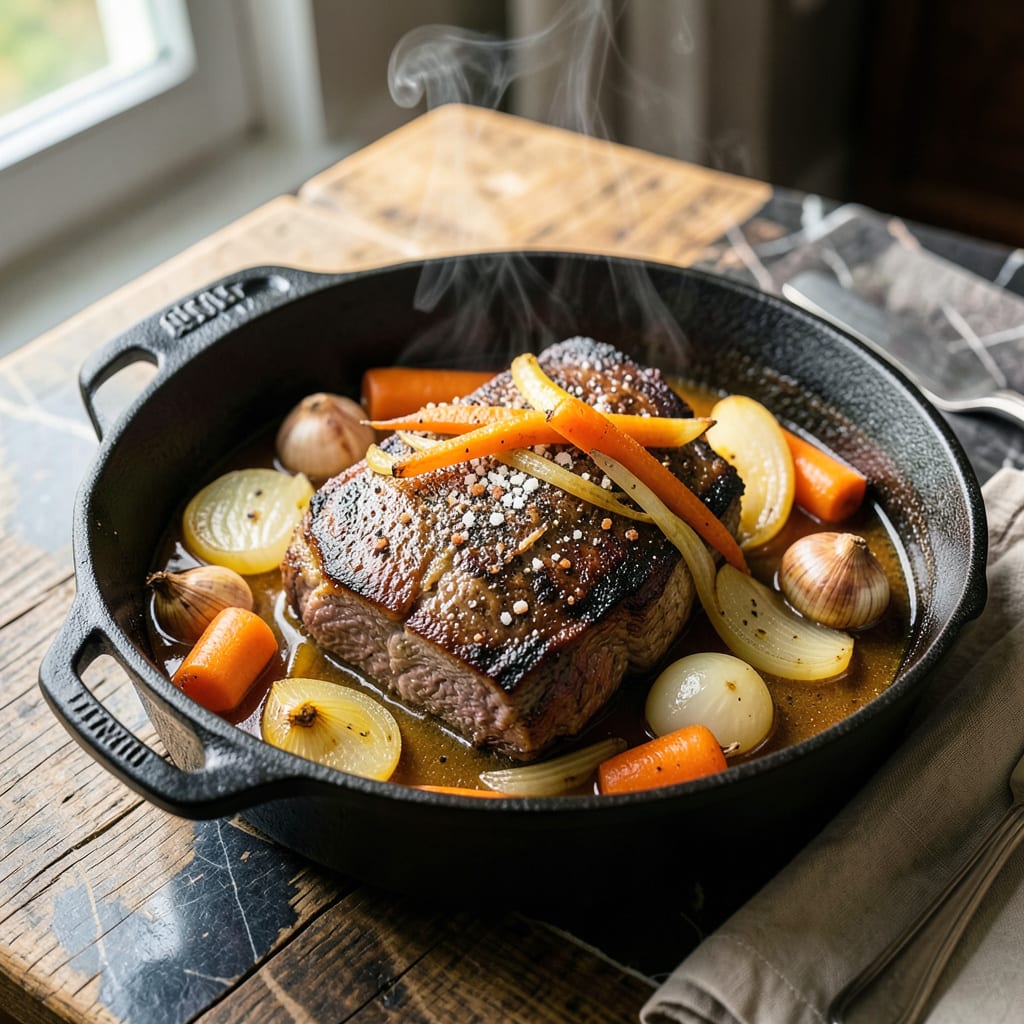
This pot roast brings Sunday dinner nostalgia to your newlywed table with tender beef and hearty root vegetables. A proven method transforms simple ingredients into a comforting meal.
Slow-cooked to perfection, the dish delivers fall-apart meat and rich, savory gravy. Ideal for creating traditions together, it’s a timeless recipe that feels like home.
Ingredients for Newlywed Pot Roast
Tender beef, root vegetables, and aromatics create this comforting Sunday dinner classic.
| Ingredient | Amount | Notes |
|---|---|---|
| Beef Chuck Roast 🥩 | 3 lb | Well-marbled, trimmed of excess fat |
| Kosher Salt 🧂 | 2 tsp | Diamond Crystal preferred for even seasoning |
| Freshly Ground Black Pepper 🌶️ | 1 tsp | Coarse grind for texture |
| Garlic Cloves 🧄 | 6 cloves | Minced for even distribution |
| Yellow Onions 🧅 | 2 whole | Large, quartered with skin on |
| Carrots 🥕 | 4 whole | Large, peeled and cut into 3-inch pieces |
| Russet Potatoes 🥔 | 4 whole | Medium, peeled and quartered |
| Celery Stalks 🌿 | 3 whole | Cut into 2-inch pieces |
| Low-Sodium Beef Broth 💧 | 2 cups | High-quality for depth of flavor |
| Dry Red Wine 🍷 | 1 cup | Bold variety like Cabernet Sauvignon |
| Tomato Paste 🍅 | 2 tbsp | Double-concentrated for richness |
| Fresh Thyme Sprigs 🌿 | 4 whole | Tied with kitchen twine |
| Fresh Rosemary Sprig 🌿 | 1 whole | 6-inch length for aromatics |
| Bay Leaf 🍃 | 1 whole | Dried, added whole |
| Olive Oil 🫒 | 2 tbsp | Extra-virgin for searing |
The beef is non-negotiable here. Chuck roast with visible marbling ensures that fall-apart texture the recipe promises. Look for USDA Choice grade at your butcher or Whole Foods meat counter—it’s the sweet spot between quality and price. Avoid pre-cut stew meat; it lacks the connective tissue that breaks down beautifully during slow cooking. The root vegetables should be uniform in size so they cook evenly (no tiny potato pieces that turn to mush).
No red wine? Substitute with additional beef broth plus 1 tbsp balsamic vinegar for acidity. Fresh herbs are ideal, but dried thyme and rosemary at one-third the amount work in a pinch. If you’re missing an onion or two, add 2 shallots instead. The tomato paste can be swapped with 1/4 cup crushed tomatoes reduced by half. For gluten-free needs, ensure your beef broth is certified as such.
The roast tastes even better the next day—store leftovers in an airtight container for up to 4 days in the fridge or 3 months in the freezer. Reheat gently on the stovetop with a splash of broth to restore the gravy’s consistency. The herbs can be prepped a day ahead (store wrapped in damp paper towels), but don’t sear the beef until ready to cook.
Why You’ll Love This Recipe
- One Pot Magic: Honestly, I just dump everything in, and the oven does the rest—no babysitting required.
- Sunday or Wednesday: I’ve served this at dinner parties and eaten it solo for lunch the next day.
- Stretches Far: One roast feeds us for days, and the leftovers taste even better in sandwiches.
Step-by-Step Instructions for Newlywed Pot Roast With Root Vegetables
Master the technique that transforms simple ingredients into a Sunday dinner centerpiece.
Step 1: Sear the Beef Chuck Roast to Build Flavor
Pat the 3 lb Beef Chuck Roast completely dry with paper towels. This crucial step ensures a proper sear rather than steaming. Season all sides aggressively with the 2 tsp Kosher Salt and 1 tsp Freshly Ground Black Pepper—the coarse grind will create a beautiful crust.
Heat the 2 tbsp Olive Oil in a Dutch oven over medium-high heat until shimmering. Add the roast and sear undisturbed for 4-5 minutes per side until deeply browned. You’re looking for a rich mahogany color that indicates the Maillard reaction has occurred, developing complex flavors that will infuse the entire dish.
Step 2: Develop the Aromatic Base
Remove the roast and set aside. In the same pot, add the 2 whole Yellow Onions (quartered with skin on), 4 whole Carrots, 4 whole Russet Potatoes, and 3 whole Celery Stalks. Sauté for 5-7 minutes until the onions begin to caramelize at the edges.
Add the 6 cloves Garlic Cloves and 2 tbsp Tomato Paste, stirring constantly for 1-2 minutes until the paste darkens slightly. This step intensifies the tomato flavor and prevents a raw taste in the finished dish. The fond from the roast should start to lift from the bottom of the pot.
Step 3: Deglaze and Build the Braising Liquid
Pour in the 1 cup Dry Red Wine, scraping the bottom of the pot to release all the browned bits. Let it simmer for 3-4 minutes until reduced by half. The alcohol will cook off while the concentrated flavor remains.
Add the 2 cups Low-Sodium Beef Broth, 4 whole Fresh Thyme Sprigs, 1 whole Fresh Rosemary Sprig, and 1 whole Bay Leaf. Return the roast to the pot, nestling it among the vegetables. The liquid should come about halfway up the roast—this is the perfect ratio for braising.
Step 4: Braise to Tender Perfection
Cover the pot and transfer to a 325°F oven. Braise for 2.5 to 3 hours, turning the roast every 45 minutes to ensure even cooking. You’ll know it’s ready when the meat yields easily to a fork and the internal temperature reaches 195-200°F.
The vegetables should be fork-tender and the braising liquid reduced to a rich, flavorful sauce. The house will fill with an aroma that defines Sunday dinner—deep, savory, and irresistibly comforting. Resist the urge to check too frequently; each time you open the oven, you lose valuable heat and extend the cooking time.
Pro Tips For Making Newlywed Pot Roast
- Sear it hard: Use high heat and don’t move the chuck roast for at least 3-4 minutes per side—this builds a deep crust that locks in flavor. I learned this the hard way after my first few pot roasts came out gray and bland.
- Salt overnight: Dry-brine the beef with kosher salt 12 hours before cooking. Sounds weird, but it works: the meat stays juicier and seasons all the way through.
- Skip the pre-cut: Buy whole garlic cloves and smash them yourself—pre-minced garlic turns bitter and loses its punch during the long braise.
- Use a thermometer: Pull the roast at 195°F internal temp, not when it “looks done.” After burning one to a crisp, I finally figured out looks can be deceiving with tougher cuts like chuck.
Troubleshooting Perfect Results
Tough Meat Issues
If your roast comes out tough, it likely didn’t braise long enough. The collagen in chuck roast needs 2.5-3 hours at 325°F to break down properly. Check the internal temperature—it should reach at least 195°F for that fall-apart texture.
Liquid Problems
Too much liquid? Remove the lid and let it reduce on the stovetop over medium heat for 10-15 minutes. Not enough? Add ½ cup hot beef broth and return to the oven uncovered for 20 minutes. The liquid should just cover the bottom of the pot.
Vegetable Troubles
Mushy veggies usually mean they were cut too small or added too early. For next time, keep pieces 2-3 inches thick and add them when the roast has about 1 hour left to cook. If they’re undercooked, return the pot to the oven for 30 minutes. 💡
Flavor Fixes
Bland results often come from under-seasoning. Taste before serving and adjust with Kosher Salt and Freshly Ground Black Pepper. For depth, stir in 1 tbsp tomato paste or a splash of red wine and simmer for 5 minutes.
Searing Struggles
If your roast isn’t browning well, make sure it’s completely dry before searing and don’t crowd the pan. Use medium-high heat and let it sear undisturbed for 4-5 minutes per side. A dark crust equals big flavor in your finished dish.
Herb Solutions
Overpowering herb flavors? Remove the sprigs after 2 hours of cooking. Not enough herb presence? Add 1 tsp dried thyme or ½ tsp dried rosemary during the last hour. Fresh herbs should be tied for easy removal. 🌿
Nutrition Facts
Frequently Asked Questions
What’s the best cut for this dish?
Use a well-marbled chuck roast for the most tender results. Its connective tissue breaks down beautifully during slow cooking. Avoid leaner cuts like sirloin, which can dry out.
Can I use a slow cooker instead?
Yes! Sear the roast first, then transfer to a slow cooker with all ingredients. Cook on low for 8-10 hours or high for 5-6 hours. The texture will be just as tender.
What if I don’t have red wine?
Substitute with 1 cup beef broth plus 1 tbsp balsamic vinegar for acidity. The flavor will still be rich and savory. Avoid white wine—it lacks the depth needed.
How do I know when it’s done?
The meat should reach 195-200°F internally and pull apart easily with a fork. If unsure, braise longer—overcooking isn’t possible with this method.

- 4C Bread Crumbs Meatballs Recipe: Crispy Crust and Juicy Centers - September 25, 2026
- 6 Oz Chocolate Chip Cookie Recipe: Perfectly Balanced Crispy Edges and Chewy Hearts - September 25, 2026
- 6-Inch Coffee Cake Recipe: Vanilla Bean Swirls and Buttery Streusel Topping - September 25, 2026