
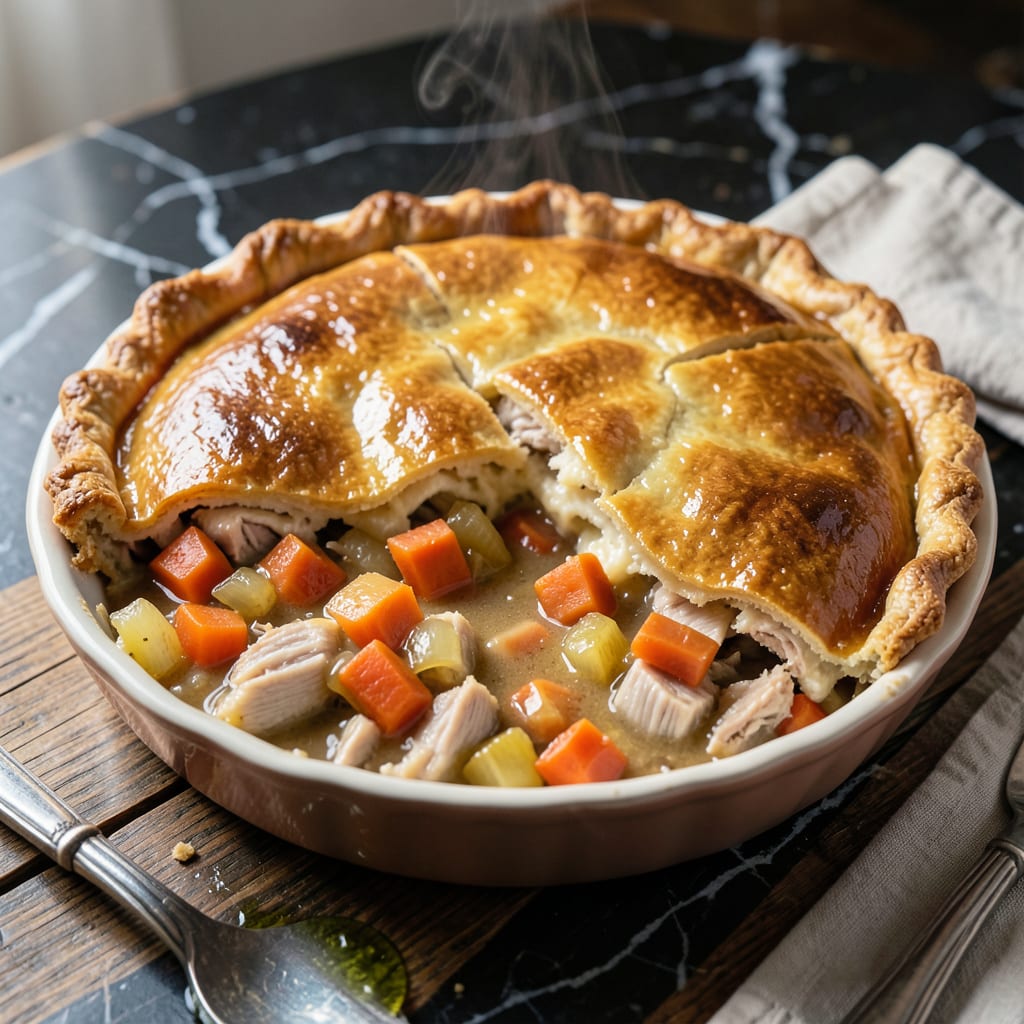
There’s nothing like a flaky crust embracing a creamy turkey filling for ultimate comfort food. This dish brings grandma’s kitchen to your table with a proven method that never fails.
I’ve streamlined the process to make it easy without sacrificing that traditional taste. The result is a golden, bubbling pie that’s as heartwarming as it is delicious.
Ingredients for Old Fashioned Turkey Pot Pie Recipe Easy
Leftover turkey transforms into this golden, bubbling comfort classic with pantry staples.
| Ingredient | Amount | Notes |
|---|---|---|
| Cooked Turkey 🦃 | 2 cups | Shredded or diced leftover |
| Pie Crust 🥧 | 2 sheets | Store-bought or homemade flaky |
| Unsalted Butter 🧈 | ½ cup | For roux base richness |
| All-Purpose Flour 🌾 | ½ cup | For thickening filling |
| Yellow Onion 🧅 | 1 whole | Medium, finely diced |
| Carrots 🥕 | 2 whole | Peeled and diced |
| Celery Stalks 🌿 | 2 whole | Diced for aroma |
| Garlic Cloves 🧄 | 2 cloves | Minced for depth |
| Chicken Broth 🍲 | 2 cups | Low-sodium preferred |
| Whole Milk 🥛 | 1 cup | For creamy filling texture |
| Frozen Peas 🌱 | 1 cup | Thawed before adding |
| Fresh Thyme 🍃 | 1 tbsp | Chopped, or 1 tsp dried |
| Salt 🧂 | 1 tsp | Diamond Crystal preferred |
| Black Pepper 🌶️ | ½ tsp | Freshly ground for best flavor |
The turkey is the star, so use what’s left from a roast or rotisserie—Costco or Whole Foods have great pre-cooked options. For the crust, Pillsbury refrigerated sheets save time and still deliver that flaky promise. I always grab the all-butter version for extra richness. The veggies should be fresh (carrots with tops still on are a good sign), but frozen works in a pinch for peas and celery.
Short on time? Pre-diced mirepoix from the produce section cuts prep to minutes. No fresh thyme? Dried at one-third the amount works fine. Chicken broth can be swapped for turkey broth if you have it. For extra depth, Better Than Bouillon paste is my go-to. The milk can be any fat percentage, but whole milk makes the creamiest filling.
Assemble and bake right away, or prep the filling a day ahead—it actually tastes better after flavors meld overnight. Keeps 3-4 days in the fridge, reheats beautifully. Freeze unbaked pies for up to 3 months (just add 10 minutes to baking time).
Why You’ll Love This Recipe
- One Pot Wonder: I love that it all comes together in a single skillet—just brown the onion in butter, stir in flour, add turkey, and top with crust.
- That Golden Crust: The buttery pie crust bakes up flaky and golden, while the turkey and onion filling stays rich and creamy underneath.
- Feeds a Crowd: Between us, this is my go-to for Sunday dinner—it’s filling, satisfying, and everyone always goes back for seconds.
- Leftovers? Yes Please: Honestly, it tastes even better the next day. I’ll often make two and freeze one for a busy week ahead.
Step-by-Step Instructions for Old Fashioned Turkey Pot Pie
This method delivers comfort in every bite with a flaky crust and creamy filling.
Step 1: Prepare the Vegetable Base
Finely dice the yellow onion, peel and dice the carrots, and dice the celery stalks. I like to keep all pieces uniform in size—about ¼-inch cubes—so everything cooks evenly and fits neatly in each bite.
Mince the garlic cloves and chop the fresh thyme. Heat a large skillet over medium heat and melt the ½ cup unsalted butter. Add the diced onion, carrots, and celery, then cook for 5-6 minutes until the vegetables soften and the onion becomes translucent.
Step 2: Create the Creamy Filling
Stir in the minced garlic and chopped thyme, cooking for an additional 1 minute until the garlic is fragrant. Sprinkle the ½ cup all-purpose flour over the vegetables, stirring constantly to form a smooth paste. This roux will thicken the filling beautifully.
Gradually whisk in the 2 cups chicken broth and 1 cup whole milk, ensuring no lumps form. Bring the mixture to a gentle simmer and cook for 3-4 minutes until it thickens to a gravy-like consistency. Stir in the 1 cup frozen peas, 2 cups cooked turkey, 1 tsp salt, and ½ tsp black pepper.
Step 3: Assemble and Top with Crust
Preheat your oven to 375°F. Transfer the filling to a 9-inch pie dish or similar baking dish. Unfold 1 sheet of pie crust and place it over the filling, gently pressing the edges to seal. Cut a few small slits in the center to allow steam to escape.
For an extra-flaky top, brush the crust with a little milk or beaten egg. This creates a beautiful golden brown finish. Place the dish on a baking sheet to catch any potential spills during baking.
Step 4: Bake to Perfection
Bake for 30-35 minutes or until the crust is deep golden brown and the filling is bubbling at the edges. If the crust begins to brown too quickly, tent the pie with aluminum foil to prevent over-browning.
Remove from the oven and let it rest for 10 minutes before serving. This allows the filling to set slightly, making it easier to slice. The crust should be crisp and flaky, while the filling remains rich and creamy.
Pro Tips For Making Old Fashioned Turkey Pot Pie Recipe Easy
- Pre-Cook the Onions: Sauté the yellow onions in butter until soft and translucent before adding flour—raw onions make the filling taste harsh. I learned this the hard way after my first pot pie had that unmistakable crunch.
- Shred the Turkey: Use two forks to pull the cooked turkey into small, even pieces instead of chopping. It distributes better in the filling and avoids those awkwardly large bites.
- Skip the Soggy Crust: Brush the bottom crust with a thin layer of egg wash or melted butter before adding the filling to create a moisture barrier. After three watery bottoms, I finally figured out this simple fix.
- Use Cold Butter: When making the roux, start with cold, cubed unsalted butter—it melts more evenly into the flour and prevents lumps. Sounds weird, but it works every time.
Make-Ahead Tips for Leftovers
Prep Ahead Filling
You can prep the entire filling 1-2 days ahead and store it in the fridge. In fact, I think it tastes even better the next day as the flavors meld together. Just let it cool completely before refrigerating in an airtight container. 💡
Crust Prep
If using store-bought crust, keep it chilled until ready to assemble. For homemade, make the dough 2-3 days ahead and refrigerate, or freeze for up to 1 month. Thaw in the fridge overnight before rolling out.
Assemble Early
Assemble the entire pie 8-12 hours before baking and refrigerate. This works especially well if you’re serving it for a holiday meal. Just add 5-10 minutes to the baking time since it’ll start cold.
Freeze for Later
Unbaked pies freeze beautifully for up to 3 months. Wrap tightly in plastic wrap then foil. Bake from frozen, adding 15-20 minutes to the cooking time. Cover with foil for the first 20 minutes to prevent over-browning. ❄️
Reheating Leftovers
Individual slices reheat well in the microwave with a damp paper towel for 1-2 minutes. For the whole pie, warm in a 350°F oven for 15-20 minutes until bubbling.
Pro Tip
Label your frozen pies with the date—I always forget! Also, if prepping filling ahead, undercook the veggies slightly so they don’t turn mushy during the final bake.
Nutrition Facts
Frequently Asked Questions
Can I use rotisserie chicken instead?
Swap in 2 cups of shredded rotisserie chicken for the turkey. The flavor will be just as rich and the texture works perfectly.
How do I prevent a soggy bottom crust?
Prevent sogginess by baking on the lower oven rack and using a preheated baking sheet. Also, let the filling cool slightly before assembling.
Can I make this with gluten-free crust?
Yes! Use a gluten-free pie crust and swap all-purpose flour for a gluten-free 1:1 flour blend. The texture remains excellent.
What’s the best way to store leftovers?
Store in an airtight container in the fridge for up to 4 days. Reheat in the oven for best texture.

- 4C Bread Crumbs Meatballs Recipe: Crispy Crust and Juicy Centers - September 25, 2026
- 6 Oz Chocolate Chip Cookie Recipe: Perfectly Balanced Crispy Edges and Chewy Hearts - September 25, 2026
- 6-Inch Coffee Cake Recipe: Vanilla Bean Swirls and Buttery Streusel Topping - September 25, 2026