
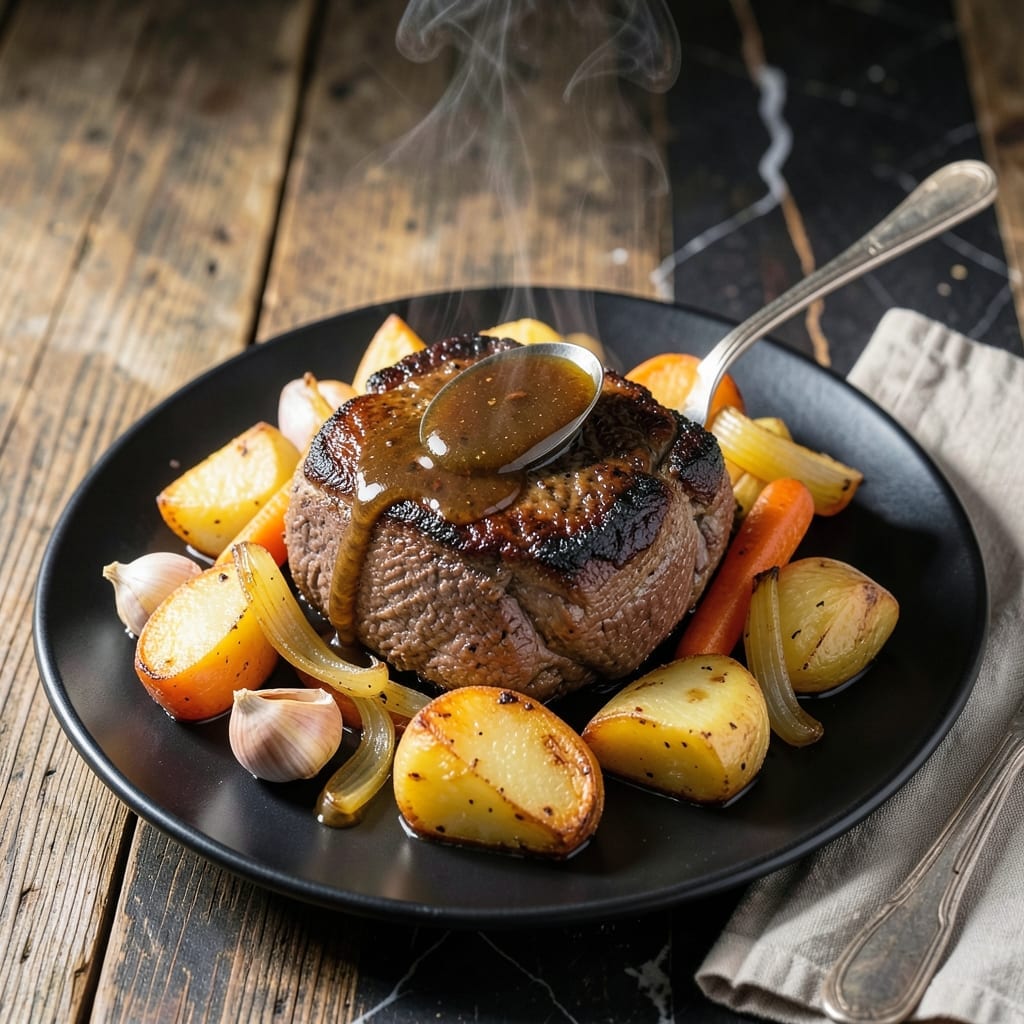
My Ninja Foodi grill transforms pot roast into a tender, flavorful masterpiece with minimal effort. This multi-function approach combines pressure cooking and air crisping for perfect results every time.
The secret lies in searing the beef first to lock in juices, then letting the pressure function work its magic. Root vegetables soak up the rich beefy flavors as they cook alongside the roast.
In under 2 hours, you’ll have fall-apart beef with carrots and potatoes that taste like they’ve been slow-cooked all day. The grill function adds a final touch of caramelization.
This method delivers restaurant-quality pot roast with the convenience of one-pot cooking. The results speak for themselves.
Ingredients for Ninja Foodi Grill Pot Roast
Nothing exotic here—just good stuff for a pot roast that falls apart beautifully.
| Ingredient | Amount | Notes |
|---|---|---|
| Chuck Roast 🥩 | 3 lb | Well-marbled, trimmed of excess fat |
| Carrots 🥕 | 4 whole | Peeled, cut into 3-inch chunks |
| Yukon Gold Potatoes 🥔 | 1 ½ lb | Cut into 2-inch pieces |
| Yellow Onion 🧅 | 1 whole | Large, quartered |
| Garlic Cloves 🧄 | 6 cloves | Smashed, peeled |
| Beef Stock 🥣 | 2 cups | Low-sodium preferred |
| Worcestershire Sauce 💧 | 2 tbsp | Adds umami depth |
| Tomato Paste 🍅 | 2 tbsp | For richness and color |
| Dried Thyme 🌿 | 1 tsp | Or 1 tbsp fresh thyme |
| Dried Rosemary 🌿 | 1 tsp | Crushed between fingers |
| Bay Leaves 🍃 | 2 whole | Removed before serving |
| Olive Oil 🫒 | 2 tbsp | For searing beef |
| Kosher Salt 🧂 | 1 ½ tsp | Plus more to taste |
| Black Pepper 🌶️ | 1 tsp | Freshly ground preferred |
The beef is everything here. Chuck roast with good marbling gives you that melt-in-your-mouth texture—skip the lean cuts, they dry out. Costco has great pre-portioned chuck, but your local butcher can cut it to your specs. Look for bright red meat with white fat streaks. The carrots and potatoes? Any variety works, but Yukon Golds hold their shape better than russets.
No chuck roast? Brisket or short ribs work too (adjust cooking time). Fresh herbs? Use one-third the amount of dried. Out of Worcestershire? Soy sauce plus a splash of balsamic gets you close. The tomato paste is non-negotiable for depth of flavor—those squeeze tubes at Trader Joe’s are perfect for keeping it fresh without waste.
Leftovers taste even better the next day. Store in the fridge for up to 4 days or freeze for 3 months. The beef slices beautifully cold for sandwiches (trust me on this).
Why You’ll Love This Recipe
- Set and Forget: The Ninja Foodi does all the work—I just toss in the chuck roast, veggies, and garlic, then walk away.
- Feeds a Hungry Table: This one-pan meal stretches to feed six, with enough for leftovers the next day.
- Budget-Friendly Centerpiece: A chuck roast and a few cheap veggies turn into a hearty dinner that tastes like a Sunday supper.
Step-by-Step Instructions for Ninja Foodi Grill Pot Roast
Here’s the method for achieving fall-apart beef with perfectly cooked vegetables every time.
Step 1: Sear the Chuck Roast for Deep Flavor
Pat the 3 lb Chuck Roast dry with paper towels and season generously with the 1.5 tsp Kosher Salt and 1 tsp Black Pepper. I press the seasoning into the meat so it adheres well during searing.
Select the “Grill” function on your Ninja Foodi and set it to high heat. Add the 2 tbsp Olive Oil and let it get shimmering hot. Sear the chuck roast for 4-5 minutes per side until you develop a deep brown crust. This creates the Maillard reaction that builds complex flavors in your dish.
Don’t rush this step—you want a good crust on all sides. Use tongs to flip the meat, and don’t pierce it with a fork. Transfer the seared roast to a plate and set aside while you prepare the vegetables.
Step 2: Sauté Aromatics and Build the Braising Liquid
In the same pot, add the 4 whole Carrots, 1.5 lb Yukon Gold Potatoes, 1 whole Yellow Onion, and 6 cloves Garlic Cloves. Sauté for 3-4 minutes until the onions start to soften and the garlic becomes fragrant.
Stir in the 2 tbsp Tomato Paste and cook for 1 minute to deepen its flavor. Then add the 2 tbsp Worcestershire Sauce, 2 cups Beef Stock, 1 tsp Dried Thyme, 1 tsp Dried Rosemary, and 2 whole Bay Leaves. Scrape the bottom of the pot to release all those flavorful browned bits.
This liquid will transform into a rich, savory sauce as it braises. The tomato paste adds body and a subtle sweetness that balances the acidity of the Worcestershire sauce perfectly.
Step 3: Pressure Cook for Maximum Tenderness
Return the seared chuck roast to the pot, nestling it among the vegetables. Secure the lid on your Ninja Foodi and set it to “Pressure” on high for 60 minutes. Make sure the valve is sealed properly—you should hear it lock into place.
As it cooks, the pressure will break down the tough connective tissues in the chuck roast, transforming it into buttery, fork-tender beef. The vegetables will soak up all that rich, meaty flavor, becoming incredibly tender themselves.
Let the pressure release naturally for 10 minutes after cooking, then quick-release any remaining pressure. This gradual release prevents the meat from seizing up and becoming tough.
Step 4: Reduce the Sauce and Finish
Carefully remove the chuck roast and vegetables to a serving platter. Skim any excess fat from the surface of the braising liquid, then select the “Sauté” function on your Ninja Foodi.
Let the liquid simmer for 5-7 minutes until it reduces by about a third and thickens into a rich sauce. Taste and adjust seasoning with additional Kosher Salt or Black Pepper if needed. Remove and discard the 2 whole Bay Leaves before serving.
Slice the pot roast against the grain and arrange it on the platter with the vegetables. Spoon the reduced sauce over everything and serve immediately while hot. The beef should pull apart easily with a fork, and the vegetables should be tender but still hold their shape.
Pro Tips For Making Ninja Foodi Grill Pot Roast
- Sear the Chuck First: I learned this the hard way—searing the chuck roast for 3-4 minutes per side on the Foodi’s “Sear/Sauté” function locks in juices and adds a depth of flavor that skipping this step just can’t match.
- Cut Potatoes Evenly: Sounds obvious, but chopping the Yukon Golds into 1.5-inch chunks guarantees they cook through at the same rate as the carrots—no more biting into a raw center.
- Skip Overcrowding the Basket: After burning a few batches, I finally figured out that piling in too many veggies steams them instead of roasting; use two layers max with space between pieces.
- Use Beef Broth, Not Water: My grandmother swore by this, and she was right: substituting beef broth for water when pressure cooking adds richness that water just can’t—about 1 cup does the trick.
Pro Cooking Tips for This Dish
Perfect Searing Technique
Pat the beef completely dry before seasoning—this ensures a deep brown crust. Use high heat on your Ninja Foodi’s grill function, and don’t move the roast for at least 4 minutes per side. I hear the sizzle change pitch when it’s ready to flip. 🔥
Pressure Cooking Timing
For a 3 lb chuck roast, 60 minutes on high pressure is ideal. Larger roasts need 70-75 minutes. The natural release for 10 minutes is non-negotiable—it prevents the meat from tightening up.
Liquid Balance
Use exactly 2 cups beef stock—too much and your sauce won’t reduce properly. The Ninja Foodi’s pressure function concentrates flavors beautifully. I always scrape the browned bits from the bottom for maximum depth.
Sauce Reduction
After pressure cooking, simmer the braising liquid on the sauté setting for 5-7 minutes. You want it thick enough to coat the back of a spoon. Skim excess fat first for a cleaner finish.
Resting Matters
Let the roast rest 10-15 minutes before slicing. This lets juices redistribute. I cover it loosely with foil to keep it warm. Slice against the grain for the most tender bites.
Equipment Tip
Always check your Ninja Foodi’s sealing ring before starting. A proper seal ensures even pressure. I replace mine every 6-8 months for best results. 💡
Nutrition Facts
Frequently Asked Questions
Do I need to brown the meat first?
Yes! Searing for 4-5 minutes per side creates a flavorful crust. Skipping this step means missing out on deep, rich flavor development in your dish.
Can I use a different cut of beef?
Brisket or short ribs work well, but adjust cooking time. Avoid lean cuts like sirloin—they dry out. Chuck roast’s marbling makes it ideal for this method.
How do I know when it’s done?
The beef should pull apart easily with a fork. For a 3 lb roast, 60 minutes under pressure plus 10 minutes natural release is perfect.
What if my sauce is too thin?
Simmer uncovered on the sauté setting for 5-7 minutes to reduce. Skim excess fat first for better texture and flavor concentration.

- 6 Oz Chocolate Chip Cookie Recipe: Perfectly Balanced Crispy Edges and Chewy Hearts - September 25, 2026
- 6-Inch Coffee Cake Recipe: Vanilla Bean Swirls and Buttery Streusel Topping - September 25, 2026
- 1 Hour Soup Recipe: Velvety Richness Without the Wait - September 25, 2026