
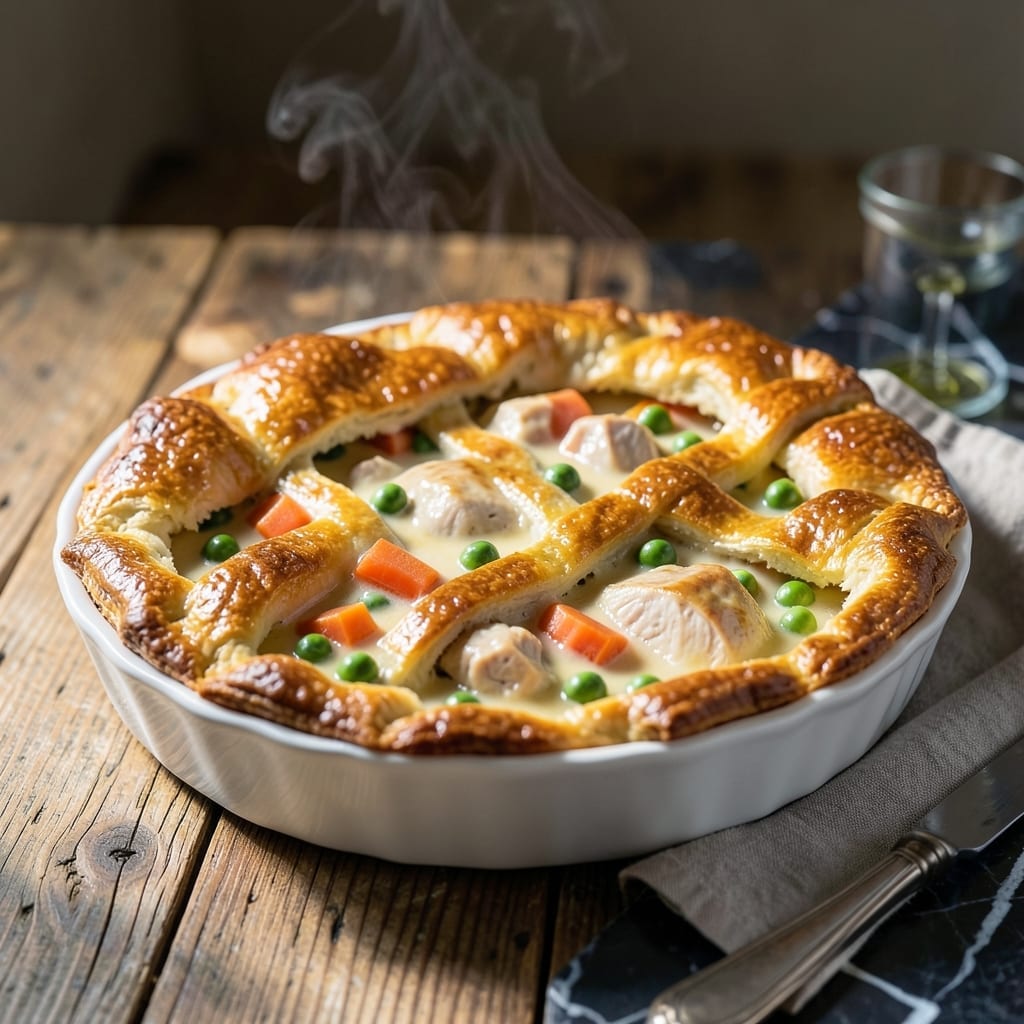
There’s nothing quite like a homemade pot pie with its rich filling and flaky crust, and the Ninja Foodi makes it effortless. I’ve perfected this method to deliver that classic comfort food taste with minimal hands-on time.
The multi-cooker handles everything—browning the chicken, cooking the vegetables, and baking the crust to golden perfection. This approach streamlines the process without sacrificing the dish’s hearty, satisfying nature.
What you’ll get is a creamy, savory filling encased in a buttery, flaky crust that’s crisp on top and tender underneath. It’s a complete meal in one pot, with all the flavors of a traditional pot pie.
Perfect for a cozy family dinner or a comforting weekend meal. Here’s how to make it.
Ingredients for Ninja Foodi Pot Pie
Pantry staples meet a few fresh items for that flaky, golden perfection.
| Ingredient | Amount | Notes |
|---|---|---|
| Boneless, Skinless Chicken Breasts 🍗 | 1 ½ lb | Cut into 1-inch cubes |
| Unsalted Butter 🧈 | ½ cup | Cold, cubed for crust |
| All-Purpose Flour 🌾 | 2 cups | Plus extra for dusting |
| Ice Water 💧 | ⅓ cup | For pie crust dough |
| Chicken Broth 🍲 | 1 ½ cups | Low-sodium preferred |
| Heavy Cream 🥛 | ½ cup | Or whole milk for lighter filling |
| Carrots 🥕 | 2 whole | Peeled and diced small |
| Celery Stalks 🌿 | 2 whole | Diced, leaves reserved |
| Yellow Onion 🧅 | 1 whole | Medium, finely diced |
| Frozen Peas 🌱 | 1 cup | No need to thaw |
| Garlic Cloves 🧄 | 3 cloves | Minced for filling |
| Dried Thyme 🍃 | 1 tsp | Or fresh thyme leaves |
| Salt 🧂 | 1 tsp | Divided for crust and filling |
| Black Pepper 🌶️ | ½ tsp | Freshly ground preferred |
The crust is the star here. Cold butter and ice water are non-negotiable for flakiness—don’t even think about softening that butter first. I grab Land O’Lakes for the butter (it’s reliable) and King Arthur for the flour (higher protein = better structure). The chicken? Boneless, skinless breasts stay tender in the multi-cooker. Buy them thick so you can cube them evenly.
Short on time? Rotisserie chicken works great—just shred and skip the browning step. No thyme? Poultry seasoning at half the amount gets you close. Swap the peas for corn or green beans if that’s what’s in the freezer. The heavy cream can be whole milk plus a spoon of flour for thickening, but the richness won’t be quite the same. Fresh garlic is worth it, but jarred minced (the stuff in oil) works in a pinch.
The unbaked crust can chill in the fridge for 24 hours if you prep ahead. Leftovers keep 3-4 days in the fridge—reheat in the Foodi or oven to keep the crust crisp. For make-ahead, assemble the pie but don’t bake it. Wrap it tight and freeze for up to 2 months.
Why You’ll Love This Recipe
- One-Pot Wonder: I toss everything into the Ninja Foodi—chicken, broth, butter—and let it do the work while I set the table.
- Buttery Crust: The flaky layers from the butter and flour mix with the juices for that comfort-food bite I crave.
- Feeds the Crew: Between us, this makes enough for my family of four with leftovers for lunch the next day.
Step-by-Step Instructions for Ninja Foodi Pot Pie
Here’s the method. Straightforward, tested, works every time.
Step 1: Prepare the Flaky Pie Crust
In a food processor, pulse the 2 cups all-purpose flour with ½ tsp black pepper and ½ tsp salt. Add the 0.5 cup cold, cubed unsalted butter and pulse until the mixture resembles coarse crumbs with pea-sized butter pieces visible.
With the processor running, drizzle in the 0.33 cup ice water through the feed tube. Stop as soon as the dough begins to come together—it should hold when pressed but not be sticky. Overworking the dough develops gluten, which makes it tough instead of flaky.
Turn the dough out onto a lightly floured surface, divide into two equal portions, and shape into discs. Wrap in plastic and refrigerate for 30 minutes while you prepare the filling. This chilling step ensures the butter stays cold, which creates those beautiful flaky layers.
Step 2: Sauté the Aromatics and Chicken
Select the Sauté function on your Ninja Foodi and set to Normal. When the pot is hot, add the remaining ½ tsp salt, diced yellow onion, carrots, and celery stalks. Sauté for 4-5 minutes until the vegetables begin to soften and the onion turns translucent.
Add the 1.5 lb chicken breasts, cut into 1-inch cubes, and the 3 cloves minced garlic cloves. Cook for 5-6 minutes, stirring occasionally, until the chicken is no longer pink on the outside. The chicken will finish cooking later, so don’t worry if it’s not fully done yet.
Step 3: Create the Creamy Filling
Sprinkle the 1 tsp dried thyme over the chicken and vegetable mixture. Pour in the 1.5 cups chicken broth and 0.5 cup heavy cream, stirring to combine. Add the 1 cup frozen peas—no need to thaw them first.
Secure the lid and set the valve to Seal. Cook on High Pressure for 5 minutes. When done, quick-release the pressure. The filling should be bubbling and thickened, with the chicken fully cooked through to 165°F internal temperature.
If the filling seems too thin, use the Sauté function to simmer for 2-3 minutes until it reaches your desired consistency. The sauce should coat the back of a spoon but still be pourable.
Step 4: Assemble and Pressure Cook the Pot Pie
Roll out one disc of dough to fit the inside of your Ninja Foodi pot. Place it over the filling, allowing the edges to hang over slightly. Roll out the second disc and place it on top, crimping the edges to seal. Cut a few small slits in the top crust to allow steam to escape.
Secure the lid and set the valve to Seal. Cook on High Pressure for 12 minutes. When done, let the pressure release naturally for 5 minutes, then quick-release any remaining pressure. The crust should be golden brown and the filling bubbling through the slits.
Carefully remove the pot pie by lifting the parchment sling. Let it rest for 5 minutes before serving to allow the filling to set slightly. Each serving should have a perfect ratio of flaky crust to creamy, vegetable-packed filling.
Pro Tips For Making Ninja Foodi Pot Pie
- Chill the Dough: Use ice water for the crust and let it rest 15 minutes in the fridge—I learned this the hard way after ending up with a tough, chewy top instead of flaky layers.
- Cube the Chicken: Cut boneless chicken breasts into 1-inch pieces before pressure cooking; it cooks faster and more evenly than whole pieces, which can dry out.
- Thicken Before Baking: After pressure cooking, reduce the broth and chicken mixture on sauté mode for 5 minutes to thicken it—otherwise, your pie filling will be watery under the crust.
- Butter the Crust: Brush the top crust with melted butter before air frying; it adds a golden finish and extra richness to the flaky layers.
Creative Variations of ninja foodi pot pie
Turkey Swap
For a lighter option, use 1.5 lb boneless turkey breast instead of chicken. The flavor is milder but still delicious. I find turkey stays extra juicy in the Foodi’s pressure cooker. 💪
Vegetarian Version
Replace chicken with 1.5 cups diced mushrooms and 1 can chickpeas (drained). Sauté 5 minutes longer to develop deep umami flavor. Use vegetable broth to keep it meat-free.
Spicy Kick
Add ½ tsp cayenne with the thyme for warmth. I also stir in 2 tbsp hot sauce with the cream for a buffalo-style twist. The heat balances the creamy filling perfectly.
Herb Crust
Mix 1 tbsp dried rosemary or sage into the crust flour. These herbs pair beautifully with the chicken and veggies. Brush the top crust with egg wash and sprinkle with 1 tsp garlic powder before cooking. 🌟
Cheddar Topping
Sprinkle ½ cup shredded cheddar over the top crust before pressure cooking. It melts into a golden, cheesy blanket. I use sharp cheddar for maximum flavor impact.
Individual Servings
Divide filling into 4 ramekins and top each with a small crust round. Cook on High Pressure for 8 minutes. These personal pot pies are adorable for dinner parties.
Nutrition Facts
Frequently Asked Questions
Can I use store-bought pie crust?
Yes, a refrigerated pie crust works in a pinch. Just let it sit at room temperature for 15 minutes before rolling. Homemade tastes better, but store-bought saves time.
How do I prevent a soggy bottom crust?
Press the bottom crust firmly into the pot and blind-bake it for 5 minutes using the Air Crisp lid before adding filling. This creates a barrier against moisture.
Can I make this ahead of time?
Assemble the pie but don’t cook it. Refrigerate for 24 hours or freeze for up to 2 months. Thaw overnight before pressure cooking.
What if my filling is too thin?
After pressure cooking, use the Sauté function to simmer uncovered for 2-3 minutes. Stir in 1 tbsp cornstarch mixed with water if needed.

- 6 Oz Chocolate Chip Cookie Recipe: Perfectly Balanced Crispy Edges and Chewy Hearts - September 25, 2026
- 6-Inch Coffee Cake Recipe: Vanilla Bean Swirls and Buttery Streusel Topping - September 25, 2026
- 1 Hour Soup Recipe: Velvety Richness Without the Wait - September 25, 2026