
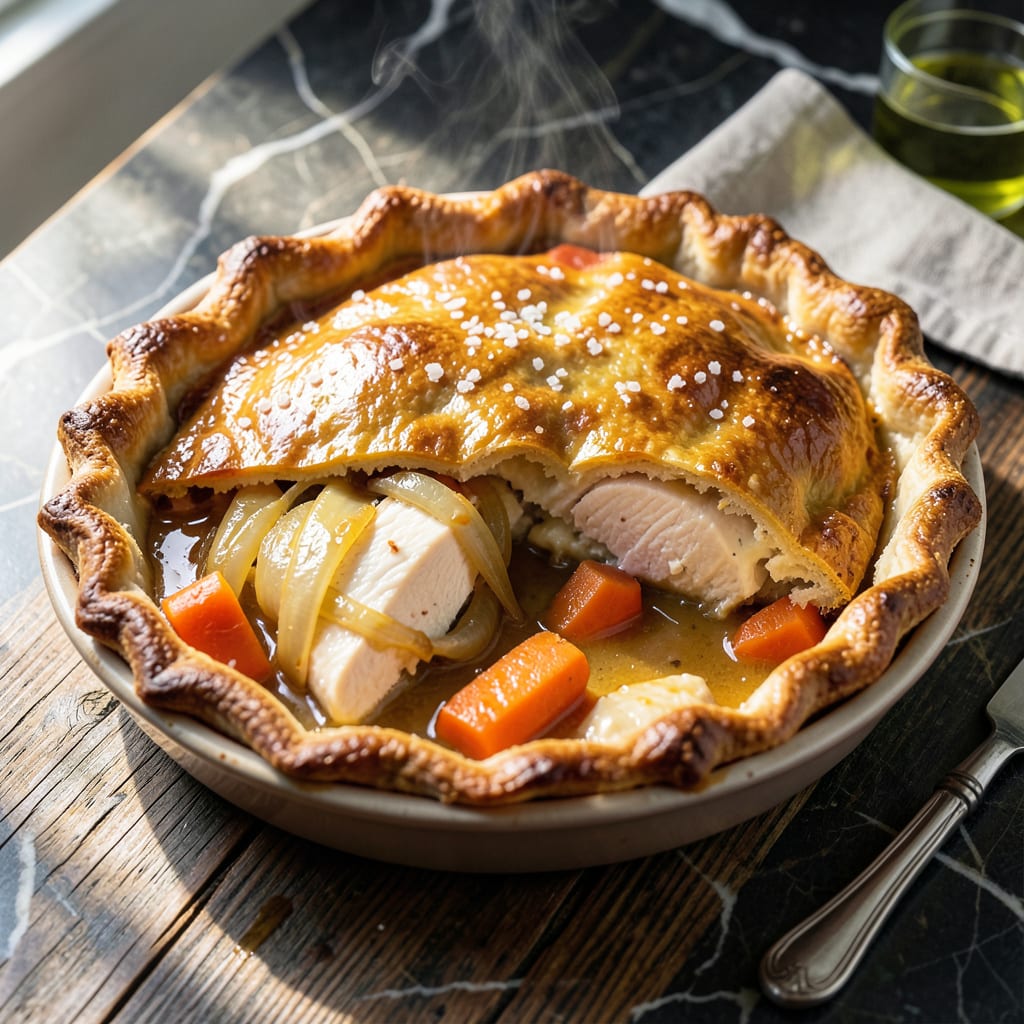
There’s something deeply satisfying about a golden crust giving way to a creamy, hearty filling. This method turns a classic into a one-pot masterpiece.
Using the Ninja appliance simplifies the process, ensuring a flaky top and bottom without juggling multiple dishes. The result is comfort food at its finest, ready to warm any table.
Ingredients for Ninja Pot Pie
Golden crust and creamy filling start with these quality ingredients for one-pot perfection.
| Ingredient | Amount | Notes |
|---|---|---|
| All-Purpose Flour 🌾 | 2 cups | Plus extra for dusting |
| Unsalted Butter 🧈 | ¾ cup | Cold, cubed for crust |
| Ice Water 💧 | ¼ cup | Plus 1 tbsp as needed |
| Salt 🧂 | 1 tsp | Divided between crust and filling |
| Boneless Chicken Breast 🍗 | 1 ½ lb | Diced into 1-inch pieces |
| Yellow Onion 🧅 | 1 whole | Medium, finely diced |
| Carrots 🥕 | 2 whole | Medium, peeled and diced |
| Celery Stalks 🥬 | 2 whole | Diced, leaves reserved |
| Garlic Cloves 🧄 | 3 cloves | Minced finely |
| Fresh Thyme 🌿 | 1 tbsp | Leaves only, chopped |
| Chicken Broth 🥣 | 1 ½ cups | Low-sodium preferred |
| Heavy Cream 🥛 | ½ cup | Full-fat for creaminess |
| Frozen Peas 🌱 | 1 cup | No need to thaw |
| Black Pepper 🌶️ | ½ tsp | Freshly ground preferred |
| Large Egg 🥚 | 1 whole | For egg wash on crust |
The butter must be cold—Land O’Lakes or Kerrygold are reliable. All-purpose flour from King Arthur gives consistent results, though any brand works. For the chicken, boneless, skinless thighs add more flavor than breasts if you prefer. The vegetables should be fresh and firm—avoid limp celery or soft carrots. Thyme from the produce section is ideal, but dried (at one-third the amount) works in a pinch.
No chicken? Turkey breast or even mushrooms (for a vegetarian twist) can substitute. Heavy cream can be replaced with half-and-half or whole milk, though the filling won’t be as rich. Fresh peas instead of frozen? Add them with the carrots. The chicken broth should be low-sodium—you can always season to taste later. For the crust, store-bought pie dough saves time if needed.
The assembled pie keeps 3-4 days in the fridge, though the crust softens. Freeze unbaked pies for up to 2 months—thaw overnight before cooking. Leftover filling? It reheats well as a creamy soup. Always store with the crust covered to prevent drying out.
Why You’ll Love This Recipe
- One Pot Magic: The Ninja Foodi handles everything—browning the chicken, simmering the filling, even baking the flaky crust. I just mix flour, butter, and ice water for the pastry, then let the pot do the work.
- Buttery Crust Perfection: That all-butter crust made with ice water and a pinch of salt? It shatters in the best way, wrapping around tender chicken in every bite.
- Weeknight Hero: I toss this together after work—start to finish in under an hour. It’s my go-to for busy evenings when I need something hearty.
- Leftovers? Even Better: The filling thickens overnight, and the crust stays crisp if reheated in the air fryer. Honestly, I make extra just for the next-day lunch.
Step-by-Step Instructions for Ninja Pot Pie
This method leverages your Ninja appliance for perfectly layered comfort food with minimal effort.
Step 1: Prepare the Flaky Pie Crust
In a food processor, pulse the 2 cups all-purpose flour with ½ tsp salt to combine. Add the 0.75 cup unsalted butter (cold and cubed) and pulse until the mixture resembles coarse crumbs with pea-sized butter pieces visible.
With the processor running, drizzle in the 0.25 cup ice water through the feed tube. Process just until the dough begins to come together—about 10-15 seconds. The dough should hold when pressed but not be sticky. Turn it out onto plastic wrap, divide into two equal portions, and shape each into a disk. Chill for 30 minutes while you prepare the filling.
Step 2: Sauté Aromatics and Cook Chicken
Using the “Sauté” function on your Ninja, heat the inner pot. Add the diced yellow onion, carrots, and celery stalks. Cook for 5 minutes until the vegetables begin to soften, stirring occasionally to prevent browning.
Add the minced garlic cloves and chopped fresh thyme, cooking for 30 seconds until fragrant. Stir in the diced 1.5 lb boneless chicken breast and cook for 5-6 minutes until the chicken is no longer pink and the vegetables are tender. The chicken should reach an internal temperature of 165°F.
Step 3: Create the Creamy Filling
Sprinkle the remaining ½ tsp salt and 0.5 tsp black pepper over the chicken and vegetable mixture. Pour in the 1.5 cups chicken broth and 0.5 cup heavy cream, stirring to combine. Add the 1 cup frozen peas—no need to thaw them first.
Switch the Ninja to the “Slow Cook” function on High and cook for 15 minutes, stirring occasionally, until the mixture thickens into a rich, creamy consistency. The sauce should coat the back of a spoon. If it’s too thin, cook for an additional 5 minutes; if too thick, stir in a splash of broth.
Step 4: Assemble and Pressure Cook the Pot Pie
Roll out one disk of dough on a lightly floured surface to fit the bottom of your Ninja’s inner pot. Press it into place, allowing the edges to extend up the sides. Pour the chicken and vegetable filling over the crust, spreading it evenly.
Roll out the second dough disk to create the top crust. Place it over the filling and crimp the edges to seal, trimming any excess. Cut a few small slits in the top crust to allow steam to escape. Brush the top with the 1 whole large egg beaten with 1 tbsp water for a golden finish.
Secure the lid and set the Ninja to “Pressure” on High for 15 minutes. Allow a natural release for 10 minutes, then quick-release any remaining pressure. The pot pie is done when the crust is golden brown and the filling is bubbling.
Pro Tips For Making Ninja Pot Pie
- Chill the Dough: Pop your flour-butter crust in the fridge for at least 30 minutes before rolling—I learned this the hard way after my first three pot pies turned into tough, chewy disasters.
- Cube the Chicken: Cut the boneless chicken breast into uniform 1-inch pieces so they cook through evenly in the filling, no dry chunks or underdone bits.
- Ice Water Only: Use actual ice water (not just cold) for the crust—it keeps the butter from melting prematurely, which is the thing that matters most for flaky layers.
- Vent the Crust: Poke a few small slits in the top crust with a knife before baking, or steam builds up and turns your pot pie into a soggy mess—I skip this when I’m lazy, but the dish is noticeably better when I don’t.
Common Mistakes When Making Perfect Results
Overworking the Dough
Handle the crust dough as little as possible after adding ice water. Overworking develops gluten, making your crust tough instead of flaky. I pulse mine just until it comes together—about 10-15 seconds. 💡
Skipping the Chill
Don’t rush the 30-minute chill for your dough disks. Cold butter creates steam during cooking, which makes those perfect layers. If you skip this, your crust won’t rise properly and may turn out dense.
Overcrowding the Pot
When sautéing the onion, carrots, and celery, don’t overfill the Ninja pot. Crowding causes steaming instead of browning, leading to a watery filling. Cook in batches if needed.
Undercooking the Chicken
Always ensure your 1.5 lb chicken reaches 165°F internally before adding liquids. I use a meat thermometer to check—undercooked chicken can ruin the entire dish and pose a safety risk.
Skipping the Steam Vents
Forgetting to cut slits in the top crust traps steam, leading to a soggy bottom. I make 3-4 small cuts with a sharp knife before pressure cooking. This also prevents the crust from puffing up unevenly.
Without these vents, the filling may also bubble over, making a mess in your Ninja.
Rushing the Pressure Release
A natural 10-minute release is crucial for the crust to set. Quick-releasing too soon can cause the crust to collapse. I set a timer to remind myself—patience pays off with a perfect finish. 🔥
Nutrition Facts
Frequently Asked Questions
Can I use store-bought pie crust?
Yes, you can substitute 2 sheets of store-bought pie dough to save time. Just ensure it’s thawed if frozen and roll it to fit your Ninja pot. The texture won’t be quite as flaky as homemade, but it works in a pinch.
How do I prevent a soggy bottom crust?
Press the bottom crust firmly into the pot and pre-cook it for 5 minutes using the “Sauté” function before adding filling. This creates a barrier that helps keep the crust crisp. Also, ensure your filling isn’t too watery before adding it.
Can I make this ahead of time?
Assemble the entire pot pie (uncooked) and refrigerate for up to 12 hours before cooking. Alternatively, freeze the unbaked pie for up to 2 months—thaw overnight in the fridge before pressure cooking.
What if my filling is too thin?
If the filling hasn’t thickened after 15 minutes on “Slow Cook,” switch to the “Sauté” function and cook for an additional 5-10 minutes uncovered. Stir occasionally until it coats the back of a spoon. A cornstarch slurry can also help thicken it quickly.

- 4C Bread Crumbs Meatballs Recipe: Crispy Crust and Juicy Centers - September 25, 2026
- 6 Oz Chocolate Chip Cookie Recipe: Perfectly Balanced Crispy Edges and Chewy Hearts - September 25, 2026
- 6-Inch Coffee Cake Recipe: Vanilla Bean Swirls and Buttery Streusel Topping - September 25, 2026