
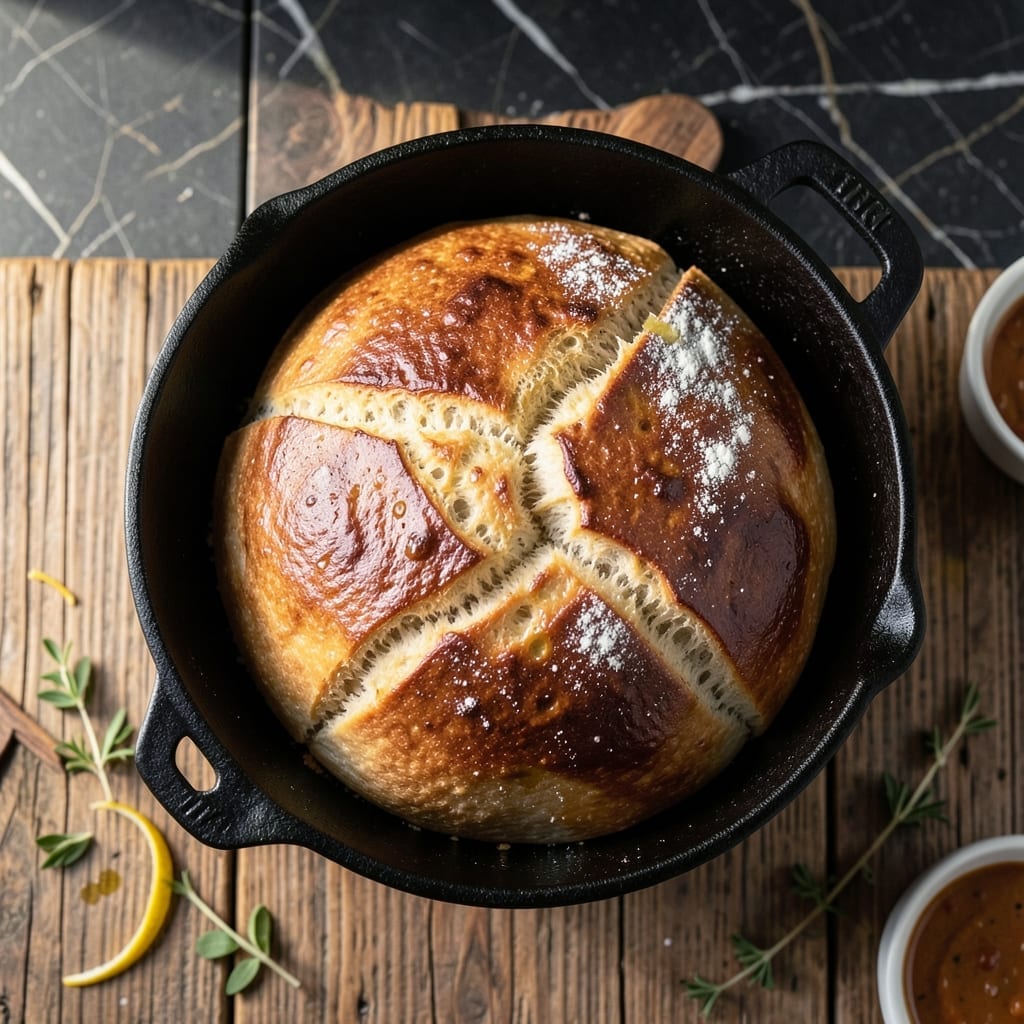
Making bread at home doesn’t have to be complicated. This no-knead method delivers a crusty loaf with minimal effort and maximum flavor.
With just one bowl and one pot, you can achieve bakery-style results without specialty equipment. The dough comes together quickly and rises in under an hour.
The high-heat baking in a covered pot creates steam, which gives the bread its signature golden crust and airy interior. No kneading, no fuss.
Simply mix, rise, and bake. You’ll have fresh, warm bread ready to serve in about one hour.
Ingredients for One Pot Bread
One bowl, one pot, eight ingredients. Bakery bread at home.
| Ingredient | Amount | Notes |
|---|---|---|
| Bread Flour 🌾 | 3 ½ cups | All-purpose works in a pinch |
| Instant Yeast 🍞 | 2 ¼ tsp | Or active dry yeast |
| Kosher Salt 🧂 | 1 ½ tsp | Diamond Crystal preferred |
| Sugar 🍚 | 1 tbsp | Granulated white sugar |
| Warm Water 💧 | 1 ½ cups | About 110°F, not hot |
| Olive Oil 🫒 | 1 tbsp | For greasing bowl |
| Cornmeal 🌽 | 2 tbsp | For dusting pot |
| All-Purpose Flour 🌾 | ¼ cup | For dusting surface |
The flour is key here. King Arthur Bread Flour gives the best texture, but Gold Medal All-Purpose works if that’s what you’ve got. Yeast matters too—check the expiration date (yes, it goes bad). I grab mine from Whole Foods or the baking aisle at Kroger. Warm water should feel like bathwater—too hot kills the yeast, too cold won’t activate it.
No bread flour? All-purpose plus 1 tbsp vital wheat gluten per cup mimics it. Out of yeast? This isn’t a good substitute situation—just wait. Sugar can be honey or maple syrup, but stick to granulated for consistency. The cornmeal prevents sticking and adds crunch (skip it if you must, but don’t say I didn’t warn you).
Dough rises fast—use it within 2 hours or refrigerate for 24 hours (flavor improves). Baked loaf keeps 3-4 days in a paper bag. Freeze slices for 3 months if it lasts that long.
Why You’ll Love This Recipe
- One Pot Magic: I just dump in the flour, yeast, salt, sugar and warm water, stir, and let it rise right in the same pot.
- Crusty Perfection: That golden crust with the soft, airy center from the Dutch oven? Ridiculously good.
- Breakfast to Dinner: Honestly, it’s my go-to for toast in the morning or soup-dunking at night.
- Pennywise Loaf: Five ingredients I always have, and it costs less than a store-bought loaf.
Step-by-Step Instructions for One Pot Bread
This no-knead method delivers a crusty loaf with minimal effort and maximum flavor.
Step 1: Mix and Proof the Dough
In a large bowl, combine the 3.5 cups Bread Flour, 2.25 tsp Instant Yeast, 1.5 tsp Kosher Salt, and 1 tbsp Sugar. I whisk these dry ingredients together first to ensure the yeast is evenly distributed—this prevents hot spots that could overproof certain areas of the dough.
Add the 1.5 cups Warm Water and stir with a wooden spoon until a shaggy dough forms. The dough will be sticky and slightly wet, but that’s exactly what you want. Cover the bowl with a damp towel and let it rise at room temperature for 30-45 minutes until nearly doubled in size.
Step 2: Shape and Prepare the Pot
After the first rise, lightly dust your work surface with the 0.25 cup All-Purpose Flour. Turn the dough out and gently shape it into a round loaf by folding the edges under. Don’t overwork it—this is a no-knead recipe, so the gluten development comes from the initial mixing and resting, not manual manipulation.
Generously coat the inside of a Dutch oven with the 1 tbsp Olive Oil, then sprinkle the 2 tbsp Cornmeal evenly across the bottom. The cornmeal creates a crisp barrier between the bread and the pot, preventing sticking and adding a subtle crunch to the crust. Place the shaped dough seam-side down into the prepared pot.
Step 3: Final Rise and Score
Cover the pot and let the dough rise again for 20-30 minutes until it springs back slowly when pressed. This second rise gives the bread its final structure. Preheat your oven to 450°F during this time so it’s fully heated when you’re ready to bake.
Just before baking, use a sharp knife or razor to score the top of the dough in a shallow X pattern. This allows the bread to expand properly in the oven without cracking unpredictably. The cuts should be about ¼ inch deep—deep enough to guide the expansion but not so deep that it deflates the loaf.
Step 4: Bake to Crusty Perfection
Place the covered Dutch oven in the preheated oven and bake for 30 minutes. The lid traps steam, which is crucial for developing that beautiful, crackly crust. After 30 minutes, remove the lid and continue baking for another 15-20 minutes until the loaf is deep golden brown and sounds hollow when tapped.
You’ll know it’s done when the internal temperature reaches 200-210°F on an instant-read thermometer. The crust should be thick and crisp, with a rich, mahogany color. If it’s browning too quickly, tent the pot with foil to prevent over-browning while the interior finishes cooking.
Step 5: Cool and Serve
Carefully remove the bread from the pot and transfer it to a wire rack. Let it cool for at least 20 minutes before slicing. I know it’s tempting to dig in right away, but this resting period allows the crumb structure to set, preventing a gummy texture.
The finished loaf should have a thick, crisp crust with a soft, airy interior dotted with irregular holes—a hallmark of good no-knead bread. Serve warm with butter or olive oil for dipping. The bread stays fresh for 2-3 days in an airtight container, though it’s best enjoyed the day it’s baked.
Pro Tips For Making One Pot Bread
- Use Hotter Water: I learned this the hard way—warm water at about 110°F activates the instant yeast faster, but going slightly hotter (up to 120°F) cuts the rise time in half without killing the yeast.
- Measure Flour Right: Skip the scoop-and-pack method; spoon the bread flour into your measuring cup and level it off, or you’ll end up with a dense, dry loaf.
- Skip the Over-Kneading: After mixing, resist the urge to knead beyond just combining the ingredients—this isn’t a workout, and overworking the dough makes the bread tough.
- Preheat the Pot: About 10 minutes in a 450°F oven with the Dutch oven inside guarantees a crisp crust and even rise, even if it feels like you’re just waiting around.
Troubleshooting Great one pot bread
Dense or Flat Loaf
If your bread turns out dense, the yeast might have been old or inactive. Always check the expiration date—I learned this the hard way with a loaf that refused to rise. Also, ensure your water is 110°F; too hot kills yeast, too cold slows activation. 🌡️
Pale or Soft Crust
For a darker, crispier crust, bake uncovered for the full 15-20 minutes. If it’s browning too fast, tent with foil but keep baking. Steam is key—make sure your Dutch oven lid fits tightly during the first 30 minutes of baking.
Sticking to the Pot
Prevent sticking by using enough cornmeal and olive oil in the pot. If it still sticks, let the loaf cool for 5 minutes before removing. A well-seasoned Lodge Dutch oven works best for easy release.
Uneven Rising
If one side rises more, your dough may have been shaped unevenly. Gently fold the edges under when shaping to create surface tension. Also, ensure your oven is fully preheated to 450°F for even baking.
Gummy Interior
This usually means the bread wasn’t baked long enough. Use an instant-read thermometer to check for 200-210°F internally. If unsure, bake an extra 5 minutes uncovered. 💡
Also, resist slicing too soon—waiting 20 minutes lets the crumb set properly.
Nutrition Facts
Frequently Asked Questions
Do I need a Dutch oven for this?
A heavy pot with a tight lid works best, but any oven-safe pot with a lid can substitute. The key is trapping steam during the first 30 minutes of baking.
Can I use all-purpose flour instead?
Yes, but the texture will be slightly less chewy. For best results, add 1 tbsp vital wheat gluten per cup to mimic bread flour’s protein content.
Why does my bread have a pale crust?
Bake uncovered for the full 15-20 minutes. If browning too fast, tent with foil but keep baking. Steam during the first half is crucial for a golden finish.
How do I know when it’s done?
The loaf should sound hollow when tapped and reach an internal temperature of 200-210°F. A deep golden-brown color is another good indicator.

- 6 Oz Chocolate Chip Cookie Recipe: Perfectly Balanced Crispy Edges and Chewy Hearts - September 25, 2026
- 6-Inch Coffee Cake Recipe: Vanilla Bean Swirls and Buttery Streusel Topping - September 25, 2026
- 1 Hour Soup Recipe: Velvety Richness Without the Wait - September 25, 2026