
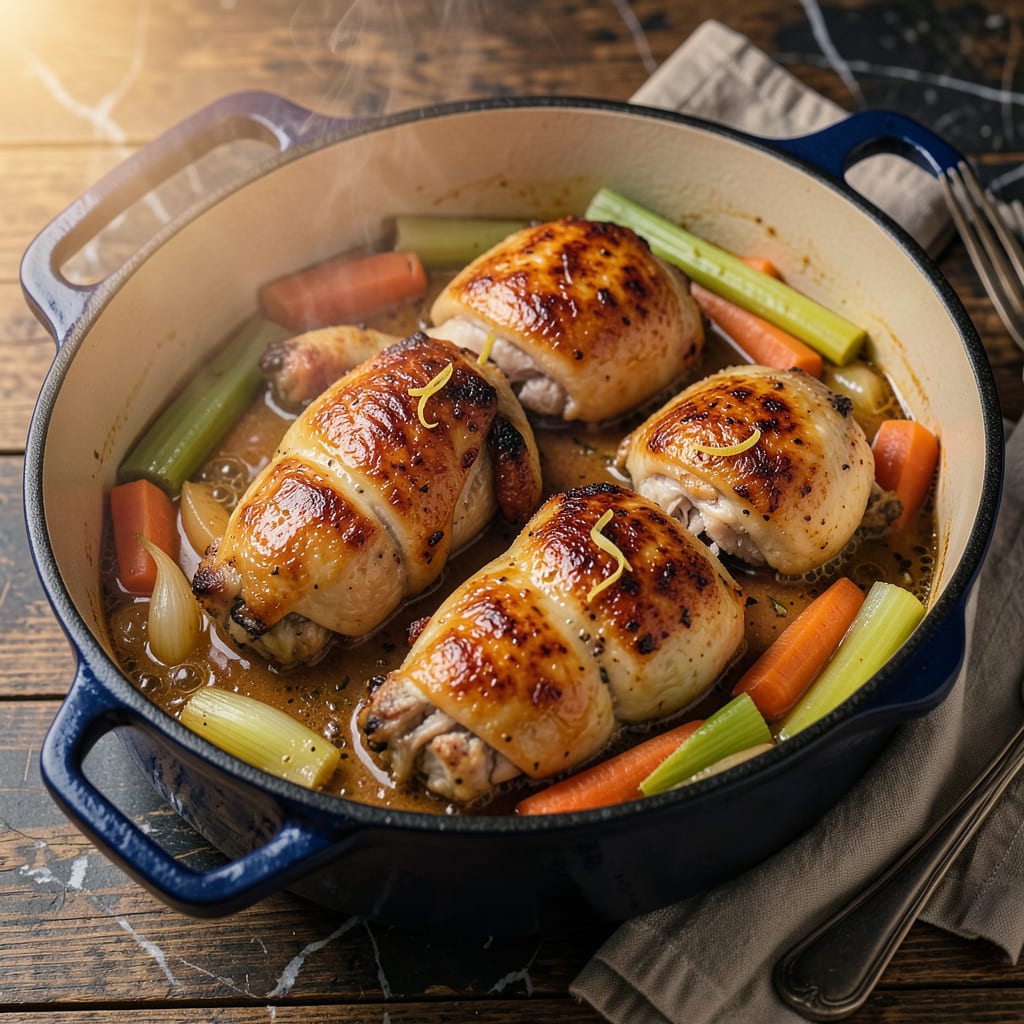
This one-pot chicken recipe delivers juicy thighs with rich, developed flavors—all while keeping cleanup to a single pot. The method relies on proper browning and a controlled simmer, ensuring tender meat and a deeply flavorful sauce without extra dishes.
Perfect for busy weeknights, this approach combines chicken with aromatics and liquid in one vessel, allowing flavors to meld as everything cooks. The result is a complete meal with minimal effort, proving that one-pot cooking doesn’t mean sacrificing quality or taste.
Ingredients for One-pot Chicken
Bone-in chicken thighs, aromatic vegetables, and pantry staples combine for this flavorful one-pot meal with minimal cleanup.
| Ingredient | Amount | Notes |
|---|---|---|
| Bone-in, Skin-on Chicken Thighs 🍗 | 2 ½ lb | Pat dry for optimal browning |
| Extra-Virgin Olive Oil 🫒 | 2 tbsp | Divided for browning and sautéing |
| Yellow Onion 🧅 | 1 whole | Medium dice, about 1.5 cups |
| Carrots 🥕 | 3 whole | Peeled, cut into 1-inch pieces |
| Celery Stalks 🌿 | 2 whole | Cut into 1-inch pieces |
| Garlic Cloves 🧄 | 6 cloves | Minced for even distribution |
| Dry White Wine 🍷 | ½ cup | Sauvignon Blanc or Pinot Grigio |
| Low-Sodium Chicken Broth 🥫 | 1 ½ cups | Homemade or quality store-bought |
| Canned Diced Tomatoes 🍅 | 1 can | 14.5 oz, fire-roasted preferred |
| Tomato Paste 🍅 | 2 tbsp | For concentrated umami depth |
| Fresh Thyme Sprigs 🌿 | 4 sprigs | Tied with kitchen twine |
| Bay Leaves 🌿 | 2 whole | Dried, for aromatic infusion |
| Diamond Crystal Kosher Salt 🧂 | 1 ½ tsp | Divided for seasoning layers |
| Freshly Ground Black Pepper 🌶️ | 1 tsp | Coarse grind preferred |
| Unsalted Butter 🧈 | 2 tbsp | For finishing sauce |
The chicken thighs are critical for both flavor and texture. Bone-in, skin-on varieties ensure juiciness during the long simmer, while the skin renders fat that enriches the sauce. Optimal quality requires air-chilled chicken from reputable brands like Bell & Evans or Mary’s Free-Range, available at Whole Foods or well-stocked supermarkets. The tomato products should be high-quality—San Marzano canned tomatoes and Amoretti tomato paste deliver superior depth of flavor compared to generic brands.
Substitutions must account for moisture and flavor balance. Boneless thighs can be used but reduce cooking time by 20% to prevent dryness. Replace white wine with additional broth plus 1 tbsp apple cider vinegar for acidity. Fresh rosemary can substitute for thyme, though its piney notes differ. For a richer sauce, porcini mushroom powder (1 tsp) enhances umami when bloomed in the olive oil. The butter finish is essential for sauce emulsification—vegan butter alternatives work but may separate more easily.
Storage requires attention to food safety. Cooked chicken keeps 3-4 days refrigerated in airtight containers, with sauce quality peaking on day 2 as flavors meld. Freeze portions for up to 3 months in vacuum-sealed bags, excluding potatoes if included. The fresh herbs lose potency quickly—use within 24 hours or freeze in ice cube trays with olive oil. Reheat gently to maintain sauce consistency, adding a splash of broth if needed.
Why You’ll Love This Recipe
- Dirty One Pan: Honestly, I love that this entire meal cooks in a single pot—sear the chicken thighs, toss in the onion, carrots, and celery, then let it all simmer together. No colander, no extra bowls, just one pan to scrub when you’re done.
- Crispy Meets Tender: That skin-on chicken thigh gets impossibly crispy while the meat stays juicy, and the veggies soak up all the rich, caramelized drippings. I’ll be real: the first time I made this, I ate half the pan straight out of the pot.
- Weeknight Lifesaver: Between soccer practice and work emails, this recipe’s saved me more times than I can count. Chop the veggies while the chicken sears, then walk away—it’s hands-off for 30 minutes (yes, even on a Tuesday night).
- Leftovers That Improve: The flavors deepen overnight, so I always make extra. Shred the chicken for tacos, toss the veggies into fried rice, or just reheat as-is—it’s even better the next day. My kids fight over the last bites.
Step-by-Step Instructions for One-Pot Chicken
This method delivers perfectly cooked thighs and rich flavor development with just one pot to clean.
Step 1: Brown the Chicken Thighs for Maximum Flavor
Pat the 2.5 lb bone-in, skin-on chicken thighs completely dry with paper towels—this ensures optimal browning. Season both sides with ½ tsp Diamond Crystal kosher salt and ½ tsp freshly ground black pepper. Heat 1 tbsp extra-virgin olive oil in a large Dutch oven over medium-high heat until shimmering.
Add the chicken skin-side down and cook undisturbed for 6-8 minutes until the skin is deep golden brown and crisp. Resist the urge to move the pieces—this develops the Maillard reaction for rich flavor. Flip and cook for 3-4 minutes more until lightly browned on the second side. Transfer to a plate and set aside.
Step 2: Build the Aromatic Base
In the same pot, add the remaining 1 tbsp extra-virgin olive oil if needed. Add the medium-diced yellow onion, peeled carrots cut into 1-inch pieces, and celery cut into 1-inch pieces. Cook over medium heat for 5-6 minutes, stirring occasionally, until the vegetables soften and begin to caramelize at the edges.
Add the minced garlic cloves and cook for 1 minute until fragrant but not browned. Stir in the 2 tbsp tomato paste and cook for 2 minutes, allowing it to darken slightly—this intensifies its umami properties. The mixture should develop a rich, brick-red color at this stage.
Step 3: Deglaze and Simmer with Liquids
Pour in the 0.5 cup dry white wine and scrape up all the browned bits from the bottom of the pot with a wooden spoon. Simmer for 2-3 minutes until the liquid reduces by half. Add the 1.5 cups low-sodium chicken broth, canned diced tomatoes with their juices, 4 sprigs fresh thyme, and 2 bay leaves.
Return the chicken thighs to the pot, skin-side up, along with any accumulated juices. The liquid should come about halfway up the thighs. Bring to a gentle simmer, then reduce heat to medium-low, cover, and cook for 25 minutes. This slow simmer ensures the meat becomes fall-off-the-bone tender while absorbing the aromatic flavors.
Step 4: Finish and Reduce the Sauce
After 25 minutes, remove the lid and increase heat to medium. Simmer uncovered for 10-12 minutes until the sauce reduces slightly and the chicken reaches an internal temperature of 175°F when tested at the thickest part near the bone. The sauce should coat the back of a spoon but still have a loose consistency.
Discard the thyme sprigs and bay leaves. Stir in the 2 tbsp unsalted butter off heat until fully incorporated—this adds a velvety finish to the sauce. Taste and adjust seasoning with the remaining 1 tsp Diamond Crystal kosher salt and ½ tsp freshly ground black pepper as needed. The final sauce should balance acidity from the tomatoes with the richness of the chicken fat.
Dietary Considerations for This one-pot chicken
Gluten-Free Adaptation
This recipe is naturally gluten-free when prepared as written, since we rely on fresh vegetables, chicken, and pantry staples without any wheat-based thickeners. The only potential concern is the chicken broth—some store-bought versions contain gluten as a stabilizer. I always check labels or use homemade broth to be safe. For extra richness without flour, the butter finish at the end creates a velvety texture naturally. 💡
Dairy-Free Modifications
To make this dairy-free, simply omit the 2 tbsp unsalted butter at the end. The sauce will still be flavorful from the rendered chicken fat and olive oil. For a similar velvety finish, stir in 1 tbsp extra-virgin olive oil or 1 tbsp coconut cream off heat. I’ve found the coconut version adds a subtle sweetness that pairs well with the tomatoes.
Lower-Sodium Option
For those watching sodium intake, use no-salt-added canned tomatoes and homemade chicken broth without added salt. Reduce the Diamond Crystal kosher salt to ½ tsp total—you can always adjust at the end. The natural juices from the chicken and vegetables provide plenty of flavor. I often finish with a squeeze of lemon juice to brighten everything without salt.
Keto-Friendly Adjustments
This dish is already keto-friendly with its focus on protein and healthy fats. To reduce carbs further, decrease the carrots to 1 medium carrot and add 1 cup chopped zucchini instead. The zucchini absorbs flavors beautifully while keeping net carbs low. I also recommend serving over cauliflower rice instead of traditional starches to complete the meal.
Vegetable Variations
For those with celery allergies or preferences, fennel bulb makes an excellent substitute—use 1 small bulb, diced, for its mild anise flavor. If avoiding nightshades, replace the canned tomatoes with 1 cup roasted red peppers and ½ cup tomato-free marinara. The peppers add natural sweetness while keeping the dish vibrant.
Protein Swaps
While chicken thighs are ideal, you can use bone-in chicken breasts if preferred—just reduce the simmer time to 15-18 minutes to prevent dryness. For a vegetarian version, swap in 1.5 lb portobello mushrooms and 1 can white beans. Brown the mushrooms well first to develop that meaty umami flavor we love in this dish. 🌱
Nutrition Facts
Frequently Asked Questions
Why use bone-in thighs instead of breasts?
Bone-in thighs stay juicier during long cooking and their fat renders into the sauce for richer flavor. Breasts dry out faster and lack the collagen that breaks down into velvety texture. The skin also crisps better, adding textural contrast.
Can I make this ahead and reheat?
The flavors actually improve overnight as the sauce melds. Store in an airtight container for up to 3 days. Reheat gently on the stovetop with a splash of broth to maintain sauce consistency. Avoid microwaving to prevent rubbery chicken.
What if I don’t have white wine?
Substitute with additional broth plus 1 tbsp vinegar (apple cider or white wine vinegar). The acidity mimics wine’s role in deglazing. For depth, add 1 tsp mushroom powder to the tomato paste step. The sauce will still develop rich flavor.
How do I prevent soggy skin?
Pat the thighs completely dry before browning and don’t overcrowd the pot. After simmering, broil for 2-3 minutes to crisp the skin if needed. The initial high-heat sear is key—don’t skip it!

- 6-Inch Coffee Cake Recipe: Vanilla Bean Swirls and Buttery Streusel Topping - September 25, 2026
- 1 Hour Soup Recipe: Velvety Richness Without the Wait - September 25, 2026
- 3 Dozen Deviled Eggs Recipe: Classic Bites With Creamy Yolk Magic - September 25, 2026