
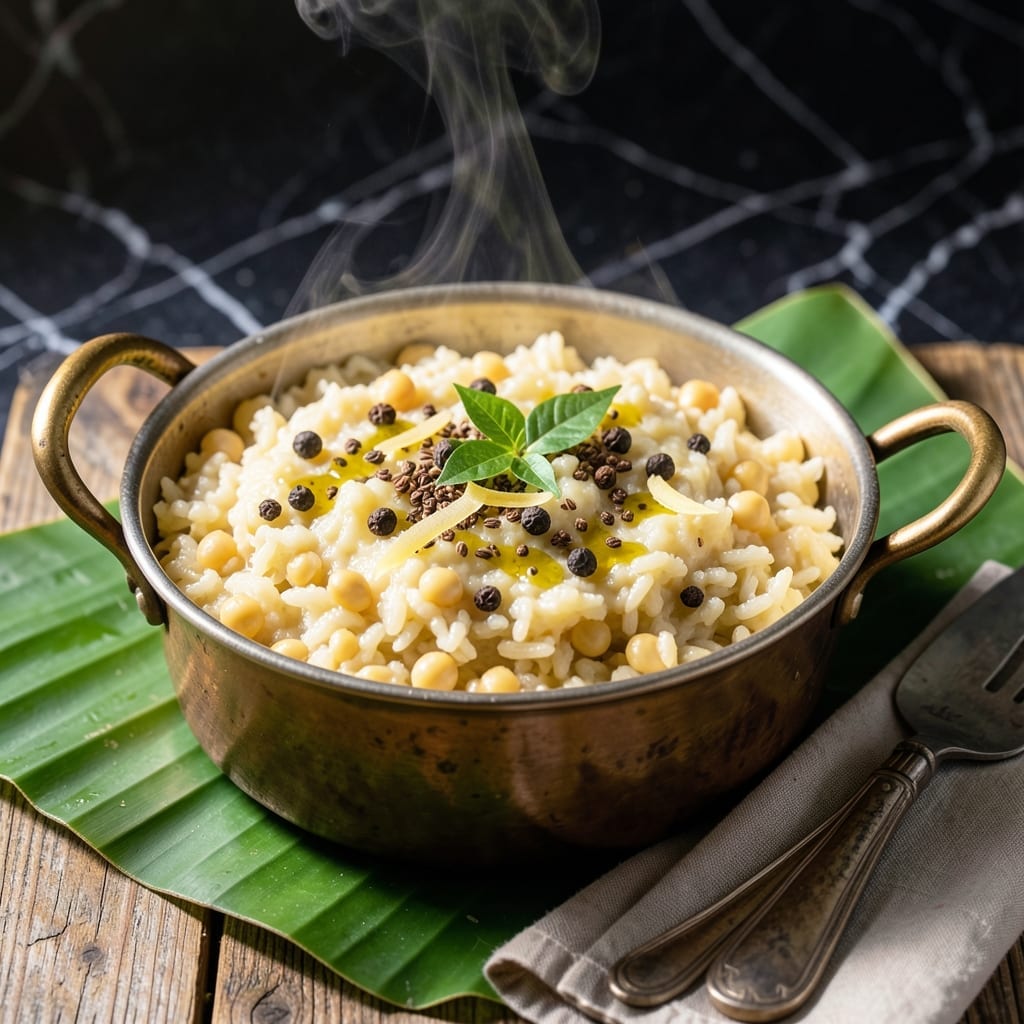
There’s a reason pongal has been a South Indian staple for generations—it delivers comfort in every bite without demanding hours in the kitchen. This one-pot method simplifies the traditional process while keeping all the rich, savory flavors intact.
The dish brings together rice, lentils, and aromatic spices in a single simmer, creating a creamy, porridge-like texture that’s both hearty and soothing. The ghee and cumin seeds add depth, while the cashews and ginger provide subtle crunch and warmth.
What emerges is a dish that’s as satisfying as it is simple, with layers of flavor that develop effortlessly. The slow cooking allows the ingredients to meld together, resulting in a velvety consistency that’s perfect for any meal.
Serve it hot with coconut chutney or sambar for the full experience. This recipe stays true to tradition while making it accessible for any home cook.
Ingredients for One Pot Pongal
Simple pantry staples create this creamy, comforting South Indian classic with ease.
| Ingredient | Amount | Notes |
|---|---|---|
| Raw Rice 🍚 | 1 cup | Short-grain preferred for creaminess |
| Split Yellow Moong Dal 🌾 | ½ cup | Rinsed and drained well |
| Ghee 🧈 | 3 tbsp | Clarified butter for authenticity |
| Cumin Seeds 🌿 | 1 tsp | Toasted until fragrant |
| Black Peppercorns 🌶️ | 1 tsp | Lightly crushed for texture |
| Fresh Ginger 🌿 | 1 tbsp | Finely grated or minced |
| Green Chilies 🌶️ | 2 whole | Slit lengthwise for heat |
| Cashew Nuts 🌰 | ¼ cup | Halved or whole for crunch |
| Curry Leaves 🍃 | 10 pieces | Fresh for authentic aroma |
| Asafoetida 🌿 | ¼ tsp | Hing, optional but traditional |
| Salt 🧂 | 1 ½ tsp | Adjust to taste preference |
| Water 💧 | 4 ½ cups | Or vegetable broth for extra flavor |
The ghee is non-negotiable for authentic flavor—look for organic clarified butter at Indian markets or Whole Foods. The rice and moong dal ratio is key; use short-grain rice for that porridge-like texture. For the cashews, raw and unsalted is best to control the seasoning. Fresh curry leaves add unmistakable aroma (find them at Indian grocery stores or freeze extras for later).
No ghee? Vegan butter or coconut oil works in a pinch. Skip the asafoetida if unavailable, but it adds depth. Green chilies can be adjusted for heat preference—jalapeños are a fine substitute. For extra richness, swap water for vegetable broth. The ginger can be powdered at one-fourth the amount, but fresh is ideal.
Stores well for 2-3 days in the fridge. Reheat gently with a splash of water to restore creaminess. Freezes for up to 1 month (thaw overnight before reheating). Always keep curry leaves in the freezer if fresh ones aren’t available.
Why You’ll Love This Recipe
- One Pot Wonder: I just dump rice, moong dal, and spices in one pot—no fancy techniques, no extra dishes to wash.
- Ghee Magic: The ghee-toasted cumin and peppercorns give it that rich, aromatic depth I crave in every bite.
- Breakfast or Dinner: Honestly, I make this for lazy Sunday brunches and quick weeknight dinners—it works for both.
- Budget Stretcher: A handful of rice, some dal, and pantry staples feed my family for days without breaking the bank.
Step-by-Step Instructions for One Pot Pongal
Here is the method. Simple, traditional, and perfectly comforting every time.
Step 1: Rinse and Prepare the Lentils and Rice
Place the 1 cup Raw Rice and 0.5 cup Split Yellow Moong Dal in a fine-mesh strainer and rinse under cold running water until the water runs clear. This removes excess starch and prevents the dish from becoming gummy.
Drain well and set aside. I always give them a final shake in the strainer to remove every last drop of water. Properly rinsed dal and rice ensure a clean, distinct texture in the finished dish.
Step 2: Temper the Spices in Ghee
Heat 3 tbsp Ghee in a heavy-bottomed pot over medium heat. Once melted and shimmering, add the 1 tsp Cumin Seeds, 1 tsp Black Peppercorns, and 0.25 tsp Asafoetida. Stir constantly for 30-45 seconds until the cumin seeds turn light golden brown and release their aroma.
Quickly add the 1 tbsp Fresh Ginger, 2 whole Green Chilies, 0.25 cup Cashew Nuts, and 10 pieces Curry Leaves. Sauté for another 1-2 minutes until the cashews turn lightly golden and the curry leaves become crisp. This tempering process infuses the ghee with deep, layered flavors.
Step 3: Cook the Rice and Dal Together
Add the drained rice and dal mixture to the pot and stir well to coat everything in the spiced ghee. Toast for 1-2 minutes, stirring constantly, until the grains appear slightly translucent at the edges. This step enhances the nutty flavor of the rice and dal.
Pour in the 4.5 cups Water and add the 1.5 tsp Salt. Stir once to combine, then bring to a rolling boil over high heat. As soon as it boils, reduce the heat to low, cover the pot, and let it simmer undisturbed for 18-20 minutes.
Step 4: Finish and Rest for Perfect Texture
After 18-20 minutes, check that the water has been fully absorbed and the grains are tender. If the top looks dry but the center is still firm, drizzle in 2-3 tablespoons of hot water, cover, and cook for another 2-3 minutes.
Once done, turn off the heat and let the pongal sit covered for 10 minutes. This resting period allows the grains to steam and soften further, resulting in a creamy yet distinct texture. Gently fluff with a fork before serving to separate the grains without breaking them.
Pro Tips For Making One Pot Pongal
- Roast Spices First: Heat ghee and temper cumin and black peppercorns until they sizzle and release aroma—I learned this the hard way after my first pongal tasted bland.
- Rinse Dal Well: Wash split yellow moong dal thoroughly until water runs clear to remove starch and prevent a gummy texture.
- Maintain Water Ratio: Use exactly 3 cups water for every 1 cup of rice and dal combined, or you’ll end up with either mush or undercooked grains.
- Simmer Covered: After pressure cooking or boiling, let it sit covered for 10 minutes—this lets the rice and dal absorb all the flavors and steam evenly.
Essential Equipment for Great one pot pongal
Heavy-Bottomed Pot
I always use my 7-quart Le Creuset Dutch oven for pongal—its even heat distribution prevents hot spots that can burn the tempered spices. A stainless steel stock pot works too, but requires more stirring. Avoid thin aluminum pots as they scorch the ghee. 🔥
Fine-Mesh Strainer
Rinsing the rice and dal properly is non-negotiable. I swear by my OXO Good Grips strainer with fine mesh—it catches every grain while letting water flow through easily. Give it a good shake at the end to remove all excess water.
Wooden Spoon
For tempering spices and stirring the cooking pongal, a long wooden spoon is ideal. It won’t scratch your pot and handles the thick mixture well. I keep mine 12 inches long to reach the bottom of my deep Dutch oven comfortably.
Tight-Fitting Lid
A proper lid traps steam for that perfect creamy texture. My Dutch oven’s lid fits snugly, but if yours doesn’t, use aluminum foil to seal it. The steam is what transforms the rice and dal into that velvety consistency.
Measuring Cups
Precision matters with the rice-to-dal ratio. I use my Pyrex glass measuring cups for both dry and liquid ingredients. The 1:2 ratio of rice to water is crucial—use the same cup for both to maintain accuracy.
Serving Bowl
Pongal deserves a proper presentation. I serve mine in a wide, shallow ceramic bowl that shows off its creamy texture. A garnish of extra cashews and curry leaves makes it look as good as it tastes. 💛
Nutrition Facts
Frequently Asked Questions
What kind of rice works best?
Short-grain rice is ideal for that classic creamy texture. Avoid basmati as it stays too separate. 1 cup rice to 0.5 cup moong dal is the perfect ratio for authenticity.
Can I make this without ghee?
Yes, but it changes the flavor. Use coconut oil or vegan butter as substitutes. The dish will still be tasty, though less rich. 3 tbsp of any fat works.
Why did my pongal turn mushy?
Overcooking or too much water causes this. Stick to 18-20 minutes simmer time and 4.5 cups water. Let it rest 10 minutes off heat for perfect texture.
How do I store leftovers?
Keep in an airtight container in the fridge for 2-3 days. Reheat with a splash of water to restore creaminess. Freezes well for 1 month.

- 6 Oz Chocolate Chip Cookie Recipe: Perfectly Balanced Crispy Edges and Chewy Hearts - September 25, 2026
- 6-Inch Coffee Cake Recipe: Vanilla Bean Swirls and Buttery Streusel Topping - September 25, 2026
- 1 Hour Soup Recipe: Velvety Richness Without the Wait - September 25, 2026