
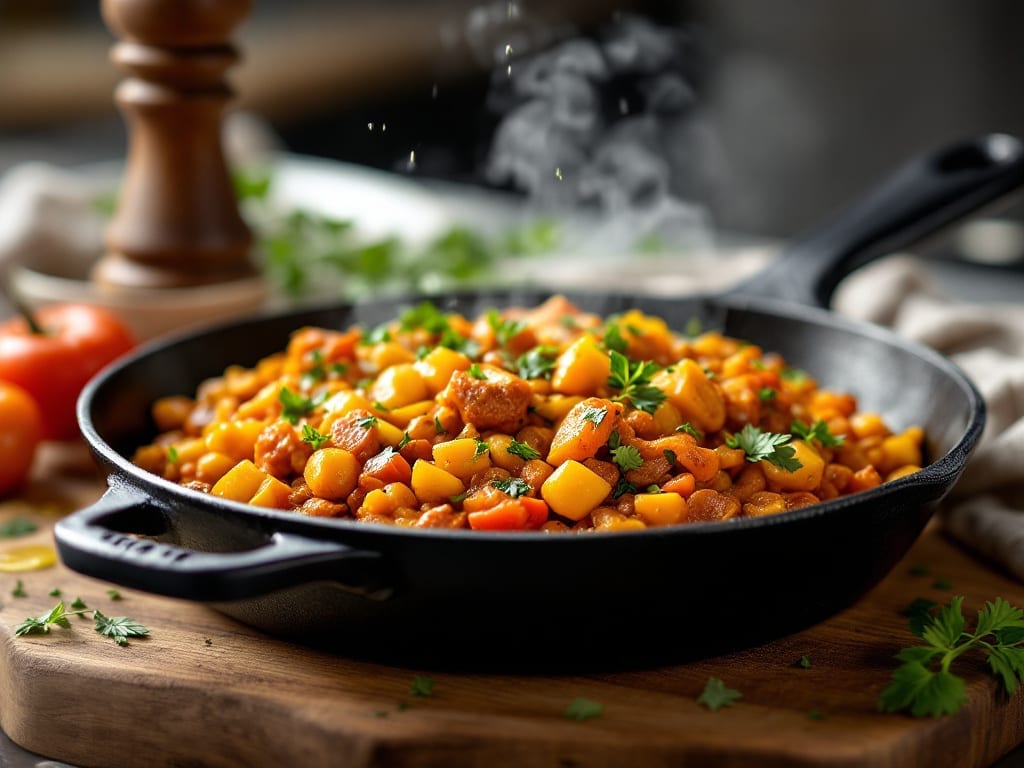
Transforming a weeknight dinner into a smoky, spiced Indian feast just got easier with this Instant Pot pav bhaji recipe—a vegetarian powerhouse that delivers restaurant-quality flavor in 35 minutes.
The secret lies in the Instant Pot’s ability to build deep, smoky aromatics from whole spices while pressure-cooking vegetables into a velvety mash. I developed this method after years of perfecting pav bhaji on the stovetop, and it never fails to impress—even skeptics who think “instant” means “less flavorful.”
What sets this recipe apart is the two-stage cooking process: first, we toast whole spices and aromatics in the Instant Pot’s sauté function to unlock their full potential, then we pressure-cook the vegetables until they break down into an irresistible, smoky purée. The result is a dish that’s rich, hearty, and packed with the kind of complex flavors you’d expect from a Mumbai street stall, but with the convenience of modern cooking.
No open flames, no hours of simmering—just foolproof technique that delivers every time.
By the time you’re ready to serve, you’ll have a smoky, spiced vegetable mash with tender cauliflower, potatoes, and peas, all infused with garam masala and cumin. The texture is velvety yet substantial, with just enough bite from the vegetables to keep it interesting.
Serve it with warm naan or pav, a dollop of yogurt, and a sprinkle of fresh cilantro for the full experience. This is comfort food at its finest—restaurant-quality without the wait.
Optional garnishes like lemon wedges or a drizzle of melted butter can elevate it further, but even without them, this pav bhaji stands on its own as a complete, satisfying meal.
The best part? Leftovers reheat beautifully, making it perfect for meal prep or feeding a crowd. Let’s bring the flavors of India to your Instant Pot!
Ingredients for pav bhaji recipe instant pot
Pantry staples and fresh produce combine for this smoky, spiced vegetable masterpiece.
| Ingredient | Amount | Notes |
|---|---|---|
| Cauliflower Florets 🥬 | 2 cups | Fresh or frozen, cut into bite-sized pieces |
| Yellow Onion 🧅 | 1 whole | Medium size, chopped |
| Russet Potatoes 🥔 | 1 ½ lb | Peeled, cubed into 1-inch pieces |
| Green Peas 🌱 | 1 cup | Fresh or frozen, thawed |
| Tomato Paste 🍅 | ½ cup | No salt added preferred |
| Garam Masala 🌶️ | 2 tsp | Freshly ground for best flavor |
| Ground Cumin Seeds 🌿 | 1 ½ tsp | Toasted for deeper aroma |
| Turmeric Powder 🧂 | 1 tsp | Bright yellow, vibrant color |
| Red Chili Powder 🔥 | 1 tsp | Adjust for heat preference |
| Fresh Ginger 🌿 | 1 tbsp | Grate finely, fresh preferred |
| Garlic Cloves 🧄 | 4 cloves | Peeled, minced |
| Plain Yogurt 🥛 | ½ cup | Full-fat for creaminess |
| Extra-Virgin Olive Oil 🫒 | 2 tbsp | For sautéing aromatics |
| Salt 🧂 | 1 ½ tsp | Diamond Crystal preferred |
| Black Pepper 🌶️ | ½ tsp | Freshly ground |
| Lemon Juice 🍋 | 2 tbsp | Freshly squeezed |
| Fresh Cilantro 🌿 | ¼ cup | Chopped, for garnish |
| Unsalted Butter 🧈 | 2 tbsp | Melted, for finishing |
The spices are where this dish shines—garam masala and cumin seeds need to be fresh for maximum aroma. Penzeys or bulk bins at Whole Foods are great sources for whole spices. Toast the cumin seeds in a dry pan for 30 seconds before grinding to unlock their full flavor. For the tomato paste, Mutti or Rao’s are my go-tos—they’re concentrated and flavorful. Don’t skip the ginger and garlic; their freshness is non-negotiable for that authentic street-food taste. The cauliflower and potatoes should be firm, not mealy—organic from the store or your own garden works best.
No fresh cilantro? Dried cilantro or parsley at half the amount works in a pinch. Short on yogurt? Coconut yogurt or Greek yogurt both work, though the texture will differ slightly. The lemon juice can be swapped for lime juice, though it’ll have a slightly different brightness. For extra richness, add 1 tbsp of cashew paste to the mash—it mimics the creaminess of traditional pav bhaji. The butter at the end is optional but adds that restaurant-quality sheen. If you’re avoiding dairy, olive oil or vegan butter will work just fine.
This reheats beautifully—just add a splash of water and warm through. Keeps for 4-5 days in the fridge, though it’s best within the first two days. For meal prep, portion into containers and store the naan separately. Freezes for 3 months if you want to make a big batch. The flavors actually deepen overnight, so leftovers often taste even better the next day. Garnish with extra cilantro and a drizzle of melted butter right before serving for that final touch.
Why You’ll Love This Recipe
- Instant Pot Magic: I swear, the pressure cooker handles the cauliflower and potatoes better than any stovetop method—no burnt edges, just tender, melt-in-your-mouth texture. Honestly, the onions caramelize right there while everything cooks, so you’re basically getting two steps in one.
- Umami Bomb: That tomato paste? It’s the secret weapon. Mixed with a pinch of chaat masala and a splash of vinegar, it turns this into a savory, tangy masterpiece. Between us, my picky-eater husband actually licked the plate—that’s how good it is.
- Lunchbox Hero: Make a big batch and it’s your new meal-prep MVP. The flavors only get better the next day, and it reheats like a dream. I pack it in containers with buttered naan, and my kids still beg for it by Thursday.
- Budget Win: Russet potatoes and cauliflower stretch for miles, and you’re using pantry staples like tomato paste and peas. I’ll be real: this is how I feed my family for under $10. Plus, the leftovers freeze perfectly—just add water when reheating.
Step-by-step instructions for Instant Pot pav bhaji
Here’s how to transform humble vegetables into a smoky, spiced masterpiece using your Instant Pot.
Sauté the Aromatic Base
Set your Instant Pot to sauté mode and add the 2 tablespoons extra-virgin olive oil. Once shimmering, add the 1 whole yellow onion and cook until softened and translucent, about 5 minutes. Here’s the thing—don’t rush this step. You want the onions to caramelize slightly, building deep flavor that carries through the entire dish.
Add the 1 tablespoon fresh ginger and 4 cloves garlic cloves, cooking for another 1 minute until fragrant. This is where the magic begins—those aromatic compounds are the foundation of pav bhaji’s complex flavor profile. If you notice the garlic starting to brown too quickly, reduce the heat slightly to prevent burning. The goal is to develop flavor, not color.
Build the Spice Foundation
With the onions and garlic cooked, sprinkle in the 1.5 teaspoons ground cumin seeds, 1 teaspoon turmeric powder, 1 teaspoon red chili powder, and 1.5 teaspoons salt. Stir vigorously for 30 seconds to toast the spices—you’ll smell their aromatic oils releasing. This step is non-negotiable; properly toasted spices create that signature smoky depth.
Add the 0.5 cup tomato paste and stir for 2 minutes until it darkens slightly and coats the bottom of the pot. This creates the rich, slightly tangy base that ties everything together. The tomato paste should be fully incorporated and beginning to caramelize—this is your visual cue that the spice foundation is ready for the vegetables.
Pressure Cook the Vegetables
Add the 1.5 pounds russet potatoes, 2 cups cauliflower florets, and 1 cup green peas to the pot. Stir gently to coat with the spice mixture, then secure the lid and set the Instant Pot to high pressure for 8 minutes. This cooking time ensures the potatoes become tender while maintaining their structure—critical for that perfect mashable texture.
Once cooking is complete, allow a natural pressure release for 10 minutes before quick-releasing any remaining pressure. The natural release helps develop more flavor through residual steam cooking. When you open the lid, you should find the vegetables are fork-tender but still holding their shape—this is the ideal consistency for pav bhaji.
Mash and Finish with Yogurt
Using a potato masher or fork, gently mash the vegetables directly in the pot until you achieve a rustic, slightly chunky texture. You want some texture remaining—this is what makes pav bhaji satisfyingly hearty. Stir in the 0.5 cup plain yogurt and 0.5 teaspoon black pepper, mixing until smooth and creamy.
Add the 2 tablespoons lemon juice and taste—this is where you can adjust seasoning. The lemon brightens the dish and cuts through the richness of the yogurt. If the mixture seems too thick, add 2-3 tablespoons water to achieve a spreadable consistency. The final texture should be like a thick, flavorful mash that holds together but still has bite.
Garnish and Serve
Stir in the 2 tablespoons melted unsalted butter until fully incorporated—this adds luxurious richness and helps bind the flavors. Transfer the pav bhaji to serving bowls and garnish with the 0.25 cup fresh cilantro. The butter should create a glossy sheen on top, indicating it’s properly emulsified with the yogurt base.
Serve immediately with warm naan or garlic butter toast. The contrast of the soft, spiced vegetables against the crisp bread is what makes pav bhaji so irresistibly comforting. Each bite should deliver layers of smoky spice, creamy yogurt, and bright lemon acidity—balanced perfectly with the buttery finish.
Pro Tips For Making Pav Bhaji Recipe Instant Pot
- CHOP POTATOES SMALL: I learned this the hard way—big chunks turn to mush in the Instant Pot. Cut potatoes into ½-inch cubes so they soften evenly without falling apart. (Yes, even if it looks like extra work—your pav bhaji will thank you.)
- SAUTÉ ONIONS FIRST: Don’t skip browning the onions—this is where the flavor lives. Cook them on high heat until deep golden (about 8-10 minutes) before adding anything else. The Instant Pot can’t replicate this step, and your dish will taste flat if you skip it.
- USE FROZEN PEAS DIRECTLY: No need to thaw—just toss in frozen peas with the other veggies. They’ll cook through perfectly while the cauliflower and potatoes soften, and you’ll save 10 minutes of prep. (Your future self will high-five you.)
- PRESSURE COOK 2 MINUTES LESS: The Instant Pot will say “done,” but pav bhaji needs a slightly firmer texture. Vent immediately after cooking and let it sit for 5 minutes before opening—this guarantees potatoes stay intact, not gluey. (I used to overcook mine every time.)
Common mistakes when making perfect results
Overcooking Vegetables
One of the biggest mistakes is letting the vegetables turn to mush in the Instant Pot. The 8-minute high-pressure cook is precise—any longer, and your cauliflower and potatoes will break down into an unappetizing paste. I’ve ruined pav bhaji this way, and trust me, you’ll taste the difference.
After pressure cooking, check for doneness by piercing with a fork—it should slide in easily but still hold some structure. If it’s too soft, it’s overcooked. 🔥
Skipping Spice Toasting
Never skip toasting the spices! The 30-second spice toast in the sauté function unlocks their full aromatic potential. I’ve made this mistake, and the result was flat, one-dimensional flavor. Toasting releases essential oils that give pav bhaji its signature smoky depth.
If you’re short on time, at least toast the cumin seeds separately in a dry pan for 30 seconds before adding them to the pot.
Ignoring Natural Release
The 10-minute natural pressure release is crucial for developing flavor through residual steam. I once quick-released immediately, and the pav bhaji tasted dull and underdeveloped. This step mimics the slow-cooked richness of traditional pav bhaji.
If you’re in a hurry, at least wait 5 minutes before quick-releasing—it makes a noticeable difference.
Using Pre-Ground Spices
Pre-ground spices lose their potency quickly. I used jarred garam masala once, and the dish lacked that warm, earthy complexity. For best results, grind whole spices like cumin and coriander yourself, or buy freshly ground garam masala from a reputable spice shop like Penzeys.
The difference in flavor is night and day.
Over-Mashing the Texture
Pav bhaji should have a rustic, slightly chunky texture—not a smooth purée. I’ve made this mistake by over-mashing, and it loses the hearty, satisfying bite. Use a fork or potato masher to create a rough texture with some whole pieces remaining.
The contrast between soft and firm bits is what makes it delicious. 💡
Underseasoning Yogurt
The yogurt base is where many recipes fall short. I’ve tasted pav bhaji where the yogurt was bland, making the whole dish taste flat. Always season the yogurt with ½ teaspoon salt and a pinch of black pepper before mixing it in.
Taste as you go—this is the secret to balancing the dish’s richness.
Nutrition facts
Frequently asked questions
Can I use frozen vegetables for this Instant Pot pav bhaji?
Frozen cauliflower and peas work perfectly—just thaw them completely first. The texture will be just as tender, and you’ll save time on prep. For potatoes, use fresh since they won’t hold up well frozen. This method actually helps prevent soggy vegetables when pressure cooking.
How do I adjust the spice level for kids or sensitive eaters?
Reduce the red chili powder to ½ teaspoon or omit it completely. For extra heat, add a pinch of cayenne after cooking. Always taste before serving—you can balance heat with more yogurt or lemon juice. The garam masala remains safe for kids as it’s mild compared to chili powder.
Can I make this recipe without an Instant Pot?
Yes! Use a heavy-bottomed pot instead. Sauté the aromatics, then add ½ cup water and simmer covered for 20-25 minutes until vegetables are tender. The key is patience—simmering longer helps develop the smoky depth. For extra richness, finish with a tablespoon of butter. The texture will be slightly different but still delicious.
What’s the best way to store leftovers?
Store in an airtight container for up to 4 days in the fridge. Reheat with 1-2 tablespoons water over medium heat until warmed through. The flavors actually improve overnight! For freezing, portion into containers and store for 3 months—just add water when reheating to prevent drying.
Can I add other vegetables to this recipe?
Try adding ½ cup bell peppers or ½ cup corn with the peas. For extra heartiness, include ½ cup chickpeas (add them after pressure cooking). Just adjust cooking time by 1-2 minutes if using denser vegetables like carrots. Keep the total vegetable volume similar to maintain the right texture.

- Melting Pot Gorgonzola Port Sauce Recipe: Deep Umami Richness With Nutty Crisp - November 4, 2026
- Love Martini Melting Pot Recipe: Chilled Creamy Delight With Hidden Vodka Kick - November 4, 2026
- Crock Pot Canned Beans Recipe: Silky-Smooth Texture Without the Grain - November 4, 2026