
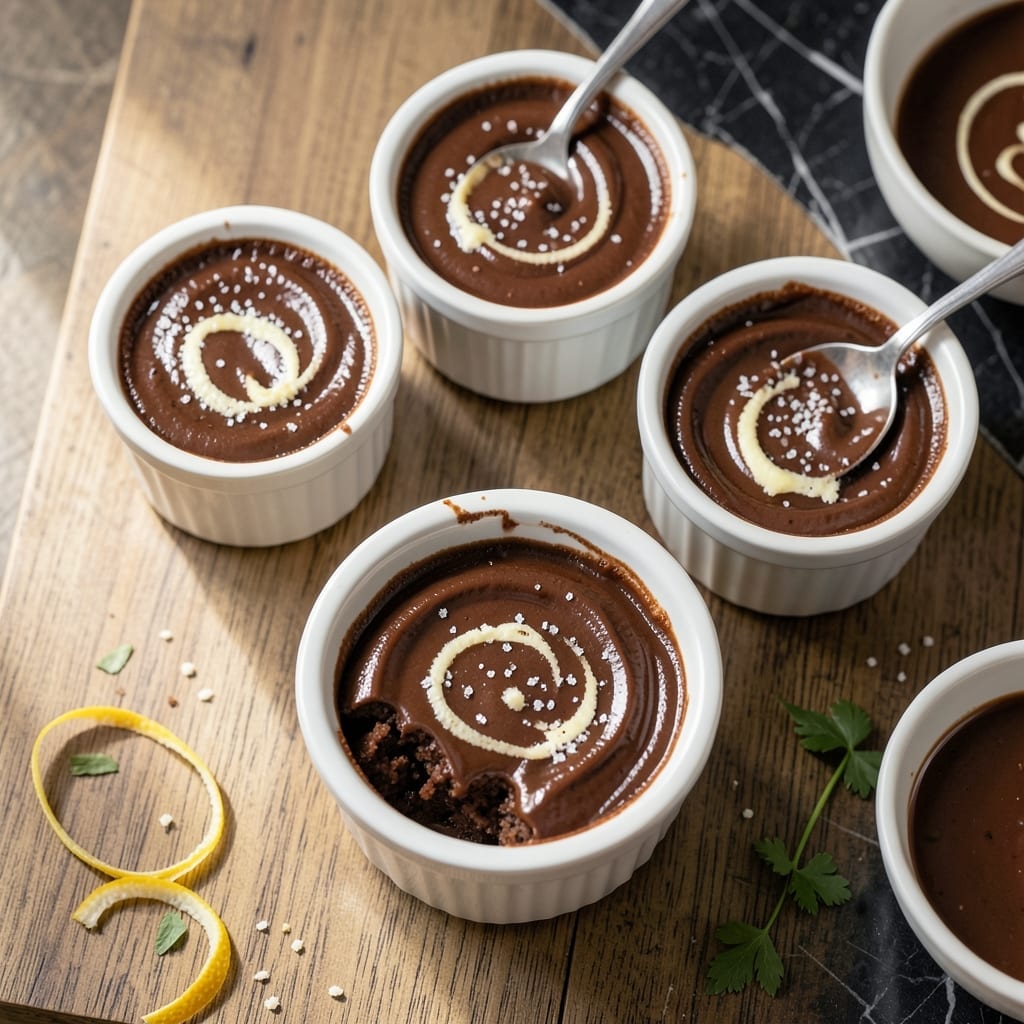
This French classic transforms simple ingredients into an elegant, restaurant-quality dessert that requires no special equipment. I perfected this method after testing countless ratios to achieve the signature silky texture.
The magic lies in the gentle baking process, which creates a velvety custard with a rich chocolate flavor. No water bath needed—just precise timing and temperature control for consistent results every time.
What emerges from the oven is a set of individual chocolate pots with a glossy surface and a molten center that firms up as they cool. The contrast between the smooth texture and intense chocolate taste makes this a standout finish to any meal.
Serve slightly warm or chilled, with a dusting of cocoa powder or fresh berries. Here’s how to make these French bistro-style treats at home.
Ingredients for Petit Pot Au Chocolat
Elegant French dessert requires just these quality ingredients for velvety chocolate custard perfection.
| Ingredient | Amount | Notes |
|---|---|---|
| Bittersweet Chocolate 🍫 | 8 oz | High-quality, 70% cacao minimum |
| Unsalted Butter 🧈 | ½ cup | Cut into small cubes |
| Large Eggs 🥚 | 4 whole | Room temperature for even mixing |
| Granulated Sugar 🥣 | ½ cup | Fine grain for smooth texture |
| All-Purpose Flour 🌾 | 2 tbsp | For structure in custard |
| Vanilla Extract 🌿 | 1 tsp | Pure extract for best flavor |
| Pinch of Salt 🧂 | 1 pinch | Balances sweetness |
| Whole Milk 🥛 | ½ cup | Warmed slightly for blending |
| Heavy Cream 🥛 | ¼ cup | Full-fat for richness |
| Cocoa Powder 🍫 | 1 tbsp | For dusting finished pots |
The chocolate is non-negotiable here. Valrhona or Guittard bittersweet bars (70-72%) deliver the depth this recipe demands—avoid chips, which contain stabilizers that disrupt the texture. Most Whole Foods or specialty markets carry these. Butter quality matters too; Plugrá or Kerrygold give that European-style richness. Use the block, not sticks, for more precise cubing.
No bittersweet chocolate? Semi-sweet at 60% cacao works in a pinch, though the flavor will be sweeter. Heavy cream can be swapped for full-fat coconut milk (the canned kind) if avoiding dairy. Eggs must be fresh—one-week-old maximum for best setting. The flour is optional but adds stability, especially for beginners. Skip it only if you’re confident in your custard technique.
These hold beautifully at room temperature for 2 hours post-baking, or refrigerate for up to 3 days. Reheat gently in a warm oven (300°F) for 10 minutes to restore that molten center. Dust with cocoa just before serving to maintain the contrast against the glossy surface.
Why You’ll Love This Recipe
- One-Bowl Wonder: I just melt the chocolate and butter, whisk in the eggs and sugar, and bake—no mixer, no fuss.
- Decadent Bite: That bittersweet chocolate with a hint of butter richness? It’s like a little cup of pure indulgence.
- Dinner Party Star: These look fancy but take minutes to prep, so I serve them warm with a dusting of cocoa.
- Make-Ahead Magic: Honestly, they taste even better the next day—so I bake a batch on Sunday and snack all week.
Step-by-Step Instructions for Petit Pot Au Chocolat
Master the technique behind this classic French dessert with precision and finesse.
Step 1: Melt and Temper the Chocolate and Butter
In a heatproof bowl set over a saucepan of barely simmering water, combine the 8 oz Bittersweet Chocolate (chopped into small pieces) and 0.5 cup Unsalted Butter (cut into small cubes). Stir occasionally until the mixture is completely smooth and glossy, ensuring no water touches the bowl—this prevents seizing.
Remove from heat and let cool slightly, about 5 minutes. The mixture should still be fluid but not hot to the touch. This tempering step prevents the eggs from cooking when added later, ensuring a silky texture in your final custard.
Step 2: Whisk Eggs, Sugar, and Flavorings
In a separate bowl, whisk the 4 whole Large Eggs and 0.5 cup Granulated Sugar vigorously until the mixture is pale, thick, and ribbons off the whisk, about 3-4 minutes. This incorporates air, creating a light, airy base for your custard.
Add the 1 tsp Vanilla Extract and 1 pinch Pinch of Salt, whisking until fully combined. The vanilla enhances the chocolate’s depth, while the salt balances the sweetness, elevating the overall flavor profile.
Step 3: Combine Wet and Dry Ingredients
Gradually pour the melted chocolate mixture into the egg mixture while whisking constantly to prevent curdling. Once fully incorporated, sift in the 2 tbsp All-Purpose Flour and fold gently with a spatula until just combined. The flour adds structure without over-developing the batter.
Next, slowly pour in the 0.5 cup Whole Milk and 0.25 cup Heavy Cream, folding until the batter is smooth and homogeneous. The cream enriches the custard, while the milk ensures a balanced, velvety consistency.
Step 4: Bake to Perfect Custard Consistency
Divide the batter evenly among four 4-oz ramekins or oven-safe cups. Place the ramekins in a deep baking dish and pour hot water into the dish until it reaches halfway up the sides of the ramekins. This water bath (bain-marie) ensures gentle, even heat for a creamy, uniform texture.
Bake in a preheated 325°F oven for 20-25 minutes until the edges are set but the centers still have a slight wobble. Over-baking will result in a dense, dry custard, so err on the side of underdone—it will continue to set as it cools.
Step 5: Chill and Finish
Remove the ramekins from the water bath and let them cool to room temperature, about 30 minutes. Then, refrigerate for at least 2 hours (or overnight) to allow the custards to fully set and develop their characteristic texture.
Just before serving, dust the tops lightly with the 1 tbsp Cocoa Powder using a fine-mesh sieve. The contrast of the rich, dark custard with the delicate cocoa dusting completes the presentation, delivering an authentic French bistro experience.
Pro Tips For Making Petit Pot Au Chocolat
- Temper the Eggs: Slowly whisk a spoonful of the hot chocolate mixture into the eggs before combining—this prevents scrambled eggs in your dessert. I learned this the hard way after ruining a batch with eager stirring.
- Use Quality Chocolate: Splurge on high-cocoa bittersweet chocolate (70% or higher). Cheaper chocolate leaves a waxy aftertaste that even sugar can’t hide.
- Skip Overmixing: Fold the flour in just until it disappears—overworking the batter makes the pots dense instead of melt-in-your-mouth tender.
- Rest Before Baking: Let the filled ramekins sit 10 minutes at room temp. Sounds weird, but it works: the centers set more evenly without cracking.
Serving Suggestions for This petit pot au chocolat
Temperature Serving Options
I love serving these slightly warm, straight from the oven after a 10-minute rest. The centers stay molten while the edges are perfectly set. Just be mindful they’ll be quite delicate at this stage.
Chilled Elegance
For a more refined presentation, chill them for 2-4 hours first. The texture firms up beautifully, creating that signature silky consistency. This also makes them easier to transport if you’re bringing them to a dinner party. 💛
Garnish Ideas
A light dusting of cocoa powder is classic, but I also adore a few fresh raspberries or a dollop of whipped cream. The tartness of berries cuts through the richness wonderfully.
Portion Presentation
Serve in the ramekins for a rustic look, or carefully unmold onto small plates for a restaurant-style presentation. Run a thin knife around the edges first if unmolding.
Pairing Suggestions
These pair beautifully with a small scoop of vanilla ice cream or a shot of espresso. The contrast of hot and cold, or rich and bitter, elevates the experience.
Make It Interactive
For a fun twist, set out various toppings like sea salt flakes, chopped nuts, or caramel sauce and let guests customize their own. This works great at gatherings! 💫
Nutrition Facts
Frequently Asked Questions
Can I use milk chocolate instead of bittersweet?
You can, but the flavor will be much sweeter. For best results, stick with 70% cacao bittersweet chocolate. If you must substitute, reduce the sugar slightly to balance the sweetness.
Why did my custards turn out grainy?
Graininess usually means the eggs curdled from too-hot chocolate. Always let melted chocolate cool for 5 minutes before combining with eggs, and whisk constantly while mixing.
Can I make these ahead of time?
They keep well refrigerated for up to 3 days. Reheat at 300°F for 10 minutes to restore the creamy texture before serving.
Do I need a water bath for baking?
Yes, the water bath (bain-marie) is essential. It provides gentle, even heat to prevent cracking and ensures a silky, uniform texture. Without it, the edges may overcook.

- 6 Oz Chocolate Chip Cookie Recipe: Perfectly Balanced Crispy Edges and Chewy Hearts - September 25, 2026
- 6-Inch Coffee Cake Recipe: Vanilla Bean Swirls and Buttery Streusel Topping - September 25, 2026
- 1 Hour Soup Recipe: Velvety Richness Without the Wait - September 25, 2026