
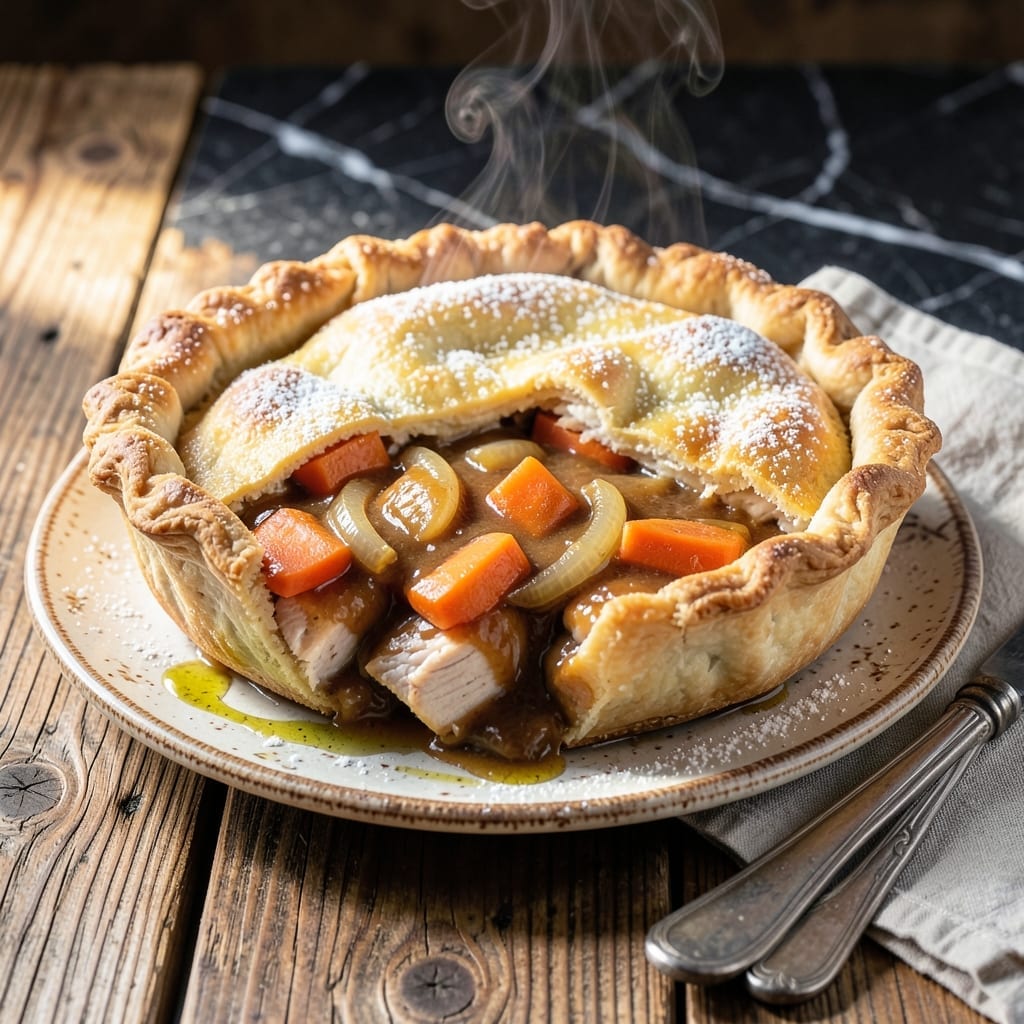
There’s nothing quite like a warm chicken pot pie to bring comfort to the dinner table. This version uses a clever shortcut to deliver all the cozy flavors you love without the fuss of homemade pastry.
Pillsbury dough creates a flaky, golden crust that bakes up beautifully while enclosing a creamy, savory filling. The result is a meal that tastes like it took hours but comes together in under an hour.
Tender chicken, hearty vegetables, and a velvety sauce come together under that perfect crust. The filling is rich and satisfying, with every bite delivering that classic pot pie experience.
Ideal for busy weeknights or when you need a taste of home. This dish delivers on both flaky texture and comfort in every serving.
Ingredients for Pillsbury Dough Chicken Pot Pie
Pantry staples meet shortcut pastry for that cozy, flaky magic everyone loves.
| Ingredient | Amount | Notes |
|---|---|---|
| Pillsbury Refrigerated Pie Crusts 🥧 | 2 sheets | Thawed per package directions |
| Boneless, Skinless Chicken Breasts 🍗 | 1 ½ lb | Cut into bite-sized pieces |
| Unsalted Butter 🧈 | ½ cup | 1 stick, for sauce base |
| All-Purpose Flour 🌾 | ⅓ cup | For thickening sauce |
| Yellow Onion 🧅 | 1 whole | Medium, finely diced |
| Carrots 🥕 | 2 whole | Medium, peeled and diced |
| Celery Stalks 🌿 | 2 whole | Diced for flavor base |
| Garlic Cloves 🧄 | 3 cloves | Minced for depth |
| Chicken Broth 🍲 | 1 ½ cups | Low-sodium preferred |
| Whole Milk 🥛 | ¾ cup | For creamy sauce |
| Frozen Peas 🌱 | 1 cup | No need to thaw |
| Fresh Thyme 🍃 | 2 tsp | Chopped, or 1 tsp dried |
| Salt 🧂 | 1 tsp | Adjust to taste |
| Black Pepper 🌶️ | ½ tsp | Freshly ground best |
| Large Egg 🥚 | 1 whole | For egg wash on crust |
The crust is the star here—Pillsbury refrigerated pie crusts (the kind in the red box) give you that flaky layers without the effort. Costco sells them in bigger packs if you’re making multiple pies. For the chicken, boneless, skinless breasts stay tender, but thighs work too if that’s what you’ve got. Look for fresh, pink meat without that grayish tint. The veggies (carrots, celery, onion) should be firm, not rubbery.
No fresh thyme? Dried at half the amount works fine. Short on milk? Half-and-half makes it even richer. If you’re out of peas, frozen corn or green beans (thawed and drained) can step in. The broth can be swapped for vegetable broth in a pinch, but chicken gives the best flavor. For the sauce, whole milk is ideal, but 2% works too (just less creamy).
Assemble and bake right away, or prep the filling 1 day ahead—just keep it chilled. Leftovers stay good for 3-4 days in the fridge. The crust softens when stored, so reheat in the oven or toaster oven at 350°F for 10-15 minutes to crisp it back up.
Why You’ll Love This Recipe
- No-Fuss Crust: Honestly, the Pillsbury dough does all the work—just unroll, fill, and bake. No rolling pins or floury mess.
- Rich & Creamy: The butter and flour create this velvety sauce that soaks into the chicken and onions.
- Weeknight Hero: I throw this together on busy evenings and still get that homemade comfort food feel.
- Leftovers? Yes Please: It tastes even better the next day, and the crust stays flaky. My lunchbox win.
Step-by-Step Instructions for Chicken Pot Pie with Pillsbury Dough
Here’s the method. Straightforward, tested, works every time.
Step 1: Prepare the Filling Base
Melt the 0.5 cup unsalted butter in a large pot over medium heat. When it starts to foam, add the 0.33 cup all-purpose flour and whisk constantly for 1-2 minutes until the mixture turns light golden brown and smells nutty. This creates your roux, the foundation for a velvety sauce.
Gradually whisk in the 1.5 cups chicken broth and 0.75 cup whole milk, a little at a time, ensuring no lumps form. Bring to a gentle simmer and cook for 3-4 minutes until the sauce thickens enough to coat the back of a spoon. The texture should be smooth, not gluey.
Step 2: Build Flavor with Vegetables and Chicken
Add the finely diced yellow onion, diced carrots, diced celery stalks, and minced garlic cloves to the sauce. Cook for 5-6 minutes, stirring often, until the vegetables soften slightly but still have a bit of bite. The onions should turn translucent, and the carrots should be just beginning to tenderize.
Stir in the 1.5 lb boneless, skinless chicken breasts (cut into bite-sized pieces), 1 cup frozen peas, 2 tsp fresh thyme, 1 tsp salt, and 0.5 tsp black pepper. Simmer for 8-10 minutes until the chicken is cooked through and the peas are heated. You’ll know the chicken is done when it’s no longer pink inside and the pieces are tender when pierced with a fork.
Step 3: Assemble the Pot Pie
Preheat your oven to 375°F. Unroll one sheet of the Pillsbury Refrigerated Pie Crusts (thawed per package directions) and line a 9-inch pie dish with it, pressing gently into the bottom and sides. Pour the chicken and vegetable filling into the crust, spreading it evenly. The filling should be thick and hearty, with plenty of sauce to keep everything moist.
Unroll the second sheet of pie crust and place it over the filling. Trim any excess dough hanging over the edge, then crimp the edges together with a fork to seal. Cut 4-5 slits in the top crust to allow steam to escape—this prevents the crust from becoming soggy.
Step 4: Bake to Flaky Perfection
In a small bowl, beat the large egg lightly with a fork. Brush the top crust with the egg wash, ensuring full coverage. This step gives the crust that beautiful golden brown finish and adds a subtle sheen. Bake for 35-40 minutes until the crust is deeply golden and the filling is bubbling.
Let the pot pie rest for 10 minutes before slicing. This allows the filling to set slightly, making it easier to serve. The crust should be flaky and crisp, with a rich, creamy filling that’s packed with tender chicken and vegetables in every bite.
Pro Tips For Making Pillsbury Dough Chicken Pot Pie
- Chill the Dough: Let the Pillsbury crusts sit in the fridge for 15-20 minutes before rolling—this prevents shrinking and makes them easier to handle.
- Cube the Chicken: Cut the chicken breasts into 1-inch cubes so they cook evenly and faster, avoiding dry, overcooked pieces.
- Cook the Onions First: Sauté the yellow onions until soft before adding flour—this builds flavor and prevents a raw, starchy taste in the filling.
- Vent the Top Crust: Cut 3-4 small slits in the top crust before baking so steam can escape, keeping the pie from getting soggy underneath.
Flavor Customization for This Recipe
Herb Infusions
Swap the fresh thyme for 1 tbsp chopped rosemary and 1 tsp sage for a piney, earthy depth that pairs beautifully with chicken. I find this combo tastes especially cozy in fall. The rosemary should be finely minced to avoid woody textures.
Spicy Kick
Add ½ tsp cayenne pepper and 1 tsp smoked paprika to the filling for warmth and complexity. The cayenne wakes up the flavors without overwhelming the dish. For extra heat, include 1 diced jalapeño with the vegetables. 🌶️
Creamy Variations
Replace ½ cup of the milk with ½ cup heavy cream for an ultra-rich sauce. Alternatively, stir in 2 oz cream cheese at the end for a tangy twist. Both options make the filling luxuriously velvety.
Vegetable Swaps
Add 1 cup diced potatoes with the carrots for heartiness, or use 1 cup green beans instead of peas. Mushrooms also work well—sauté 8 oz cremini mushrooms with the onions for an umami boost.
Cheesy Addition
Sprinkle ½ cup shredded cheddar over the filling before adding the top crust. The cheese melts into the sauce, creating delicious pockets of gooey goodness. Gruyère also works wonderfully for a nutty flavor.
Crust Upgrade
Brush the top crust with 1 tbsp melted butter mixed with ½ tsp garlic powder before baking. This adds a subtle savory note that complements the filling beautifully. 💛
Nutrition Facts
Frequently Asked Questions
Can I use Pillsbury biscuit dough instead of pie crust?
Not recommended. Biscuit dough lacks the flaky texture of pie crust and may become too dense. Stick with Pillsbury pie crust for best results.
How do I keep the bottom crust from getting soggy?
Pre-bake the bottom crust for 8-10 minutes at 375°F before adding filling. Also, ensure your filling isn’t too watery.
Can I make this ahead of time?
Assemble the pie and refrigerate for up to 24 hours before baking. Or freeze unbaked pie for up to 1 month.
What’s the best way to reheat leftovers?
Reheat in the oven at 350°F for 10-15 minutes to restore the crust’s crispness. Avoid microwaving as it softens the crust.

- 6 Oz Chocolate Chip Cookie Recipe: Perfectly Balanced Crispy Edges and Chewy Hearts - September 25, 2026
- 6-Inch Coffee Cake Recipe: Vanilla Bean Swirls and Buttery Streusel Topping - September 25, 2026
- 1 Hour Soup Recipe: Velvety Richness Without the Wait - September 25, 2026