
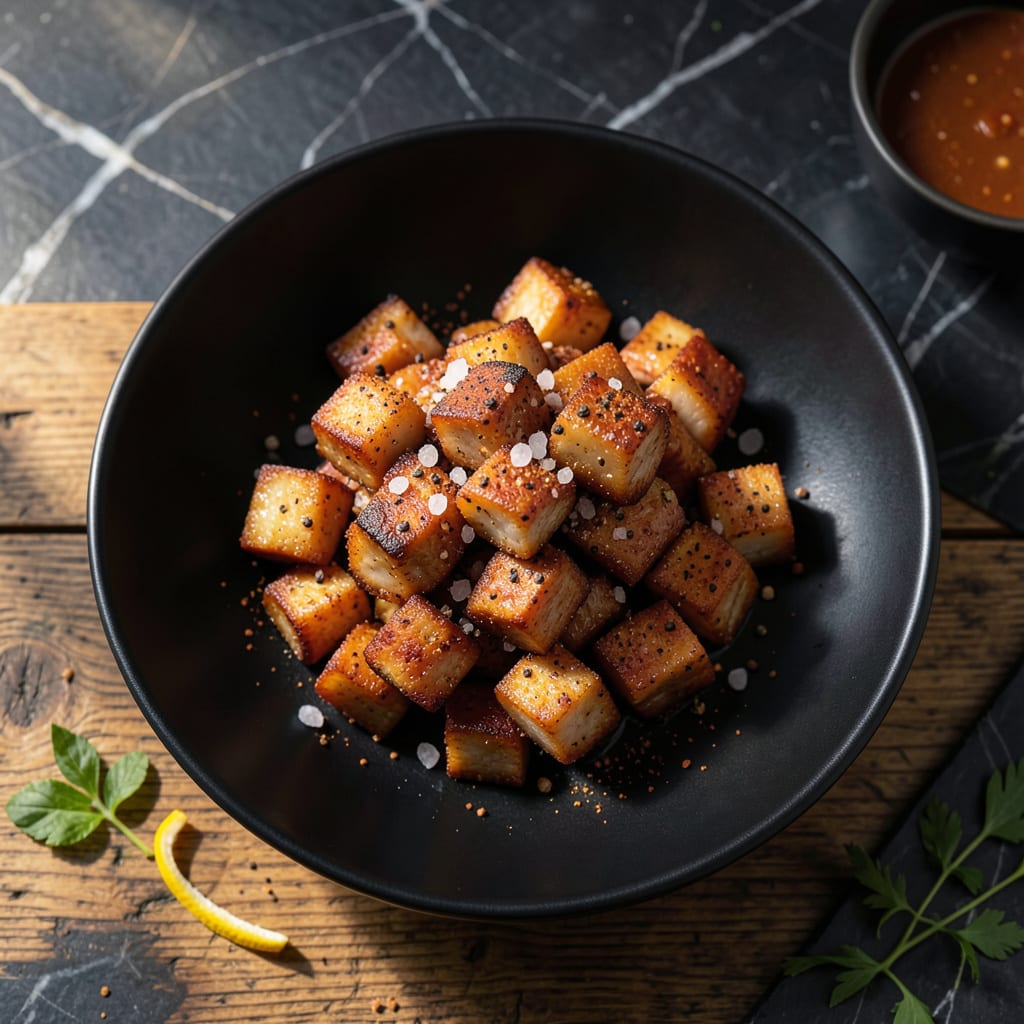
This recipe transforms pork fat back into crispy, golden bites with deep savory flavor. The key lies in proper rendering and patient cooking to achieve perfect texture.
With a few simple techniques, you’ll create a dish that’s rich, satisfying, and surprisingly versatile. The process rewards attention to detail and timing.
Ingredients for Pork Fat Back
Simple ingredients transform pork fat back into crispy, golden bites with rich savory depth.
| Ingredient | Amount | Notes |
|---|---|---|
| Pork Fat Back 🥓 | 2 lb | Cut into 1-inch cubes, skin removed |
| Kosher Salt 🧂 | 1 tbsp | Diamond Crystal preferred for even texture |
| Freshly Ground Black Pepper 🌶️ | 1 tsp | Coarse grind for best results |
| Garlic Powder 🧄 | 1 tsp | Not garlic salt substitute |
| Smoked Paprika 🌶️ | 1 tsp | Sweet or hot variety works |
| Onion Powder 🧅 | 1 tsp | Fresh ground for maximum flavor |
| Dried Thyme 🍃 | ½ tsp | Rubbed between fingers to release oils |
| Dried Rosemary 🌿 | ½ tsp | Crushed lightly before adding |
| Cayenne Pepper 🔥 | ¼ tsp | Adjust to heat preference |
| Neutral Cooking Oil 🫒 | ¼ cup | For initial rendering, high smoke point |
| Water 💧 | ½ cup | For deglazing and moisture control |
| Apple Cider Vinegar 🍏 | 1 tbsp | Balances richness, adds brightness |
The pork fat back quality is paramount. Source from a trusted butcher or specialty meat market—look for pieces with a good ratio of fat to lean meat. Costco often carries it in the fresh pork section, but call ahead to confirm availability. The fat should be firm and white, with no grayish discoloration. For rendering, a heavy-bottomed pot like Le Creuset or All-Clad provides even heat distribution.
No pork fat back? Pork belly is the closest substitute, though it has more meat—adjust cooking time accordingly. Out of smoked paprika? Regular paprika plus a pinch of liquid smoke mimics the depth. Apple cider vinegar can be swapped with white vinegar or lemon juice in equal amounts. The spices are flexible—feel free to experiment with ground coriander or mustard powder for variation.
Rendered fat can be stored in the fridge for 1 month or frozen for 6 months. The crispy bites keep for 3-4 days refrigerated in an airtight container. Reheat in a dry skillet to restore crispness—microwaving makes them soggy. Always render fat on medium-low heat to prevent burning.
Why You’ll Love This Recipe
- Five Minute Prep: I just rub the fat back with salt, pepper, and those spices—no chopping, no fuss.
- Smoky Depth: The smoked paprika and garlic powder turn the crispy fat into something ridiculously good.
- Breakfast to Dinner: I fry it up for eggs in the morning, or roast a batch for tacos at night.
- Pantry Stretch: A pound of pork fat back costs pennies and renders enough fat to cook with for weeks.
Step-by-Step Instructions for Pork Fat Back
Here is the method to transform this dish into crispy, flavorful perfection with ideal texture.
Step 1: Season the Pork Fat Back
Begin by patting the 2 lb Pork Fat Back cubes completely dry with paper towels. This removes surface moisture that could prevent crispiness. In a small bowl, combine the 1 tbsp Kosher Salt, 1 tsp Freshly Ground Black Pepper, 1 tsp Garlic Powder, 1 tsp Smoked Paprika, and 1 tsp Onion Powder.
Rub this seasoning blend evenly over all surfaces of the pork cubes, pressing gently to adhere. The spices should coat each piece thoroughly without clumping. This layer of seasoning will create the deep, savory base flavor that defines the final product.
Step 2: Render and Crisp the Fat
Heat the 0.25 cup Neutral Cooking Oil in a large, heavy-bottomed skillet over medium heat. When the oil shimmers but doesn’t smoke, add the seasoned pork cubes in a single layer without crowding. Cook undisturbed for 8-10 minutes to allow the fat to begin rendering.
As the pork cooks, it will release its fat while the exterior begins to crisp. Stir occasionally, maintaining medium heat, for another 8-10 minutes until the cubes are uniformly golden brown and crispy on all sides. The rendered fat should pool in the pan, creating a rich cooking medium.
Step 3: Add Aromatics and Deglaze
Reduce the heat to medium-low and sprinkle the 0.5 tsp Dried Thyme and 0.5 tsp Dried Rosemary over the crisping pork. I crush the herbs between my fingers as I add them to release their essential oils. Stir to distribute the herbs evenly.
Carefully pour in the 0.5 cup Water and 1 tbsp Apple Cider Vinegar to deglaze the pan, scraping up any browned bits. The 0.25 tsp Cayenne Pepper can be added now for even distribution. Simmer for 3-5 minutes until the liquid reduces and the pork absorbs the aromatic flavors.
Step 4: Finish and Drain
Increase the heat back to medium and cook for an additional 2-3 minutes, stirring frequently, until all the liquid has evaporated and the pork cubes are deeply browned and crispy throughout. The pieces should have a uniform texture with no soft spots.
Transfer the crispy pork fat back to a paper towel-lined plate to drain excess fat. The final product should have a rich, golden-brown exterior with a satisfying crunch when bitten. The aromatics will have infused every piece with complex, savory notes that balance the richness of the rendered fat.
Pro Tips For Making Pork Fat Back
- Render Low and Slow: I learned this the hard way—cranking the heat too high turns your fat back into greasy bits instead of crispy gold. Keep it at medium-low, around 275°F, and let the fat melt out gradually for that perfect texture.
- Score the Skin: Before seasoning, make shallow cuts in a crosshatch pattern on the fat cap. This isn’t just for looks—it helps the salt and spices penetrate and keeps the meat from curling as it cooks.
- Skip the Overcrowding: After burning three batches, I finally figured out that piling the pieces too close in the pan steams instead of crisps. Give each slice at least an inch of space so the fat can render properly.
- Dry It First: Sounds weird, but it works: pat the fat back completely dry with paper towels before seasoning. Moisture is the enemy of crispiness, and this small step actually changes the outcome.
Best Sauces and Condiments for This Dish
Classic BBQ Glaze
A sweet and tangy BBQ glaze cuts through the richness perfectly. I mix ½ cup ketchup with 2 tbsp apple cider vinegar and 1 tbsp brown sugar for balance. Brush it on during the final 2 minutes of cooking. 🔥
Spicy Sriracha Aioli
Combine ½ cup mayo with 1 tbsp sriracha and 1 tsp lime juice for a creamy, spicy kick. This aioli adds a bright contrast to the savory pork. The acidity helps cut the fat beautifully.
Honey Mustard Dip
Whisk together ¼ cup Dijon mustard, ¼ cup honey, and 1 tbsp whole-grain mustard for a sweet and sharp dip. I love how the mustard seeds add texture against the crispy pork.
Garlic Herb Yogurt
Mix 1 cup Greek yogurt with 1 minced garlic clove, 1 tbsp chopped dill, and salt to taste. The cool yogurt provides a refreshing contrast to the rich, warm pork. 💛
Apple Cider Reduction
Simmer 1 cup apple cider with 1 tbsp apple cider vinegar until reduced by half. The concentrated sweet-tart flavors complement the pork’s savory notes perfectly.
Hot Honey Drizzle
Warm ¼ cup honey with 1 tsp chili flakes for 1 minute until fragrant. Drizzle this over the finished pork for a spicy-sweet finish that’s irresistible.
Nutrition Facts
Frequently Asked Questions
What’s the best way to store leftover crispy bits?
Keep them in an airtight container in the fridge for up to 3-4 days. Reheat in a dry skillet to restore crispness—microwaving makes them soggy.
Can I use a different cut of pork?
Pork belly works well, though it has more meat. Adjust cooking time to ensure full rendering. Avoid lean cuts like tenderloin, as they won’t crisp properly.
How do I prevent burning during rendering?
Cook on medium heat and stir occasionally. Too-high heat can scorch the fat before it renders fully. Use a heavy-bottomed pan for even heat distribution.
Why add water and vinegar at the end?
The 0.5 cup water and 1 tbsp vinegar deglaze the pan, lifting flavorful browned bits. The vinegar balances the richness with a touch of acidity.

- 8 Bean Soup Recipe Crock Pot: Hearty Vegetable Medley in One Pot - September 25, 2026
- 4C Bread Crumbs Meatballs Recipe: Crispy Crust and Juicy Centers - September 25, 2026
- 6 Oz Chocolate Chip Cookie Recipe: Perfectly Balanced Crispy Edges and Chewy Hearts - September 25, 2026