
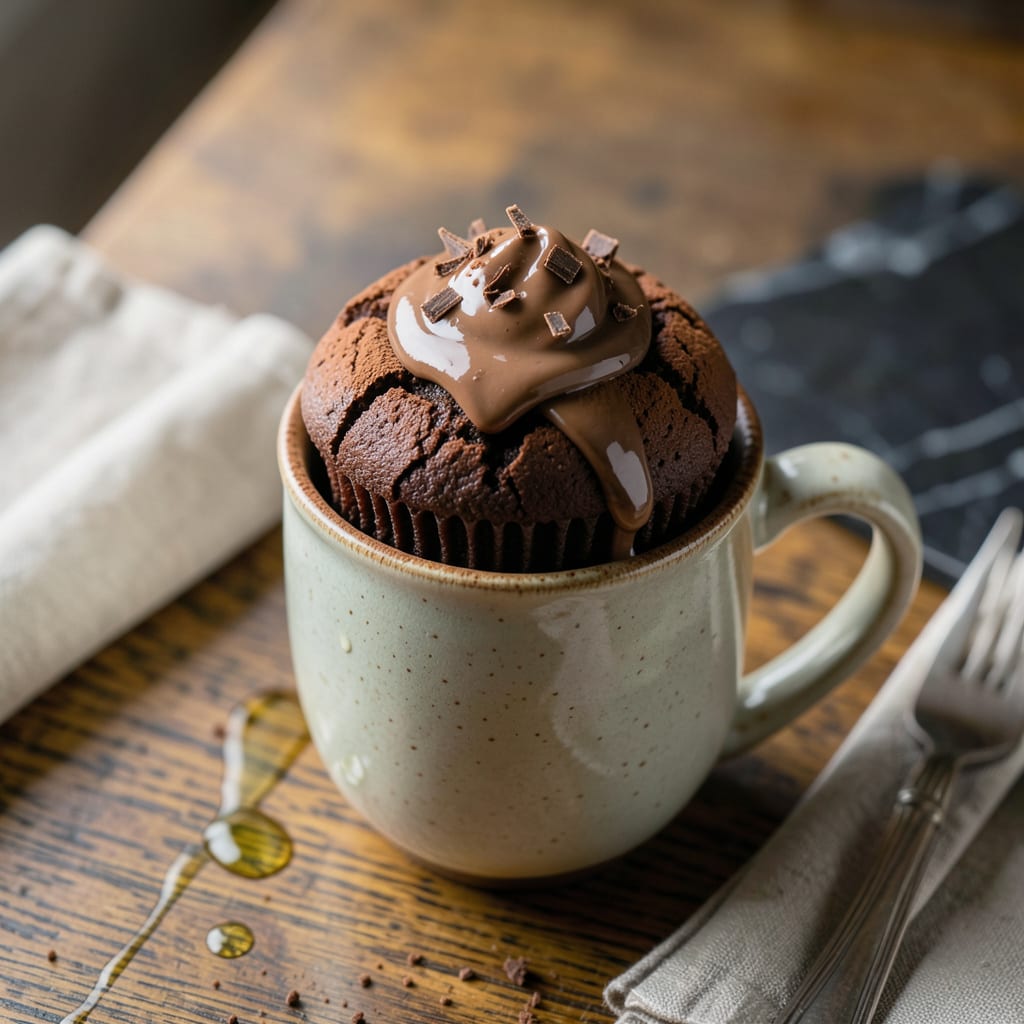
This single-serve chocolate cupcake delivers rich, decadent flavor in a personal portion. I’ve refined this method to ensure consistent texture and perfect doneness every time.
With precise measurements and a straightforward process, you’ll achieve a moist, fudgy treat ideal for satisfying cravings. No special equipment is required—just a mug and a microwave.
Ingredients for Pot Cupcake
A handful of pantry staples transforms into a decadent single-serve treat with ease.
| Ingredient | Amount | Notes |
|---|---|---|
| All-Purpose Flour 🌾 | 4 tbsp | Sifted for smooth texture |
| Granulated Sugar 🍬 | 3 tbsp | Fine grain preferred |
| Unsweetened Cocoa Powder 🍫 | 2 tbsp | Dutch-process for richness |
| Baking Powder 🧂 | ¼ tsp | Ensures proper rise |
| Salt 🧂 | 0.125 tsp | Fine sea salt preferred |
| Milk 🥛 | 3 tbsp | Whole milk for creaminess |
| Vegetable Oil 🫒 | 2 tbsp | Neutral flavor preferred |
| Vanilla Extract 🌿 | ½ tsp | Pure extract for best flavor |
| Large Egg 🥚 | 1 whole | Room temperature preferred |
| Semi-Sweet Chocolate Chips 🍫 | 2 tbsp | Optional for extra richness |
The cocoa powder is critical here. Hershey’s Special Dark or Ghirardelli deliver the deep chocolate flavor this recipe demands. Always check the expiration—old cocoa loses its potency. For the flour, King Arthur or Gold Medal are reliable. The baking powder should be fresh (test by dropping a pinch in hot water—it should bubble vigorously). Milk can be any variety, but whole milk yields the richest texture.
No cocoa powder? Melted chocolate at one-third the amount works, though the texture will differ slightly. Out of all-purpose flour? Cake flour plus a pinch of cornstarch can substitute. For a dairy-free version, almond or oat milk swaps in seamlessly. The vegetable oil can be replaced with melted butter (cool slightly before adding). Egg-free? 1 tbsp applesauce plus 1 tsp baking powder mimics the binding effect.
Store dry ingredients in airtight containers for up to 6 months. The finished cupcake is best eaten immediately but can be kept covered at room temperature for 1 day. Reheat briefly in the microwave to restore moisture if needed.
Why You’ll Love This Recipe
- One Bowl Magic: I dump everything in, stir, and it’s ready for the oven—no mixer, no fuss.
- Rich Chocolate Fix: That deep cocoa flavor hits just right, like my favorite bakery but homemade.
- Party or Midnight Snack: I’ve served these at birthdays and scarfed one down at 2 a.m. with zero regret.
- Pantry Staples Only: Flour, sugar, cocoa—I always have these on hand, so cravings never win.
Step-by-Step Instructions for Single-Serve Chocolate Cupcake
Here’s the method. Straightforward, tested, works every time.
Step 1: Combine Dry Ingredients for Even Distribution
In a microwave-safe mug, whisk together the 4 tbsp All-Purpose Flour, 3 tbsp Granulated Sugar, 2 tbsp Unsweetened Cocoa Powder, 0.25 tsp Baking Powder, and 0.125 tsp Salt until fully incorporated. Sifted flour ensures a smooth, lump-free batter.
This step creates the structural foundation. The cocoa powder adds depth of flavor, while the baking powder provides lift. I always tap the mug to settle the dry ingredients before adding the wet components—this prevents air pockets that could lead to uneven cooking.
Step 2: Incorporate Wet Ingredients for Moist Texture
Add the 3 tbsp Milk, 2 tbsp Vegetable Oil, 0.5 tsp Vanilla Extract, and 1 whole Large Egg to the mug. Whisk vigorously for 30-45 seconds until the batter is completely smooth and no dry streaks remain.
Room temperature egg emulsifies better with the oil, creating a stable batter. The neutral vegetable oil allows the chocolate flavor to shine, while whole milk adds richness. I check the consistency—it should be thick but pourable, similar to pancake batter.
Real talk: If you see any lumps, keep whisking. A smooth batter ensures even cooking and a tender crumb in the final cupcake.
Step 3: Fold in Chocolate Chips for Bursts of Flavor
Gently fold in the 2 tbsp Semi-Sweet Chocolate Chips using a small spatula or spoon. Distribute them evenly throughout the batter, ensuring each bite will have a melty chocolate surprise.
These chips add pockets of gooey chocolate that contrast beautifully with the cake’s texture. I reserve a few chips to sprinkle on top before microwaving—they create an attractive, bakery-style finish and provide immediate visual feedback when the cupcake is done.
Step 4: Microwave to Perfection
Microwave on high for 1 minute 30 seconds to 2 minutes. Start checking at 1 minute 30 seconds—the cupcake is done when the top springs back lightly when touched and a toothpick inserted in the center comes out with only a few moist crumbs.
Microwave ovens vary, so your timing might differ slightly. The edges should pull away from the mug, and the center should look set but still slightly fudgy. If it’s not done, continue microwaving in 10-second increments until fully cooked.
This is the moment that matters: Don’t overcook. The residual heat will continue cooking the cupcake after you remove it from the microwave, so it’s better to err on the side of slightly underdone.
Step 5: Rest and Serve Warm
Let the cupcake rest in the mug for 1-2 minutes. This allows the structure to set and makes it easier to remove without breaking. The texture will firm up slightly as it cools.
Run a butter knife around the edges to loosen, then tip the cupcake onto a plate. Serve warm with a dusting of powdered sugar or a dollop of whipped cream for extra indulgence. The contrast between the warm, moist cake and cool topping is irresistible.
Pro Tips For Making Pot Cupcake
- Preheat Your Mug: I learned this the hard way—always microwave your empty mug for 20 seconds before adding batter. It kickstarts the cooking process and prevents that sad, gummy center.
- Measure Cocoa Right: Spoon the unsweetened cocoa powder into your measuring tool, then level it off—don’t scoop directly from the container. It packs down and throws off the ratio, making your cupcake bitter and dense.
- Skip the Overmixing: Stir the batter just until the flour disappears, even if it looks a little lumpy. Overmixing develops the gluten, and suddenly you’ve got a pot cupcake with the texture of a hockey puck.
- Add a Pinch More Salt: Sounds weird, but a tiny extra pinch of salt—about ⅛ teaspoon—actually makes the chocolate flavor pop. My first batch tasted flat until I tried this.
Make-Ahead Tips for Leftovers
Pre-Mix Dry Ingredients
Combine and store the 4 tbsp All-Purpose Flour, 3 tbsp Granulated Sugar, 2 tbsp Unsweetened Cocoa Powder, 0.25 tsp Baking Powder, and 0.125 tsp Salt in a sealed jar. This mix stays fresh for up to 2 months at room temperature.
Portion Wet Ingredients
Pre-measure the 3 tbsp Milk, 2 tbsp Vegetable Oil, and 0.5 tsp Vanilla Extract in small containers. Store the milk separately in the fridge for up to 1 week, but keep oil and vanilla at room temperature for easy mixing.
Egg Preparation
Crack the 1 whole Large Egg into a small bowl and whisk lightly. Cover and refrigerate for up to 1 day before using. For best results, let it sit at room temperature for 10 minutes before mixing into the batter.
Chocolate Chip Storage
Keep the 2 tbsp Semi-Sweet Chocolate Chips in an airtight container in a cool, dark place. They’ll stay fresh for 6-8 months. For extra convenience, pre-portion them into small bags for single servings.
Quick Assembly
When ready to bake, combine the pre-mixed dry ingredients with the wet components in your mug. This approach cuts prep time to under 2 minutes and ensures consistent results every time. 💡
I love this method for busy mornings or late-night cravings—it’s a game-changer for efficiency.
Nutrition Facts
Frequently Asked Questions
Can I make this without a microwave?
Yes! Bake in a ramekin at 350°F for 12-15 minutes. Check for doneness with a toothpick. The texture will be slightly different but just as delicious.
Why did my cupcake turn out rubbery?
Overmixing the batter or microwaving too long causes this. Stick to 30-45 seconds of whisking and check at 1 minute 30 seconds. Less is more with mug cakes!
What can I use instead of cocoa powder?
Melt 1 oz of dark chocolate and reduce other liquids by 1 tbsp. The flavor will be richer but slightly denser. Always use high-quality chocolate.
Can I double the recipe?
Use two mugs or a small oven-safe dish. Microwave time may increase to 2-3 minutes. Watch closely as ovens vary.

- 4C Bread Crumbs Meatballs Recipe: Crispy Crust and Juicy Centers - September 25, 2026
- 6 Oz Chocolate Chip Cookie Recipe: Perfectly Balanced Crispy Edges and Chewy Hearts - September 25, 2026
- 6-Inch Coffee Cake Recipe: Vanilla Bean Swirls and Buttery Streusel Topping - September 25, 2026