
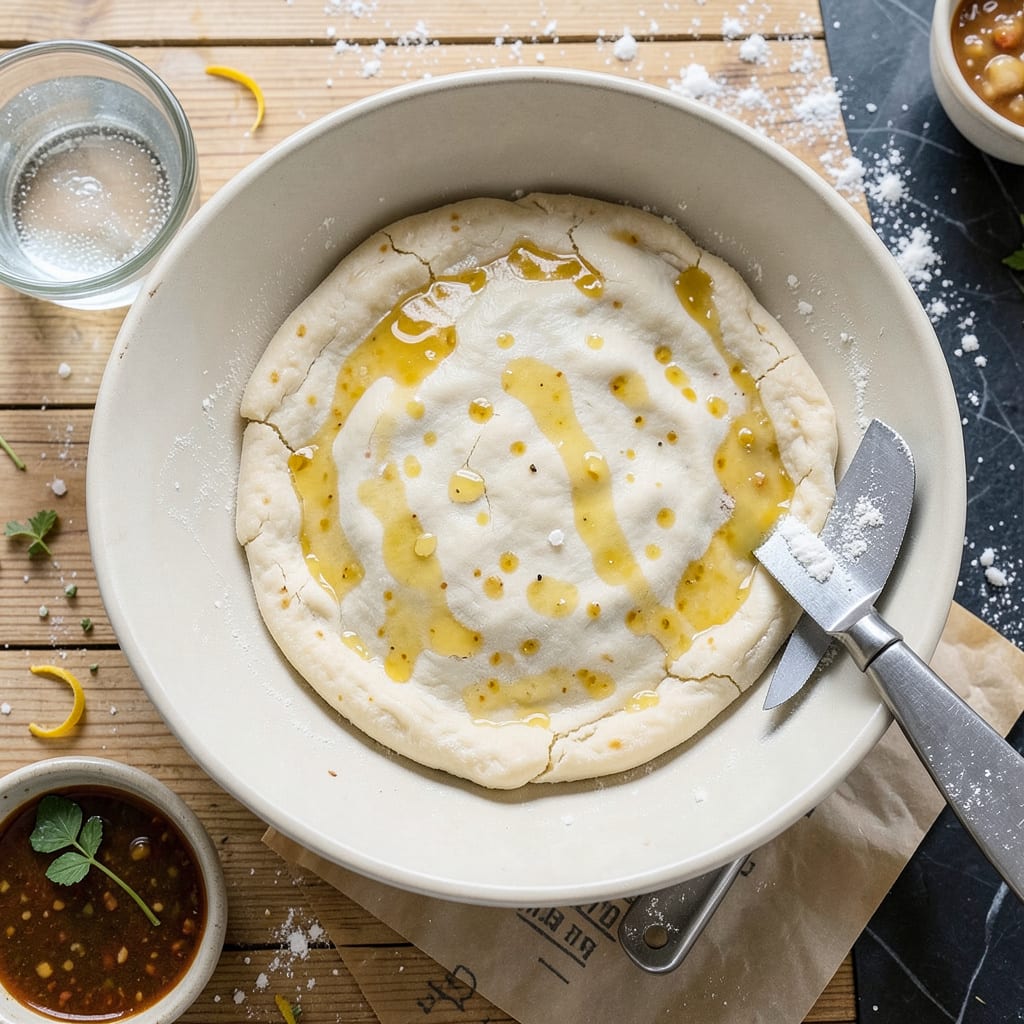
Creating the perfect pot pie crust doesn’t require hours of effort—just the right technique. This recipe delivers flaky, buttery layers in under 10 minutes, using simple ingredients and a foolproof method. Whether you’re making a classic chicken pot pie or a hearty vegetable version, the crust is what elevates the dish from good to unforgettable.
The secret lies in keeping ingredients cold and working quickly to prevent gluten development, ensuring a tender, crisp finish every time. I’ve included both a traditional butter-based version and a vegan alternative using coconut oil, so everyone can achieve that ideal golden, flaky texture. Pair it with your favorite filling, and you’ve got a meal that’s as impressive as it is comforting.
Ingredients for Pot Pie Crust Recipe Quick
Nine simple ingredients create that signature flaky, buttery crust—whether using traditional butter or the vegan coconut oil alternative.
| Ingredient | Amount | Notes |
|---|---|---|
| All-Purpose Flour 🌾 | 2 ½ cups | Unbleached, plus extra for dusting |
| Unsalted Butter 🧈 | 1 cup | Cold, cut into small cubes |
| Refined Coconut Oil 🥥 | ¾ cup | Solid, for vegan option |
| Ice Water 💧 | ⅓ cup | Plus 1-2 tbsp as needed |
| Salt 🧂 | 1 tsp | Fine sea salt preferred |
| Granulated Sugar 🍚 | 1 tsp | Balances flavor (optional) |
| Apple Cider Vinegar 🍎 | 1 tsp | For vegan version only |
| Large Egg 🥚 | 1 whole | For egg wash (optional) |
| Heavy Cream 🥛 | 1 tbsp | For egg wash (optional) |
| Plant-Based Milk 🌱 | 1 tbsp | For vegan egg wash |
The butter is critical for texture—Land O’Lakes or Kerrygold deliver consistent results. For the vegan version, refined coconut oil (like Nutiva) ensures neutral flavor. Keep both fat sources ice-cold until use. The flour should be unbleached all-purpose; King Arthur or Gold Medal work well. Measure by spooning into cups rather than scooping to avoid compacting.
No butter? Vegan butter sticks (like Miyoko’s) substitute 1:1. Out of coconut oil? Cold vegetable shortening works, though texture may differ slightly. For gluten-free crusts, King Arthur Measure for Measure flour blend performs best. The vinegar in the vegan version tenderizes; white vinegar at half the amount can substitute if needed.
Store uncooked dough wrapped tightly in plastic for 2 days refrigerated or 3 months frozen. Baked crust keeps 3 days at room temperature in airtight container. For make-ahead convenience, roll dough between parchment sheets before chilling—ready to use straight from fridge. Always bring dough to room temperature for 10 minutes before rolling to prevent cracking.
Why You’ll Love This Recipe
- No-Fuss Dough: Honestly, this might be the least intimidating crust I’ve ever made. The coconut oil keeps it pliable (no cracking when rolling), and the butter gives that classic flavor without requiring perfect pastry skills.
- Buttery, Flaky Magic: Here’s what sold me—the combo of cold butter and coconut oil creates layers that actually crisp up, not just turn soggy. That first bite where the crust shatters? Worth every second.
- Freezer-Friendly Lifesaver: I double the batch, roll out extra dough, and freeze it flat between parchment. Now, pot pie night is just “grab crust, fill, bake”—no last-minute stress. (Yes, even on a Tuesday night.)
- Pantry Staples Only: No special trips to the store. Flour, butter, coconut oil (the refined kind so no coconut taste), salt, and water—that’s it. I’ve made this when I thought I had “nothing” to cook with, and it’s saved dinner more than once.
Step-by-Step Instructions for Pot Pie Crust
This method delivers perfectly flaky, buttery layers with minimal effort and maximum reliability.
Step 1: Prepare the Dry Ingredients
In a large mixing bowl, whisk together the 2.5 cups All-Purpose Flour, 1 tsp Salt, and 1 tsp Granulated Sugar until thoroughly combined. The sugar helps balance the flavor and promotes browning, while the salt enhances the overall taste of the crust.
Make sure there are no lumps in the flour mixture. I prefer to use a fine-mesh sieve if my flour looks particularly compacted. This step ensures even distribution of the dry ingredients, which is crucial for consistent texture throughout the crust.
Step 2: Cut in the Cold Fats
Add the 1 cup Unsalted Butter (cut into small cubes) to the flour mixture. Using a pastry cutter or your fingertips, work the butter into the flour until the mixture resembles coarse crumbs with pea-sized butter pieces visible. For a vegan option, use the 0.75 cup Refined Coconut Oil instead, working it in the same way.
The key here is keeping the fat cold—this creates those desirable flaky layers. If the butter starts to soften or melt, chill the mixture for 10 minutes before proceeding. You should still see distinct pieces of fat throughout the mixture when you’re done.
Step 3: Bind the Dough with Liquid
Create a well in the center of your flour-fat mixture. Add the 0.33 cup Ice Water and 1 tsp Apple Cider Vinegar (for vegan version) or plain ice water (for standard version). Using a fork, gently toss the mixture until it just begins to come together. The dough should look shaggy with some dry bits remaining.
Be careful not to overwork the dough at this stage. The moment it starts to clump together when pressed, stop mixing. Overworking develops gluten, which makes the crust tough rather than flaky. If needed, add 1-2 tbsp additional ice water, but err on the side of too dry rather than too wet.
Step 4: Form and Chill the Dough
Turn the dough out onto a lightly floured surface and gently press it into a cohesive ball. Divide the dough in half and flatten each portion into a 1-inch thick disk. Wrap each disk tightly in plastic wrap and refrigerate for at least 30 minutes, or up to 2 days.
This chilling period allows the gluten to relax and the fat to resolidify. When you roll out the dough later, it will be much more cooperative and less likely to shrink during baking. The disks also chill more quickly and evenly than a single large ball.
Step 5: Roll and Prepare for Baking
Remove one disk of dough from the refrigerator and let it sit at room temperature for 5-10 minutes to soften slightly. On a lightly floured surface, roll the dough into a 12-inch circle, about 1/8-inch thick. Rotate the dough frequently as you roll to maintain an even thickness and prevent sticking.
For a golden finish, whisk together the 1 whole Large Egg with 1 tbsp Heavy Cream for the egg wash (or use 1 tbsp Plant-Based Milk for vegan version). Brush this mixture lightly over the crust before baking. This creates that beautiful, shiny golden-brown finish that makes pot pies so appealing.
Best Sauces and Condiments for This Dish
Classic Gravy Pairing
Nothing complements a flaky pot pie crust better than a rich, velvety gravy. I love using a homemade chicken gravy made with pan drippings, 2 tbsp butter, and 2 tbsp all-purpose flour for the roux. Simmer it with 1 cup chicken broth and a splash of heavy cream until it coats the back of a spoon. This adds moisture and depth to every bite. 🍲
Herb-Infused Cream Sauce
For a lighter but equally flavorful option, try a thyme and garlic cream sauce. Sauté 3 minced garlic cloves and 1 tbsp fresh thyme in 2 tbsp olive oil, then whisk in 1 cup heavy cream and ½ cup vegetable broth. Reduce until thickened—this pairs beautifully with mushroom or vegetable fillings.
Spicy Sriracha Aioli
If you love heat, a sriracha aioli adds a bold kick. Mix ½ cup mayonnaise, 1 tbsp sriracha, 1 tsp lime juice, and ½ tsp garlic powder. Drizzle lightly over the baked crust or serve on the side for dipping. The creamy spice cuts through the buttery layers perfectly. 🌶️
Tangy Mustard Cream
A Dijon mustard cream brings brightness to richer pot pies. Whisk together ¼ cup sour cream, 1 tbsp Dijon mustard, 1 tsp honey, and 1 tbsp chopped chives. This works especially well with chicken or turkey fillings, balancing the savory notes.
Vegan Mushroom Reduction
For a plant-based option, simmer 1 cup sliced mushrooms, ½ cup vegetable broth, and 1 tbsp soy sauce until reduced by half. Blend until smooth for a deep, umami-packed sauce. It’s rich enough to stand up to the coconut oil crust without overpowering it.
Buttery Sage Brown Butter
Brown 4 tbsp butter with 6 fresh sage leaves until nutty and fragrant. Drizzle this golden elixir over the crust before serving—it adds a gourmet touch with minimal effort. The earthy sage complements both chicken and vegetable pot pies beautifully. ✨
Nutrition Facts
Frequently Asked Questions
Can I use a food processor to speed this up?
A food processor cuts prep time in half. Pulse the flour, salt, and sugar first, then add cold butter/coconut oil and pulse until pea-sized crumbs form. Add ice water gradually while pulsing—just until the dough clumps. Be careful not to over-process, as this can warm the fat and toughen the crust.
Why does my crust turn out tough instead of flaky?
Tough crust usually means overworked dough or warm ingredients. Keep butter/coconut oil ice-cold, and mix just until combined. If rolling becomes difficult, chill the dough for 10 minutes before continuing. Also, avoid adding too much water—start with ⅓ cup and add sparingly.
Can I make this ahead and freeze it?
Yes! Wrap the dough disks tightly in plastic, then place in a freezer bag for up to 3 months. Thaw overnight in the fridge before rolling. For pre-rolled crusts, layer between parchment paper and freeze flat. Baked crusts freeze well too—just reheat at 350°F for 10 minutes to crisp.
How do I prevent the bottom crust from getting soggy?
Blind-bake the bottom crust for 8-10 minutes before adding filling. Brush it lightly with beaten egg white (or vegan milk) to create a moisture barrier. Also, ensure your filling isn’t watery—thicken gravies with a cornstarch slurry if needed. A hot oven (400°F+) helps too!
What’s the best way to crimp the edges for a professional look?
Use your thumb and index finger to press the dough edges together, then create a fluted pattern by pinching with your opposite hand’s knuckle. Keep fingers lightly floured to prevent sticking. For extra shine, brush edges with egg wash before baking. Practice makes perfect—even messy crimps taste delicious!

- 8 Bean Soup Recipe Crock Pot: Hearty Vegetable Medley in One Pot - September 25, 2026
- 4C Bread Crumbs Meatballs Recipe: Crispy Crust and Juicy Centers - September 25, 2026
- 6 Oz Chocolate Chip Cookie Recipe: Perfectly Balanced Crispy Edges and Chewy Hearts - September 25, 2026