
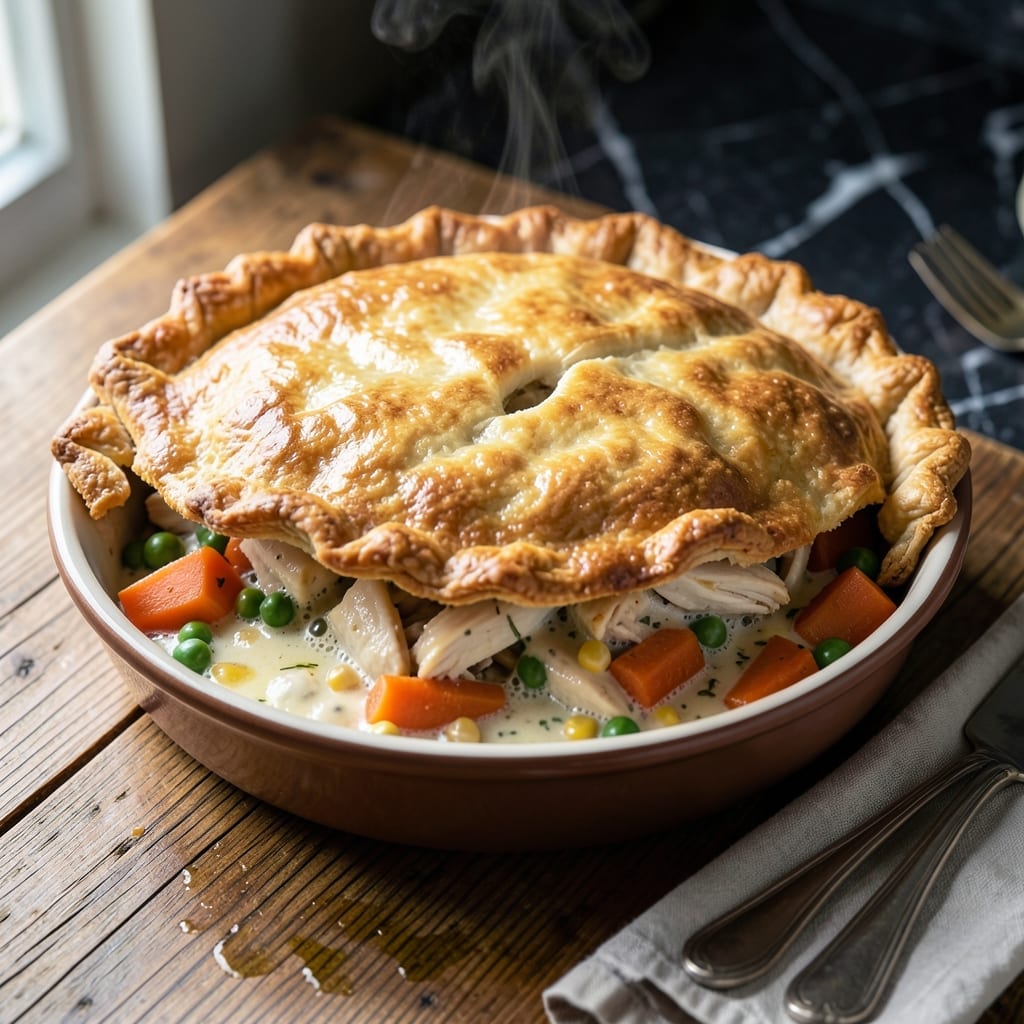
This savory comfort dish brings homemade charm to your table with minimal effort. The fluffy Bisquick topping transforms a simple filling into a satisfying meal that feels like a warm hug.
What makes this recipe special is the perfect balance between the creamy, vegetable-packed filling and the golden, biscuit-like crust. It’s a quick way to achieve that classic pot pie experience without the fuss of traditional pastry.
You’ll love how the Bisquick creates a tender, buttery layer that soaks up the rich, savory flavors of the filling. It’s comfort food at its finest, ready to impress without the complexity.
Ideal for busy weeknights or cozy weekends, this dish delivers hearty satisfaction in every bite.
Ingredients for Pot Pie Recipe Using Bisquick
Pantry staples plus Bisquick make this comfort dish effortlessly delicious and ready fast.
| Ingredient | Amount | Notes |
|---|---|---|
| Bisquick Baking Mix 🥣 | 2 cups | Original variety preferred |
| Chicken Breast 🍗 | 1 ½ lb | Cooked and shredded |
| Frozen Mixed Vegetables 🥕 | 2 cups | Peas, carrots, corn blend |
| Cream of Chicken Soup 🥫 | 1 can | 10.5 oz size |
| Chicken Broth 💧 | 1 ½ cups | Low-sodium preferred |
| Milk 🥛 | ⅔ cup | Whole or 2% works best |
| Butter 🧈 | 2 tbsp | Unsalted for control |
| Onion 🧅 | ½ whole | Yellow or white, diced |
| Garlic Cloves 🧄 | 2 cloves | Minced for depth |
| Salt 🧂 | ½ tsp | Adjust to taste |
| Black Pepper 🌶️ | ¼ tsp | Freshly ground preferred |
| Dried Thyme 🌿 | ½ tsp | For savory warmth |
| Paprika 🌶️ | ¼ tsp | Adds subtle color |
The Bisquick is key here—original mix gives you that fluffy, buttery topping. Any grocery store carries it, but Target or Walmart usually have the best prices for the big boxes. For the chicken, rotisserie is a great shortcut (just shred it up). If using raw, boneless, skinless breasts cook fastest. Look for good color—no grayish spots—and give it a quick rinse before cooking.
No cream of chicken soup? Cream of mushroom works just as well. Fresh veggies instead of frozen? Go for it—just chop them small so they cook through. The milk can be swapped for half-and-half if you want extra richness. Short on thyme? Poultry seasoning at half the amount gets you close. The broth can be vegetable if that’s what you’ve got on hand.
This reheats like a dream—actually tastes better the next day. Keeps 3-4 days in the fridge, freezes for 2 months. I make a double batch of the topping mix (just Bisquick and milk) and keep it in the freezer for next time (trust me on this).
Why You’ll Love This Recipe
- One Bowl Wonder: I just dump Bisquick, soup, broth, and veggies in a bowl, stir, and pour—no fancy prep.
- That Flaky Crust: The Bisquick topping bakes up golden and crisp, while the creamy chicken filling stays rich and savory.
- Feeds My Crew: Between us, this is my go-to for busy weeknights, potlucks, or when I need to feed a hungry family with minimal fuss.
- Leftovers for Days: Honestly, it tastes even better the next day, and it reheats like a dream—no soggy crust here.
Step-by-Step Instructions for Pot Pie with Bisquick Topping
Here’s the method. Straightforward, tested, works every time.
Step 1: Cook Chicken and Prepare Base
Start by cooking the 1.5 lb Chicken Breast until fully done—poach, bake, or use rotisserie chicken for speed. Once cool enough to handle, shred it into bite-sized pieces. This step ensures tender chunks throughout your filling.
In a large skillet, melt the 2 tbsp Butter over medium heat. Sauté the diced 0.5 whole Onion for 3-4 minutes until translucent. Add the minced 2 cloves Garlic Cloves and cook for 30 seconds until fragrant but not browned.
Step 2: Build the Creamy Filling
Stir in the 1 can Cream of Chicken Soup, 1.5 cups Chicken Broth, 2 cups Frozen Mixed Vegetables, shredded chicken, 0.5 tsp Salt, 0.25 tsp Black Pepper, 0.5 tsp Dried Thyme, and 0.25 tsp Paprika. Bring to a gentle simmer.
Let this cook for 5-7 minutes until the mixture thickens slightly and the vegetables are heated through. The filling should coat the back of a spoon. Taste and adjust seasoning if needed.
Step 3: Prepare the Bisquick Topping
In a bowl, combine the 2 cups Bisquick Baking Mix with the 0.66 cup Milk. Stir just until the dry ingredients are moistened—don’t overmix. The batter will be thick and slightly lumpy, which is exactly what you want.
If the mixture seems too dry, add a splash more milk, 1 tablespoon at a time. The topping should hold its shape when dropped from a spoon but still be easy to work with.
Step 4: Assemble and Bake
Transfer the hot filling to a greased 9×13-inch baking dish or deep skillet. Drop spoonfuls of the Bisquick batter evenly over the top—it will spread as it bakes. Don’t worry about perfect coverage; the topping will rise and fill in the gaps.
Bake in a preheated 400°F oven for 20-25 minutes until the topping is golden brown and a toothpick inserted into the center comes out clean. The filling should be bubbling around the edges.
Step 5: Rest and Serve
Let the pot pie rest for 5-10 minutes after removing it from the oven. This allows the filling to set slightly and makes serving easier. The topping should be fluffy and light, not dense or soggy.
Serve warm, with each portion featuring a generous amount of the savory filling and a fluffy Bisquick biscuit topping. Leftovers reheat well, covered, in the oven at 350°F for 10-15 minutes.
Pro Tips For Making Pot Pie Recipe Using Bisquick
- Precook the Chicken: Poach the chicken breasts in the chicken broth first—this keeps them tender and adds extra flavor to the filling. I learned this the hard way after ending up with dry, chewy chicken in my early attempts.
- Thaw the Veggies: Drain and thaw the frozen mixed vegetables before mixing them in, or they’ll release too much water and make your filling soupy. Sounds obvious, but I skipped this once and regretted it instantly.
- Skip the Lumpy Mix: Stir the Bisquick into the wet ingredients just until combined—overmixing makes the topping dense instead of light and flaky. My grandmother swore by this, and she was right.
- Vent the Top: Cut a few small slits in the Bisquick topping before baking so steam can escape. After burning three batches, I finally figured out this prevents a soggy crust.
Pro Cooking Tips for Perfect Results
Bisquick Batter Secrets
Don’t overmix the 2 cups Bisquick with ⅔ cup milk—stir just until combined. Overworking develops gluten, making your topping tough instead of fluffy. A few lumps are fine and will disappear during baking. 💡
Filling Consistency Check
Your filling should be thick but pourable when going into the baking dish. If it seems too thin, let it simmer uncovered for an extra 2-3 minutes. Too thick? Add ¼ cup chicken broth to loosen it up.
Even Topping Distribution
Drop 8-10 spoonfuls of batter evenly across the filling—they’ll spread and merge as they bake. Press them lightly into the filling so they don’t slide around. This ensures every bite gets that perfect biscuit-to-filling ratio.
Oven Position Matters
Bake on the center rack at 400°F for even browning. If your oven runs hot, check at 18 minutes and tent with foil if the topping browns too quickly. A light golden color means it’s done.
Resting Time Tip
Those 5-10 minutes of resting aren’t optional. The filling thickens as it cools slightly, and the topping sets. Skipping this step often leads to a runny mess when serving. 🔥
Crispy Top Trick
For extra browning, brush the topping with 1 tbsp melted butter before baking. This adds a beautiful sheen and extra flavor. I do this when serving guests for that restaurant-quality finish.
Nutrition Facts
Frequently Asked Questions
Can I use a different baking mix instead of Bisquick?
Yes, any biscuit-style baking mix works. Use the same 2 cups measurement and follow the same liquid ratio. The texture may vary slightly, but the result will still be delicious.
How do I know when the topping is fully cooked?
Look for a golden brown color and test with a toothpick—it should come out clean after 20-25 minutes at 400°F. The filling should be bubbling at the edges.
Can I make this ahead of time?
Assemble the dish, cover, and refrigerate for up to 24 hours before baking. Add 5-10 minutes to the baking time if cooking straight from the fridge.
Why is my filling runny after baking?
This usually means it needed more simmering time before baking. Let it thicken on the stove for an extra 2-3 minutes next time. Resting 5-10 minutes after baking also helps.

- 6 Oz Chocolate Chip Cookie Recipe: Perfectly Balanced Crispy Edges and Chewy Hearts - September 25, 2026
- 6-Inch Coffee Cake Recipe: Vanilla Bean Swirls and Buttery Streusel Topping - September 25, 2026
- 1 Hour Soup Recipe: Velvety Richness Without the Wait - September 25, 2026