
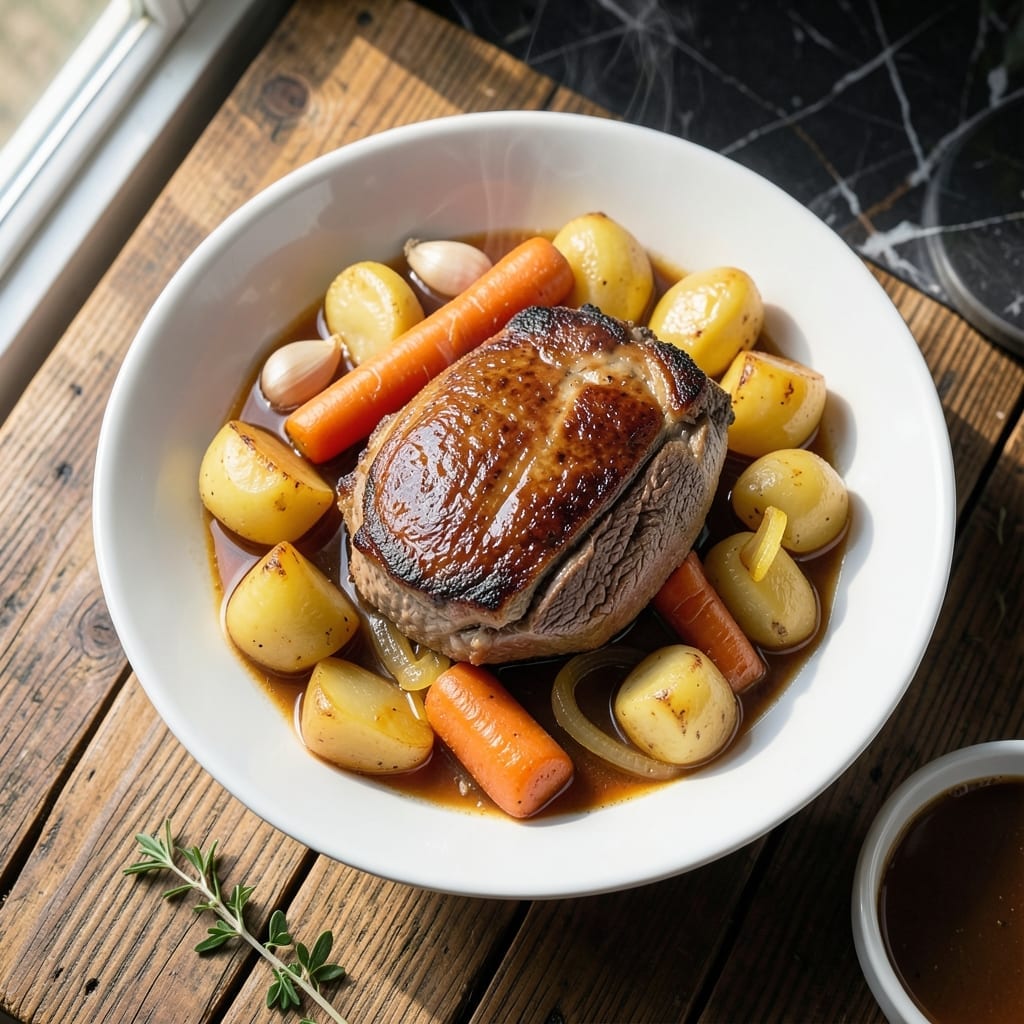
I’ve mastered the art of tender pot roast using a cooking bag, and the results are consistently perfect. The oven bag locks in moisture, transforming tough cuts into fall-apart beef with minimal effort.
This method simplifies a classic dish while enhancing flavor. The sealed environment allows the meat and vegetables to steam in their own juices, creating a naturally rich broth without constant monitoring.
The beef emerges tender every time, surrounded by carrots and potatoes that absorb the savory cooking liquids. It’s a hands-off approach that delivers restaurant-quality results.
Set it and forget it—this technique guarantees a perfect pot roast with vegetables that taste as good as they look.
Ingredients for Pot Roast in Cooking Bag
Quality ingredients and an oven bag create this fall-apart tender beef dish.
| Ingredient | Amount | Notes |
|---|---|---|
| Beef Chuck Roast 🥩 | 3 lb | Well-marbled, boneless preferred |
| Carrots 🥕 | 4 whole | Peeled, cut into chunks |
| Yukon Gold Potatoes 🥔 | 1 ½ lb | Peeled, quartered |
| Yellow Onion 🧅 | 2 whole | Sliced into wedges |
| Garlic Cloves 🧄 | 6 cloves | Peeled, smashed |
| Beef Broth 💧 | 1 cup | Low-sodium preferred |
| Worcestershire Sauce 🫒 | 2 tbsp | For depth of flavor |
| Dried Thyme 🌿 | 1 tsp | Crushed between fingers |
| Dried Rosemary 🌿 | 1 tsp | Crushed between fingers |
| Bay Leaves 🍃 | 2 whole | Whole, for infusion |
| Olive Oil 🫒 | 2 tbsp | For searing beef |
| Kosher Salt 🧂 | 1 ½ tsp | Divided for seasoning |
| Black Pepper 🌶️ | 1 tsp | Freshly ground preferred |
| Oven Cooking Bag 🛍️ | 1 bag | Large size, heat-safe |
The beef is non-negotiable for optimal results. Chuck roast with visible marbling ensures the tender texture promised—avoid lean cuts like round. Source from Whole Foods or Costco for consistent quality. The Yukon Gold potatoes add richness, but red potatoes work in a pinch. For the broth, low-sodium allows better control over seasoning.
No chuck roast? Brisket or short ribs offer similar results but may require adjusted cooking times. Substitute vegetable broth for beef broth if needed. Fresh herbs can replace dried—use triple the amount. The Worcestershire sauce is key for umami depth; soy sauce works as a backup. Skip the bag? Use a Dutch oven with tight lid.
Store raw beef in the fridge for up to 3 days before cooking. Leftovers keep for 4-5 days refrigerated or freeze for 3 months. Reheat gently to preserve moisture—microwave with a splash of broth for best results.
Why You’ll Love This Recipe
- Set and Forget: I toss everything in the bag, seal it, and let the oven do the work—no stirring, no monitoring.
- Feeds the Crew: Honestly, it’s my go-to for Sunday dinners or when the in-laws drop by unexpectedly.
- Leftovers for Days: Between us, the pot roast tastes even better the next day in sandwiches or stews.
Step-by-Step Instructions for Pot Roast in Cooking Bag
This method guarantees fall-apart beef and vegetables infused with rich, savory flavor.
Step 1: Sear and Season the Beef Chuck Roast
Heat the 2 tbsp olive oil in a large skillet over medium-high heat until it shimmers. Pat the 3 lb beef chuck roast dry with paper towels, then season generously with 1 tsp kosher salt and 1 tsp black pepper. Sear the roast on all sides for 4-5 minutes per side until deeply browned.
This searing step develops a flavorful crust that enhances the final dish. The roast should release easily from the pan when properly browned. Remove it from the skillet and set aside to rest while you prepare the vegetables.
Step 2: Prepare the Vegetables and Aromatics
In a large bowl, combine the 4 whole carrots, 1.5 lb Yukon Gold potatoes, 2 whole yellow onion, and 6 cloves garlic cloves. Toss them with the remaining ½ tsp kosher salt, then add the 1 tsp dried thyme, 1 tsp dried rosemary, and 2 whole bay leaves.
Crush the thyme and rosemary between your fingers to release their oils, ensuring maximum flavor infusion. The vegetables should be evenly coated with the herbs and salt, which will help them caramelize beautifully in the oven.
Step 3: Assemble in the Oven Cooking Bag
Place the 1 bag oven cooking bag in a large roasting pan. Add the seared 3 lb beef chuck roast to the bag, then arrange the vegetable mixture around it. Pour in the 1 cup beef broth and 2 tbsp Worcestershire sauce, ensuring the liquid pools at the bottom of the bag.
The broth should come about halfway up the roast. This creates steam that tenderizes the beef while the bag traps moisture for perfectly succulent results. Close the bag according to the manufacturer’s instructions, ensuring it’s securely sealed.
Step 4: Roast to Tender Perfection
Cut a few small slits in the top of the oven cooking bag to allow steam to escape. Roast in a preheated 325°F oven for 3 to 3½ hours, or until the beef is fork-tender and the vegetables are soft. The bag will inflate slightly, which is normal.
Check for doneness by piercing the roast with a fork—it should slide in with no resistance. The internal temperature should reach 195-200°F for optimal tenderness. Remove the pan from the oven and let it rest for 15 minutes before opening the bag.
Step 5: Serve the Pot Roast and Vegetables
Carefully open the oven cooking bag, avoiding the hot steam. Transfer the 3 lb beef chuck roast to a cutting board and slice against the grain. Arrange the carrots, Yukon Gold potatoes, and yellow onion on a serving platter alongside the beef.
Spoon the juices from the bag over the top for extra flavor. The vegetables should be tender and deeply infused with the herbs, while the beef should pull apart effortlessly. Serve immediately for the best texture and temperature.
Pro Tips For Making Pot Roast In Cooking Bag
- Sear Before Bagging: I learned this the hard way—browning the chuck roast in a hot pan for 3-4 minutes per side before it goes in the bag adds a depth of flavor the oven alone can’t.
- Cut Potatoes Evenly: Yukon Golds cook faster than you think, so slice them into 2-inch chunks so they don’t turn mushy before the beef is tender.
- Skip the Overcrowding: Sounds weird, but it works: leave at least an inch of space in the bag so steam can circulate—otherwise, the carrots end up steamed instead of roasted.
- Use Garlic Whole: My grandmother swore by this, and she was right: toss in whole garlic cloves instead of minced to avoid burning and infuse the dish with mellow, sweet flavor.
Essential Equipment for This Recipe
Oven Cooking Bag
The Reynolds Kitchens Oven Bag is my go-to—it’s heat-safe up to 400°F and large enough for a 3-4 lb roast with vegetables. The bag’s heat-resistant nylon traps steam while allowing airflow, ensuring even cooking without drying out the meat. 🔥
Heavy Roasting Pan
Use a sturdy stainless steel roasting pan with high sides to hold the bag securely. I recommend All-Clad or Cuisinart for durability. The pan should be at least 13×9 inches to give the bag room to expand during cooking.
Reliable Meat Thermometer
A good instant-read thermometer is essential for checking doneness. I use the ThermoWorks Thermapen—it gives accurate readings in 2-3 seconds. Aim for 195-200°F internal temp for fall-apart tenderness.
Large Skillet
For searing, a 12-inch cast iron skillet works perfectly. I prefer Lodge for even heat distribution. The skillet needs to be large enough to accommodate the 3 lb roast without crowding, which steams rather than sears.
Cutting Board & Knife
A large wooden cutting board provides stability for slicing the roast. Pair it with a 8-inch chef’s knife—I use Wüsthof—for clean cuts against the grain. This ensures tender slices every time.
Tongs for Handling
Use 12-inch locking tongs to safely transfer the hot roast in and out of the bag. I recommend OXO Good Grips for comfort and control. They’re also perfect for turning the roast during searing.
Nutrition Facts
Frequently Asked Questions
Do I need to sear the beef first?
Yes, searing creates a flavorful crust. Heat 2 tbsp olive oil in a skillet over medium-high heat and brown the roast for 4-5 minutes per side before adding to the bag.
What if my bag doesn’t have instructions?
Most oven bags work the same way. Place it in a roasting pan, add ingredients, and cut a few small slits in the top. Always check that it’s heat-safe up to at least 350°F.
Can I cook this at a higher temperature for less time?
Not recommended. The low-and-slow method at 325°F for 3-3½ hours ensures tender results. Higher heat can make the beef tough.

- 4C Bread Crumbs Meatballs Recipe: Crispy Crust and Juicy Centers - September 25, 2026
- 6 Oz Chocolate Chip Cookie Recipe: Perfectly Balanced Crispy Edges and Chewy Hearts - September 25, 2026
- 6-Inch Coffee Cake Recipe: Vanilla Bean Swirls and Buttery Streusel Topping - September 25, 2026