
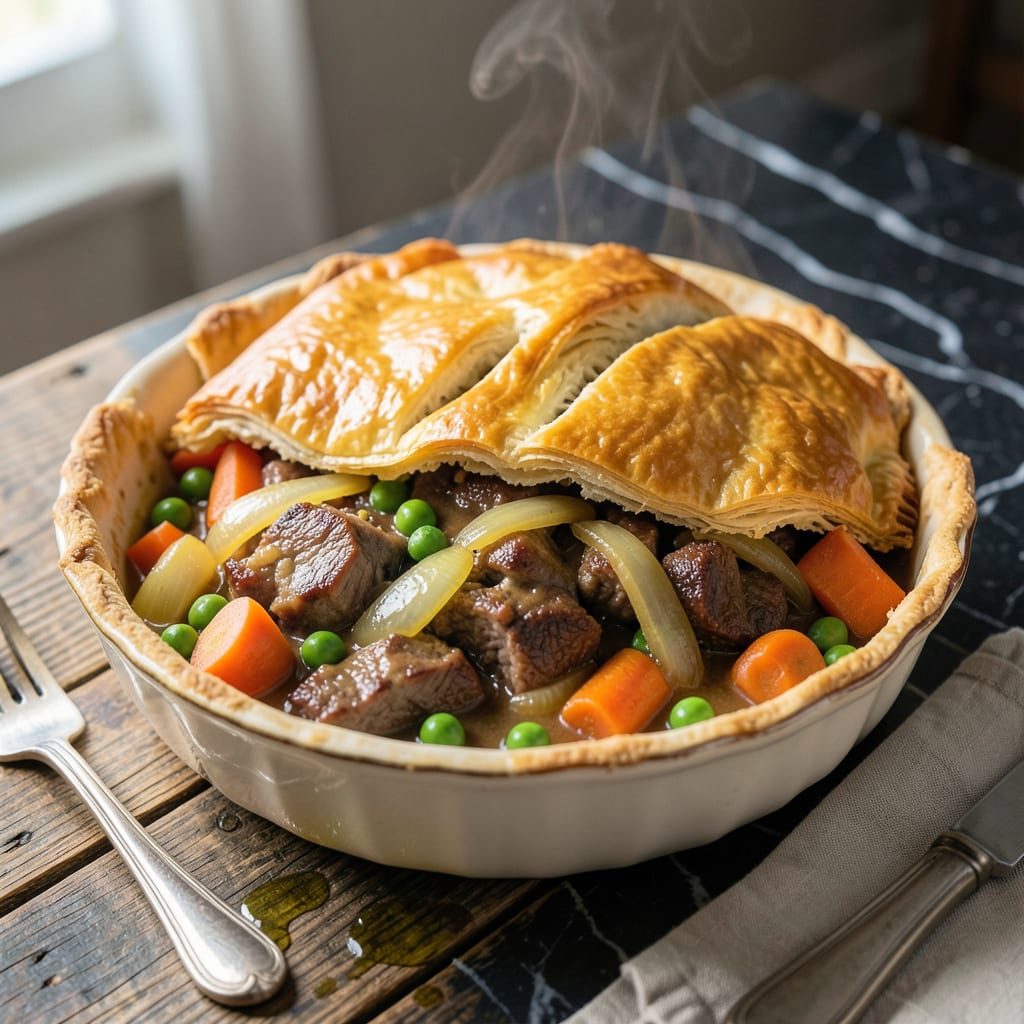
This recipe transforms leftover pot roast into a comforting masterpiece with a flaky golden crust. The rich beef and vegetable filling creates a hearty, satisfying meal that’s perfect for chilly evenings.
I’ve perfected the technique to ensure the crust stays crisp while the filling remains tender and flavorful. Every bite delivers that classic pot pie experience with minimal effort.
Ingredients for Pot Roast Pot Pie
Transform leftovers into a hearty pot pie with these comforting, familiar ingredients.
| Ingredient | Amount | Notes |
|---|---|---|
| Leftover Pot Roast 🥩 | 3 cups | Shredded, with juices reserved |
| Carrots 🥕 | 1 ½ cups | Diced into 1/2-inch pieces |
| Frozen Peas 🌱 | 1 cup | No need to thaw |
| Yellow Onion 🧅 | 1 whole | Medium, finely diced |
| Celery Stalks 🌿 | 2 pieces | Finely diced for texture |
| Garlic Cloves 🧄 | 3 cloves | Minced for depth of flavor |
| All-Purpose Flour 🌾 | ⅓ cup | For thickening the filling |
| Beef Broth 🫕 | 1 ½ cups | Low-sodium preferred for control |
| Worcestershire Sauce 💧 | 1 tbsp | Adds umami richness to filling |
| Dijon Mustard 🟡 | 1 tsp | Enhances savory depth |
| Unsalted Butter 🧈 | ½ cup | Cold, cubed for flaky crust |
| All-Purpose Flour 🌾 | 2 cups | For pie crust, plus extra for dusting |
| Ice Water 🧊 | ⅓ cup | For pie crust dough |
| Salt 🧂 | 1 tsp | Divided between filling and crust |
| Black Pepper 🌶️ | ½ tsp | Freshly ground for best flavor |
The pot roast is the foundation—use what’s leftover from a well-seasoned 3-4 lb chuck roast for optimal flavor. For vegetables, fresh carrots and celery from your local market work best, though frozen can be used in a pinch. The broth should be high-quality; Better Than Bouillon is a reliable brand for depth. Unsalted butter ensures you control the seasoning in both filling and crust.
Out of Worcestershire? Soy sauce with a pinch of sugar mimics the tangy complexity. No Dijon? Yellow mustard plus a dash of paprika works. For the crust, vegetable shortening can replace butter (use same amount), though the flavor will be slightly different. If making gluten-free, swap the all-purpose flour for King Arthur’s 1:1 blend in both filling and crust.
Assembled pie keeps 1-2 days in the fridge (best reheated in oven). The filling can be made 2 days ahead and stored separately. Baked pot pie freezes beautifully for 2-3 months—thaw before reheating to preserve crust texture.
Why You’ll Love This Recipe
- No-Fuss Assembly: I just dump the leftover pot roast, carrots, and peas into the filling—no extra cooking, just mix and go.
- Rich Comfort: The tender beef and veggies soak up the gravy, making every bite warm and satisfying.
- Feeds the Crew: One pie fills my whole family, and it’s just as good reheated the next day for lunch.
- Budget Stretch: Using leftover pot roast means I’m turning one meal into two without spending a dime.
Step-by-Step Instructions for Pot Roast Pot Pie
Master the technique for a golden, flaky crust over a rich, savory beef and vegetable filling.
Step 1: Prepare the Filling Base
In a large skillet over medium heat, melt 2 tablespoons of the unsalted butter. Add the finely diced yellow onion, celery stalks, and carrots, cooking for 5-6 minutes until the vegetables soften and the onion becomes translucent.
Stir in the minced garlic cloves and cook for an additional 30 seconds until fragrant. This builds the aromatic foundation for your filling. Add the 3 cups Leftover Pot Roast with its reserved juices, breaking up any large pieces for even distribution.
Step 2: Create the Rich Sauce
Sprinkle the 0.33 cup All-Purpose Flour evenly over the meat and vegetable mixture. Stir well to coat everything, cooking for 1-2 minutes to remove the raw flour taste. This creates a roux that will thicken your sauce beautifully.
Gradually pour in the 1.5 cups Beef Broth, 1 tbsp Worcestershire Sauce, and 1 tsp Dijon Mustard, stirring constantly. Add ½ tsp Salt and ½ tsp Black Pepper. Bring to a simmer and cook for 3-4 minutes until the mixture thickens to a gravy-like consistency.
Stir in the 1 cup Frozen Peas and remove from heat. The filling should be rich and bubbly, with vegetables tender but still holding their shape.
Step 3: Prepare the Flaky Crust
In a food processor, pulse the 2 cups All-Purpose Flour with the remaining ½ tsp Salt. Add the remaining cold, cubed unsalted butter and pulse until the mixture resembles coarse crumbs with some pea-sized butter pieces visible.
With the processor running, drizzle in the 0.33 cup Ice Water through the feed tube until the dough just comes together. It should hold when pressed but not be sticky. Turn the dough out onto a lightly floured surface and shape into a disk. Wrap in plastic and refrigerate for 30 minutes to chill the butter, which ensures flakiness.
Step 4: Assemble and Bake the Pot Pie
Preheat your oven to 375°F. Roll out the chilled dough on a floured surface to a 12-inch circle. Transfer the filling to a 9-inch pie dish and cover with the rolled dough, crimping the edges to seal. Cut several small slits in the top crust to allow steam to escape.
Bake for 35-40 minutes until the crust is golden brown and the filling is bubbling. If the edges brown too quickly, cover them with foil. The perfect pot pie has a crust that shatters at the touch and a filling that’s thick, rich, and generously studded with tender beef and vegetables.
Pro Tips For Making Pot Roast Pot Pie
- Shred the Beef Fine: I learned this the hard way—chunky pot roast pieces make the filling uneven. Shred it to about 1/2-inch bits so every bite has meat.
- Sauté the Veggies First: Cook the onion, carrots, and celery in butter for 5-7 minutes until soft. Raw celery in the filling is a sad surprise.
- Thicken Before Baking: Simmer your filling until it coats the back of a spoon—runny pot pie is a mess. A slurry of 2 tablespoons cornstarch and cold water does the trick.
- Use Store-Bought Puff: Skip the homemade crust stress. A sheet of thawed puff pastry on top bakes up flaky and golden with half the effort.
Common Mistakes When Making Perfect Results
Overworking the Dough
Handle the crust dough as little as possible once the ice water is added. Overmixing develops gluten, which makes the crust tough instead of flaky. I press the dough together just until it holds, then stop. 💡
Skipping the Chill
Don’t rush the 30-minute rest in the fridge. Cold butter is essential for creating those flaky layers in your crust. If the butter warms up, it will melt into the dough, resulting in a dense, tough texture rather than the golden, crisp finish you want.
Thin Filling
Be patient when thickening the filling. If it seems too thin after adding the beef broth, let it simmer for the full 3-4 minutes. The flour needs time to fully absorb the liquid and create that perfect gravy consistency.
Soggy Bottom Crust
To prevent a soggy bottom, par-bake the crust for 8-10 minutes before adding the filling. Alternatively, place a baking sheet on the lower oven rack to catch drips and maintain even heat distribution.
Overfilling the Pie
Avoid mounding the filling too high in the 9-inch pie dish. It can spill over during baking, making a mess and potentially burning. Stick to about 4-5 cups of filling max for a standard pie dish. 🔥
Uneven Baking
Rotate the pie dish halfway through baking to ensure even browning. If the edges start browning too quickly, cover them with foil. This ensures the entire crust bakes to that perfect golden color without burning.
Nutrition Facts
Frequently Asked Questions
Can I use store-bought pie crust?
Yes, a pre-made pie crust works in a pinch. Just thaw it according to package instructions and follow the baking time. For best results, brush the top with egg wash before baking for a golden finish.
How do I keep the crust from getting soggy?
Par-bake the bottom crust for 8-10 minutes before adding the filling. Also, ensure your filling is thick and bubbly before assembling to prevent excess moisture.
Can I make this ahead of time?
Assemble the pie and refrigerate for up to 1 day before baking. Or bake, cool, and freeze for 2-3 months. Reheat in the oven for best texture.
What if my filling is too thick?
Thin it with a splash of beef broth or water. Stir well and simmer for 1-2 minutes to reach your desired consistency before assembling.

- 4C Bread Crumbs Meatballs Recipe: Crispy Crust and Juicy Centers - September 25, 2026
- 6 Oz Chocolate Chip Cookie Recipe: Perfectly Balanced Crispy Edges and Chewy Hearts - September 25, 2026
- 6-Inch Coffee Cake Recipe: Vanilla Bean Swirls and Buttery Streusel Topping - September 25, 2026