
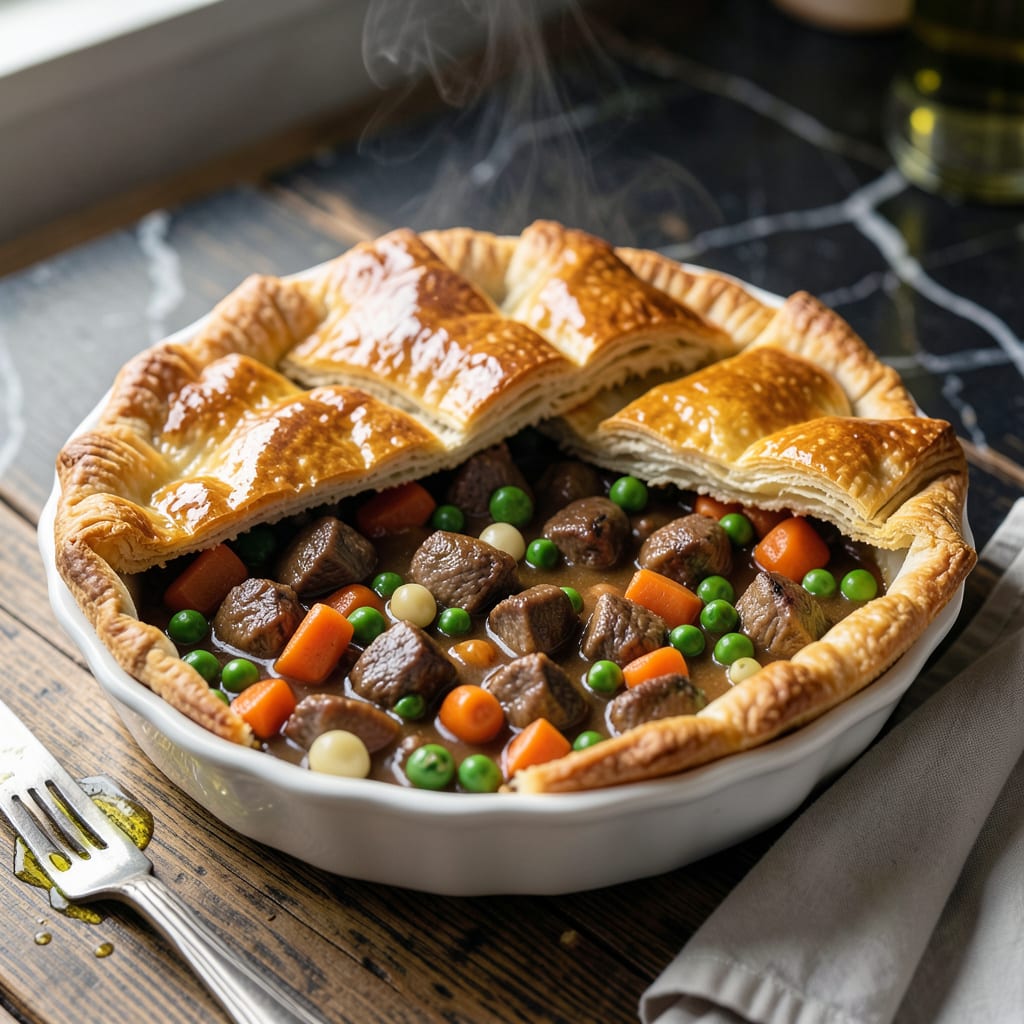
This recipe delivers a complete beef pot pie with a flaky crust, all made in your Instant Pot. No oven required.
The pressure cooker creates a rich, savory filling in a fraction of the time, while a simple technique ensures the crust stays perfectly golden and crisp. This method preserves all the comfort of the classic dish with modern convenience.
Ingredients for Instant Pot Beef Pot Pie
Classic comfort meets modern convenience with these hearty, well-seasoned ingredients for a complete dish.
| Ingredient | Amount | Notes |
|---|---|---|
| Beef Chuck 🥩 | 1 ½ lb | Cut into 1-inch cubes |
| All-Purpose Flour 🌾 | ⅓ cup | For thickening filling |
| Beef Broth 💧 | 2 cups | Low-sodium preferred |
| Frozen Mixed Vegetables 🥕 | 2 cups | Peas, carrots, corn, green beans |
| Yellow Onion 🧅 | 1 whole | Medium, finely diced |
| Garlic Cloves 🧄 | 3 cloves | Minced for depth |
| Worcestershire Sauce 🍶 | 1 tbsp | Adds umami richness |
| Dried Thyme 🌿 | 1 tsp | Or fresh thyme doubled |
| Dried Rosemary 🍃 | 1 tsp | Crushed for better flavor |
| Salt 🧂 | 1 tsp | Kosher or sea salt |
| Black Pepper 🌶️ | ½ tsp | Freshly ground preferred |
| Refrigerated Pie Crust 🥧 | 2 sheets | For top and bottom crust |
| Butter 🧈 | 2 tbsp | Unsalted, for sautéing |
| Egg 🥚 | 1 whole | For egg wash finishing |
The beef is the foundation. Chuck roast is ideal for its marbling and tenderness after pressure cooking—avoid lean cuts like sirloin. Most supermarkets carry pre-cubed stew meat, which saves time. For best results, pat the beef dry before browning to ensure a good sear. Costco offers excellent quality beef at a good price if you’re making a larger batch.
No beef broth on hand? Beef bouillon cubes dissolved in water work in a pinch. Fresh thyme and rosemary can replace dried at a 3:1 ratio. If avoiding Worcestershire sauce, substitute with soy sauce plus a pinch of sugar for similar depth. The frozen vegetable mix is flexible—use whatever medley you have, just keep the total volume at 2 cups.
Store raw beef in the fridge for up to 3 days or freeze for 6-12 months. The pie crust can be kept in the fridge until ready to use—check the package for exact expiration dates. Leftovers keep well in the fridge for 4-5 days or can be frozen for 3 months.
Why You’ll Love This Recipe
- Set It & Forget: The instant pot does all the heavy lifting—just brown the beef chuck, toss in the rest, and let it work its magic.
- Rich Beefy Depth: The beef broth and chuck roast simmer together into this ridiculously good, savory filling that makes the flaky crust sing.
- Feeds the Freezer: I always double the batch—leftovers freeze beautifully for those nights I just can’t even.
- Pantry Hero: Between us, I keep frozen veggies and beef broth on hand specifically for this. No last-minute grocery runs.
Step-by-Step Instructions for Instant Pot Beef Pot Pie
This method ensures a rich, savory filling topped with perfectly flaky crust every time.
Step 1: Sauté Aromatics and Brown the Beef
Set your Instant Pot to the Sauté function on Normal/Medium heat. Add the 2 tbsp Butter and let it melt completely. Immediately add the finely diced Yellow Onion and cook for 3-4 minutes until softened and translucent.
Add the 1.5 lb Beef Chuck cut into 1-inch cubes in a single layer. Let it sear undisturbed for 3-4 minutes until deeply browned on all sides. Stir in the minced Garlic Cloves and cook for 30 seconds until fragrant. This browning step builds the deep flavor foundation for your filling.
Step 2: Build the Filling and Pressure Cook
Sprinkle the 0.33 cup All-Purpose Flour evenly over the beef and stir to coat all pieces. This creates a roux that will thicken your filling beautifully. Pour in the 2 cups Beef Broth, 1 tbsp Worcestershire Sauce, 1 tsp Dried Thyme, 1 tsp Dried Rosemary, 1 tsp Salt, and 0.5 tsp Black Pepper.
Stir well, scraping the bottom of the pot to deglaze and release all those flavorful browned bits. Add the 2 cups Frozen Mixed Vegetables and stir to combine. Secure the lid, set the valve to Sealing, and cook on High Pressure for 20 minutes. The filling should be thick and bubbly when done.
Step 3: Prepare the Crust and Assemble
While the filling cooks, unroll the 2 sheets Refrigerated Pie Crust and let them sit at room temperature for 10-15 minutes. This makes them more pliable and easier to work with. Cut one sheet into a circle that fits the diameter of your Instant Pot liner.
Once the pressure cooking completes, perform a quick release and carefully remove the lid. The beef should be fork-tender and the vegetables soft. Stir the filling one more time to ensure everything is well combined and evenly distributed.
Step 4: Add the Crust and Finish
Place the circular pie crust on top of the filling, pressing the edges down slightly so they touch the liquid. This helps the crust adhere and prevents it from sliding around. In a small bowl, beat the 1 whole Egg and brush it generously over the crust for a golden finish.
Secure the lid again and cook on High Pressure for 5 minutes to steam the crust. Perform another quick release, then carefully remove the lid. The crust should be golden brown and flaky. Let the pot pie rest for 5 minutes before serving to allow the filling to set slightly.
Pro Tips For Making Instant Pot Beef Pot Pie
- Brown the Beef Well: Sear the beef chuck in batches—don’t crowd the pot—until it’s deeply browned on all sides. I learned this the hard way: skipping this step leaves the filling bland, even with good broth.
- Thicken Last: Stir in the flour slurry only after pressure cooking, then simmer uncovered for 3-5 minutes. Adding it too early can clog the valve or leave a raw flour taste.
- Skip Frozen Onions: Use fresh yellow onion and sauté it with the beef. Frozen onions release too much water and turn mushy, thinning the filling.
- Quick Crust Hack: Press store-bought pie dough onto the pot pie filling after cooking, then broil for 4-5 minutes. It’s not traditional, but it saves time and still gives that buttery top layer.
Flavor Customization for This Dish
Herb Infusions
Swap the dried thyme and rosemary for 1 tbsp fresh rosemary and 1 tbsp fresh tarragon for a more aromatic profile. I love how tarragon adds a subtle anise note that pairs beautifully with the beef. 🌿
Spicy Kick
Add ½ tsp cayenne pepper or 1 diced jalapeño when sautéing the onions for a spicy twist. The heat balances the richness of the filling without overpowering it. For extra depth, include 1 tsp smoked paprika for a smoky undertone.
Mushroom Boost
Stir in 1 cup sliced mushrooms with the frozen vegetables for an earthy flavor and meatier texture. Cremini or baby bella mushrooms work best. Sauté them first for 3 minutes to remove excess moisture before pressure cooking.
Cheese Topping
Sprinkle ½ cup shredded cheddar or Gruyère cheese over the crust before the final 5-minute pressure cook. This creates a gooey, golden cheese layer that’s irresistible. I prefer sharp cheddar for its bold flavor.
Alternatively, mix ¼ cup grated Parmesan into the egg wash for a crispy, savory topping. 🧀
Wine Enhancement
Deglaze the pot with ¼ cup dry red wine instead of some broth for added complexity. A bold Cabernet Sauvignon or Pinot Noir works wonders. Simmer for 2 minutes before adding the remaining liquid to cook off the alcohol.
Nutrition Facts
Frequently Asked Questions
Can I use stew meat instead of chuck?
Yes! Stew meat is pre-cut chuck, making it a perfect substitute. Just ensure pieces are 1-inch cubes for even cooking.
Why did my filling turn out watery?
This usually means not enough thickening.
Can I make this ahead of time? Prepare the filling and refrigerate for up to 2 days. Add crust and cook just before serving.
How do I prevent a soggy crust?
Press crust edges into the filling liquid and brush with egg wash. The 5-minute steam time is key for crispness.

- 4C Bread Crumbs Meatballs Recipe: Crispy Crust and Juicy Centers - September 25, 2026
- 6 Oz Chocolate Chip Cookie Recipe: Perfectly Balanced Crispy Edges and Chewy Hearts - September 25, 2026
- 6-Inch Coffee Cake Recipe: Vanilla Bean Swirls and Buttery Streusel Topping - September 25, 2026