
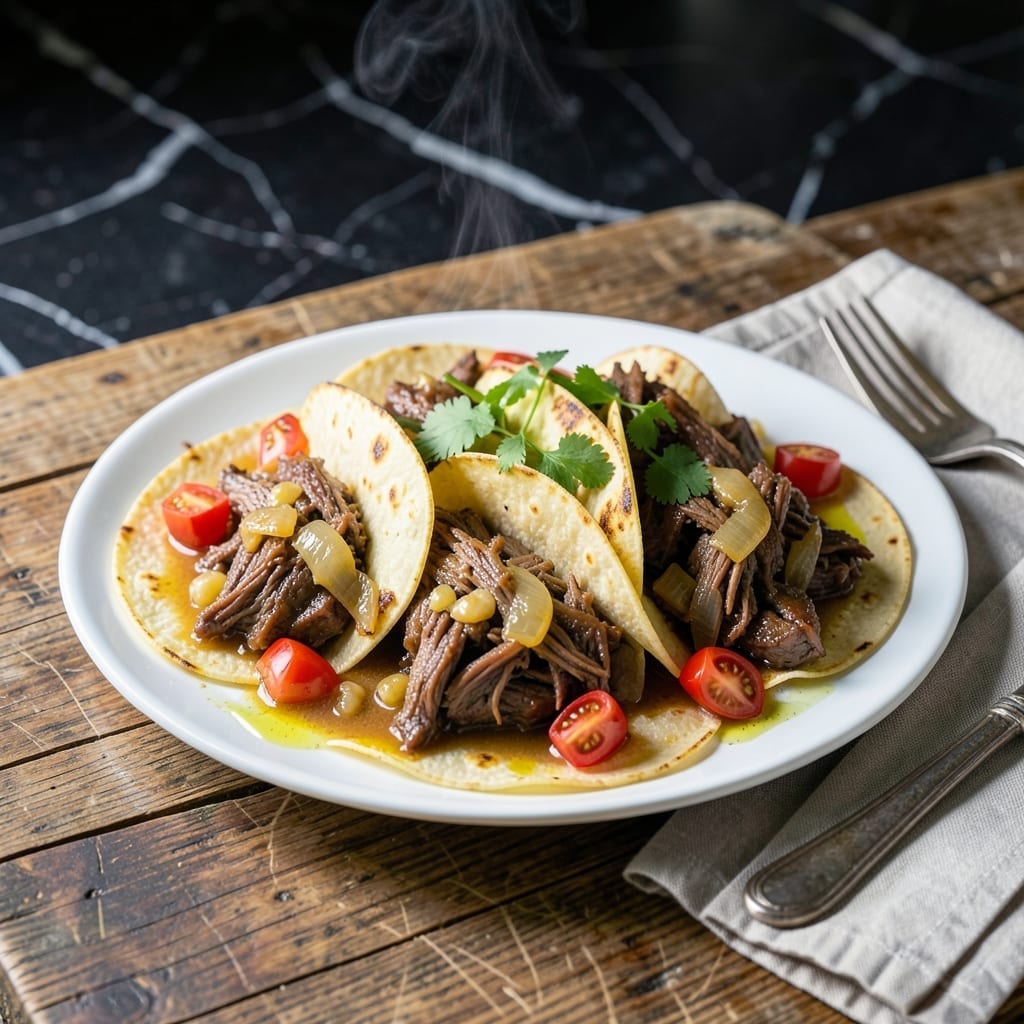
There’s a reason pot roast tacos have become a weekend favorite in my kitchen. This method transforms tough cuts of beef into tender, flavorful filling that’s perfect for warm tortillas.
The slow cooking process breaks down the meat until it shreds effortlessly, while a blend of spices infuses every bite with depth. No fancy techniques—just time and the right balance of ingredients.
What you get is a dish that’s hearty, satisfying, and far more impressive than the effort required. The beef soaks up the cooking liquid, ensuring each taco is packed with moisture and rich taste.
Serve with your choice of toppings for a meal that feels special without the fuss. Here’s how to make it.
Ingredients for Pot Roast Tacos
Transform tough beef into tender taco filling with these flavor-packed ingredients.
| Ingredient | Amount | Notes |
|---|---|---|
| Beef Chuck Roast 🥩 | 2 lb | Well-marbled, trimmed of excess fat |
| Olive Oil 🫒 | 2 tbsp | Divided for searing and cooking |
| Yellow Onion 🧅 | 1 whole | Diced into small pieces |
| Garlic Cloves 🧄 | 4 cloves | Minced for maximum flavor |
| Beef Broth 🥣 | 2 cups | Low-sodium preferred |
| Diced Tomatoes 🍅 | 1 can | 14.5 oz can, with juices |
| Ground Cumin 🌿 | 1 tbsp | Toasted for deeper aroma |
| Smoked Paprika 🌶️ | 1 tsp | Adds rich, smoky depth |
| Dried Oregano 🍃 | 1 tsp | Mexican oregano if available |
| Bay Leaves 🌿 | 2 pieces | Whole, removed before serving |
| Salt 🧂 | 1 ½ tsp | Kosher salt for even seasoning |
| Black Pepper 🌶️ | 1 tsp | Freshly ground preferred |
| Corn Tortillas 🌮 | 12 pieces | Warmed before serving |
| Fresh Cilantro 🌿 | ½ cup | Chopped, for garnish |
| Lime 🍋 | 1 whole | Cut into wedges for serving |
The beef is the star here. Chuck roast is ideal—it has the fat marbling that renders down during slow cooking, giving you that melt-in-your-mouth texture. I grab mine from Costco when I can, but any well-stocked supermarket will have it. Look for pieces with good fat distribution (not one giant chunk of fat on one side). If you see ‘chuck shoulder’ or ‘chuck arm,’ those work too.
No chuck roast? Brisket or bottom round can work in a pinch, but they need even more time to get tender. For the broth, low-sodium lets you control the salt level—Better Than Bouillon is my go-to for depth. Swap fresh tomatoes for canned if they’re in season, but add a pinch of sugar to balance acidity. The spices? Toast your cumin and paprika in a dry pan for 30 seconds to wake them up.
Leftovers taste even better the next day—store in an airtight container for up to 4 days. The beef freezes beautifully for 3 months. Reheat gently with a splash of broth to keep it moist. Tortillas are best warmed just before serving (30 seconds per side in a dry pan).
Why You’ll Love This Recipe
- One Pot Wonder: I brown the chuck roast in the same pot where it slow cooks with onions and garlic—no extra dishes.
- Fallback Flavor: The beef broth and garlic turn the meat so tender and rich, it’s ridiculous.
- Feeds a Crowd: I make a big batch for Sunday dinner, and everyone goes back for seconds.
- Lunch All Week: Honestly, the leftovers taste even better in tacos the next day.
Step-by-Step Instructions for Slow-Cooked Beef Tacos
Here’s the method that turns tough beef into tender, flavorful filling for perfect tacos.
Step 1: Sear the Beef Chuck Roast
Heat 1 tbsp Olive Oil in a large Dutch oven over medium-high heat until it shimmers. Pat the 2 lb Beef Chuck Roast dry with paper towels—this prevents steaming and ensures a good sear. I like to season it aggressively on all sides with 1.5 tsp Salt and 1 tsp Black Pepper.
Sear the roast for 4-5 minutes per side until deep golden brown. You’ll know it’s ready to flip when it releases easily from the pan. Don’t rush this step—browning creates the foundation of flavor for the entire dish. Transfer the seared beef to a plate and set aside.
Step 2: Sauté Aromatics and Build the Braising Liquid
In the same pot, add the remaining 1 tbsp Olive Oil if needed. Sauté the diced 1 whole Yellow Onion for 3-4 minutes until softened and just starting to brown. Add the minced 4 cloves Garlic Cloves and cook for 30 seconds until fragrant—don’t let it burn.
Pour in the 2 cups Beef Broth and 1 can Diced Tomatoes (with juices), then stir in the 1 tbsp Ground Cumin, 1 tsp Smoked Paprika, 1 tsp Dried Oregano, and 2 pieces Bay Leaves. The liquid should come to a gentle simmer. Return the beef to the pot, ensuring it’s mostly submerged.
Step 3: Slow-Cook Until Fork-Tender
Cover the pot and reduce heat to maintain a gentle simmer. Cook for 2.5 to 3 hours, turning the beef occasionally, until it shreds easily with a fork. You’ll know it’s ready when the meat pulls apart with minimal effort and the liquid has reduced slightly.
I check the beef after 2 hours—if it’s not tender yet, give it more time. The cooking time can vary depending on the cut and your stove. Remove the Bay Leaves before the next step. This slow cooking transforms the tough chuck roast into melt-in-your-mouth perfection.
Step 4: Shred the Beef and Reduce the Sauce
Transfer the beef to a cutting board and shred it using two forks. Discard any large pieces of fat. While the beef rests, bring the cooking liquid to a boil over medium-high heat and cook for 5-7 minutes until it thickens slightly into a rich, flavorful sauce.
Return the shredded beef to the pot and stir to combine with the sauce. Taste and adjust seasoning if needed. The beef should be well-coated and the sauce should cling to it beautifully. This step ensures every bite is packed with the deep, complex flavors you’ve built.
Step 5: Serve in Warm Tortillas
Warm the 12 pieces Corn Tortillas in a dry skillet over medium heat for 20-30 seconds per side until soft and pliable. Fill each tortilla with the shredded beef and garnish with chopped 0.5 cup Fresh Cilantro and a squeeze of juice from the 1 whole Lime. Serve immediately while warm.
The tortillas should be just warm enough to hold their shape but still flexible. The bright cilantro and lime cut through the richness of the beef, balancing each bite perfectly. This is where all your effort pays off in delicious, tender tacos.
Pro Tips For Making Pot Roast Tacos
- Sear the Chuck: Get your pan screaming hot before adding the beef chuck roast—about 2 tablespoons of olive oil should shimmer. A deep brown crust on all sides takes 3-4 minutes per side and locks in way more flavor than a pale sear.
- Don’t Rush the Braise: After adding beef broth, cover and keep it at a gentle simmer, not a rolling boil. I learned this the hard way—boiling toughens the meat, while a slow 2.5-3 hour braise turns it fork-tender.
- Slice Against the Grain: Once the chuck roast is cooked, let it rest 10 minutes, then slice thinly against the grain. This shortens the muscle fibers so your tacos aren’t chewy, even if the cut wasn’t perfect.
- Boost with Onion: Sauté the yellow onion until deeply caramelized before adding garlic—about 8-10 minutes on medium-low. Sounds tedious, but it adds a sweet, rich base that plain raw onion just can’t match.
Dietary Considerations for This Dish
Gluten-Free Option
This recipe is naturally gluten-free when using corn tortillas—just verify they’re labeled certified gluten-free. I always check Mission or La Tortilla Factory brands. The beef and all seasonings are inherently safe, but watch for cross-contamination if you use shared surfaces. 💪
Dairy-Free Friendly
The base recipe contains no dairy, making it perfect for dairy-free diets. If you’re adding cheese, opt for dairy-free alternatives like Violife or Daiya shreds. The beef is so flavorful, most people don’t miss traditional cheese at all.
Low-Carb Adaptation
Skip the tortillas and serve the beef over cauliflower rice or in butter lettuce cups. Each lettuce wrap holds about ¼ cup of filling. I love this version for a lighter meal that still satisfies.
Keto Version
Follow the low-carb adaptation but add 1 tbsp avocado oil to the cooking liquid for extra healthy fats. Top with diced avocado and sour cream instead of cilantro and lime. This keeps net carbs under 5g per serving. ⚡
Nut Allergies
This recipe is naturally nut-free. Just ensure your spices and broth aren’t processed in facilities with nuts. I always use McCormick spices for their clear allergen labeling. The risk here is minimal with whole ingredients.
Soy-Free Considerations
Most beef broth contains soy, so use a soy-free version like Imagine Foods or make your own. The rest of the ingredients are naturally soy-free. This simple swap keeps the dish safe for soy allergies.
Nutrition Facts
Frequently Asked Questions
What’s the best cut for tender beef filling?
Chuck roast is ideal due to its fat marbling, which melts during cooking. For best results, look for well-marbled pieces with fat evenly distributed.
Can I use a slow cooker instead of a Dutch oven?
Yes! Sear the beef first, then transfer everything to a slow cooker. Cook on low for 8 hours or high for 5-6 hours until fork-tender.
How do I prevent soggy tortillas?
Warm tortillas just before serving and keep them covered with a clean towel. Fill them right before eating to maintain texture.
What toppings pair well with these tacos?
Classic choices include diced onions, avocado, pickled jalapeños, and cotija cheese. Fresh lime and cilantro add brightness to each bite.

- 4C Bread Crumbs Meatballs Recipe: Crispy Crust and Juicy Centers - September 25, 2026
- 6 Oz Chocolate Chip Cookie Recipe: Perfectly Balanced Crispy Edges and Chewy Hearts - September 25, 2026
- 6-Inch Coffee Cake Recipe: Vanilla Bean Swirls and Buttery Streusel Topping - September 25, 2026