
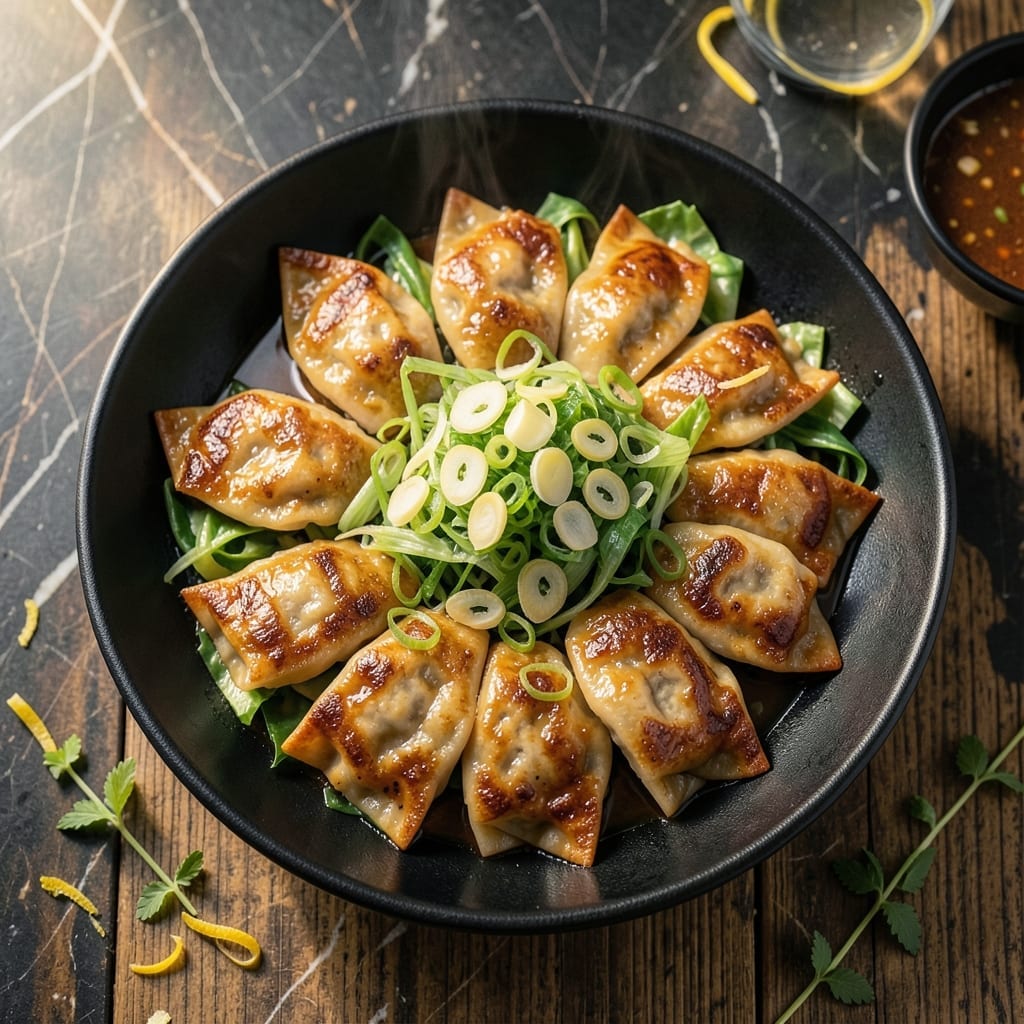
These pan-fried dumplings deliver crispy bottoms with tender, juicy centers every time. I developed this method after years of trial and error, perfecting the balance between golden sear and proper steaming.
The secret lies in the two-stage cooking process. First, a hot pan creates that essential crispy crust. Then, a quick steam finishes the cooking, ensuring the filling stays moist and flavorful.
Each bite offers the perfect contrast of textures—shatteringly crispy where it meets the pan, soft and yielding inside. The filling stays intact while absorbing the subtle flavors from the cooking process.
Serve immediately with your favorite dipping sauce for the ultimate experience. The results speak for themselves.
Ingredients for Pot Sticker Dinner
Pantry staples meet fresh ingredients for that perfect crispy texture every time.
| Ingredient | Amount | Notes |
|---|---|---|
| Ground Pork 🥩 | 1 lb | Or substitute ground chicken |
| Napa Cabbage 🥬 | 2 cups | Finely shredded, salted |
| Green Onions 🧅 | ½ cup | Thinly sliced, white and green parts |
| Garlic Cloves 🧄 | 3 cloves | Minced finely |
| Fresh Ginger 🌿 | 1 tbsp | Grated or minced |
| Soy Sauce 🫒 | 2 tbsp | Low-sodium preferred |
| Sesame Oil 🫒 | 1 tbsp | Toasted for best flavor |
| Rice Vinegar 🍚 | 1 tbsp | Or apple cider vinegar |
| Pot Sticker Wrappers 🥟 | 30 pieces | Round, store-bought or homemade |
| Neutral Oil 🫒 | 2 tbsp | For pan-frying, like vegetable or canola |
| Cornstarch 🌾 | 1 tbsp | For water slurry |
| Water 💧 | ½ cup | For steaming and slurry |
| Salt 🧂 | ½ tsp | Plus more to taste |
| Black Pepper 🌶️ | ¼ tsp | Freshly ground |
The pork is the base here—ground pork shoulder has the right fat ratio for juicy filling. Napa cabbage is essential for texture (regular cabbage works but lacks the same tenderness). Find both at H-Mart or any Asian grocery with a good meat section. Fresh ginger and garlic are non-negotiable; pre-minced in jars just doesn’t cut it for flavor.
No pork? Ground chicken or turkey work well (just add an extra splash of sesame oil). Tofu crumbles if you want vegetarian. Swap soy sauce for tamari if gluten-free. The pot sticker wrappers can be wonton wrappers in a pinch—they’re thicker but still crisp up nicely. For extra flavor, add a dash of hoisin sauce to the filling mix.
Fill and freeze uncooked dumplings on a tray before bagging—they’ll keep for 3 months. Cook from frozen (add a minute to steam time). Leftovers? Reheat in a dry pan to re-crisp the bottoms. Always serve hot with a dipping sauce of soy, vinegar, and chili oil.
Why You’ll Love This Recipe
- One Pan Magic: I love that I can fold, sear, and steam everything in a single skillet—minimal cleanup, maximum flavor.
- Umami Bomb: The pork, garlic, and ginger combo hits that perfect savory-sweet balance that’s honestly hard to resist.
- Weeknight Hero: Between us, this is my go-to when I need dinner on the table fast but still want it to feel special.
- Budget Stretcher: Ground pork and cabbage go a long way, and leftovers taste even better the next day.
Step-by-Step Instructions for Pot Sticker Dinner
Here’s the method for achieving that perfect crispy-bottom texture we’re all after.
Step 1: Prepare the Filling Mixture
In a large bowl, combine the 1 lb Ground Pork with 2 cups Napa Cabbage, 0.5 cup Green Onions, 3 cloves Garlic Cloves, and 1 tbsp Fresh Ginger. I like to use my hands for this—it’s the best way to ensure everything blends evenly without overworking the meat.
Add the 2 tbsp Soy Sauce, 1 tbsp Sesame Oil, 1 tbsp Rice Vinegar, 0.5 tsp Salt, and 0.25 tsp Black Pepper. Mix gently but thoroughly until the filling is uniformly combined. The mixture should be sticky but not wet—this consistency ensures the dumplings hold together during cooking.
Step 2: Assemble the Pot Stickers
Place a Pot Sticker Wrapper on a clean surface and add 1 tablespoon of filling to the center. I’ve found that using a small spoon or cookie scoop makes this process faster and more consistent. Be careful not to overfill—this is the most common mistake that leads to dumplings bursting open while cooking.
Dip your finger in the 0.5 cup Water and trace it around the edge of the wrapper to moisten. Fold the wrapper in half to create a half-moon shape, then pinch and pleat the edges to seal completely. Press firmly at the center first, then work your way out to the edges to remove any air pockets. Repeat with the remaining 30 pieces Pot Sticker Wrappers and filling.
Step 3: Pan-Fry to Crispy Perfection
Heat 1 tbsp Neutral Oil in a large non-stick skillet with a lid over medium-high heat until it shimmers. Arrange the pot stickers in a single layer, not touching, and cook undisturbed for 3-4 minutes until the bottoms are deep golden brown and crispy. You’ll hear them sizzling—this is the sound of that perfect crust forming.
While they cook, mix the remaining 1 tbsp Neutral Oil, 1 tbsp Cornstarch, and 0.5 cup Water to create a slurry. This will help thicken the sauce and prevent the dumplings from sticking as they steam.
Step 4: Steam and Finish
Carefully pour the cornstarch slurry around the edges of the pan—don’t pour it directly over the pot stickers. Immediately cover with a tight-fitting lid and reduce heat to medium. Let them steam for 6-8 minutes until the wrappers are translucent and the filling is cooked through.
Remove the lid and cook for an additional 1-2 minutes to crisp the bottoms again. The pot stickers are done when the liquid has mostly evaporated and the bottoms are crispy and browned. Transfer to a serving plate, crispy side up, and serve immediately with your favorite dipping sauce.
Pro Tips For Making Pot Sticker Dinner
- Pre-cook the cabbage: Salt the shredded napa cabbage, let it sit for 10 minutes, then squeeze out all the water—I learned this the hard way after my first few batches turned into soggy dumplings.
- Chill the filling: Pop the pork mixture in the fridge for 20 minutes before wrapping. It makes the filling way easier to handle and prevents the wrappers from tearing.
- Skip the overcrowding: Leave at least an inch between each pot sticker in the pan, or they’ll steam instead of crisp. Sounds obvious, but I still have to remind myself every time.
- Use a lid: Cover the pan after browning to trap steam—this guarantees the tops cook through while the bottoms get that perfect golden crust. About 5 minutes does the trick.
Make-Ahead Tips for Leftovers
Prep Ahead Strategy
I always mix the filling up to 24 hours ahead and refrigerate. This gives the flavors time to meld beautifully. Just cover it tightly with plastic wrap or transfer to an airtight container. The cabbage will release some liquid—this is normal and actually helps keep the filling moist during cooking. 💡
Freeze for Later
Assemble the dumplings and freeze them in a single layer on a baking sheet. Once frozen solid (about 1-2 hours), transfer to a zip-top bag. They’ll keep for 3 months. When ready to cook, don’t thaw—just add 1-2 minutes to the steaming time.
Fridge Storage
Uncooked assembled pot stickers can sit in your fridge for up to 12 hours before cooking. Place them on a tray, cover loosely with a damp towel to prevent drying out. Cook them straight from the fridge—no need to bring to room temperature first.
Reheating Leftovers
Store cooked pot stickers in an airtight container for up to 3 days. To reheat, place in a dry non-stick pan over medium heat for 2-3 minutes until the bottoms crisp again. Add 2 tbsp water and cover to steam for 1 minute to refresh the filling.
Batch Cooking
I often double the recipe and cook in batches. Keep finished pot stickers warm on a wire rack in a 200°F oven while you cook the rest. This prevents them from getting soggy. Serve all at once for a crowd-pleasing meal.
Nutrition Facts
Frequently Asked Questions
Can I use other proteins besides pork?
Try ground chicken or turkey for a lighter option. For a vegetarian version, tofu crumbles or finely chopped mushrooms work well. Just add an extra splash of sesame oil for flavor.
How do I prevent them from sticking to the pan?
Use a non-stick skillet and medium-high heat. Don’t move them once placed in the pan—let them sear undisturbed for 3-4 minutes to form a crispy crust. The cornstarch slurry also helps prevent sticking.
What’s the best way to fold them?
Moisten the edges with water, then fold in half. Pinch the center first, then pleat outward, pressing firmly to seal. Avoid overfilling—they should look like a half-moon with a sturdy edge.
How can I make them extra crispy?
After steaming, uncover the pan and cook for an additional 1-2 minutes on medium-high heat. This second crisping step ensures maximum crunch. Serve immediately for best texture.

- 6 Oz Chocolate Chip Cookie Recipe: Perfectly Balanced Crispy Edges and Chewy Hearts - September 25, 2026
- 6-Inch Coffee Cake Recipe: Vanilla Bean Swirls and Buttery Streusel Topping - September 25, 2026
- 1 Hour Soup Recipe: Velvety Richness Without the Wait - September 25, 2026