
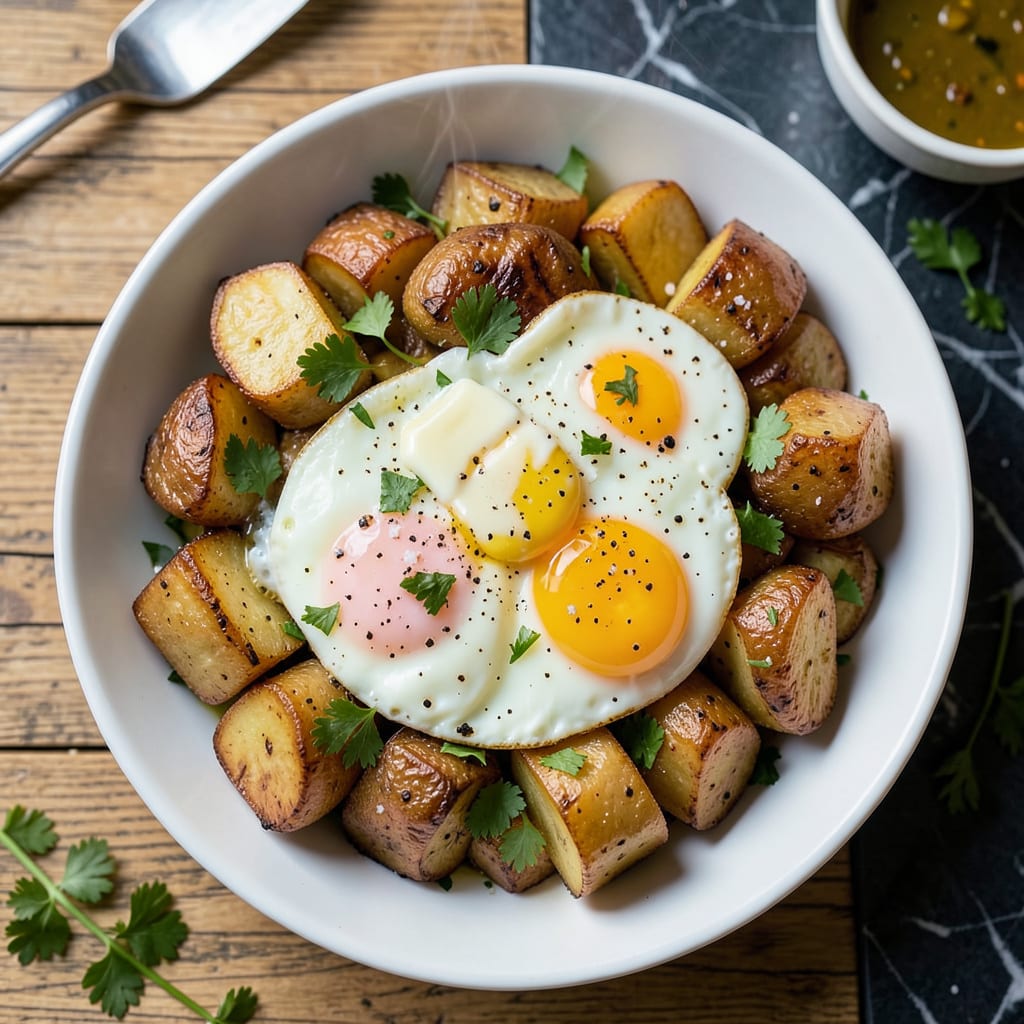
There’s something deeply satisfying about a perfectly executed potato and egg hash—where golden, crispy potatoes meet rich, runny yolks in every bite. This recipe transforms simple ingredients into a breakfast that feels special enough for weekends but remains practical for busy mornings. The technique ensures consistent results: evenly browned potatoes with tender centers and eggs cooked just until the whites set while yolks stay luscious.
The secret lies in par-cooking the potatoes before they hit the pan, creating that ideal crispy exterior without burning. I’ve refined this method through countless trials to achieve the perfect balance—potatoes that hold their shape yet develop a satisfying crunch, paired with eggs that add creamy richness. Serve this hash as is or customize with fresh herbs, cheese, or a dash of hot sauce for extra flair.
Ingredients for Potato and Eggs
This recipe transforms humble potatoes and eggs into a breakfast masterpiece with crispy edges and luscious yolks.
| Ingredient | Amount | Notes |
|---|---|---|
| Yukon Gold Potatoes 🥔 | 1 ½ lb | Diced into 1/2-inch cubes |
| Large Eggs 🥚 | 4 whole | Room temperature preferred |
| Extra-Virgin Olive Oil 🫒 | 3 tbsp | Divided for par-cooking and frying |
| Unsalted Butter 🧈 | 2 tbsp | For finishing crispiness |
| Kosher Salt 🧂 | 1 tsp | Diamond Crystal preferred |
| Freshly Ground Black Pepper 🌶️ | ½ tsp | Coarse grind recommended |
| Garlic Cloves 🧄 | 2 cloves | Minced for aromatic base |
| Yellow Onion 🧅 | ½ whole | Small dice for even cooking |
| Fresh Flat-Leaf Parsley 🌿 | 2 tbsp | Chopped for garnish |
| Shredded Cheddar Cheese 🧀 | ½ cup | Sharp cheddar recommended |
| Hot Sauce 🔥 | 1 tsp | Optional for serving |
The potatoes are the foundation—Yukon Golds offer the ideal balance of starch and moisture for that perfect crispy-yet-tender texture. Par-cooking in salted water is non-negotiable; it removes excess starch and ensures even browning. Diamond Crystal kosher salt provides precise seasoning without overpowering. For the eggs, room temperature ensures even cooking and prevents rubbery whites. Whole Foods and Trader Joe’s consistently carry high-quality organic eggs with vibrant yolks that elevate the dish.
Substitutions must preserve the texture balance. Russet potatoes can replace Yukon Golds but require longer par-cooking to prevent dryness. For a dairy-free version, nutritional yeast mimics cheddar’s umami at a one-to-one ratio. The butter can be replaced with avocado oil for higher smoke point, though flavor will be less rich. Fresh chives or scallions work equally well as parsley garnish, while smoked paprika adds depth if omitting cheese entirely.
Prepped potatoes can be refrigerated in cold water for up to 24 hours—drain and pat dry before cooking. Cooked hash keeps 3-4 days refrigerated but is best enjoyed immediately for optimal texture. Reheat gently in a skillet with a splash of water to restore crispiness. For meal prep, cook potatoes through step 4, then refrigerate; finish with eggs fresh for serving. The cheese is best added just before serving to maintain melt quality.
Why You’ll Love This Recipe
- One-Pan Magic: Honestly, I love that this comes together with just a skillet, a spatula, and zero fancy tools. The potatoes crisp in the butter and oil while the eggs cook right alongside—no extra bowls, no mess.
- That Golden Crisp: Here’s what sold me—the Yukon Golds get this buttery, caramelized crust on the outside while staying fluffy inside, and when you crack an egg over them? The yolk soaks into the warm potatoes like a built-in sauce.
- Breakfast-for-Dinner Hero: I’ve served this for lazy Sunday brunches, rushed weeknight dinners (yes, even on a Tuesday night), and even as a side at potlucks. It’s the kind of dish that works whether you’re feeding picky kids or impressing your in-laws.
- Five-Ingredient Budget Win: Between us, this costs me about $3 total, and I almost always have the ingredients on hand. Leftovers? Still delicious cold the next day—toss them in a tortilla with hot sauce, and suddenly you’ve got lunch.
Step-by-Step Instructions for Potato and Eggs Hash
This method delivers perfectly crispy potatoes and eggs with runny yolks—every time.
Step 1: Par-Cook the Diced Potatoes
Place the diced Yukon Gold potatoes in a large microwave-safe bowl. Add 2 tablespoons of the extra-virgin olive oil, ½ teaspoon of the kosher salt, and ¼ teaspoon of the freshly ground black pepper. Toss thoroughly to coat each piece evenly.
Microwave uncovered on high power for 5 minutes, then stir well. Microwave for another 3-4 minutes until the potatoes are just tender when pierced with a fork but not fully cooked. This par-cooking step ensures the potatoes will crisp up beautifully in the pan without burning.
Step 2: Build the Flavor Base
Heat the remaining 1 tablespoon of extra-virgin olive oil in a large nonstick skillet over medium heat. Add the diced yellow onion and cook for 3-4 minutes until softened and beginning to turn translucent.
Add the minced garlic cloves and cook for an additional 30 seconds until fragrant. Immediately add the par-cooked potatoes to the skillet, spreading them in an even layer. Increase heat to medium-high and cook undisturbed for 4-5 minutes to develop a crispy crust.
Step 3: Create the Crispy Hash Foundation
Using a thin metal spatula, flip the potato mixture in sections, scraping up any browned bits from the bottom. Add the 2 tablespoons of unsalted butter and the remaining ½ teaspoon of kosher salt and ¼ teaspoon of black pepper.
Continue cooking for another 5-7 minutes, stirring occasionally, until the potatoes are deep golden brown and crispy. The butter will help create that perfect crust while adding rich flavor. Sprinkle the shredded cheddar cheese over the hash and let it melt for 1 minute before proceeding.
Step 4: Cook the Eggs to Perfection
Using the back of a spoon, create four shallow wells in the hash mixture. Crack each of the large eggs into a small bowl first (to check for shell fragments), then carefully pour each egg into a well.
Cover the skillet and cook for 4-5 minutes on medium-low heat until the egg whites are set but the yolks remain runny. The steam trapped under the lid will help cook the tops of the eggs gently while keeping the yolks liquid.
Step 5: Finish and Serve Immediately
Remove from heat and let rest for 1 minute before garnishing with the chopped fresh flat-leaf parsley. The residual heat will continue cooking the eggs slightly while allowing the flavors to meld.
Serve immediately with the hot sauce on the side for those who want an extra kick. Each serving should have crispy potatoes, melted cheese, and an egg with a perfectly runny yolk that can be broken into the hash for additional richness.
Common Mistakes When Making This Dish
Skipping Par-Cooking
I can’t stress this enough—raw potatoes straight into the pan will never get that perfect crispy exterior without burning. The par-cooking step in the microwave (or boiling) removes excess starch and ensures even cooking. Without it, you’ll end up with potatoes that are either undercooked inside or burnt outside. Trust me, those extra 8-9 minutes make all the difference. 🌡️
Overcrowding the Pan
When you dump all the potatoes into a crowded skillet, they steam instead of crisp. Use a 12-inch nonstick skillet for this recipe—it gives the potatoes enough space to develop that golden crust. If your pan is too small, cook in batches. I learned this the hard way when my first attempt turned into potato mush.
High Heat Impatience
Cranking the heat to high might seem faster, but it’s a recipe for burnt potatoes and raw centers. Stick to medium-high heat after the initial sear. The potatoes need time to develop that perfect texture—about 12-15 minutes total in the pan. Rushing this step sacrifices crispiness for speed.
Neglecting the Egg Wells
Just cracking eggs directly onto the hash leads to runny whites and uneven cooking. Use the back of a spoon to create shallow wells in the potato mixture first. This contains the eggs and helps them cook evenly. I also recommend cracking eggs into a small bowl first to check for shell fragments—nothing ruins a perfect hash like biting into eggshell.
Forgetting the Lid
Leaving the skillet uncovered while cooking the eggs means the tops stay raw while the bottoms overcook. Covering traps steam to gently cook the egg whites while keeping yolks runny. Remove the lid after 4-5 minutes—you’ll see perfectly set whites with jiggly yolks. This simple step transforms good eggs into restaurant-quality results.
Improper Resting Time
Slicing into the hash immediately causes the eggs to break prematurely and the cheese to slide off. That 1-minute rest after removing from heat lets everything set just enough. I use this time to chop my parsley garnish or warm the plates. The residual heat continues cooking gently while you prepare to serve. ✨
Nutrition Facts
Frequently Asked Questions
Can I use a different type of potato?
Yes, but texture will vary. Russet potatoes work but need longer par-cooking to prevent dryness. Red potatoes stay firmer but won’t crisp as well. Stick with Yukon Golds for the ideal balance of creaminess and crispiness.
Why do my eggs turn out rubbery?
Overcooking is the culprit. Cover the skillet for only 4-5 minutes on medium-low heat. Remove immediately when whites set but yolks still jiggle. Room-temperature eggs also help prevent rubberiness.
Can I make this ahead of time?
Prep potatoes up to 24 hours ahead—store in cold water in the fridge. Cook the hash completely, then reheat gently in a skillet with a splash of water. Add eggs fresh for serving to maintain runny yolks.
What’s the best way to get extra-crispy potatoes?
Pat potatoes completely dry after par-cooking. Use butter + oil combo in the pan, and don’t stir too often. Let them sear undisturbed for 4-5 minutes before flipping for maximum crunch.
Can I use an air fryer for this recipe?
For potatoes only—air fry at 400°F for 12-15 minutes after par-cooking. Add eggs separately in a skillet, as air fryers won’t cook them properly with the hash.

- 8 Bean Soup Recipe Crock Pot: Hearty Vegetable Medley in One Pot - September 25, 2026
- 4C Bread Crumbs Meatballs Recipe: Crispy Crust and Juicy Centers - September 25, 2026
- 6 Oz Chocolate Chip Cookie Recipe: Perfectly Balanced Crispy Edges and Chewy Hearts - September 25, 2026