
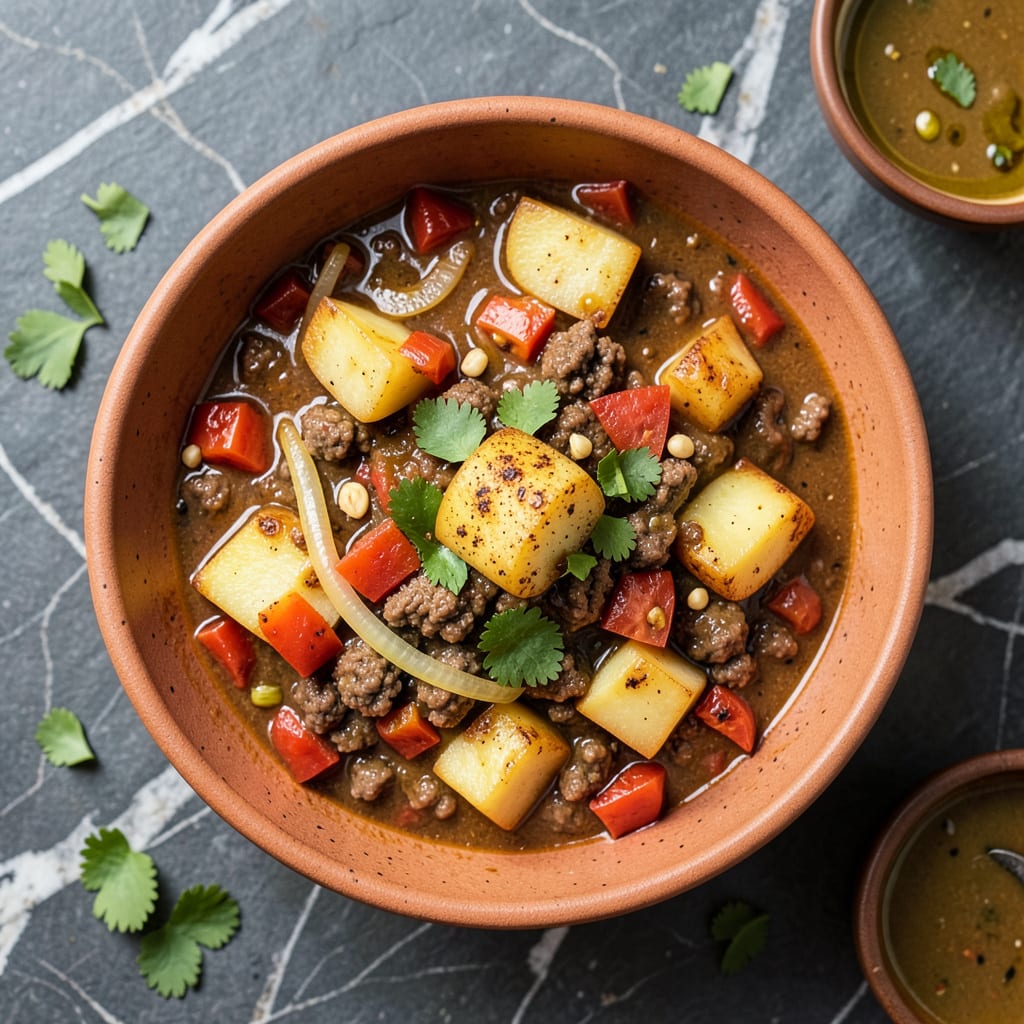
There’s something deeply satisfying about a bowl of potato chili that combines the heartiness of traditional chili with the comforting creaminess of potatoes. This recipe transforms simple ingredients into a rich, satisfying meal that warms you from the inside out. The potatoes break down slightly during cooking, creating a velvety texture that balances the robust flavors of spices and tomatoes.
The secret lies in layering flavors—browning the meat first, blooming the spices, and allowing everything to simmer until the potatoes reach perfect tenderness. Whether you’re feeding a crowd or meal prepping for the week, this chili delivers consistent comfort in every spoonful. Serve it with your favorite toppings for a meal that feels both homey and special.
Ingredients for Potato Chili
This comforting chili starts with Yukon Golds and pantry staples that transform into something truly special.
| Ingredient | Amount | Notes |
|---|---|---|
| Yukon Gold Potatoes 🥔 | 2 ½ lb | Diced into 1/2-inch cubes |
| Ground Beef 🥩 | 1 ½ lb | 85/15 lean-to-fat ratio |
| Yellow Onion 🧅 | 1 whole | Medium, finely diced |
| Red Bell Pepper 🌶️ | 1 whole | Cored, seeded, diced |
| Garlic Cloves 🧄 | 5 cloves | Minced for depth of flavor |
| Fire-Roasted Diced Tomatoes 🍅 | 2 cans | 14.5 oz each, undrained |
| Tomato Paste 🍅 | 3 tbsp | For concentrated umami |
| Vegetable Broth 💧 | 3 cups | Low-sodium preferred |
| Dark Kidney Beans 🫘 | 2 cans | 15 oz each, drained/rinsed |
| Chili Powder 🌶️ | 2 tbsp | Medium heat blend |
| Ground Cumin 🌿 | 1 ½ tsp | Freshly toasted ideal |
| Smoked Paprika 🌶️ | 1 tsp | For depth and warmth |
| Dried Oregano 🌿 | 1 tsp | Mexican variety preferred |
| Bay Leaves 🍃 | 2 whole | For aromatic simmering |
| Extra-Virgin Olive Oil 🫒 | 2 tbsp | For browning and depth |
The potatoes are everything here—Yukon Golds break down just enough to create that creamy texture the intro promised (trust me, russets stay too firm). For the beef, I go for 85/15 ground chuck at Whole Foods or Costco—leaner and it won’t dry out during the long simmer. The fire-roasted tomatoes? Muir Glen is my go-to brand; their charred flavor saves you from roasting fresh tomatoes yourself. And don’t skip the smoked paprika—it’s what gives this chili that deep, layered warmth.
No beef? Swap in extra-firm tofu (crumbled and browned first) or lentils (1 cup dried, cooked). Out of fire-roasted tomatoes? Regular diced tomatoes plus 1 tsp liquid smoke works in a pinch. The vegetable broth can be homemade or store-bought—I like Imagine No-Chicken for extra body. For the beans, Goya or Eden Organic are reliable brands. And if you’re missing a spice, just bump up what you have—chili powder can carry the load.
This chili tastes even better the next day once the potatoes soak up all the flavors. Store in airtight containers for up to 5 days in the fridge or freeze for 3 months. I like to portion it into 16-oz deli containers—perfect for lunches or quick dinners. The potatoes will thicken it as it sits, so you might need to add a splash of broth when reheating. Toppings stay freshest when added just before serving.
Why You’ll Love This Recipe
- One-Pot Magic: I love that everything—from browning the beef to simmering the potatoes—happens in a single pot. No extra dishes, no fuss, just a hearty meal with minimal cleanup.
- That Yukon Gold Trick: Here’s what sold me—the potatoes soak up all the beefy, garlicky flavor while keeping their creamy texture. It’s like a cross between chili and loaded baked potatoes, but better.
- Weeknight Lifesaver: Between soccer practice and late meetings, this is my go-to. Prep the veggies ahead, and dinner’s on the table in 35 minutes (yes, even on a Tuesday night).
- Stretches Like Crazy: A pound of beef and a few potatoes feed my family of four with leftovers for lunch. Honestly, it’s the rare recipe that’s both budget-friendly and filling enough to keep everyone happy.
Step-by-Step Instructions for Potato Chili
This hearty chili comes together with simple techniques that build layers of flavor in every bite.
Step 1: Brown the Ground Beef and Aromatics
Heat the 2 tbsp extra-virgin olive oil in a large Dutch oven over medium-high heat until it shimmers. Add the 1.5 lb ground beef and cook, breaking it up with a wooden spoon, until it develops a deep brown crust—this takes about 6-8 minutes. The key here is patience; don’t stir too frequently. You want that rich, caramelized color that signals maximum flavor development.
Once the beef is browned, add the finely diced yellow onion and diced red bell pepper. Cook for another 5 minutes, stirring occasionally, until the vegetables soften and the onion becomes translucent. The edges of the peppers should just begin to char slightly—this adds a subtle smoky note that complements the chili powder beautifully.
Step 2: Build the Flavor Base with Spices and Garlic
Reduce the heat to medium and add the 5 minced garlic cloves, 2 tbsp chili powder, 1.5 tsp ground cumin, 1 tsp smoked paprika, and 1 tsp dried oregano. Stir constantly for 1 minute—just until the spices become fragrant. This quick toasting step wakes up the spices’ essential oils, creating a more complex flavor profile.
Immediately add the 3 tbsp tomato paste and stir to coat everything evenly. Cook for another 2 minutes, allowing the tomato paste to caramelize slightly on the bottom of the pot. You’ll notice the color deepen and the mixture become slightly sticky—this concentrated tomato flavor is the secret to a rich, well-rounded chili base.
Step 3: Incorporate Potatoes and Simmering Liquids
Add the 2.5 lb diced Yukon Gold potatoes to the pot, stirring to coat them in the spiced beef mixture. The potatoes should glisten with the rendered beef fat and spices. Pour in the 2 cans fire-roasted diced tomatoes (with their juices) and 3 cups vegetable broth. Drop in the 2 whole bay leaves and stir well to combine all ingredients.
Bring the mixture to a gentle boil, then reduce the heat to low to maintain a steady simmer. Partially cover the pot and let it cook for 20 minutes, stirring occasionally. The potatoes should be fork-tender but still hold their shape—you’re looking for that perfect balance between creamy interiors and structure that holds up in each spoonful.
Step 4: Finish with Kidney Beans and Final Seasoning
Stir in the 2 cans drained dark kidney beans and let the chili simmer uncovered for an additional 10-15 minutes. This final cooking time allows the beans to absorb the complex flavors you’ve built while maintaining their shape. The chili should thicken slightly as the potatoes release their starches into the broth.
Taste and adjust the seasoning—you might want to add a pinch more salt or an extra dash of chili powder depending on your preference. The flavors should be well-balanced: the smokiness from the paprika and fire-roasted tomatoes, the earthy warmth of cumin, and the subtle heat from the chili powder all working in harmony. Remove and discard the bay leaves before serving.
Step 5: Rest and Serve for Maximum Comfort
Turn off the heat and let the chili rest for 10 minutes before serving. This brief resting period allows the flavors to meld together completely. You’ll notice how the potatoes continue to absorb the rich broth, becoming even more tender and flavorful.
Ladle the chili into bowls while it’s still hot. The perfect serving should showcase chunks of tender potatoes, hearty beef, and kidney beans all suspended in a thick, flavorful broth. The potatoes add a comforting creaminess that makes this chili particularly satisfying, while the spices provide just enough warmth to make it deeply comforting without being overwhelming.
Make-Ahead Tips for potato chili
Prep Ahead Strategy
You can chop all your vegetables 1-2 days ahead—store the diced Yukon Gold potatoes in cold water in the fridge to prevent browning, and keep the onion, bell pepper, and garlic in separate airtight containers. I like using glass Pyrex containers with snap-tight lids for this. The potatoes will stay fresh, and you’ll save 20 minutes of prep time on cooking day. 💡
Brown the ground beef up to 24 hours in advance and refrigerate it in its rendered fat—this actually deepens the flavor as it sits. When ready to cook, just reheat the beef in your Dutch oven before adding the vegetables. This make-ahead step ensures your chili still develops that rich, caramelized base without the last-minute rush.
Spice Blend Prep
Mix your chili powder, cumin, smoked paprika, and oregano in a small bowl or jar ahead of time. I use a 4-oz mason jar for this—it keeps the spices fresh and makes them easy to grab when you’re ready to cook. The flavors will meld slightly overnight, giving your chili an even more complex profile when you add them to the pot.
If you’re really organized, make a double batch of this spice blend and store the extra in a cool, dark place for up to 3 months. It’s perfect for your next chili night or even sprinkling on roasted vegetables. This simple prep step takes less than 2 minutes but makes a noticeable difference in flavor consistency.
Potato Pre-Cooking
For an even creamier texture, you can parboil the diced potatoes for 5 minutes before adding them to the chili. Drain and cool them completely, then store in the fridge for up to 24 hours. This head start means they’ll break down just right during simmering, creating that velvety texture we love without turning to mush.
I learned this trick from a restaurant chef—it’s how they maintain perfect potato texture in large batches. Just be sure to undercook them slightly during the parboil, as they’ll finish cooking in the chili. This method also helps if you’re using slightly older potatoes that might take longer to soften in the chili.
Broth and Tomato Prep
Combine the vegetable broth and fire-roasted tomatoes (with juices) in a separate container the night before. I use a large measuring cup with a lid for this. Letting them sit together allows the flavors to start mingling, and you can just pour everything in at once when cooking. This small step saves time and reduces cleanup during the busy cooking process.
If you’re using canned beans, drain and rinse them ahead of time too. Store them in a container with a bit of water to keep them from drying out. This way, they’re ready to add at the perfect moment without any last-minute can opening or draining. It’s these little preparations that make chili night feel effortless.
Full Batch Prep
For true meal prep magic, make the entire chili 1-2 days ahead—it actually tastes better after sitting! The potatoes absorb more flavor, and the spices have time to develop their full potential. Store it in the fridge in your serving containers (I love 16-oz deli containers for perfect portions) for up to 5 days. 🌟
When reheating, add a splash of broth or water and warm over medium-low heat for 10-15 minutes, stirring occasionally. The chili will thicken as it sits, so this gentle reheating brings it back to the perfect consistency. Toppings stay freshest when added just before serving, so keep those separate until you’re ready to eat.
Freezer-Friendly Approach
This chili freezes beautifully for up to 3 months. Portion it into freezer-safe containers (leave 1-inch headspace for expansion) and cool completely before freezing. I like to freeze in individual serving sizes—it makes weeknight dinners a breeze. Just thaw overnight in the fridge before reheating.
For the best texture after freezing, reheat gently on the stovetop with an extra ¼ cup broth per portion. The potatoes might absorb more liquid during freezing, so this helps restore that creamy consistency. A sprinkle of fresh chopped cilantro or green onions after reheating brings back that just-made freshness.
Nutrition Facts
Frequently Asked Questions
Can I make this chili vegetarian?
Swap the ground beef for 1.5 cups dried lentils (rinsed) or 2 cans black beans (drained). Brown crumbled extra-firm tofu with the spices for a meaty texture. The potatoes and existing beans provide plenty of heartiness.
Why did my potatoes turn mushy?
Overcooking is the usual culprit. Yukon Golds should simmer for exactly 20 minutes—check with a fork at 15 minutes. For firmer texture, use red potatoes instead and reduce simmer time by 5 minutes. The key is gentle heat.
What’s the best way to thicken leftover chili?
Mash a few potatoes right in the pot, or stir in 1-2 tbsp masa harina (corn flour). Simmer for 5 minutes after adding. Avoid regular flour—it can create a pasty texture. The starches from the potatoes usually do most of the work naturally.
Can I use sweet potatoes instead?
Yes, but adjust the spices. Sweet potatoes pair well with 1 tsp cinnamon and ½ tsp allspice added to the blend. Their natural sweetness balances the chili’s heat beautifully. Reduce simmer time to 15 minutes as they soften faster.
How do I fix chili that’s too spicy?
Stir in ½ cup plain yogurt or 1 diced russet potato (simmer 10 minutes then remove). The starches absorb capsaicin. Adding 1 tbsp brown sugar also helps balance heat without diluting flavor. Taste as you adjust.

- 8 Bean Soup Recipe Crock Pot: Hearty Vegetable Medley in One Pot - September 25, 2026
- 4C Bread Crumbs Meatballs Recipe: Crispy Crust and Juicy Centers - September 25, 2026
- 6 Oz Chocolate Chip Cookie Recipe: Perfectly Balanced Crispy Edges and Chewy Hearts - September 25, 2026