
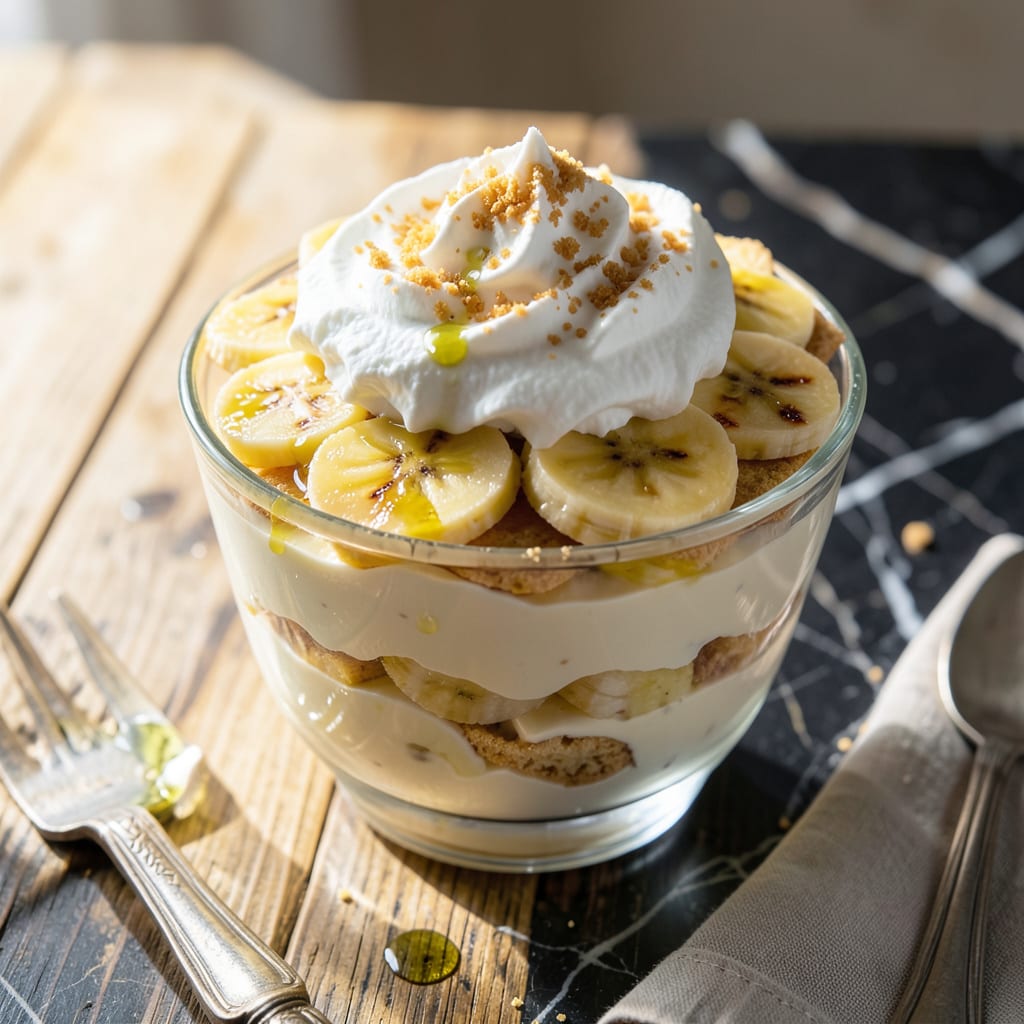
This lightened version of classic banana pudding delivers all the creamy, layered goodness without the guilt. By using low-fat ingredients and a few clever swaps, we create a dessert that’s every bit as satisfying as the original.
You’ll love how the smooth vanilla custard pairs with fresh bananas and crisp vanilla wafers, making it a foolproof treat for any occasion. Simple, delicious, and better for you—this pudding proves you can have your dessert and enjoy it too.
Ingredients for Recipe for Low Fat Banana Pudding
Light ingredients, bold flavor. Every layer tastes like the classic, just better for you.
| Ingredient | Amount | Notes |
|---|---|---|
| Low-Fat Vanilla Pudding Mix 🥄 | 1 box | Instant or cook-and-serve |
| Low-Fat Milk 🥛 | 2 cups | 2% or skim works best |
| Fresh Bananas 🍌 | 4 whole | Ripe but firm, sliced |
| Vanilla Wafers 🍪 | 1 box | About 30 cookies |
| Light Whipped Topping 🍦 | 1 cup | Thawed if frozen |
| Vanilla Extract 🌿 | 1 tsp | Pure for best flavor |
| Granulated Sugar 🧂 | 2 tbsp | Optional for extra sweetness |
| Low-Fat Cream Cheese 🧀 | 4 oz | Softened to room temperature |
| Cornstarch 🌾 | 1 tbsp | For thickening custard |
| Salt 🧂 | ¼ tsp | Balances sweetness |
The pudding mix is the foundation here. Jell-O brand or store-brand instant both work—just watch for added sugars if that’s a concern. The milk should be low-fat, but don’t go fat-free or the custard won’t set properly. I grab mine from Walmart (cheap and reliable) or Kroger if I’m making a last-minute run. Bananas are key—get ones that are yellow with just a few brown speckles (the sweet spot for flavor).
No vanilla wafers? Shortbread cookies or graham crackers work in a pinch. Out of light whipped topping? Greek yogurt whipped with a touch of sugar mimics the texture surprisingly well. For extra richness, fold in a spoonful of low-fat cream cheese—it adds creaminess without the guilt. The cornstarch is optional but helps thicken the custard if you’re using cook-and-serve pudding.
Assemble this the morning you plan to serve it—bananas brown fast, even with a splash of lemon juice. Keeps in the fridge for 2-3 days (if it lasts that long). Leftovers? Layer them in small jars for grab-and-go treats. The wafers soften over time, but honestly, that’s part of the charm.
Why You’ll Love This Recipe
- 5-Minute Assembly: I just whisk the pudding mix with milk, layer with bananas and wafers, and it’s done. No baking, no fuss.
- Creamy Dreamy Layers: The light whipped topping and fresh bananas make it taste indulgent without the guilt.
- Potluck Hero: Honestly, it’s my go-to for parties—everyone loves it, and it travels like a champ.
- Budget-Friendly Batch: A box of pudding mix and a bunch of bananas feed a crowd for pennies. I’ll be real: it’s my wallet’s favorite dessert.
Step-by-Step Instructions for Low Fat Banana Pudding
Here’s how I build these perfect layers every time—simple, satisfying, and guilt-free.
Step 1: Prepare the Creamy Custard Base
In a medium saucepan, whisk together the 1 box Low-Fat Vanilla Pudding Mix, 1 tbsp Cornstarch, and 2 tbsp Granulated Sugar. Gradually whisk in the 2 cups Low-Fat Milk until completely smooth with no lumps remaining.
Place the saucepan over medium heat and cook, stirring constantly with a wooden spoon, until the mixture thickens and comes to a full boil. This should take 5-7 minutes. You’ll know it’s ready when it coats the back of the spoon and leaves a clean line when you run your finger through it.
Remove from heat and stir in the 4 oz Low-Fat Cream Cheese and 1 tsp Vanilla Extract until the cream cheese is completely melted and incorporated. The mixture should be smooth and glossy. Let it cool for 5 minutes before assembling.
Step 2: Slice Bananas and Prepare Layers
While the custard cools slightly, slice the 4 whole Fresh Bananas into ¼-inch thick rounds. I like to arrange them in a single layer on a plate to prevent browning. If you notice any browning starting, just toss them with a tiny bit of the 0.25 tsp Salt to slow the oxidation.
Open the 1 box Vanilla Wafers and have them ready. You’ll use about half the box for the base layer and the other half for the top. The wafers should be at room temperature—cold ones might crack when you layer them.
Step 3: Assemble the Pudding Layers
In a 2-quart serving dish or individual glasses, start with a layer of vanilla wafers. I arrange them slightly overlapping to create a solid base. Next, add a layer of sliced bananas, covering the wafers completely. The bananas should be in a single layer to ensure every bite gets that perfect banana flavor.
Pour half of the warm custard mixture over the bananas, spreading it evenly with a spatula. Repeat the layers: another layer of vanilla wafers, the remaining bananas, and then the rest of the custard. Gently press down on the top layer to help the custard seep into all the nooks and crannies.
Step 4: Chill and Add Final Touches
Cover the dish with plastic wrap, pressing it directly onto the surface of the pudding to prevent a skin from forming. Refrigerate for at least 4 hours, but overnight is even better. This chilling time allows the wafers to soften and absorb the custard flavors, creating that classic banana pudding texture.
Just before serving, spread the 1 cup Light Whipped Topping evenly over the top. For a pretty presentation, you can pipe it on or create decorative swirls with the back of a spoon. The whipped topping adds a light, airy contrast to the creamy layers below.
Serve chilled, with extra vanilla wafers on the side for dipping or crumbling on top. Each serving should have distinct layers of creamy custard, tender bananas, and soft vanilla wafers.
Pro Tips For Making Recipe For Low Fat Banana Pudding
- Chill the Pudding: After mixing the pudding with milk, pop it in the fridge for at least 30 minutes—I learned this the hard way when my first batch was still runny after layering.
- Slice Bananas Last: Cut the bananas right before assembling to prevent browning; I used to prep them early and ended up with sad, discolored slices.
- Skip the Soggy Wafers: Add the vanilla wafers just before serving or they’ll turn mushy; even 10 minutes too early can ruin the texture.
- Fold in Topping Gently: Use a spatula and light strokes when mixing the whipped topping to keep it fluffy—overmixing deflates it faster than you’d think.
Pro Cooking Tips for Great recipe for low fat banana pudding
Perfect Custard Texture
Whisk the pudding mix and cornstarch together before adding milk to prevent lumps. I use a heavy-bottomed saucepan to avoid scorching, and I never stop stirring until it reaches a full boil. The mixture should thicken enough to coat the back of a spoon in 5-7 minutes over medium heat. 🌡️
Layering Like a Pro
Start with a solid base of vanilla wafers arranged slightly overlapping. I place banana slices directly on top in a single layer to ensure even distribution. Press down gently on each custard layer to help it seep into the wafers and bananas below. This creates that perfect texture in every bite.
Banana Freshness Tip
Slice bananas just before assembling to prevent browning. If you must prep early, toss slices with a pinch of salt or a squeeze of lemon juice. I find ripe bananas with a few brown speckles offer the best sweetness. Use them within 30 minutes of slicing for optimal freshness.
Chilling for Best Results
Always chill for at least 4 hours—overnight is ideal. Cover the dish with plastic wrap pressed directly onto the surface to prevent a skin from forming. This waiting time allows the wafers to soften and absorb flavors, creating that classic pudding texture we all love. ❄️
Whipped Topping Trick
Spread the thawed whipped topping just before serving. For a professional touch, pipe it on using a ziplock bag with a corner snipped off. I sometimes add a dusting of cinnamon or a few extra wafer crumbles on top for added flair.
Nutrition Facts
Frequently Asked Questions
Can I use fat-free milk instead of low-fat?
No, fat-free milk won’t set the pudding properly. Stick with 2% or skim milk for best results. The small amount of fat is essential for texture.
How do I prevent the bananas from browning?
Slice bananas just before assembling. Toss with a pinch of salt or lemon juice if prepping early. Use within 30 minutes for freshest flavor.
Can this be made ahead of time?
Yes! Assemble and refrigerate for at least 4 hours, or overnight. The wafers soften as they soak up custard, enhancing flavor.
What can replace vanilla wafers?
Shortbread cookies or graham crackers work well. For a gluten-free option, try almond flour cookies. Adjust quantities to fit your dish.

- 8 Bean Soup Recipe Crock Pot: Hearty Vegetable Medley in One Pot - September 25, 2026
- 4C Bread Crumbs Meatballs Recipe: Crispy Crust and Juicy Centers - September 25, 2026
- 6 Oz Chocolate Chip Cookie Recipe: Perfectly Balanced Crispy Edges and Chewy Hearts - September 25, 2026