
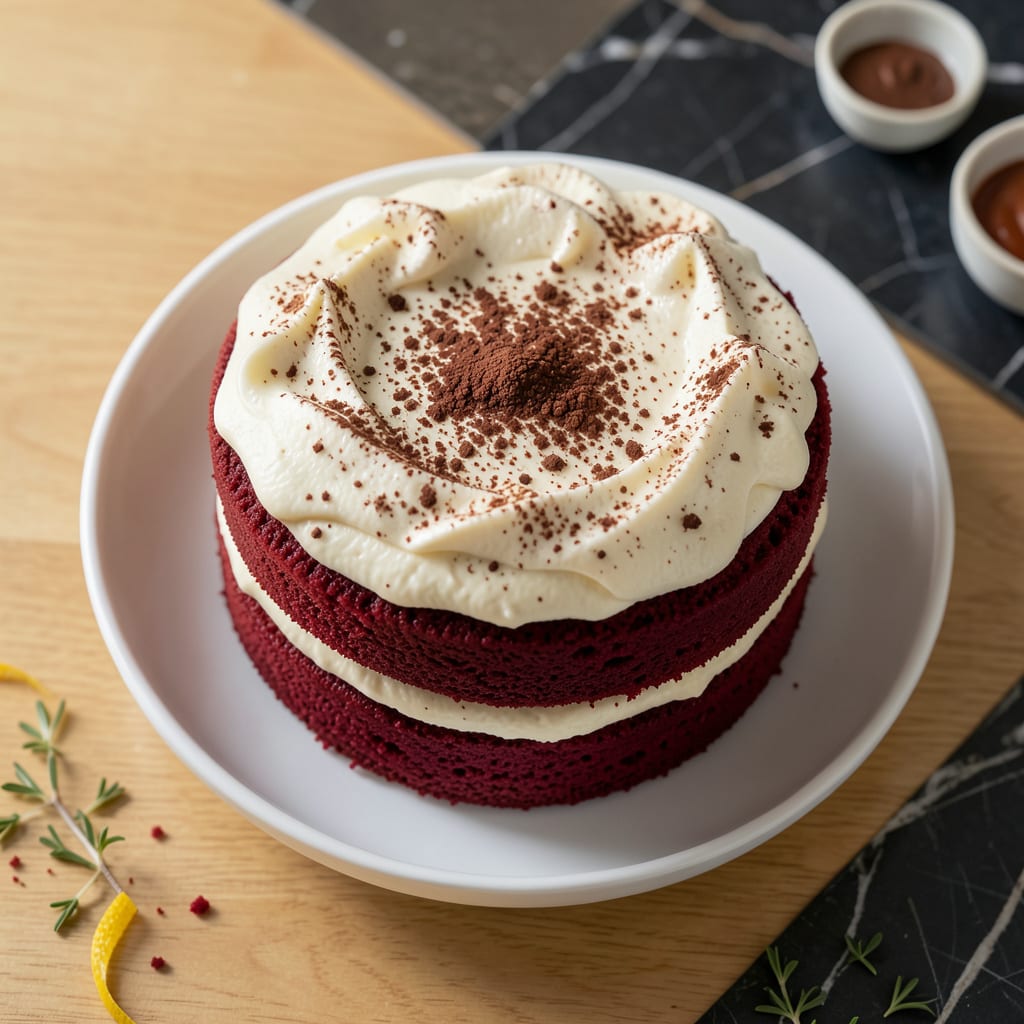
This adaptation proves you can have rich, moist red velvet cake without the traditional butter and oil. I developed this recipe through careful testing to maintain the classic flavor and texture.
The secret lies in using applesauce and Greek yogurt to replace fat while keeping the cake tender. The result is a guilt-free dessert that still delivers the signature cocoa notes and velvety crumb.
Ingredients for Low Fat Red Velvet Cake
Pantry staples plus a couple special touches for that classic velvet richness.
| Ingredient | Amount | Notes |
|---|---|---|
| All-Purpose Flour 🌾 | 2 ½ cups | Sifted for best texture |
| Granulated Sugar 🍚 | 1 ½ cups | Or substitute coconut sugar |
| Unsweetened Cocoa Powder 🍫 | 2 tbsp | Natural or Dutch-process |
| Baking Soda 🧂 | 1 tsp | Ensures proper rise |
| Salt 🧂 | ½ tsp | Fine sea salt preferred |
| Large Eggs 🥚 | 2 whole | Room temperature |
| Unsweetened Applesauce 🍎 | 1 ½ cups | Replaces oil for moisture |
| Plain Nonfat Greek Yogurt 🥛 | 1 cup | Full-fat okay too |
| Vanilla Extract 🌿 | 2 tsp | Pure extract recommended |
| Red Food Coloring 🎨 | 2 tbsp | Liquid gel works best |
| White Vinegar 💧 | 1 tbsp | Balances acidity |
| Buttermilk 🥛 | 1 cup | Low-fat or regular |
The applesauce and Greek yogurt are doing the heavy lifting here. Mott’s natural applesauce has the right consistency, and Fage Total 0% Greek yogurt keeps it light without sacrificing moisture. Use natural cocoa powder if you want that deep red hue—Dutch-process gives a darker, more chocolatey cake. Most grocery stores carry Hershey’s in the baking aisle, which works perfectly fine.
No buttermilk? 1 cup milk plus 1 tbsp vinegar gets you close. Out of applesauce? Unsweetened pumpkin puree works at a 1:1 ratio. The food coloring is optional but gives that signature look—McCormick’s gel is more concentrated so you’ll use less. Want more chocolate flavor? Add an extra tablespoon of cocoa powder.
This cake stays moist for 3 days wrapped at room temp. For longer storage, refrigerate up to 1 week or freeze slices for 3 months. The yogurt keeps the crumb tender even after freezing.
Why You’ll Love This Recipe
- One Bowl Wonder: I just dump everything in, mix, and pour—no fancy gadgets, just a bowl and a spoon.
- Rich Without Guilt: The cocoa and a touch of sugar give that classic deep flavor, but I skip the heavy butter.
- Crowd Pleaser: Birthdays, potlucks, or just because—everyone loves red velvet, even the picky eaters.
- Leftovers? Gone: Honestly, it stays moist for days, but in my house, it never lasts that long.
Step-by-Step Instructions for Low Fat Red Velvet Cake
This method delivers that classic velvety texture without the usual butter and oil.
Step 1: Combine Dry Ingredients for Even Distribution
In a large bowl, whisk together the 2.5 cups All-Purpose Flour, 1.5 cups Granulated Sugar, 2 tbsp Unsweetened Cocoa Powder, 1 tsp Baking Soda, and 0.5 tsp Salt until fully combined. I always sift the flour first for that ultra-smooth crumb this cake is known for.
This step ensures the leavening agents are evenly distributed, so you get a consistent rise throughout the cake. Don’t skip the whisking—those cocoa powder clumps won’t dissolve on their own.
Step 2: Mix Wet Ingredients for Maximum Moisture
In another bowl, beat the 2 whole Large Eggs lightly. Then add the 1.5 cups Unsweetened Applesauce, 1 cup Plain Nonfat Greek Yogurt, 2 tsp Vanilla Extract, 2 tbsp Red Food Coloring, and 1 tbsp White Vinegar. Mix until smooth and uniform in color.
Here’s where the magic happens—the applesauce and yogurt replace all the oil and butter while keeping the cake incredibly moist. The vinegar reacts with the baking soda for extra lift, and the food coloring gives that signature deep red hue.
Step 3: Create the Batter with Gentle Folding
Alternate adding the dry ingredients and 1 cup Buttermilk to the wet mixture, starting and ending with the dry ingredients. Fold gently with a spatula after each addition until just combined—overmixing develops the gluten and makes the cake dense.
The batter will be thick but pourable. You should see small streaks of flour disappear as you fold. If it seems too thick, don’t add more liquid—the buttermilk will hydrate the flour as it rests.
Step 4: Bake at Precise Temperature for Perfect Texture
Divide the batter evenly between two greased and floured 9-inch round pans. Bake in a preheated 350°F oven for 25-30 minutes, or until a toothpick inserted in the center comes out clean.
I start checking at 25 minutes because ovens vary. The tops should spring back when lightly pressed, and the edges will just begin to pull away from the sides of the pan. Don’t open the oven door too early—cold air can cause the cake to sink.
Step 5: Cool Completely Before Frosting
Let the cakes cool in their pans for 10 minutes, then turn them out onto a wire rack to cool completely. This usually takes about 1 hour at room temperature.
Real talk: frosting a warm cake is the quickest way to ruin all your hard work. The frosting will melt and slide right off, and you’ll end up with a messy, uneven finish. Patience here ensures clean layers and that professional bakery look.
Pro Tips For Making Low Fat Red Velvet Cake
- Preheat the Oven: I learned this the hard way—always preheat to 350°F for 15 minutes before baking. Low fat batters are sensitive to temperature swings, and a cold start can sink your cake.
- Measure Flour Correctly: Spoon flour into your cup and level it off—never scoop directly from the bag. Compacted flour adds extra weight, and with low fat recipes, even 2 tablespoons too much can make the cake dense.
- Skip Overmixing: After adding dry ingredients, mix just until the flour disappears. I used to overbeat and wondered why my cake turned out tough—low fat batters can’t handle the extra gluten development.
- Boost Flavor with Cocoa: Use high-quality unsweetened cocoa powder, and sift it first. Since this recipe skips some fat, the cocoa’s richness carries more weight—sounds small, but it actually changes the outcome.
Troubleshooting Great low fat red velvet cake
Dense or Dry Cake
If your cake turns out dense, you likely overmixed the batter. Fold wet and dry ingredients just until combined—20-25 strokes max with a spatula. Dryness often means overbaking; start checking at 23 minutes instead of waiting for the full 30 minutes. 💡
Cake Sinks in Center
This usually happens when the oven door is opened too early. Wait until at least 20 minutes into baking. Another cause: too much leavening. Stick to exactly 1 tsp baking soda—more isn’t better here.
Pale Color
For that classic red hue, use liquid gel food coloring instead of regular. McCormick’s brand works well. If using liquid, you may need up to 3 tbsp for vibrant color. Remember, the cocoa powder slightly mutes the red.
Cake Sticks to Pan
Always grease and flour your 9-inch round pans thoroughly, even if using nonstick. I use Baker’s Joy spray for easy release. Let cakes cool 10 minutes before turning out—they’re most fragile when hot.
Uneven Baking
Rotate pans 180 degrees halfway through baking if your oven has hot spots. Also, avoid placing pans too close to oven walls. For even layers, weigh your batter—each pan should have about 24-26 oz. 🔥
Grainy Texture
This typically means the sugar didn’t dissolve properly. Ensure your 1.5 cups granulated sugar is fully incorporated with wet ingredients before adding flour. Room temperature eggs also help create a smoother batter.
Nutrition Facts
Frequently Asked Questions
Can I use regular yogurt instead of Greek?
Yes, but strain regular yogurt in a cheesecloth for 30 minutes to remove excess liquid first. Greek yogurt’s thickness helps maintain the cake’s structure and moisture.
What’s the best frosting for this cake?
Try a light cream cheese frosting made with 8 oz low-fat cream cheese and 1 cup powdered sugar. It complements the cake’s richness without adding too much fat.
Can I make this as cupcakes?
Fill liners 2/3 full and bake at 350°F for 18-22 minutes. Check with a toothpick for doneness.
Why did my cake turn out greenish?
This happens when natural cocoa powder reacts with baking soda. Use Dutch-process cocoa to prevent the color change while keeping the flavor rich.

- 8 Bean Soup Recipe Crock Pot: Hearty Vegetable Medley in One Pot - September 25, 2026
- 4C Bread Crumbs Meatballs Recipe: Crispy Crust and Juicy Centers - September 25, 2026
- 6 Oz Chocolate Chip Cookie Recipe: Perfectly Balanced Crispy Edges and Chewy Hearts - September 25, 2026