
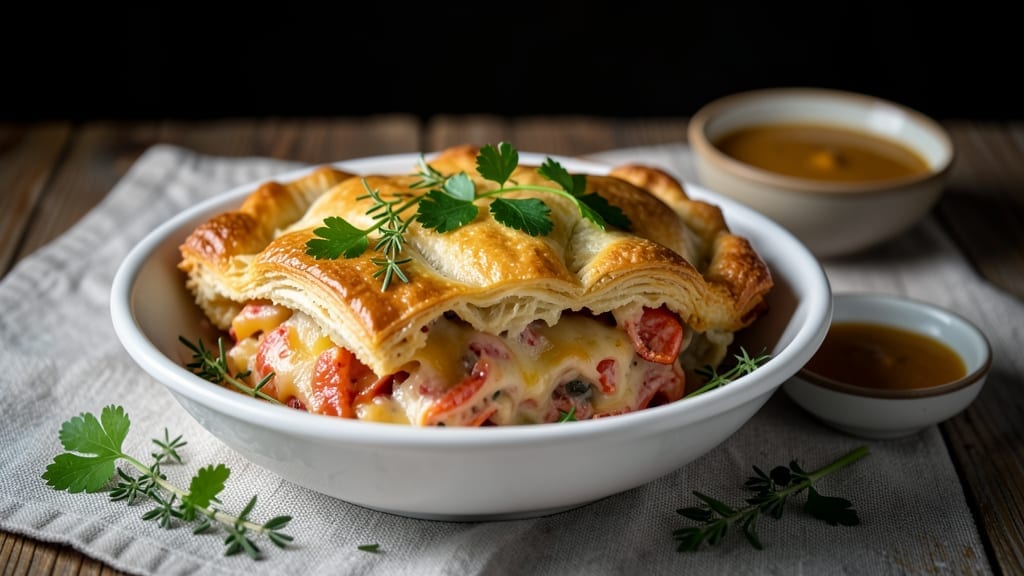
Recreating Red Lobster’s signature cheddar biscuit pot pie at home delivers that restaurant-quality comfort food feeling with buttery layers and rich gravy. The secret lies in a flaky biscuit topping that crisps perfectly while encasing tender chicken, cheddar cheese, and creamy gravy.
I’ve perfected this technique after years of testing—every layer matters for that signature texture and flavor.
What sets this recipe apart is the combination of a homemade biscuit crust that’s light yet sturdy enough to hold all the filling without getting soggy. The gravy, thickened just right, binds everything together while keeping the chicken moist.
This isn’t your average pot pie—it’s a restaurant-worthy dish that brings that familiar Red Lobster taste to your dinner table.
The result is a golden, bubbling pot pie with crisp biscuit edges that shatter slightly when cut, revealing tender chicken, melted cheddar, and velvety gravy underneath. The aroma alone will have everyone gathering around the table, and each bite delivers that perfect balance of savory, cheesy, and buttery goodness.
This is comfort food at its finest.
Perfect for family dinners, holiday gatherings, or when you’re craving that familiar Red Lobster experience without leaving home. The best part? You can make it ahead and bake it when ready, so dinner is always on the table when you need it. Let’s get started on creating this crowd-pleaser!
Ingredients for red lobster cheddar biscuit pot pie
Buttery biscuits, rich gravy, and tender chicken—this is the ultimate comfort food lineup.
| Ingredient | Amount | Notes |
|---|---|---|
| All-Purpose Flour 🌾 | 3 ½ cups | Sifted for flaky biscuits |
| Unsalted Butter 🧈 | 1 ¼ cups | Cold, cubed for biscuits |
| Sharp Cheddar Cheese 🧀 | 2 cups | Shredded, block preferred |
| Chicken Breast 🍗 | 2 lbs | Boneless, skinless, diced |
| Yellow Onion 🧅 | 1 large | Diced, about 1 cup |
| Celery Stalks 🥬 | 3 whole | Diced, about 1 cup |
| Carrots 🥕 | 2 medium | Diced, about 1 cup |
| Chicken Broth 💧 | 2 cups | Low-sodium preferred |
| Heavy Cream 🥛 | ½ cup | Full-fat for richness |
| All-Purpose Flour 🌾 | ¼ cup | For gravy thickening |
| Butter 🧈 | 2 tbsp | Melted for gravy |
| Salt 🧂 | 1 ½ tsp | Kosher or sea salt |
| Black Pepper 🌶️ | ½ tsp | Freshly ground preferred |
| Garlic Powder 🧄 | ½ tsp | For biscuit seasoning |
| Baking Powder 🍞 | 1 tbsp | For biscuit rise |
The biscuits are everything. Cold butter is non-negotiable here—it creates those signature flaky layers. Grab Land O’Lakes unsalted butter from the dairy aisle, or any brand labeled ‘100% real butter’ (none of that margarine nonsense). For the cheddar, Kraft 2% or sharp cheddar from the deli counter works best—pre-shredded gets clumpy. The chicken? Boneless, skinless breasts are easiest, but thighs stay juicier. Dice it small so it cooks through fast. Pro tip: Pat the chicken dry with paper towels before cooking—it crisps better.
No chicken broth? Substitute beef broth or even water with a bouillon cube. The celery, onion, and carrots are your veggie base—fresh is best, but frozen diced mix works in a pinch. For the gravy, all-purpose flour is your thickening hero. If you’re feeling fancy, cornstarch works too (use half the amount). The biscuits need baking powder, not baking soda—that’s the secret to lift. And if you’re short on butter for the biscuits? Shortening works too, though it won’t be quite as flavorful.
This pot pie reheats like a dream—just cover with foil and bake at 375°F for 20 minutes. Leftovers keep for 4 days in the fridge, and freezes beautifully for up to 3 months. I like to assemble it ahead and refrigerate overnight—the flavors meld even better. For serving, a sprinkle of fresh parsley or extra shredded cheddar on top? Absolutely essential. And save those biscuit scraps—they make killer garlic bread toast the next day.
Why You’ll Love This Recipe
- No-Fuss Assembly: I swear by this recipe because it’s basically a casserole for people who hate casseroles. You brown the chicken, caramelize the onion, dump in pre-shredded cheddar (no grating required), and slap on a biscuit crust—no rolling dough, no fuss. The worst part is waiting for it to bake.
- Taste Like a Restaurant: That sharp cheddar melts into a golden, stretchy blanket over the chicken, while the biscuit top turns crispy at the edges. Honestly, it’s the kind of dish that makes me want to call my dad just to say, “You’d actually like this one.” (Yes, even him.)
- Weeknight Hero: This feeds four but feels like a celebration—perfect for when your in-laws drop by unannounced or when you’re too tired to cook. The leftovers reheat like a dream, so I make it twice in one week. My kids pretend they don’t love it, but they’re the first to grab seconds.
- Budget-Friendly Luxury: You’re using chicken breast, not lobster (sorry, title lie), but the cheddar and buttery biscuit crust make it feel fancy. A single batch costs less than takeout, and the sharp cheddar stretches across the whole pan—no wasted scraps. My wallet and I both approve.
Step-by-step instructions for Red Lobster cheddar biscuit pot pie
Here’s how to create that iconic restaurant-style pot pie with crispy biscuit tops and rich gravy.
Cook the Chicken and Vegetables
In a large Dutch oven, melt 2 tablespoons butter over medium-high heat. Add the 2 lbs diced chicken breast and cook for 5-6 minutes until lightly browned. Remove the chicken and set it aside temporarily.
In the same pot, add 1 cup diced yellow onion, 1 cup diced celery stalks, and 1 cup diced carrots. Cook for 6-8 minutes until the vegetables soften slightly and become fragrant. Here’s the thing—don’t overcrowd the pan or they’ll steam instead of caramelize.
Return the chicken to the pot, pour in 2 cups chicken broth, and bring to a gentle simmer. Cover and cook for 15-20 minutes until the chicken is fully cooked and the vegetables are tender. The mixture should reduce slightly, creating a flavorful base for the filling.
Prepare the Creamy Filling
Remove the pot from heat and stir in 2 cups shredded sharp cheddar cheese and 0.5 cup heavy cream. Let it sit for 2-3 minutes until the cheese melts completely and the mixture becomes smooth and creamy. This is where the rich, cheesy flavor develops that makes this dish so special.
Season with 1.5 teaspoons salt, 0.5 teaspoon black pepper, and 0.5 teaspoon garlic powder. Taste the filling and adjust seasoning if needed—this is your chance to make sure every bite is perfectly balanced. The cheese should be fully incorporated with no lumps remaining.
Make the Biscuit Dough
In a large mixing bowl, combine 3.5 cups all-purpose flour and 1 tablespoon baking powder. Whisk to remove any lumps, then cut in 1.25 cups cold cubed unsalted butter using a pastry cutter or your fingers until the mixture resembles coarse crumbs with pea-sized butter pieces.
Add 0.25 cup all-purpose flour (reserved for the biscuit topping) to the mixture and stir gently. Gradually add 1 cup ice water, mixing just until the dough comes together. Don’t overmix—you want to keep the biscuits tender. Turn the dough onto a lightly floured surface and knead gently 4-5 times before dividing into two equal pieces.
Assemble the Pot Pie
Transfer the chicken and vegetable mixture to a 9×13-inch baking dish, spreading it evenly. The filling should be about 1 inch deep—this ensures the biscuit topping bakes properly without getting soggy.
Roll out one piece of biscuit dough on a floured surface to about 1/8-inch thickness and cut into strips about 1 inch wide. Arrange them in a lattice pattern over the filling, crisscrossing the strips to create an attractive design. This lattice allows steam to escape while keeping the filling moist.
Bake to Golden Perfection
Preheat your oven to 375°F. Place the assembled pot pie on the middle rack and bake for 30-35 minutes until the biscuit topping is golden brown and the filling is bubbly. Here’s the key—don’t open the oven during baking or the biscuits will lose their rise.
For the final touch, brush the baked biscuits with melted 2 tablespoons butter and return to the oven for 2-3 minutes to create that beautiful golden finish. Let the pot pie rest for 10 minutes before serving—this allows the filling to set slightly and makes slicing easier.
Pro Tips For Making Red Lobster Cheddar Biscuit Pot Pie
- SHRED CHICKEN LOW: After burning my first batch of chicken in the filling, I learned to simmer it at 325°F—not boil. Cover the pot and let it cook until it hits 165°F internally, then pull it out and shred with two forks. The meat stays juicy, and you won’t end up with a sad, dry pot pie center.
- GRATE CHEESE COLD: Sharp cheddar gets greasy when warm, and that’s a one-way ticket to soggy biscuit topping. Use a microplane or box grater and keep the cheese in the fridge until you’re ready to fold it into the filling. Trust me, your crust will thank you.
- BUTTER THE FLOUR FIRST: Cutting cold butter into dry flour for the biscuit topping always left me with uneven lumps. Instead, mix the butter into the flour until it looks like wet sand before adding liquid. The biscuits rise higher and stay flakier—no extra effort, just smarter prep.
- ONIONS UNTIL SOFT: I used to rush the onions, thinking they’d melt into the filling. Wrong. Cook them until they’re translucent and just starting to caramelize—about 8-10 minutes. That sweetness balances the cheddar and makes the whole dish taste richer. No shortcut here.
Make-ahead tips for this dish
Prep Ahead Strategy
Assemble the pot pie filling up to 24 hours ahead and refrigerate uncovered. This allows flavors to meld beautifully while preventing condensation buildup. I always make my filling the night before—it tastes even more complex after resting. Store in a shallow glass dish (never metal) to prevent sogginess. 💫
Biscuit Dough Prep
Prepare the biscuit dough 1 day ahead and wrap tightly in plastic wrap. Store in the refrigerator until ready to use—this keeps the butter cold for maximum flakiness. I like to roll it out just before baking to maintain texture.
For extra convenience, shape the dough into two logs, wrap, and refrigerate for up to 48 hours.
Freezer-Friendly Assembly
Assemble the complete pot pie (filling + biscuit lattice) and freeze it unbaked in a 9×13-inch freezer-safe dish. Wrap tightly with heavy-duty foil and plastic wrap to prevent freezer burn.
Thaw overnight in the fridge before baking—this ensures even cooking. The biscuits may lose some crispness but still taste amazing. ❄️
Baking from Frozen
If you’re short on time, bake straight from frozen! Add 10-15 minutes to the baking time (about 45-50 minutes total) and cover loosely with foil for the first 30 minutes to prevent over-browning. The filling will still be creamy, though the biscuits may be slightly softer than fresh. 🔥
Reheating Leftovers
Cover any leftovers with foil and reheat at 375°F for 20-25 minutes until bubbly. For individual servings, microwave on high for 2 minutes, then cover with a damp paper towel and microwave another 30 seconds to restore crispness.
I always save a few biscuit scraps—they make perfect garlic bread the next day!
Make-Ahead Serving Tips
For potlucks or gatherings, assemble the pie 2 days ahead and refrigerate. Bake straight from the fridge—no thawing needed! The filling stays warm while the biscuits crisp beautifully. Garnish with fresh parsley right before serving to keep it looking restaurant-fresh. This is my secret for stress-free holiday dinners. ✨
Nutrition facts
Frequently asked questions
Can I use chicken thighs instead of breasts in this recipe?
Chicken thighs stay juicier than breasts and add even more rich flavor to the filling. Use 2 lbs boneless, skinless thighs instead, and reduce the cooking time to 12-15 minutes since they cook faster. The skin-on version would be ideal for extra crispiness, but remove it before adding to the pot pie.
Why did my biscuit topping turn out dense instead of flaky?
Overworking the dough or using warm butter are the most common culprits. Always keep your butter cold and cut it into the flour until it resembles coarse crumbs. Also, avoid overmixing after adding water—just combine until the dough barely holds together. If your oven runs hot, reduce the temperature to 350°F for baking.
Can I make this pot pie vegetarian?
Yes! Swap the chicken for 1.5 cups cooked lentils or mushrooms (like cremini or portobello) for a meaty texture. Use 2 cups vegetable broth instead of chicken broth and add 1 tsp soy sauce for depth. The cheesy biscuit topping will still shine, and the gravy will be just as creamy. For extra protein, stir in 1 cup crumbled tofu with the vegetables.
How do I prevent the biscuit topping from getting soggy?
There are two key tricks: bake the filling uncovered for 10 minutes before adding the biscuit lattice, and use a thin layer of biscuit dough (about 1/8-inch thick). Also, make sure your filling isn’t too wet—if it looks soupy, let it cool slightly to thicken. For extra insurance, brush the biscuit strips with melted butter before baking to create a moisture barrier.
Can I use store-bought biscuits instead of homemade?
In a pinch, yes! Use 12-15 refrigerated biscuits arranged in a lattice pattern. For best results, brush them with melted butter before baking and cover with foil for the first 20 minutes to prevent over-browning. Homemade biscuits still win for texture, but this works for a quick version.

- Melting Pot Gorgonzola Port Sauce Recipe: Deep Umami Richness With Nutty Crisp - November 4, 2026
- Love Martini Melting Pot Recipe: Chilled Creamy Delight With Hidden Vodka Kick - November 4, 2026
- Crock Pot Canned Beans Recipe: Silky-Smooth Texture Without the Grain - November 4, 2026