
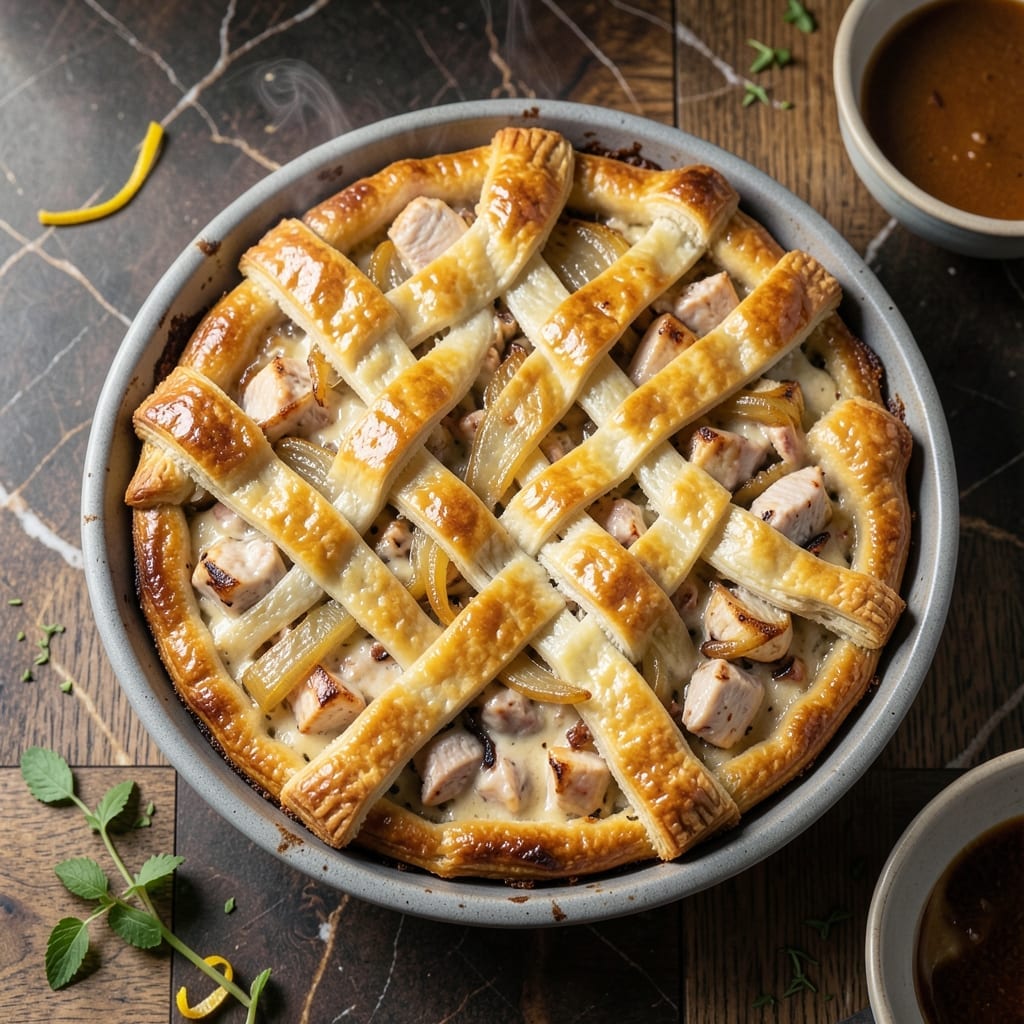
There’s nothing quite like a homemade chicken pot pie to bring comfort to the dinner table. This recipe delivers on the promise of flaky, golden crust and hearty filling every time.
I’ve perfected this method to ensure the crust stays tender while the filling thickens to just the right consistency. The key is in the balance of simple ingredients and precise timing.
The result is a dish that looks as impressive as it tastes—golden pastry encasing tender chicken and vegetables in a creamy sauce. It’s the kind of meal that turns an ordinary evening into something special.
Serve it straight from the oven for the best experience. The aroma alone will have everyone gathered around the table.
Ingredients for Rustic Chicken Pot Pie
Simple pantry staples and fresh produce create this comforting, flaky-crusted dish in no time.
| Ingredient | Amount | Notes |
|---|---|---|
| All-Purpose Flour 🌾 | 2 ½ cups | Plus extra for dusting surface |
| Unsalted Butter 🧈 | 1 cup | Cold, cut into small cubes |
| Ice Water 💧 | ½ cup | Plus 1 tbsp as needed |
| Salt 🧂 | 1 tsp | Divided between crust and filling |
| Boneless Skinless Chicken Breasts 🍗 | 1 ½ lb | Cut into 1-inch cubes |
| Yellow Onion 🧅 | 1 whole | Medium, finely diced |
| Carrots 🥕 | 2 whole | Medium, peeled and diced |
| Celery Stalks 🌿 | 2 whole | Diced, leaves reserved |
| Frozen Peas 🌱 | 1 cup | No need to thaw |
| Garlic Cloves 🧄 | 3 cloves | Minced for filling |
| Chicken Broth 🥣 | 1 ½ cups | Low-sodium preferred |
| Whole Milk 🥛 | ¾ cup | For creamy sauce base |
| All-Purpose Flour 🌾 | ¼ cup | For thickening sauce |
| Fresh Thyme Leaves 🌿 | 1 tbsp | Or 1 tsp dried thyme |
| Black Pepper 🌶️ | ½ tsp | Freshly ground preferred |
The crust hinges on cold, high-quality butter. Plugrá or Kerrygold deliver the best flakiness. Most supermarkets stock both—just ensure it’s unsalted so you control the seasoning. For the flour, King Arthur is the gold standard, but any all-purpose works. The chicken should be fresh, not frozen, for even cooking. Look for air-chilled breasts if available—they retain moisture better during baking.
No thyme? Rosemary or sage at half the amount works well. Short on chicken? Rotisserie chicken (about 3 cups shredded) saves time—just skip the initial cooking step. For a richer sauce, heavy cream instead of milk adds decadence. The peas can be swapped for corn or green beans. If using fresh, blanch them first. The broth can be homemade, but Swanson or Pacific Foods are solid store-bought options.
Assemble the pie just before baking—sitting too long makes the crust soggy. Leftovers keep 3-4 days refrigerated, though the crust softens. Reheat in a 350°F oven for 15-20 minutes to crisp it back up. The filling also freezes well for 2 months (without the crust).
Why You’ll Love This Recipe
- One Bowl Wonder: I mix the flour, butter, and ice water right in the same bowl I’ll use for the filling—no extra dishes, no fuss.
- Buttery Crust Magic: That flaky, golden crust from the butter and flour combo? It’s the kind of crunch that makes every bite worth it.
- Feeds a Hungry Table: This pie disappears fast whether it’s a lazy Sunday or a weeknight with friends over. Honestly, it’s my go-to for any gathering.
- Leftovers? Yes Please: The filling thickens up even more the next day, and the crust stays crisp—if there’s any left, that is.
Step-by-Step Instructions for Rustic Chicken Pot Pie
This method ensures a flaky crust and rich filling with every homemade bite.
Step 1: Prepare the Flaky Pie Crust
In a large bowl, combine 2.5 cups All-Purpose Flour and ½ tsp Salt. Add 1 cup Unsalted Butter, cut into cubes, and work it into the flour with your fingers until the mixture resembles coarse crumbs with pea-sized butter pieces visible. This texture creates the flaky layers.
Gradually drizzle in ½ cup Ice Water, mixing with a fork until the dough just comes together. Don’t overwork it—visible butter streaks are essential for that rustic flakiness. Form the dough into a disk, wrap in plastic, and refrigerate for 30 minutes to let the gluten relax.
Step 2: Cook the Chicken and Vegetables
Cut 1.5 lb Boneless Skinless Chicken Breasts into 1-inch cubes. In a large skillet, cook the chicken over medium-high heat until lightly browned and no longer pink, about 6-8 minutes. Remove and set aside.
In the same skillet, sauté 1 whole Yellow Onion (finely diced), 2 whole Carrots (peeled and diced), and 2 whole Celery Stalks (diced) until softened, about 5 minutes. Add 3 cloves Garlic Cloves (minced) and cook for 30 seconds until fragrant.
Step 3: Make the Creamy Filling
Sprinkle ¼ cup All-Purpose Flour over the vegetables and stir to coat. Slowly pour in 1.5 cups Chicken Broth and ¾ cup Whole Milk, whisking constantly to prevent lumps. Stir in 1 tbsp Fresh Thyme Leaves and ½ tsp Black Pepper.
Return the chicken to the skillet, then add 1 cup Frozen Peas. Simmer for 5-7 minutes until the filling thickens and coats the back of a spoon. Taste and adjust seasoning with the remaining ½ tsp Salt if needed.
Step 4: Assemble and Bake the Pot Pie
Roll out the chilled dough on a lightly floured surface to a 12-inch round. Pour the filling into a 9-inch pie dish (or deep skillet if making a free-form pie). Drape the dough over the filling, crimping the edges to seal. Cut a few small slits in the top to allow steam to escape.
Bake at 375°F for 40-45 minutes, until the crust is golden brown and the filling is bubbling. If the edges brown too quickly, tent them with foil. Let rest for 10 minutes before slicing to allow the filling to set.
Pro Tips For Making Rustic Chicken Pot Pie
- Chill the Dough: Let your crust dough rest in the fridge for at least 30 minutes before rolling—I learned this the hard way after my first few pies came out tough as leather.
- Dry the Chicken: Pat those chicken breasts bone-dry with paper towels before searing, or they’ll steam instead of brown, and nobody wants a pale, soggy filling.
- Vent the Top: Cut a few small slits in the top crust before baking, or you’ll get a lopsided pie with a filling that bursts through the cracks like a volcano.
- Use Cold Butter: Keep your butter ice-cold when cutting it into the flour for the crust—about 1/2 inch cubes, straight from the fridge, guarantees flaky layers every time.
Best Sauces and Condiments for This Recipe
Creamy Gravy Boost
I love drizzling 2 tbsp warm chicken gravy over each serving for extra richness. Use the pan drippings from cooking the chicken, thicken with a 1 tbsp cornstarch slurry, and season with ½ tsp thyme. It takes this dish from great to unforgettable. 💛
Hot Sauce Kick
For those who like heat, Frank’s RedHot or Tabasco adds a perfect tangy spice contrast. Start with ½ tsp per serving and adjust to taste. The vinegar in hot sauce cuts through the creaminess beautifully.
Herb-Infused Drizzle
A simple herb oil elevates the presentation. Heat ¼ cup olive oil with 1 tbsp fresh rosemary until fragrant, then drizzle lightly over the crust. I use this trick for dinner parties—it looks and smells amazing.
Cheesy Topping
Sprinkle ¼ cup grated Parmesan over the hot pie right after baking. The cheese melts into the crust, adding a salty, umami depth. I prefer Parmigiano-Reggiano for its nutty flavor.
Fresh Herb Garnish
Finely chop 1 tbsp fresh parsley or chives and sprinkle generously over the top. This adds a pop of color and freshness that balances the rich filling. Always garnish right before serving.
Citrus Zest Brightness
A pinch of lemon zest on each serving brightens all the flavors. Use a microplane to get ½ tsp per pie. The citrus oils complement the thyme in the filling perfectly.
Nutrition Facts
Frequently Asked Questions
Can I use pre-made pie crust?
Yes, store-bought crust works in a pinch. For best results, use a high-quality all-butter version and chill it before rolling. The flakiness won’t match homemade, but it saves time.
How do I prevent a soggy bottom crust?
Pre-bake the bottom crust for 10 minutes before adding filling. Also, ensure your filling is thick and not watery. Letting it rest 10 minutes after baking helps too.
Can I make this ahead of time?
Assemble the pie but don’t bake it. Refrigerate for up to 12 hours or freeze for 1 month. Bake straight from the fridge, adding 5-10 minutes to the cooking time.
What’s the best way to reheat leftovers?
Place individual portions in a 350°F oven for 15-20 minutes to crisp the crust. Microwaving works but will soften the pastry. Cover edges with foil if they brown too quickly.

- 6 Oz Chocolate Chip Cookie Recipe: Perfectly Balanced Crispy Edges and Chewy Hearts - September 25, 2026
- 6-Inch Coffee Cake Recipe: Vanilla Bean Swirls and Buttery Streusel Topping - September 25, 2026
- 1 Hour Soup Recipe: Velvety Richness Without the Wait - September 25, 2026