
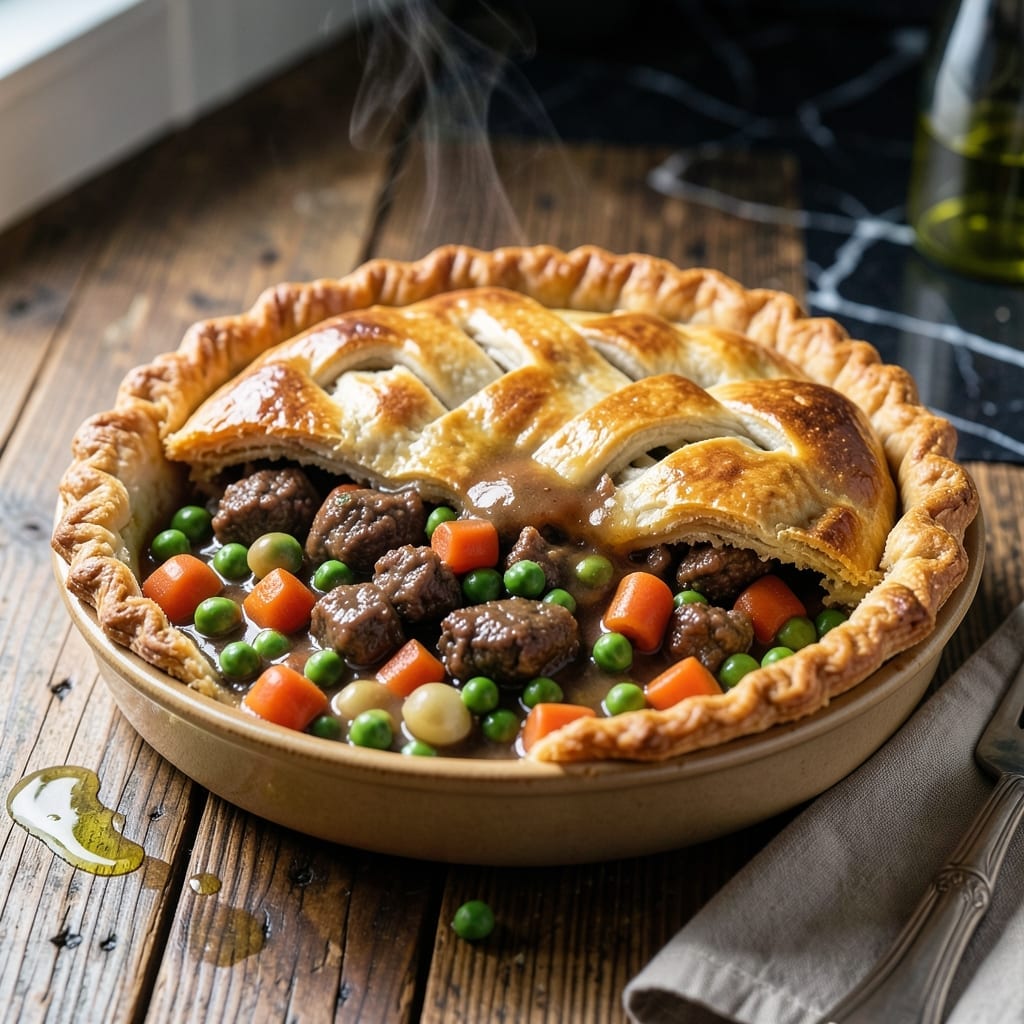
There’s nothing quite like a warm beef pot pie to bring homestyle comfort to your table. This recipe delivers all the rich, savory flavors you crave without the fuss of traditional from-scratch methods.
The secret lies in combining tender beef with hearty vegetables, all wrapped in a golden, flaky crust. Using pre-made pie crusts streamlines the process while maintaining that nostalgic, made-with-love taste. It’s the perfect balance of convenience and tradition.
What emerges from the oven is a bubbling, aromatic dish with a perfectly browned crust and a filling so rich and satisfying, it tastes like it simmered for hours. Every bite offers the warmth and comfort of a home-cooked meal.
Ideal for busy weeknights or cozy weekends, this dish proves that shortcuts can still deliver big on flavor and satisfaction.
Ingredients for Pillsbury Beef Pot Pie
Pantry staples plus a Pillsbury shortcut make this hearty dish effortless yet deeply satisfying.
| Ingredient | Amount | Notes |
|---|---|---|
| Ground Beef 🥩 | 1 lb | Lean 80/20 blend preferred |
| Pillsbury Refrigerated Pie Crusts 🥧 | 2 sheets | Thawed according to package |
| Frozen Mixed Vegetables 🥕 | 2 cups | Peas, carrots, corn blend |
| Yellow Onion 🧅 | 1 whole | Medium, finely diced |
| Garlic Cloves 🧄 | 2 cloves | Minced for depth |
| Beef Broth 🥣 | 1 ½ cups | Low-sodium recommended |
| All-Purpose Flour 🌾 | ¼ cup | For thickening gravy |
| Worcestershire Sauce 💧 | 1 tbsp | Adds umami complexity |
| Dijon Mustard 🟡 | 1 tsp | Smooth, not whole grain |
| Dried Thyme 🌿 | ½ tsp | Rubbed between fingers |
| Salt 🧂 | 1 tsp | Kosher or sea salt |
| Black Pepper 🌶️ | ½ tsp | Freshly ground preferred |
| Large Egg 🥚 | 1 whole | For egg wash crust |
| Milk 🥛 | 1 tbsp | Whole milk for richness |
The beef is the backbone here—80/20 ground beef gives you the right fat ratio for flavor without being greasy. Pillsbury pie crusts are the star shortcut (find them in the refrigerated section near biscuits). For the veggies, I grab the store-brand frozen peas-and-carrots mix—it’s pre-diced and saves chopping time. Look for low-sodium beef broth to control the salt level yourself.
No ground beef? Ground turkey or pork work in a pinch. Out of Worcestershire? Soy sauce plus a dash of lemon juice mimics the tang. The Dijon mustard adds subtle heat—regular yellow mustard if that’s what’s in your fridge (just cut back by half). Fresh thyme can replace dried at three times the amount, but dried is honestly easier here.
Assemble and bake right away, or prep the filling ahead—keeps 2 days in the fridge. Leftovers reheat beautifully (cover crust with foil). Freezes for up to 3 months if wrapped tight. Perfect for those make-ahead comfort food cravings.
Why You’ll Love This Recipe
- Sheet Pan Simple: No chopping marathons—just brown the beef with onion and garlic, dump in frozen veggies, top with the Pillsbury crust, and bake.
- That Crust Moment: The flaky Pillsbury layers shatter over the rich beef and veggie filling. Honestly, it’s the buttery top that keeps me making this.
- Feeds Tired Nights: I throw this together after work, and it’s on the table before the kids finish their squabbles over screen time.
- Leftovers? Yes Please: Tastes even better the next day, and it’s a solid lunch I can actually look forward to.
Step-by-Step Instructions for Pillsbury Beef Pot Pie
This shortcut method delivers all the homestyle comfort with half the usual effort.
Step 1: Brown the Ground Beef with Aromatics
Heat a large skillet over medium-high heat. Add the 1 lb Ground Beef and cook, breaking it apart with a wooden spoon, until evenly browned and no pink remains, about 5-7 minutes.
Stir in the finely diced Yellow Onion and minced 2 cloves Garlic Cloves. Cook for another 2-3 minutes until the onion softens and becomes translucent. This builds the flavor foundation for your filling.
Step 2: Create the Rich Gravy Base
Sprinkle the 0.25 cup All-Purpose Flour over the beef mixture and stir to coat evenly. Slowly pour in the 1.5 cups Beef Broth, 1 tbsp Worcestershire Sauce, and 1 tsp Dijon Mustard, stirring constantly to prevent lumps.
Add the 0.5 tsp Dried Thyme, 1 tsp Salt, and 0.5 tsp Black Pepper. Bring to a simmer and cook for 3-4 minutes until the gravy thickens enough to coat the back of a spoon. The mixture should look rich and velvety.
Stir in the 2 cups Frozen Mixed Vegetables and remove from heat. The vegetables will cook perfectly as the pot pie bakes, so no need to pre-cook them.
Step 3: Assemble the Pot Pie
Unroll the 2 sheets Pillsbury Refrigerated Pie Crusts according to package instructions. Press one sheet into a 9-inch pie dish, allowing the edges to overhang slightly. Pour the beef and vegetable filling into the crust.
Top with the second sheet of pie crust, sealing the edges by crimping with a fork. Trim any excess dough, then cut 4-5 small slits in the top crust to allow steam to escape during baking.
Step 4: Bake to Golden Perfection
Preheat your oven to 375°F. In a small bowl, whisk together the 1 whole Large Egg and 1 tbsp Milk to create an egg wash. Brush this evenly over the top crust for a beautiful, golden-brown finish.
Bake for 30-35 minutes until the crust is deep golden brown and the filling is bubbling. If the edges begin to brown too quickly, cover them with foil or a pie shield.
Let the pot pie rest for 10 minutes before serving. This allows the filling to set slightly, making it easier to slice and serve in neat portions.
Pro Tips For Making Pillsbury Beef Pot Pie
- Brown the Beef Well: I learned this the hard way—don’t rush browning the ground beef. Cook it until deeply browned, not just gray, to build flavor that’ll carry through the whole pie.
- Thaw the Vegetables: Skip the frozen veggies straight from the bag. Thaw and drain them first, or your pie filling will be watery—trust me, I’ve ruined two crusts this way.
- Vent the Crust: Cut a few small slits in the top crust before baking. Sounds basic, but it prevents the filling from bursting out and making a mess in your oven.
- Warm the Filling: After mixing the beef, veggies, and gravy, let it cool for 5-10 minutes before assembling. Hot filling will melt the Pillsbury crust and leave you with a soggy bottom.
Storing and Reheating This pillsbury beef pot pie
Refrigerator Storage
Let your pot pie cool completely before storing—this prevents condensation that can make the crust soggy. I use airtight containers or wrap it tightly in aluminum foil and store in the fridge for up to 4 days. The flavors actually deepen overnight. ❄️
Freezer Storage
For longer storage, freeze the entire baked pot pie or individual slices. Wrap tightly in plastic wrap, then aluminum foil, and place in a freezer bag. It keeps beautifully for up to 3 months. I always label with the date to track freshness.
Oven Reheating
Preheat your oven to 350°F and place the pot pie on a baking sheet. Cover the edges with foil to prevent over-browning. Reheat for 20-25 minutes until the internal temperature reaches 165°F. This method keeps the crust crisp.
Microwave Reheating
For a quick meal, microwave individual slices on 70% power for 2-3 minutes. Place a damp paper towel over the top to retain moisture. Stir the filling halfway through to ensure even heating. 🔥
Crust Protection
If reheating in the oven, brush the crust with a little melted butter or egg wash before baking to restore its golden color. This small step makes leftovers taste almost as fresh as the first serving.
Nutrition Facts
Frequently Asked Questions
Can I use a different type of meat?
Yes! Ground turkey or pork work just as well. For a heartier option, try diced beef stew meat—just simmer it for 30-40 minutes until tender before assembling.
How do I avoid a soggy bottom crust?
Pre-bake the bottom crust for 8-10 minutes before adding the filling. Also, let the filling cool slightly to reduce steam during baking.
Can I make this ahead of time?
Assemble the pie, cover tightly, and refrigerate for up to 24 hours before baking. Add 5-10 minutes to the baking time if going straight from the fridge.
What if my filling is too thin?
Mix 1 tablespoon cornstarch with 1 tablespoon water and stir into the filling before baking. This thickens it without altering the flavor.

- 6 Oz Chocolate Chip Cookie Recipe: Perfectly Balanced Crispy Edges and Chewy Hearts - September 25, 2026
- 6-Inch Coffee Cake Recipe: Vanilla Bean Swirls and Buttery Streusel Topping - September 25, 2026
- 1 Hour Soup Recipe: Velvety Richness Without the Wait - September 25, 2026