
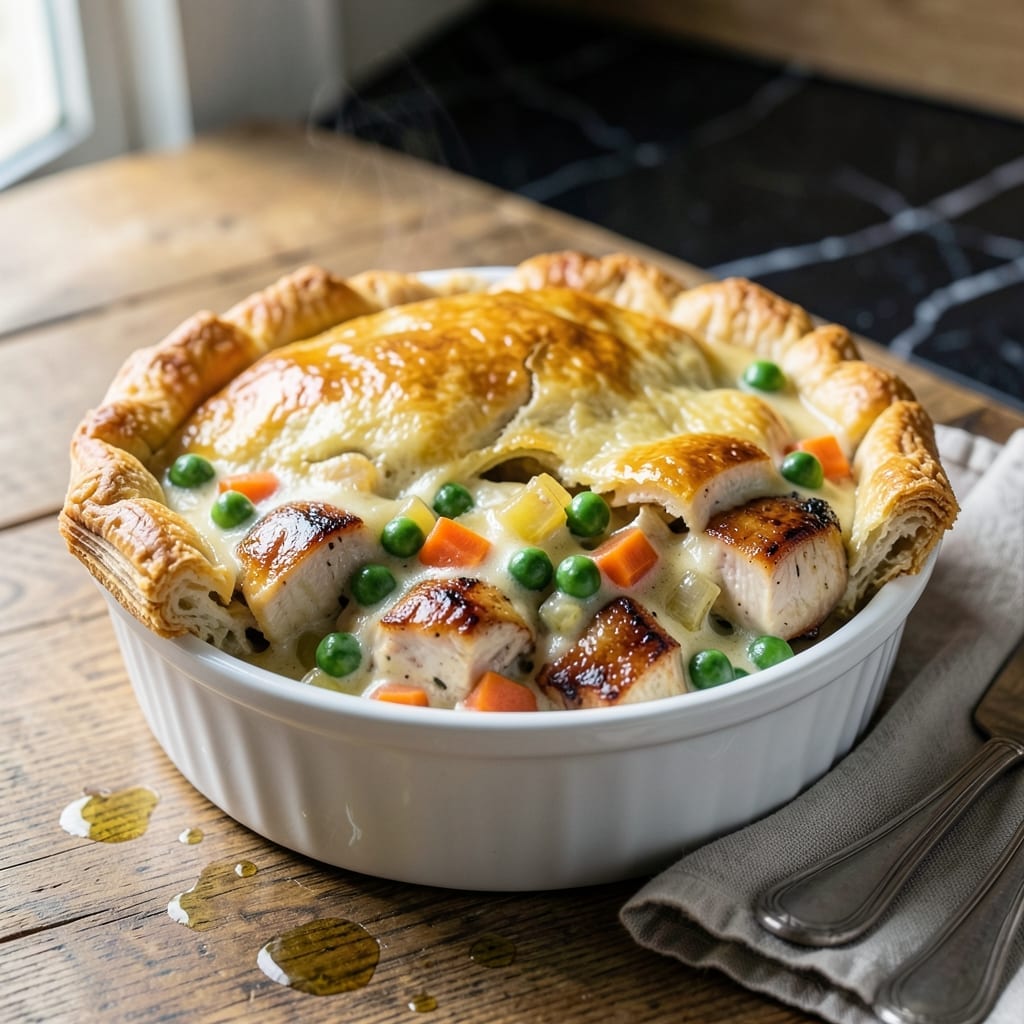
There’s something deeply satisfying about a personal-sized chicken pot pie with its golden crust and hearty filling. This single-serve version delivers all the comfort of the classic without leftovers.
The secret lies in the balance—tender chicken, creamy vegetables, and a flaky top crust baked to perfect golden perfection. No complicated techniques, just straightforward steps that guarantee restaurant-quality results at home.
In under an hour, you’ll have a steaming pot pie with a buttery crust that shatters with every bite. The filling is rich and savory, packed with flavor in every spoonful.
Ideal for a cozy dinner or whenever you crave comforting, homemade taste. Here’s how to make it.
Ingredients for Single Serve Chicken Pot Pie
Everything you need for a golden, flaky single-serve pot pie with rich filling.
| Ingredient | Amount | Notes |
|---|---|---|
| Chicken Thigh 🍗 | ½ lb | Boneless, skinless, diced |
| All-Purpose Flour 🌾 | ¼ cup | For thickening filling |
| Unsalted Butter 🧈 | 2 tbsp | Divided for filling and crust |
| Yellow Onion 🧅 | ¼ whole | Finely diced |
| Carrots 🥕 | ½ cup | Peeled and diced |
| Frozen Peas 🌱 | ¼ cup | No need to thaw |
| Garlic Cloves 🧄 | 1 clove | Minced finely |
| Chicken Broth 🍲 | ½ cup | Low-sodium preferred |
| Heavy Cream 🥛 | ¼ cup | For rich, creamy filling |
| Fresh Thyme 🌿 | 1 tsp | Chopped, or 1/3 tsp dried |
| Salt 🧂 | ½ tsp | Kosher or sea salt |
| Black Pepper 🌶️ | ¼ tsp | Freshly ground |
| Refrigerated Pie Crust 🥧 | 1 sheet | Single crust, thawed |
| Large Egg 🥚 | 1 whole | For egg wash |
The chicken is the star—thighs stay juicier than breasts for this size. I grab mine from Whole Foods or the butcher counter at Kroger. For the crust, Pillsbury refrigerated sheets are the easiest (one box makes four single-serves). The veggies can be swapped based on preference, but keep the total volume similar for proper filling consistency.
No chicken? Turkey or even mushrooms work great. Fresh thyme can be dried at one-third the amount. Heavy cream feels fancy, but half-and-half or whole milk gets you close. In a pinch, canned cream of chicken soup (mixed with a little broth) makes a quick filling base. The peas can be swapped for corn or green beans.
Assemble and bake immediately—don’t let the crust sit out too long. Best eaten fresh, but leftovers keep 2-3 days in the fridge. Reheat in the oven to keep the crust crisp. Freezes beautifully for up to 3 months if wrapped tightly in foil.
Why You’ll Love This Recipe
- One Pan Wonder: I love that I can mix the flour and butter right in the same dish I bake it in—no extra bowls to wash.
- Rich Comfort: The chicken thighs get so tender, and the buttery crust with carrots and onion? Pure cozy goodness.
- Solo Feast: Between us, it’s my favorite for a quiet night in when I want something hearty just for me.
- Budget Winner: Honestly, chicken thighs and basic pantry staples keep this dish cheap but still feel like a treat.
Step-by-Step Instructions for Single Serve Chicken Pot Pie
Here’s how to build a perfect personal pot pie with flaky crust and creamy filling.
Step 1: Cook the Chicken and Vegetables
Heat a small skillet over medium heat and add 1 tablespoon of the unsalted butter. Once melted, add the diced chicken thigh and cook for 5-6 minutes until lightly browned and cooked through. Remove the chicken and set aside.
In the same skillet, add the diced yellow onion, carrots, and minced garlic cloves. Cook for 4-5 minutes until the onion is translucent and the carrots begin to soften. Stir in the frozen peas and cook for an additional 1 minute to warm through.
Step 2: Make the Creamy Filling
Sprinkle the all-purpose flour over the vegetable mixture and stir to coat evenly. Cook for 1 minute to remove the raw flour taste. Slowly pour in the chicken broth and heavy cream, stirring constantly to avoid lumps.
Add the cooked chicken back to the skillet along with the fresh thyme, salt, and black pepper. Simmer for 3-4 minutes until the filling thickens to a gravy-like consistency. Taste and adjust seasoning if needed.
Step 3: Prepare the Pie Crust
Unroll the refrigerated pie crust on a lightly floured surface. Using a bowl or round cutter about 6 inches in diameter, cut out one circle for the bottom crust and one for the top. Press the bottom crust into a small oven-safe dish or ramekin, ensuring it covers the base and sides.
Beat the large egg and brush a thin layer over the bottom crust to create a moisture barrier. This prevents the crust from becoming soggy. Spoon the warm chicken and vegetable filling into the crust, leaving a ½-inch border around the edge.
Step 4: Assemble and Bake
Place the top crust circle over the filling and press the edges together to seal. Trim any excess dough and crimp the edges with a fork for a decorative finish. Brush the top crust with the remaining beaten egg for a golden sheen.
Cut a few small slits in the center of the top crust to allow steam to escape. Bake at 375°F for 30-35 minutes, or until the crust is golden brown and the filling is bubbly. Let it cool for 5 minutes before serving to allow the filling to set.
Pro Tips For Making Single Serve Chicken Pot Pie
- Pre-Cook the Chicken: Poach or sear the chicken thighs first—raw chicken in the filling can dry out or undercook while the crust bakes. I learned this the hard way after pulling a sad, rubbery pot pie out of the oven.
- Chill the Dough: Let your flour-butter crust rest in the fridge for at least 30 minutes before rolling. It keeps the butter from melting too fast, which means flakier layers instead of a dense, tough shell.
- Sauté the Veggies: Cook the onions and carrots until soft before adding the filling. Skipping this leaves them crunchy and underwhelming—after burning three batches, I finally figured out why my pie filling tasted half-finished.
- Use a Ramekin: A 10-12 oz ramekin is the perfect size for a single serve pot pie. It holds the filling without spilling over and ensures the crust browns evenly—no more soggy bottoms or messy edges.
Storing and Reheating This Recipe
Refrigerator Storage
Let your pot pie cool completely before storing. I use airtight containers to keep the crust crisp. It’ll stay fresh in the fridge at 40°F or below for 2-3 days. The flavors deepen overnight as the herbs meld with the filling. ❄️
Freezer Storage
For longer storage, wrap the cooled pie tightly in aluminum foil then place in a freezer bag. It freezes beautifully for up to 3 months without losing texture. I recommend labeling with the date so you don’t forget.
Oven Reheating
Preheat your oven to 350°F and place the pot pie on a baking sheet. Cover loosely with foil and heat for 15-20 minutes. Remove the foil for the last 5 minutes to crisp the crust. This method preserves the flaky texture best. 🔥
Microwave Option
For a quick meal, microwave uncovered on 70% power for 2-3 minutes. The crust won’t be as crisp, but it’s perfect when you’re short on time. Add a splash of chicken broth if the filling seems dry.
Make-Ahead Tip
You can assemble the pie up to a day ahead. Keep the unbaked pie covered in the fridge, then bake as directed when ready. I love this for meal prep – just add 5 minutes to the baking time if starting cold.
Nutrition Facts
Frequently Asked Questions
Can I use chicken breast instead of thigh?
Yes, but thighs stay juicier for this size. If using breast, cook for 4-5 minutes to avoid dryness. Brining the chicken first can help maintain moisture.
What size ramekin works best?
A 6-inch oven-safe dish holds the filling perfectly. Smaller ramekins may overflow, while larger ones could leave the crust undercooked.
How do I keep the bottom crust crisp?
Brush the bottom crust with beaten egg before adding filling to create a moisture barrier. Baking at 375°F on the lower oven rack also helps.
Can I make this ahead of time?
Assemble up to a day ahead and refrigerate. Add 5 minutes to baking time if starting cold. Avoid freezing unbaked pies.

- 6 Oz Chocolate Chip Cookie Recipe: Perfectly Balanced Crispy Edges and Chewy Hearts - September 25, 2026
- 6-Inch Coffee Cake Recipe: Vanilla Bean Swirls and Buttery Streusel Topping - September 25, 2026
- 1 Hour Soup Recipe: Velvety Richness Without the Wait - September 25, 2026