
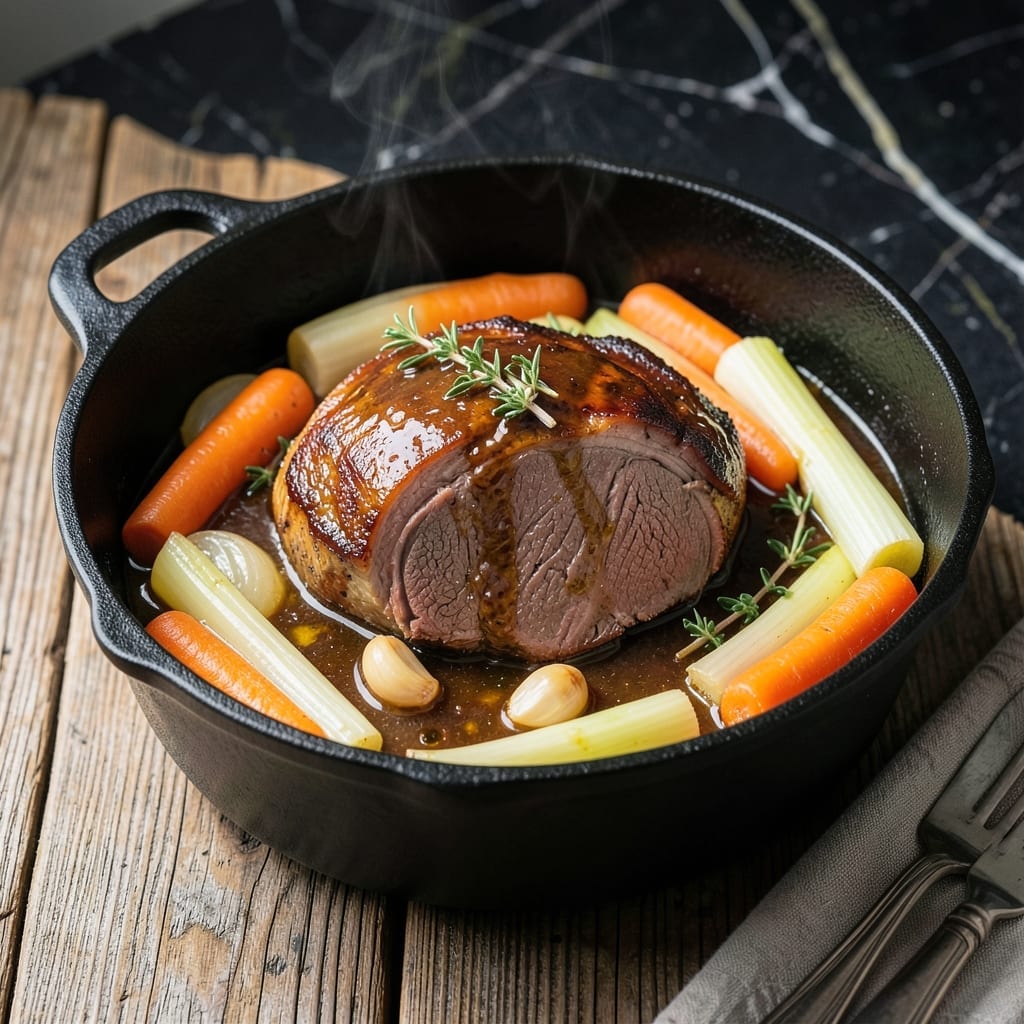
There’s something deeply satisfying about a pot roast that falls apart at the touch of a fork, especially when it’s infused with a bright, tangy depth.
This slow-braised version transforms a tough cut of beef into melt-in-your-mouth perfection, with a zesty twist that sets it apart from traditional recipes. The secret lies in the balance of bold flavors and patient cooking.
The low-and-slow method allows the meat to absorb the tangy marinade while breaking down into tender, juicy bites. By the time it’s done, you’ll have a dish that’s rich, flavorful, and guaranteed to impress.
Serve with mashed potatoes or crusty bread to soak up every drop of the savory sauce. This is comfort food elevated.
Ingredients for Tangy Pot Roast
Pantry staples plus a few fresh veggies. Nothing complicated, just bold flavor builders.
| Ingredient | Amount | Notes |
|---|---|---|
| Beef Chuck Roast 🥩 | 3 lb | Boneless, well-marbled preferred |
| Olive Oil 🫒 | 2 tbsp | Divided for searing and sauce |
| Yellow Onions 🧅 | 2 whole | Large, sliced thick |
| Garlic Cloves 🧄 | 6 cloves | Peeled, smashed |
| Carrots 🥕 | 4 whole | Peeled, cut into chunks |
| Celery Stalks 🥬 | 3 whole | Cut into large pieces |
| Red Wine Vinegar 🍷 | ½ cup | For tangy brightness |
| Beef Broth 🥣 | 2 cups | Low-sodium preferred |
| Tomato Paste 🍅 | 2 tbsp | For depth of flavor |
| Dijon Mustard 🟡 | 1 tbsp | Adds sharp tang |
| Brown Sugar 🫙 | 2 tbsp | Balances acidity |
| Dried Thyme 🌿 | 1 tsp | Crushed between fingers |
| Bay Leaves 🍃 | 2 whole | For aromatic depth |
| Salt 🧂 | 1 ½ tsp | Kosher or sea salt |
| Black Pepper 🌶️ | 1 tsp | Freshly ground preferred |
The beef is everything here. Chuck roast is non-negotiable for that fall-apart texture—Costco often has well-marbled pieces at a good price. Look for chunks with visible fat streaks; that’s what melts into the sauce. I grab mine the day before so it’s not cold from the fridge when I start searing. Onions and carrots? Any variety works (the good stuff, not the pre-bagged salad kind).
Red wine vinegar is key for that tang, but apple cider vinegar works in a pinch. No beef broth? Mushroom or vegetable broth plus a splash of Worcestershire gets you close. Dried thyme can be swapped for rosemary or sage if that’s what you’ve got. The tomato paste can come from those squeeze tubes at Trader Joe’s—no waste, keeps forever. Skip the pre-minced jarred garlic though; fresh is worth the extra minute.
This tastes even better the next day once the flavors meld. Keeps in the fridge for 4-5 days or freezes for 3 months. Portion leftovers into containers for easy lunches all week (trust me on this).
Why You’ll Love This Recipe
- Set and Forget: Most of the work is just tossing the chuck roast, onions, and carrots into the pot—then the oven does the rest.
- Melt-in-Your-Mouth Tang: The garlic and slow-cooked beef create this rich, tangy depth that’s honestly hard to resist.
- Feeds the Whole Week: I make a big batch Sunday and we’re set for leftovers, sandwiches, or even tacos by Tuesday.
- Budget Stretcher: Chuck roast is affordable, and with the carrots and onions, it turns into a hearty meal that doesn’t break the bank.
Step-by-Step Instructions for Tangy Pot Roast
Here’s my foolproof method for fall-apart tender beef with bold, tangy flavor.
Step 1: Sear the Beef Chuck Roast
Heat 1 tablespoon of olive oil in a large Dutch oven over medium-high heat. Pat the 3 lb beef chuck roast completely dry with paper towels—this is crucial for a good sear. Season all sides generously with 1.5 tsp salt and 1 tsp black pepper.
Add the roast to the hot oil and sear undisturbed for 4-5 minutes per side until a deep, rich brown crust forms. You’ll hear a satisfying sizzle when it hits the pan. Don’t rush this step; a proper sear creates the flavor foundation for the entire dish. Transfer the seared roast to a plate and set aside.
Step 2: Sauté the Aromatics
Reduce heat to medium and add the remaining 1 tablespoon olive oil to the Dutch oven. Add the 2 whole yellow onions, 4 whole carrots, and 3 whole celery stalks. Cook for 6-7 minutes, stirring occasionally, until the onions begin to soften and everything takes on a light golden color.
Stir in the 6 cloves garlic cloves, 2 tbsp tomato paste, 1 tbsp Dijon mustard, 2 tbsp brown sugar, and 1 tsp dried thyme. Cook for 1-2 minutes until the mixture becomes fragrant. The tomato paste will darken slightly and coat the vegetables—this is when you know it’s ready.
Step 3: Deglaze and Build the Braising Liquid
Carefully pour in the 0.5 cup red wine vinegar to deglaze the pan, scraping up all the browned bits from the bottom with a wooden spoon. These fond bits are packed with flavor and will dissolve into the liquid. Let it simmer for 2-3 minutes until the vinegar reduces by about half.
Add the 2 cups beef broth and 2 whole bay leaves, then return the seared roast to the Dutch oven along with any accumulated juices. The liquid should come about halfway up the sides of the roast. Bring to a gentle simmer.
Step 4: Braise to Perfection
Cover the Dutch oven with a tight-fitting lid and transfer to a preheated 325°F oven. Braise for 3 to 3.5 hours, turning the roast over halfway through. The low and slow cooking process transforms the tough chuck roast into fork-tender perfection.
You’ll know it’s done when the beef shreds easily with a fork and the internal temperature reaches 195-200°F. The braising liquid will have reduced slightly and taken on a rich, tangy character from the vinegar and tomato paste.
Step 5: Rest and Serve
Carefully transfer the roast to a cutting board and tent loosely with foil. Let it rest for 15 minutes—this allows the juices to redistribute, ensuring every bite is moist and flavorful. Skim any excess fat from the surface of the braising liquid if desired.
Slice or shred the beef against the grain and serve with the vegetables and a generous ladle of the tangy braising liquid spooned over the top. The sauce should be rich and deeply flavorful, with a perfect balance of tangy and savory notes.
Pro Tips For Making Tangy Pot Roast
- Sear It Hard: Crank the heat to medium-high and sear the chuck roast until deeply browned on all sides—about 4-5 minutes per side. I learned this the hard way when my first few pot roasts tasted bland because I rushed this step.
- Slice Onions Thin: Cut those yellow onions into thin, even slices so they melt into the sauce instead of staying chunky. Sounds fussy, but it actually changes the outcome.
- Don’t Drown the Meat: Use just enough liquid to come halfway up the roast—about 2 cups. After a watery pot roast disaster, I finally figured out less is more for that tangy reduction.
- Add Vinegar Late: Stir in the vinegar or other tangy element (like lemon juice) in the last 30 minutes to keep the flavor bright instead of dull. My grandmother swore by this, and she was right.
Common Mistakes When Making This Recipe
Skipping the Sear
I see many skip searing to save time, but this is a flavor disaster. The Maillard reaction from browning creates complex flavors that define your roast. Take the 5 minutes per side—it’s non-negotiable for depth. Use high smoke point oil like avocado if you’re concerned about burning. 🔥
Using Lean Cuts
Chuck roast with its marbling is essential here. Lean cuts like sirloin tip will turn dry and tough, no matter how long you cook them. The fat melts into the sauce, creating that luxurious mouthfeel. Trust me, the extra $2 per pound for well-marbled beef is worth it.
Overcrowding the Pot
If your Dutch oven is too small, the vegetables will steam instead of sear, and the meat won’t brown properly. Use at least a 5-6 quart pot for a 3 lb roast. I learned this the hard way with a crowded pot and bland results. Cook in batches if needed.
Not Enough Liquid
Your braising liquid should come about halfway up the roast. With 2 cups beef broth and the vinegar, you’re usually good, but check at the 2-hour mark. If it’s low, add ½ cup hot water. Too little liquid means the bottom will burn before the top cooks. 💡
Rushing the Braise
3-3.5 hours at 325°F isn’t just a suggestion—it’s science. The collagen needs this time to break down into gelatin. I’ve tried speeding it up at 350°F, and while it cooks faster, the texture suffers. Patience makes the difference between good and spectacular.
Ignoring the Rest
That 15-minute rest isn’t optional. Cutting too soon lets all the juices spill onto your cutting board instead of staying in the meat. Tent it with foil and resist the urge to peek. The temperature will also rise about 5-10°F during resting, finishing the cooking process perfectly.
Nutrition Facts
Frequently Asked Questions
Can I use a different type of vinegar?
Yes, apple cider vinegar works well as a substitute for red wine vinegar. It will give a slightly fruitier tang. Avoid white vinegar as it can be too harsh.
What’s the best way to store leftovers?
Store in an airtight container in the fridge for 4-5 days or freeze for up to 3 months. Reheat gently on the stove or in the microwave.
Can I make this in a slow cooker?
Sear the meat first, then transfer everything to the slow cooker. Cook on low for 7-8 hours or high for 4-5 hours.
Why is my pot roast tough?
It likely didn’t cook long enough. Chuck roast needs 3-3.5 hours at 325°F to break down. Check the internal temp—it should reach 195-200°F.

- 4C Bread Crumbs Meatballs Recipe: Crispy Crust and Juicy Centers - September 25, 2026
- 6 Oz Chocolate Chip Cookie Recipe: Perfectly Balanced Crispy Edges and Chewy Hearts - September 25, 2026
- 6-Inch Coffee Cake Recipe: Vanilla Bean Swirls and Buttery Streusel Topping - September 25, 2026