
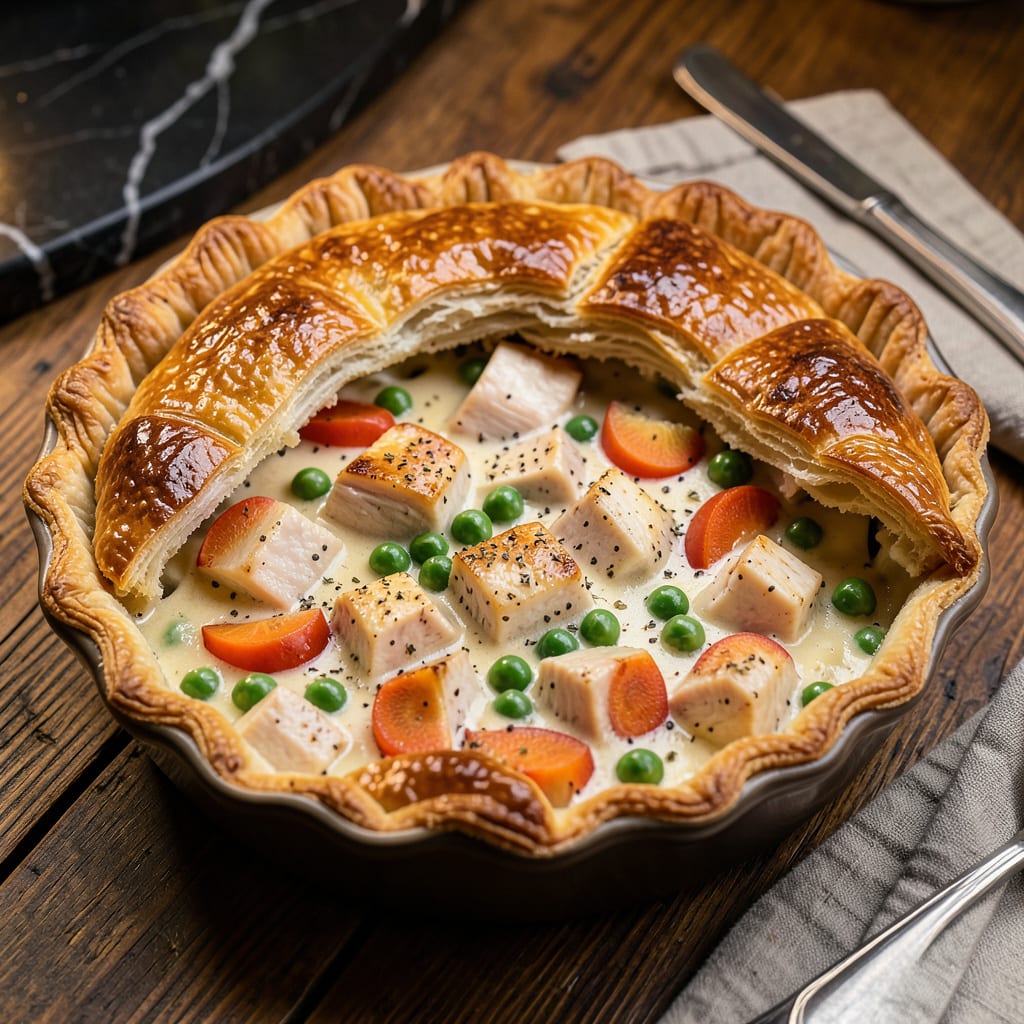
This TikTok-inspired chicken pot pie delivers everything you love about the classic—creamy filling, tender chicken, and seasonal vegetables—with a modern twist that’s taken social media by storm. The secret lies in a simple roux-based sauce that creates that signature velvety texture without complicated techniques.
What sets this version apart is the flaky, golden crust that bakes to perfection every time. Using store-bought puff pastry as a shortcut (a viral favorite) ensures professional results with minimal effort. The filling comes together in one pot, making this comforting dish surprisingly practical for weeknight dinners.
Ingredients for Tiktok Chicken Pot Pie
Here’s your shortcut to that viral-worthy pot pie—tender chicken, creamy sauce, and flaky crust with minimal effort.
| Ingredient | Amount | Notes |
|---|---|---|
| Boneless, Skinless Chicken Breasts 🍗 | 1 ½ lb | Cut into 1-inch cubes |
| Frozen Puff Pastry Sheet 🥧 | 1 sheet | Thawed according to package |
| Unsalted Butter 🧈 | 6 tbsp | Divided for roux and filling |
| All-Purpose Flour 🌾 | ⅓ cup | For roux thickening |
| Whole Milk 🥛 | 1 ½ cups | Warmed for smooth sauce |
| Chicken Broth 🍲 | 1 ½ cups | Low-sodium preferred |
| Yellow Onion 🧅 | 1 whole | Finely diced for even cooking |
| Carrots 🥕 | 2 whole | Peeled and diced small |
| Celery Stalks 🌿 | 2 whole | Finely chopped for texture |
| Frozen Green Peas 🌱 | ¾ cup | No need to thaw |
| Fresh Thyme Leaves 🌿 | 1 tbsp | Stripped from stems |
| Garlic Cloves 🧄 | 3 cloves | Minced for aromatic base |
| Kosher Salt 🧂 | 1 ½ tsp | Diamond Crystal preferred |
| Freshly Ground Black Pepper 🌶️ | ½ tsp | Coarse grind ideal |
| Large Egg 🥚 | 1 whole | For egg wash finish |
The puff pastry is your secret weapon—Pepperidge Farm or Dufour brands deliver that golden, flaky crust everyone’s raving about. Thaw it properly (follow package times) or you’ll struggle with rolling. For the chicken, boneless thighs work too (they stay juicier), but breasts give that classic pot pie texture. I grab pre-cubed chicken from Whole Foods to save time, but any grocery store’s butcher section can cube it for you (just ask).
No puff pastry? Store-bought pie crust works in a pinch—just brush with egg wash for extra shine. Swap the peas for corn or green beans if that’s what’s in your freezer. The milk can be half-and-half for extra richness or 2% if that’s what you’ve got. Fresh thyme is ideal, but 1 tsp dried thyme (added with the roux) gets you 90% there. And yes, you can use rotisserie chicken—about 3 cups shredded—to skip cooking raw chicken entirely.
Assemble the pie right before baking for the crispiest crust. Leftovers keep 3-4 days in the fridge (the pastry softens but still tastes great). Freeze unbaked pies for up to 3 months—wrap tightly in foil, then plastic. The filling thickens as it cools, so don’t stress if it seems loose straight from the oven.
Why You’ll Love This Recipe
- I’ll be real: if you can open a box of puff pastry and boil chicken, you’ve already won. The whole thing comes together with one skillet for the filling and a sheet pan for baking—no fancy techniques, just layer-and-go simplicity.
- No-Fuss Assembly: I’ll be real: if you can open a box of puff pastry and boil chicken, you’ve already won. The whole thing comes together with one skillet for the filling and a sheet pan for baking—no fancy techniques, just layer-and-go simplicity.
- That Golden Crunch: Here’s what sold me—the buttery puff pastry bakes up crisp and flaky while the creamy milk-and-flour filling stays rich and velvety. It’s the kind of contrast that makes you pause mid-bite just to appreciate it.
- Feeds a Hungry Table: Between us, this is my secret weapon for everything from Sunday supper to potlucks. Swap in rotisserie chicken to save time, or double the batch and freeze one for those “I-can’t-even” nights.
Step-by-Step Instructions for Chicken Pot Pie
Here’s how to build that perfect golden crust with a velvety filling that’s taken over TikTok.
Step 1: Prepare the Chicken and Vegetables
Start by cutting the 1.5 lb boneless, skinless chicken breasts into 1-inch cubes for even cooking. I like to pat them dry with paper towels first—this helps them brown better when sautéed. Season immediately with 1 tsp of the kosher salt and 0.25 tsp of the freshly ground black pepper while you prep the vegetables.
Finely dice the yellow onion, peel and dice the 2 carrots into small cubes, and finely chop the 2 celery stalks. Keep everything uniform so it cooks evenly. Mince the 3 garlic cloves and strip the fresh thyme leaves from their stems. This prep work ensures your filling cooks quickly and develops maximum flavor.
Step 2: Cook the Filling and Make the Roux
In a large skillet over medium-high heat, melt 2 tbsp of the unsalted butter. Add the seasoned chicken and cook for 5-6 minutes until lightly golden and cooked through. Remove the chicken with a slotted spoon and set aside, leaving the juices in the pan.
In the same skillet, add another 2 tbsp of the unsalted butter. Sauté the diced onion, carrots, and celery for 6-8 minutes until softened. Add the minced garlic and thyme, cooking for 1 minute until fragrant. Sprinkle the 0.33 cup all-purpose flour over the vegetables and stir constantly for 2 minutes to cook out the raw flour taste—this creates your roux base.
Step 3: Build the Creamy Sauce
Slowly whisk in the 1.5 cups whole milk and 1.5 cups chicken broth, ensuring no lumps form. Bring to a gentle simmer and cook for 8-10 minutes, stirring frequently, until the sauce thickens enough to coat the back of a spoon. The sauce should be velvety smooth with no floury taste remaining.
Return the cooked chicken to the skillet along with the 0.75 cup frozen green peas (no need to thaw). Stir to combine and let everything simmer together for 3-4 minutes. Taste and adjust seasoning with the remaining 0.5 tsp kosher salt and 0.25 tsp freshly ground black pepper if needed. The filling should be rich, creamy, and packed with tender chicken and vegetables.
Step 4: Assemble and Bake the Pot Pie
Transfer the filling to a 9-inch pie dish or similar baking dish. Unfold the thawed puff pastry sheet and gently drape it over the filling, pressing the edges to seal. Trim any excess pastry, leaving about a 1-inch overhang. Cut 3-4 small slits in the center to allow steam to escape during baking.
Whisk the large egg with 1 tbsp water to make an egg wash. Brush this evenly over the puff pastry—this creates that golden, glossy finish everyone loves. Bake at 375°F for 30-35 minutes until the crust is deep golden brown and puffed dramatically. Let it rest for 10 minutes before serving to allow the filling to set slightly.
Essential Equipment for This Dish
Must-Have Baking Dish
A 9-inch glass pie dish is my top recommendation for even baking and that perfect golden crust. I use Pyrex because it conducts heat beautifully and lets you monitor the bottom crust. Avoid metal pans—they can overbrown the pastry before the filling heats through. 🥧
Quality Puff Pastry
Don’t skimp on the pastry—Dufour or Pepperidge Farm brands deliver that viral-worthy flakiness. Thaw it overnight in the fridge (not on the counter) for best results. If using frozen, follow package times exactly—rushing leads to cracks when rolling.
Essential Skillet
A 12-inch stainless steel skillet (like All-Clad) is perfect for building the filling. The wide surface lets you brown chicken properly and develop the roux without crowding. Nonstick works too, but stainless gives better fond for flavor development.
Roux Whisk
Invest in a flat-bottomed whisk—it gets into the skillet corners to prevent flour lumps. I love the OXO Good Grips version. The flat shape also helps scrape up any browned bits from the chicken for maximum flavor in your sauce.
Pastry Brush
A silicone pastry brush ensures smooth, even egg wash application. I keep one dedicated to baking (no garlic or oil residue). The Wilton brand is affordable and heat-resistant. Brush in one direction for that professional bakery finish.
Oven Thermometer
Don’t trust your oven’s built-in thermometer—375°F can vary wildly. I use a ThermoWorks Dot to verify temperature. This $20 tool prevents undercooked crusts or overbrowned pastry, especially in older ovens. ✨
Nutrition Facts
Frequently Asked Questions
Can I use rotisserie chicken to save time?
Swap the raw chicken for 3 cups shredded rotisserie chicken. Skip the initial cooking step and add it directly to the sauce. This cuts prep time by 15 minutes while keeping the flavor rich. Just ensure the chicken is warm before mixing into the filling.
Why did my crust turn out soggy?
This usually happens when the filling is too watery or the pie wasn’t baked long enough. Make sure your sauce is thick enough to coat a spoon before assembling. Bake at 375°F for the full 35 minutes—the steam slits are crucial for letting moisture escape.
Can I make this ahead of time?
Yes! Assemble the pie completely (unbaked) and refrigerate for up to 24 hours. When ready, bake as directed, adding 5-10 extra minutes since it’ll start cold. For longer storage, freeze unbaked pies for up to 3 months—just thaw overnight before baking.
What’s the best shortcut for the crust?
Store-bought puff pastry is the viral secret—it delivers that dramatic rise and golden color with zero effort. Thaw it properly (overnight in the fridge) and brush with egg wash for bakery-level shine. Pie crust works too but won’t puff as dramatically.

- 8 Bean Soup Recipe Crock Pot: Hearty Vegetable Medley in One Pot - September 25, 2026
- 4C Bread Crumbs Meatballs Recipe: Crispy Crust and Juicy Centers - September 25, 2026
- 6 Oz Chocolate Chip Cookie Recipe: Perfectly Balanced Crispy Edges and Chewy Hearts - September 25, 2026