
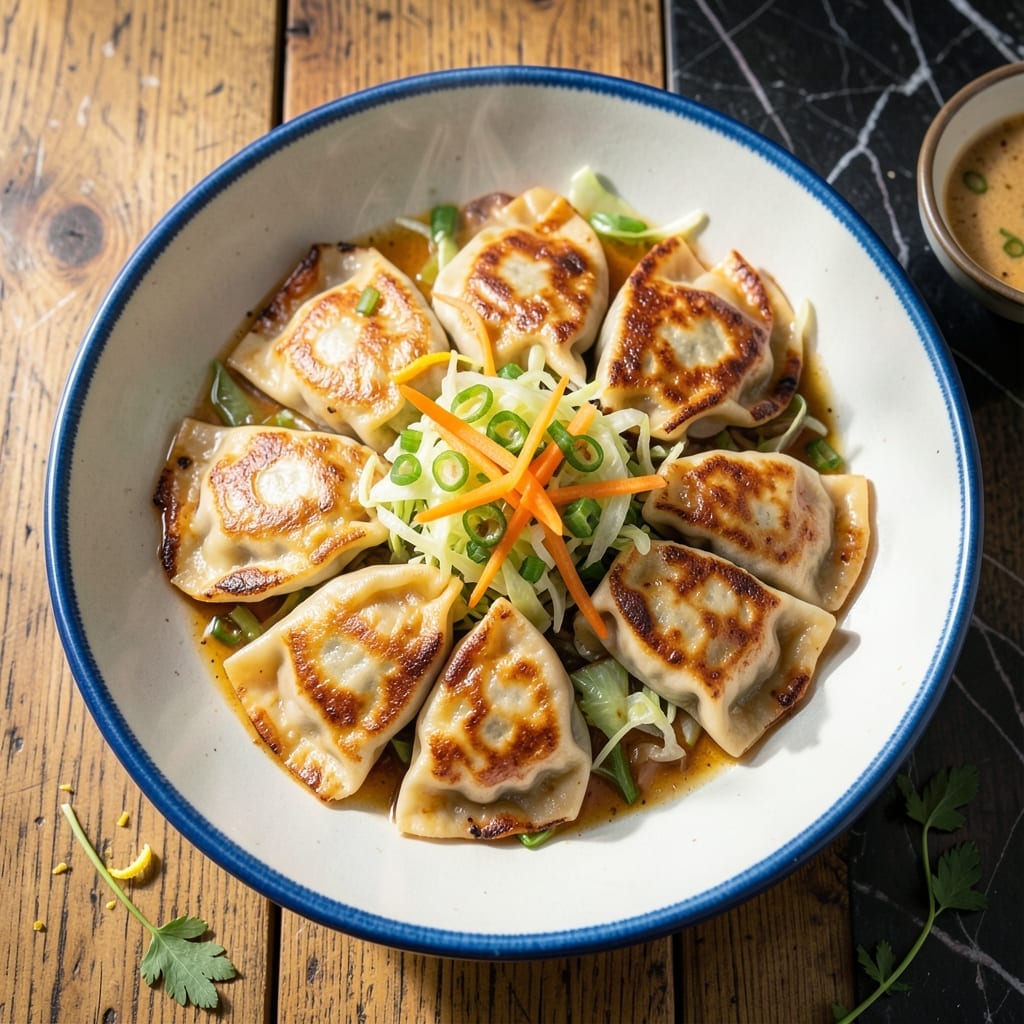
These pan-fried dumplings deliver restaurant-quality results with a crispy golden bottom and tender, flavorful filling. I’ve refined the technique over years of testing to ensure each bite offers the perfect contrast of textures.
The dough comes together quickly with just a few pantry staples, while the vegetable filling balances savory depth with fresh, vibrant notes. A hot skillet and precise timing create that signature crispy base without drying out the filling.
You’ll end up with dumplings that are golden on the bottom, tender on top, and packed with umami-rich flavor in every bite. The contrast between the crispy crust and soft filling is what makes these irresistible.
Serve with a tangy dipping sauce for the full experience. Here’s how to make them perfectly every time.
Ingredients for Vegetable Pot Stickers
Pantry staples and fresh vegetables create these restaurant-quality dumplings with crispy golden bottoms.
| Ingredient | Amount | Notes |
|---|---|---|
| All-Purpose Flour 🌾 | 2 cups | Plus extra for dusting work surface |
| Warm Water 💧 | ¾ cup | Approximately 110-115°F for dough activation |
| Napa Cabbage 🥬 | 2 cups | Finely shredded, salted and drained |
| Carrots 🥕 | 1 cup | Julienned or finely grated |
| Green Onions 🧅 | 4 whole | Thinly sliced, white and green parts separated |
| Garlic Cloves 🧄 | 3 cloves | Minced for filling depth |
| Fresh Ginger 🌿 | 1 tbsp | Peeled and finely grated |
| Shiitake Mushrooms 🍄 | ½ cup | Diced, stems removed |
| Vegetable Oil 🫒 | 3 tbsp | Divided for cooking and frying |
| Soy Sauce 🥫 | 2 tbsp | Low-sodium preferred for balance |
| Sesame Oil 🫒 | 1 tsp | Toasted variety for aromatic depth |
| Rice Vinegar 🍶 | 1 tbsp | Adds tang to filling mixture |
| Salt 🧂 | ½ tsp | Divided for dough and filling |
| White Pepper 🌶️ | ¼ tsp | Subtle heat without color |
| Cornstarch 🌾 | 1 tbsp | For dusting and filling binder |
The dough requires high-protein all-purpose flour for the right chew—King Arthur is a reliable brand. Napa cabbage is essential for its tender-crisp texture, but regular green cabbage works in a pinch (salt it well to draw out moisture). For authentic flavor, seek out fresh shiitake mushrooms at Asian markets—their umami depth is unmatched. The ginger and garlic should be fresh; pre-minced versions lack the necessary punch (worth the extra minute).
No Napa cabbage? Substitute half the amount of regular cabbage or add shredded bok choy. Out of shiitakes? Cremini mushrooms or finely chopped wood ear mushrooms work well. For gluten-free dough, use a 1:1 all-purpose gluten-free flour blend with xanthan gum. The soy sauce can be swapped for tamari (gluten-free) or coconut aminos for soy-free. Toasted sesame oil is non-negotiable—it adds the signature aroma.
Fillings keep 1-2 days refrigerated in an airtight container. Dough is best used immediately but can rest 24 hours wrapped tightly in plastic. Cooked pot stickers reheat well—store in fridge for 3 days or freeze uncooked on a tray before bagging for 1 month.
Why You’ll Love This Recipe
- One Bowl Wonder: I mix the dough right in the bowl—no fancy tools, just flour and warm water.
- Crispy Veggie Bite: That pan-fried edge with the cabbage and carrot filling? Ridiculously good.
- Freezer Friendly: I make a big batch, freeze half, and pull them out for impromptu snacks.
- Pocket Change Meal: Napa cabbage and carrots stretch far—this feeds my family for less than a takeout bill.
Step-by-Step Instructions for Vegetable Pot Stickers
Master the technique for perfect texture contrast: crisp golden bottoms with tender, flavorful fillings.
Step 1: Prepare the Dough
Combine the 2 cups All-Purpose Flour and 0.75 cup Warm Water in a mixing bowl, adding the water gradually while stirring with chopsticks or a fork. The dough should come together into a shaggy mass. Transfer to a lightly floured surface and knead for 8-10 minutes until smooth and elastic.
Cover with a damp towel and let rest for 30 minutes. This resting period relaxes the gluten, making the dough easier to roll out. The surface should feel slightly tacky but not sticky—if it’s too wet, knead in a bit more flour.
Step 2: Make the Filling
In a large bowl, combine the 2 cups Napa Cabbage, 1 cup Carrots, white parts of the 4 whole Green Onions, 3 cloves Garlic Cloves, 1 tbsp Fresh Ginger, and 0.5 cup Shiitake Mushrooms. Add 2 tbsp Soy Sauce, 1 tbsp Rice Vinegar, 1 tsp Sesame Oil, 0.25 tsp White Pepper, and 1 tbsp Cornstarch to bind the mixture.
Mix thoroughly until the filling is cohesive and the vegetables are evenly coated. The cabbage should be well-drained to prevent a watery filling. Taste and adjust seasoning with a pinch of the 0.5 tsp Salt if needed.
Step 3: Assemble the Pot Stickers
Divide the rested dough into 4 equal portions and roll each into a long log about 1-inch thick. Cut each log into 8-10 pieces and roll each piece into a thin circle, about 3 inches in diameter, keeping the remaining dough covered to prevent drying.
Place 1 tablespoon of filling in the center of each wrapper. Moisten the edge with water, fold in half, and pleat the edges to seal, pressing firmly to ensure the filling is enclosed. Arrange the finished pot stickers on a floured surface, covering them as you work to prevent drying.
Step 4: Pan-Fry to Crispy Perfection
Heat 2 tbsp Vegetable Oil in a non-stick skillet over medium-high heat. Arrange the pot stickers in a single layer, flat-side down, and cook undisturbed for 3-4 minutes until the bottoms turn golden brown and crisp.
Carefully add ½ cup water to the pan, immediately cover with a lid, and steam for 6-8 minutes until the water has evaporated and the wrappers are translucent. Remove the lid and cook for an additional 1-2 minutes to ensure the bottoms are extra crispy.
Step 5: Serve with Dipping Sauce
Transfer the pot stickers to a serving platter, crispy-side up. In a small bowl, whisk together the remaining 1 tbsp Vegetable Oil, a splash of the Soy Sauce, and a drizzle of the Sesame Oil for a quick dipping sauce. Garnish with the green parts of the Green Onions, thinly sliced.
Serve immediately while hot, ensuring the contrast of textures—crispy bottoms and tender fillings—is at its peak. The pot stickers should hold their shape and release cleanly from the pan without sticking.
Pro Tips For Making Vegetable Pot Stickers
- Salt the Cabbage: I learned this the hard way—salt your shredded Napa cabbage and let it sit for 10 minutes before squeezing out the water. It keeps the filling from turning your pot stickers into soggy dumplings.
- Seal Tightly: Press the edges firmly with your fingertips, then give them a quick pinch-and-twist to lock in the filling. Sounds fussy, but it stops them from bursting open in the pan.
- Skip Cold Water: Use warm water for the dough—about 110°F, like bathwater. Cold water makes the flour fight back, and you’ll end up kneading forever.
- Double Pan Fry: After the first crispy bottom forms, add a splash of water, cover, and steam for 2 minutes. This guarantees the filling cooks through without drying out the wrapper.
Make-Ahead Tips for This Dish
Prep Filling Ahead
The vegetable filling can be made 1-2 days in advance and stored in an airtight container in the fridge. I recommend draining any excess liquid before using to prevent soggy dumplings. The flavors actually deepen overnight as the ingredients meld together. 💡
Dough Preparation
Fresh dough is best used immediately, but it can rest in the fridge for up to 24 hours wrapped tightly in plastic. Let it sit at room temperature for 30 minutes before rolling to take the chill off. Avoid freezing dough as it affects texture.
Assemble and Freeze
Uncooked pot stickers can be frozen on a floured tray for 1 hour before transferring to a freezer bag. They’ll keep for up to 1 month. Freeze in a single layer first to prevent sticking. Label bags with the date for easy tracking.
Cook from Frozen
No need to thaw! Add 1-2 extra minutes of covered cooking time when pan-frying from frozen. Use a non-stick skillet and medium heat to prevent burning. I often cook straight from the freezer for quick weeknight meals.
Reheating Cooked
Store cooked pot stickers in the fridge for up to 3 days. Reheat in a dry skillet over medium-low heat for 2-3 minutes to revive the crispy bottom. A quick spritz of water in the pan helps steam them back to life. ❄️
Dipping Sauce Prep
Mix your dipping sauce up to 3 days ahead and store in a small jar in the fridge. I like to add a pinch of red pepper flakes for extra kick. Give it a good stir before serving as the ingredients may settle.
Nutrition Facts
Frequently Asked Questions
Can I use store-bought wrappers instead of homemade dough?
Yes! Store-bought wrappers work perfectly and save time. Look for round dumpling wrappers in the refrigerated section of Asian markets. Thaw if frozen, and keep them covered with a damp towel to prevent drying while assembling.
Why did my pot stickers stick to the pan?
This usually happens if the pan isn’t hot enough before adding them or if you move them too soon. Use medium-high heat and let them sear undisturbed for 3-4 minutes first. A non-stick skillet helps too.
How do I get extra crispy bottoms?
After steaming, uncover and cook for an additional 1-2 minutes to evaporate any remaining moisture. Ensure the pan is hot and the oil is evenly distributed before adding the dumplings.
Can I bake or air-fry these instead of pan-frying?
Yes, but the texture will differ. Brush with oil and bake at 375°F for 15-20 minutes, flipping halfway. Air-fry at 375°F for 10-12 minutes, shaking once. They won’t be as crispy as pan-fried.

- 6 Oz Chocolate Chip Cookie Recipe: Perfectly Balanced Crispy Edges and Chewy Hearts - September 25, 2026
- 6-Inch Coffee Cake Recipe: Vanilla Bean Swirls and Buttery Streusel Topping - September 25, 2026
- 1 Hour Soup Recipe: Velvety Richness Without the Wait - September 25, 2026