
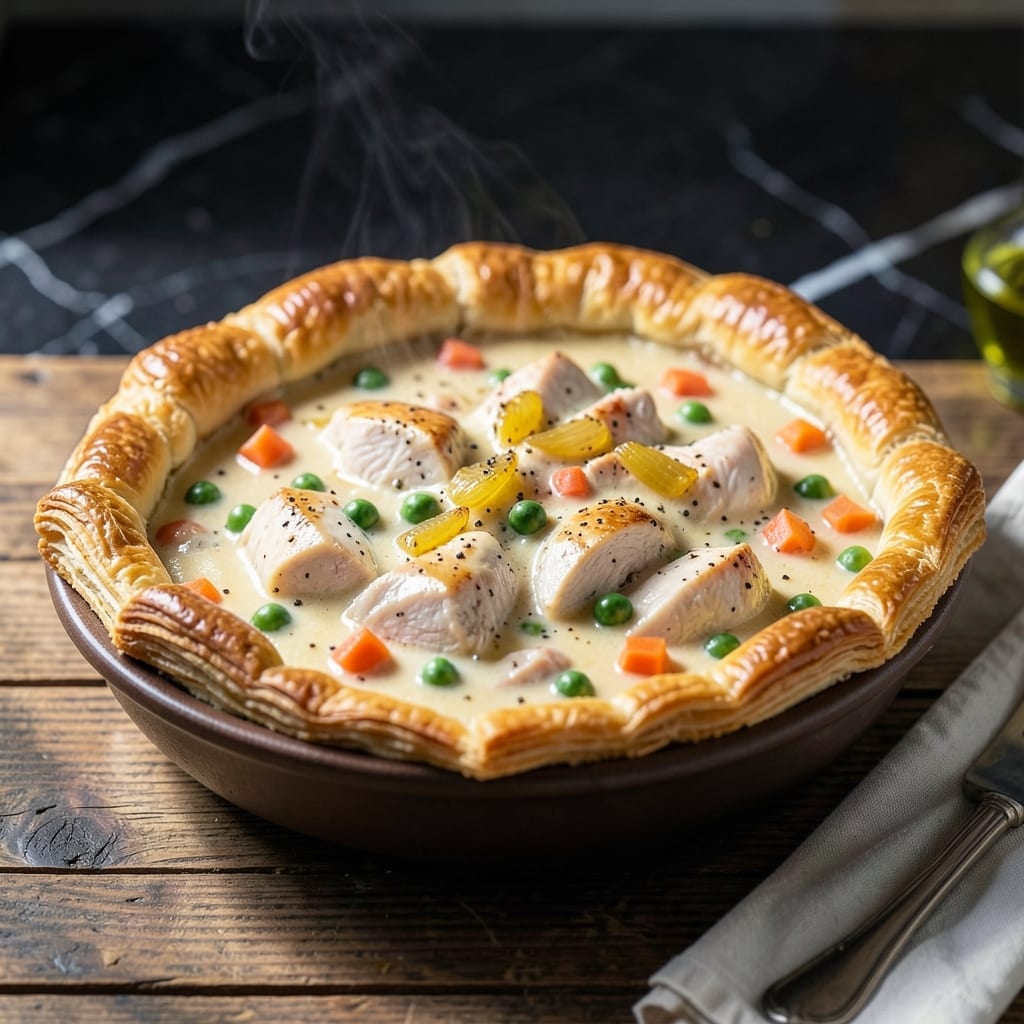
There’s something deeply comforting about a chicken pot pie with its golden crust and rich, creamy filling. This version elevates the classic by focusing on quality ingredients and a flaky, buttery pastry that shatters with every bite.
I’ve refined this recipe to ensure the filling is velvety without being heavy, using a blend of fresh herbs and tender chicken. The crust is made from scratch, but don’t let that intimidate you—it’s simpler than you think.
The result is a dish that feels both nostalgic and gourmet, with layers of flavor in every forkful. The herbs add a bright contrast to the creamy sauce, while the vegetables stay just tender enough to hold their shape.
Perfect for a cozy dinner or a special occasion, this pot pie delivers warmth and satisfaction in every serving. Here’s how to make it.
Ingredients for Whole Foods Chicken Pot Pie
Quality ingredients define this dish from crust to creamy filling.
| Ingredient | Amount | Notes |
|---|---|---|
| Boneless, Skinless Chicken Breasts 🍗 | 1 ½ lb | Cut into 1-inch pieces |
| All-Purpose Flour 🌾 | ½ cup | For thickening the filling |
| Unsalted Butter 🧈 | ½ cup | Plus extra for crust |
| Whole Milk 🥛 | 1 cup | Full-fat for creaminess |
| Chicken Stock 💧 | 1 ½ cups | Low-sodium preferred |
| Yellow Onion 🧅 | 1 whole | Medium, finely diced |
| Carrots 🥕 | 2 whole | Medium, diced |
| Celery Stalk 🌿 | 2 whole | Diced for texture |
| Fresh Thyme 🌿 | 2 tsp | Chopped, or 1 tsp dried |
| Fresh Rosemary 🌿 | 1 tsp | Chopped, or 0.5 tsp dried |
| Frozen Peas 🌱 | ¾ cup | No need to thaw |
| Kosher Salt 🧂 | 1 tsp | Plus more to taste |
| Ground Black Pepper 🌶️ | ½ tsp | Freshly ground preferred |
| Pie Crust 🥧 | 2 sheets | Homemade or store-bought |
| Large Egg 🥚 | 1 whole | For egg wash |
The chicken should be high-quality—Whole Foods carries excellent boneless, skinless breasts that stay tender. For the crust, organic butter (like Organic Valley) makes a noticeable difference in flakiness. The herbs? Fresh thyme and rosemary from the produce section (not dried) give the bright, aromatic contrast the filling needs. If making the crust from scratch, use King Arthur Flour for consistent results.
No whole milk? Half-and-half at a 1:1 ratio works for extra richness. Out of fresh herbs? Use dried at one-third the amount, but add them earlier in cooking. Chicken stock can be swapped with vegetable stock, but the flavor will be milder. For the crust, store-bought pie dough (like Whole Foods’ 365 brand) saves time without sacrificing quality. The peas can be swapped with diced potatoes if preferred.
The pot pie is best served fresh but holds well in the fridge for 3 days. Reheat in the oven at 350°F for 15-20 minutes to restore the crust’s crispness. The filling thickens as it cools, so if making ahead, reheat gently to avoid drying out. Freeze unbaked pies for up to 2 months.
Why You’ll Love This Recipe
- I’ll be real: it reheats even better the next day, and the flavors just get deeper.
- One-Pan Wonder: I love that everything comes together in a single skillet—just brown the chicken, stir in the butter-flour roux, and let the milk and stock work their magic.
- Rich Homestyle Taste: The buttery crust on top with that creamy, herby filling? Honestly, it’s the kind of comfort food that tastes like a hug.
- Feeds the Whole Crew: Between us, this is my go-to for family dinners, potlucks, or even just meal prepping for the week.
Step-by-Step Instructions for Chicken Pot Pie
Here’s the method. Straightforward, tested, works every time.
Step 1: Cook the Chicken and Vegetables
Cut the boneless, skinless chicken breasts into 1-inch pieces and season with kosher salt and ground black pepper. Heat a large skillet over medium-high heat and add 2 tablespoons of the unsalted butter. Once melted, add the chicken and cook for 5-6 minutes until no longer pink inside.
Remove the chicken and set aside. In the same skillet, melt the remaining butter and add the finely diced yellow onion, diced carrots, and diced celery stalk. Cook for 5-7 minutes until the vegetables soften and the onion becomes translucent.
Step 2: Make the Creamy Herb Filling
Sprinkle the all-purpose flour over the vegetables and stir well to coat. Cook for 1-2 minutes to remove the raw flour taste. Slowly pour in the chicken stock and whole milk, whisking constantly to prevent lumps from forming.
Add the fresh thyme, fresh rosemary, frozen peas, and cooked chicken. Stir to combine and let the mixture simmer for 5-7 minutes until it thickens to a creamy consistency. Taste and adjust seasoning with more kosher salt if needed.
Step 3: Assemble and Bake the Pot Pie
Preheat your oven to 375°F. Roll out one sheet of pie crust and place it in a 9-inch pie dish, pressing it gently against the bottom and sides. Trim any excess dough hanging over the edge.
Pour the creamy chicken and vegetable filling into the crust. Roll out the second sheet of pie crust and place it over the filling. Crimp the edges to seal, then cut a few small slits in the top crust to allow steam to escape.
Step 4: Add the Egg Wash and Bake
Whisk the large egg with 1 tablespoon of water to create an egg wash. Brush the top crust evenly with the mixture for a golden finish.
Bake for 35-40 minutes until the crust is golden brown and the filling is bubbly. If the edges begin to brown too quickly, cover them with aluminum foil or a pie shield.
Remove from the oven and let it rest for 10 minutes before slicing. This allows the filling to set and makes serving easier.
Pro Tips For Making Whole Foods Chicken Pot Pie
- Poach the Chicken: Simmer the boneless breasts in the chicken stock for 12-15 minutes—just until they hit 160°F. I learned this the hard way after dry, overcooked chicken ruined my first few pies.
- Chill the Dough: Let your flour-butter crust rest in the fridge for at least 30 minutes before rolling. Sounds tedious, but it prevents shrinking and guarantees a flaky top.
- Thicken Slowly: Whisk the flour into the butter for a full 2 minutes before adding milk to avoid lumps. After burning a batch from rushed roux, I now take my time.
- Use Cold Stock: Add the chicken stock cold when making your filling—it gives you more control over the thickening process and prevents a gummy texture.
Storing and Reheating This Dish
Refrigerator Storage
Let your pot pie cool completely before storing—this takes about 2 hours at room temperature. Transfer to an airtight container or wrap tightly with plastic wrap. It’ll keep in the fridge at 40°F or below for up to 3 days. ❄️
Freezer Storage
For longer storage, freeze unbaked pot pies before adding the egg wash. Wrap tightly in heavy-duty aluminum foil and place in a freezer bag. They’ll stay fresh for up to 2 months. Thaw overnight in the fridge before baking as usual.
Oven Reheating
Preheat your oven to 350°F and place the pot pie on a baking sheet. Cover loosely with foil to prevent over-browning. Heat for 15-20 minutes until the filling is bubbly and the crust regains its crispness.
Microwave Reheating
For a quick meal, microwave individual slices on 70% power for 2-3 minutes. Add a damp paper towel over the top to retain moisture. Stir the filling halfway through to ensure even heating.
Reviving the Crust
If the crust loses its crispness, pop it under the broiler for 1-2 minutes after reheating. Watch closely to avoid burning. This trick works wonders for both oven and microwave reheated pies. 🔥
Nutrition Facts
Frequently Asked Questions
Can I use pre-cooked chicken?
Yes, using rotisserie or leftover cooked chicken works perfectly. Just shred or chop it into 1-inch pieces and add it at the end to warm through. This saves 10-15 minutes of cooking time.
Why is my filling too thin?
This usually happens if the flour wasn’t cooked long enough. Simmer the sauce for an extra 2-3 minutes after adding thickeners. Also, ensure you’re using all-purpose flour, not a self-rising variety.
How do I prevent a soggy bottom crust?
Blind-bake the bottom crust for 8-10 minutes before adding the filling. Also, avoid overfilling and make sure the filling is thick, not watery, before baking.
Can I make this ahead of time?
Assemble the pie up to the egg wash step, then refrigerate for up to 1 day. Add the egg wash just before baking for the best golden finish.

- 6 Oz Chocolate Chip Cookie Recipe: Perfectly Balanced Crispy Edges and Chewy Hearts - September 25, 2026
- 6-Inch Coffee Cake Recipe: Vanilla Bean Swirls and Buttery Streusel Topping - September 25, 2026
- 1 Hour Soup Recipe: Velvety Richness Without the Wait - September 25, 2026