
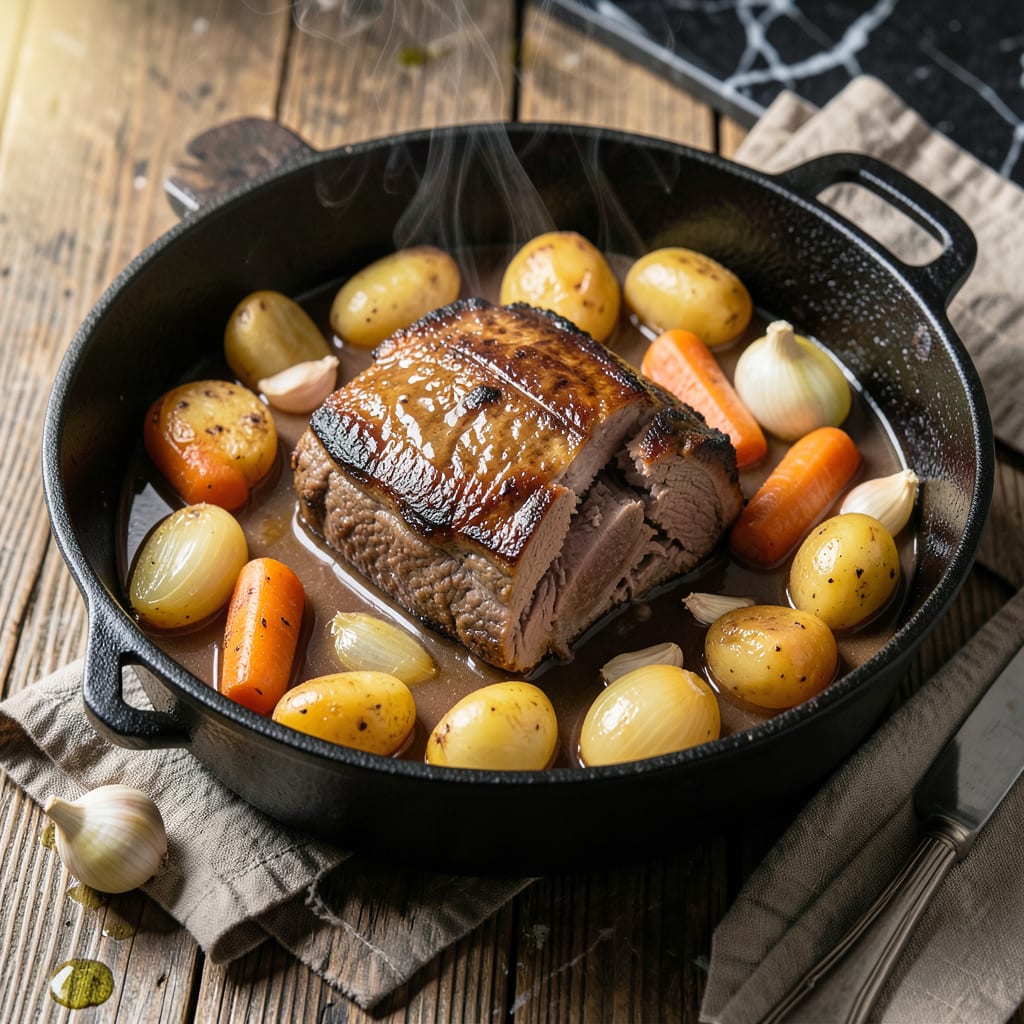
This pot roast delivers fork-tender beef with root vegetables, perfect for a comforting meal. The slow cooking process ensures the meat becomes incredibly soft and full of flavor.
Simple ingredients and a few hours in the oven create a dish that tastes like it took all day to prepare. The vegetables soak up the rich, savory juices, making every bite satisfying.
Ingredients for Ww Pot Roast
Simple, hearty ingredients for a comforting pot roast with melt-in-your-mouth beef and vegetables.
| Ingredient | Amount | Notes |
|---|---|---|
| Chuck Roast 🥩 | 2 ½ lb | Well-marbled, trimmed of excess fat |
| Carrots 🥕 | 4 whole | Peeled, cut into 3-inch chunks |
| Yukon Gold Potatoes 🥔 | 4 whole | Peeled, quartered |
| Yellow Onions 🧅 | 2 whole | Peeled, quartered |
| Garlic Cloves 🧄 | 4 cloves | Smashed, peeled |
| Low-Sodium Beef Broth 💧 | 2 cups | Reduced-sodium preferred |
| Tomato Paste 🍅 | 2 tbsp | For depth of flavor |
| Worcestershire Sauce 🫒 | 1 tbsp | Adds umami richness |
| Dried Thyme 🌿 | 1 tsp | Dried, not fresh |
| Dried Rosemary 🌿 | 1 tsp | Crushed for better release |
| Bay Leaves 🍃 | 2 whole | Dried, removed before serving |
| Olive Oil 🫒 | 1 tbsp | For searing the roast |
| Kosher Salt 🧂 | 1 ½ tsp | Divided for seasoning layers |
| Black Pepper 🌶️ | 1 tsp | Freshly ground preferred |
[recipeingredientscaler]
The chuck roast is non-negotiable for that fall-apart texture. Look for good marbling at Whole Foods or Costco—their selection is consistently high-quality. Avoid lean cuts like sirloin, which dry out during long cooking. The Yukon Gold potatoes add buttery richness (worth the extra dollar over russets). Most grocery stores carry them year-round, but Trader Joe’s often has the best price.
No chuck? Brisket or short ribs work but need longer cooking. Swap Yukon Golds for sweet potatoes or parsnips if preferred. Out of Worcestershire? Soy sauce plus a pinch of sugar gets you close. Dried herbs are fine, but if you have fresh thyme or rosemary, use triple the amount. The tomato paste can be omitted in a pinch, though the flavor will be less complex.
Leftovers taste even better the next day. Store in an airtight container for up to 4 days in the fridge or freeze for 3 months. The fat solidifies when chilled—skim it off before reheating for a cleaner dish.
Why You’ll Love This Recipe
- Set It and Forget It: I toss the chuck roast, carrots, potatoes, and onions in the slow cooker before work and come home to a house that smells like a Sunday dinner.
- Melt-in-Your-Mouth Tender: The garlic cloves and slow cooking turn the chuck roast so tender it falls apart with just a fork.
- Feeds the Whole Crew: Honestly, this one pot makes enough for my family of five with leftovers for lunch the next day.
- Budget-Friendly Comfort: Between us, a chuck roast and a bag of potatoes stretch further than any other meal I make.
Step-by-Step Instructions for Fork-Tender Beef With Root Vegetables
This method guarantees melt-in-your-mouth beef with rich, savory vegetables every time.
Step 1: Sear and Season the Chuck Roast
Heat the 1 tbsp olive oil in a large Dutch oven over medium-high heat until shimmering. Pat the 2.5 lb chuck roast dry with paper towels, then season all sides with 1 tsp kosher salt and 1 tsp black pepper.
Sear the roast for 4-5 minutes per side until deep brown and crusty. This creates a flavor-packed fond on the bottom of the pot that will enrich the sauce. Remove the roast and set aside.
Step 2: Build the Flavor Base
In the same pot, add the 2 whole yellow onions, 4 whole carrots, and 4 cloves garlic cloves. Cook for 3-4 minutes until the onions begin to soften and develop light golden color.
Stir in the 2 tbsp tomato paste, 1 tbsp Worcestershire sauce, 1 tsp dried thyme, 1 tsp dried rosemary, and remaining ½ tsp kosher salt. Cook for 1 minute, stirring constantly, until the tomato paste darkens slightly.
Step 3: Deglaze and Add Vegetables
Pour in the 2 cups low-sodium beef broth, scraping the bottom of the pot to release all the browned bits. Add the 2 whole bay leaves and return the chuck roast to the pot along with any accumulated juices.
Arrange the 4 whole Yukon Gold potatoes around the roast. The liquid should come about halfway up the roast. If needed, add a splash of water. Bring to a simmer.
Step 4: Braise to Perfection
Cover the pot and transfer to a preheated 325°F oven. Braise for 2.5 to 3 hours until the beef is fork-tender and easily pulls apart with a gentle tug.
Check halfway through and add a little water if the liquid level drops too low. The vegetables should be soft and infused with the rich beef flavor. Remove the 2 whole bay leaves before serving.
Pro Tips For Making Ww Pot Roast
- Sear the Chuck: I learned this the hard way—browning the chuck roast in batches with 1 tablespoon of oil per pound guarantees a deep crust that locks in flavor, even if it adds 10 minutes to your prep.
- Cut Evenly: Keep your carrots and potatoes roughly the same size, about 2-inch chunks, so everything cooks through at the same rate without turning to mush.
- Skip the Boil: Resist the urge to add cold liquid straight from the fridge—let your broth or wine come to room temp first to avoid shocking the meat and toughening it up.
- Use a Thermometer: After burning three batches, I finally figured out that pulling the roast at 195°F (not 160°F) makes it fall apart just right, every single time.
Make-Ahead Tips for ww pot roast
Overnight Prep
You can prep all your vegetables the night before—peel and chop the carrots, potatoes, and onions, then store them in airtight containers in the fridge. This saves 20 minutes on cooking day. I often do this while watching TV to make it feel effortless. 💡
Morning Sear
If you’re short on time in the evening, sear the 2.5 lb chuck roast in the morning and refrigerate it in the Dutch oven with the vegetables. When you’re ready to cook, just add the beef broth and herbs, then pop it into the oven. The flavors meld beautifully during the wait.
Slow Cooker Adaptation
Transfer everything to a slow cooker after searing, then cook on low for 8-10 hours or high for 5-6 hours. This is perfect for busy days—I start mine before work and come home to a house smelling incredible. The beef will be just as tender as the oven method.
Freezer-Friendly
This dish freezes wonderfully for up to 3 months. Portion the cooled pot roast and vegetables into freezer bags, removing as much air as possible. Label with the date, and you’ll have a ready-to-go meal for those nights when cooking feels impossible. ❄️
Reheating Tips
Thaw overnight in the fridge, then reheat gently on the stovetop over medium-low heat for 15-20 minutes. Add a splash of water or broth if it seems dry. The flavors taste even deeper the second time around—I often think leftovers are better than the original!
Herb Infusion
For extra flavor, tie the thyme, rosemary, and bay leaves in a cheesecloth bundle before adding them. This makes removal easier and keeps the herbs contained. I learned this trick from my grandmother, and it’s been a game-changer for clean, herb-infused broth.
Nutrition Facts
Frequently Asked Questions
Can I use a different cut of beef?
Stick with chuck for best results, but brisket or short ribs work too. These cuts have enough fat and connective tissue to become tender during long cooking. Avoid lean cuts like sirloin, which dry out.
What if my liquid level gets too low?
Check halfway through cooking and add ½ cup water or broth if needed. The liquid should come about halfway up the roast. Too little liquid can cause burning.
How do I know when it’s done?
The beef is ready when it pulls apart easily with a fork. For precise results, use a meat thermometer—it should read 195-200°F internally.
Can I cook this on the stovetop instead?
Yes! After searing and adding all ingredients, cover and simmer on low heat for 3-4 hours. Check occasionally to ensure liquid doesn’t evaporate.

- 4C Bread Crumbs Meatballs Recipe: Crispy Crust and Juicy Centers - September 25, 2026
- 6 Oz Chocolate Chip Cookie Recipe: Perfectly Balanced Crispy Edges and Chewy Hearts - September 25, 2026
- 6-Inch Coffee Cake Recipe: Vanilla Bean Swirls and Buttery Streusel Topping - September 25, 2026