
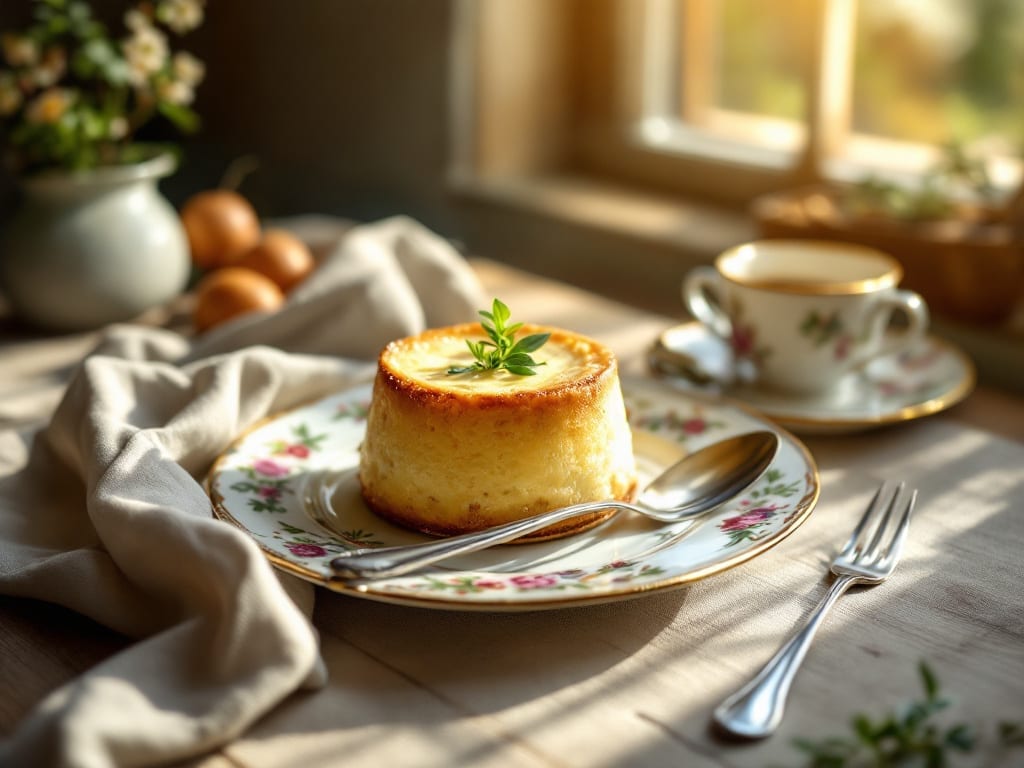
This yogurt pot cake recipe delivers effortlessly silky layers with no mixing required—a technique that transforms simple ingredients into a dessert so tender it practically melts in your mouth. The secret lies in the yogurt’s natural acidity, which creates that signature moist, cake-like texture without a trace of dryness.
I first discovered this method while exploring Middle Eastern baking traditions, where it’s traditionally served warm with tea or drizzled with honey.
The beauty of this recipe is its simplicity: just five core ingredients combine to form a batter so smooth it pours effortlessly into a pot. No electric mixer, no overmixing—just a whisk and patience as the yogurt and flour work their magic.
The result is a cake with delicate, almost custard-like layers that stay moist for days, making it perfect for meal prep or last-minute gatherings.
What makes this recipe truly special is how it balances tradition with convenience. While it originates from regions where yogurt cakes are a staple, this version adapts perfectly to modern kitchens with minimal effort.
The baking process is hands-off, requiring just 30 minutes to yield a dessert that tastes like it came from a bakery. Serve it warm with a dusting of powdered sugar or a drizzle of honey for an experience that feels both nostalgic and refined.
Whether you’re baking for a family dinner or treating yourself to a quiet afternoon dessert, this yogurt pot cake delivers restaurant-quality results with zero fuss. The technique is foolproof, the ingredients are accessible, and the outcome is consistently impressive.
Let’s get started on creating layers of silky perfection that will have everyone asking for seconds.
Ingredients for yogurt pot cake
Five simple ingredients create silky layers without mixing—just whisk and bake.
| Ingredient | Amount | Notes |
|---|---|---|
| Plain Whole Milk Yogurt 🥛 | 2 cups | Full-fat for optimal creaminess |
| All-Purpose Flour 🌾 | 2 cups | Sifted for smooth batter consistency |
| Granulated White Sugar 🍚 | 1 ½ cups | Superfine preferred for finer texture |
| Unsalted Butter 🧈 | ½ cup | Cold, cubed for easier incorporation |
| Baking Powder 🍞 | 2 tsp | Freshly opened for proper leavening |
| Vanilla Extract 🌸 | 1 tbsp | Pure Madagascar bourbon preferred |
| Salt 🧂 | ½ tsp | Diamond Crystal kosher preferred |
| Powdered Sugar 🍚 | ½ cup | For dusting finished cake |
| Honey 🍯 | ¼ cup | Optional drizzle for serving |
| Vegetable Oil 🫒 | 2 tbsp | For greasing the pot |
The yogurt is the heart of this recipe, and full-fat Greek-style yogurt yields the most luxurious texture. Fage or Siggi’s from the refrigerated section deliver optimal thickness, though plain whole milk yogurt works in a pinch. Look for brands with minimal additives—just live cultures and milk. The flour should be sifted before measuring to prevent lumps, which can disrupt the delicate layers. For the sugar, superfine sugar dissolves more easily, but granulated works if pulsed briefly in a food processor. The butter should be cold and cubed to prevent premature melting during the whisking stage, which is critical for maintaining the cake’s structure.
No vanilla extract? Almond extract at half the amount provides a similar depth, though the flavor profile shifts. The baking powder must be fresh—old powder loses its lift, resulting in dense layers. For a dairy-free adaptation, substitute the yogurt with unsweetened coconut yogurt, though the texture will be slightly lighter. The honey drizzle is optional but enhances the cake’s natural sweetness; raw acacia honey offers a delicate floral note. If you prefer a different sweetener, agave nectar works at a 1:1 ratio, but it may yield a slightly moister cake. The vegetable oil for greasing should be neutral-flavored—avoid strongly scented oils like sesame.
This cake stores beautifully in an airtight container at room temperature for 3 days, though it’s best enjoyed fresh. For longer storage, wrap tightly and refrigerate for up to 5 days, though the texture may become slightly denser. Reheat slices in a 350°F oven for 5-7 minutes to restore warmth. The cake freezes well for up to 3 months—wrap individual slices in plastic wrap before placing in a freezer bag. For serving, dust with powdered sugar immediately after baking to prevent sticking, or drizzle with honey while still warm for a restaurant-quality finish.
Why You’ll Love This Recipe
- No Mixer Needed: I swear by this recipe on lazy mornings—just stir the yogurt, flour, and sugar until crumbly, then fold in melted butter. The dough comes together faster than my coffee brews, and honestly, that’s all it takes.
- Buttery Sweet Magic: That first bite? Warm, tender cake with a crispy top thanks to the butter and baking powder, all balanced by the tangy yogurt. It’s like a hug for your taste buds—simple, but dangerously addictive.
- Breakfast or Dessert: Serve it plain with a drizzle of honey for a quick breakfast, or dust with powdered sugar and a scoop of ice cream for an after-dinner treat. My kids ask for it both ways, and I never say no.
- Leftovers? No Problem: The cake keeps well for days, so I bake a batch on Sunday and grab slices for snacks or lunches all week. Plus, the ingredients won’t break the bank—yogurt and flour stretch far, and you’ll have enough for seconds.
Step-by-step instructions for yogurt pot cake
Here’s the method for creating tender, moist layers without a single mix—just pour, bake, and enjoy.
Prepare the Cake Pot and Mix Dry Ingredients
Begin by greasing a 10-inch Bundt pan or tube pan thoroughly with the 2 tablespoons vegetable oil, using a paper towel to ensure even coverage. The oil prevents sticking and promotes even browning. Dust the pan generously with 2 cups all-purpose flour, tapping out any excess. This creates a nonstick barrier that allows the cake to release cleanly when inverted.
In a medium bowl, whisk together the 2 cups plain whole milk yogurt, 1.5 cups granulated white sugar, and 1 tablespoon vanilla extract until fully combined. The yogurt should be smooth with no lumps, and the sugar should dissolve completely. This mixture forms the base of your cake, contributing to its signature moist texture.
Combine Wet and Dry Components
In a separate large bowl, sift the 2 cups all-purpose flour, 2 teaspoons baking powder, and 0.5 teaspoon salt together. This ensures even distribution of leavening agents and prevents dense pockets in the cake. Create a well in the center of the dry ingredients and pour in the yogurt mixture. Using a rubber spatula, gently fold the ingredients together just until combined—avoid overmixing, which develops gluten and results in a tough cake.
Cut the 0.5 cup unsalted butter into small cubes and fold them into the batter. The cold butter will create pockets of moisture and fat, contributing to the cake’s tender crumb. The batter should be thick but pourable—if it appears too stiff, add 1-2 tablespoons of yogurt to loosen it. Pour the batter into the prepared pan, smoothing the top with a spatula.
Bake to Golden Perfection
Preheat your oven to 350°F and place the cake pan inside to warm for 5 minutes. This step ensures even baking from the start. Pour 0.25 cup honey over the batter, allowing it to slowly seep into the cake as it bakes. The honey adds subtle sweetness and helps create a glossy finish.
Bake the cake for 50-60 minutes, or until a toothpick inserted into the center comes out clean. The cake should be golden brown with a slightly domed top. If the edges brown too quickly, tent the pan with aluminum foil to prevent over-browning while allowing the center to cook through. The honey will caramelize slightly, adding depth of flavor.
Cool and Invert for Presentation
Allow the cake to cool in the pan for 10 minutes before inverting it onto a serving plate. To ensure a clean release, run a thin knife around the edges of the pan and tap the pan gently on the counter. The cake should slide out effortlessly, revealing its signature layers. If it sticks, let it cool for an additional 5 minutes before attempting to invert again.
Once inverted, dust the cake generously with 0.5 cup powdered sugar for a sweet, snowy finish. Serve warm or at room temperature, optionally drizzling with additional honey for extra richness. This cake is best enjoyed within 2-3 days, though it can be stored in an airtight container for up to 5 days. The layers will remain moist and tender, making every slice a delight.
Pro Tips For Making Yogurt Pot Cake
- Whisk the Yogurt First: I learned this the hard way—lumpy batter ruins the texture. Before mixing anything else, whisk the yogurt until completely smooth. This prevents those dreaded streaks of thick yogurt in your cake, especially if yours isn’t perfectly fresh.
- Use Cold Butter: Cut that butter straight from the fridge, cubed and cold. Melted butter makes the cake dense, and room-temperature butter risks overmixing. You want flaky layers, not a brick.
- Don’t Overmix the Batter: Mix just until the flour disappears—no more. Overworking the batter develops gluten, and your cake will turn out tough instead of tender. Stop when it’s barely combined.
- Grease the Pot Well: Use butter and flour—don’t skip either. Brush the pot with melted butter, then dust with flour, tapping out the excess. This guarantees your cake won’t stick, even if you’re impatient and don’t let it cool completely before removing it.
Troubleshooting this dish
Batter Too Thick?
If your batter appears too stiff to pour, don’t panic—this is common with yogurt cakes. Gradually whisk in 1-2 tablespoons of warm water or yogurt until it reaches a pourable consistency.
The goal is a thick but smooth batter that flows easily into the pan. Overworking the batter can introduce air bubbles, so gentle whisking is key. 💡
Cake Sticking to Pan
Even with proper greasing, cakes sometimes stick. Ensure your pan is well-coated with vegetable oil and dusted with flour, tapping out excess. If the cake still sticks, let it cool in the pan for an extra 10 minutes before inverting.
A thin knife run around the edges can also help release it. Avoid forcing it—patience prevents breakage!
Dense or Dry Texture
Overmixing the batter is the #1 cause of dense cakes. Fold dry ingredients just until combined—lumps are fine! For dryness, ensure your yogurt is full-fat (Greek-style works best) and that your baking powder is fresh. If using a substitute like coconut yogurt, expect a slightly lighter texture. 🥛
Uneven Baking
If edges brown too quickly, tent the pan with aluminum foil after 20 minutes of baking. For uneven layers, ensure your pan is level on the oven rack and rotate the pan halfway through baking. A 350°F oven is ideal—hotter temps can cause over-browning before the center cooks.
No Rise or Flat Cake
Check your baking powder first—old powder loses potency. Ensure your oven is properly calibrated using an oven thermometer. If using a glass pan, reduce baking time by 5-10 minutes as glass conducts heat faster.
For extra lift, whisk egg whites separately and fold them into the batter before pouring. 🌟
Honey Not Seeping In
If your honey stays on top, pour it over the batter after preheating the pan but before baking. The heat helps it distribute naturally. For a glossier finish, brush the top with a thin layer of honey or simple syrup after removing the cake from the oven.
This also adds moisture to the top layer.
Nutrition facts
Frequently asked questions
Why does this yogurt cake have layers?
The signature layers come from the yogurt’s natural acidity and the gentle folding technique. The cold butter creates pockets of moisture while the baking powder lifts the batter upward as it bakes, creating those signature delicate layers. The honey drizzle also helps maintain moisture during baking, enhancing the layering effect.
Can I make this cake without a Bundt pan?
Yes! Use any tube pan (like a Bundt or angel food pan) or even a round cake pan. For a different shape, try a loaf pan or individual ramekins for mini cakes. The key is using a pan with a center tube to allow even baking and proper layer formation. Just adjust baking time by 5-10 minutes depending on your pan size.
How do I know when the cake is fully baked?
Insert a toothpick into the center—it should come out clean or with just a few moist crumbs. The cake should also spring back slightly when gently pressed. For visual confirmation, look for a golden-brown top with slight doming. If unsure, err on the side of slightly underbaking to prevent dryness.
What’s the best way to store leftovers?
Keep the cake in an airtight container at room temperature for up to 3 days for best texture. For longer storage, refrigerate for 5 days or freeze individual slices wrapped tightly for 3 months. Reheat slices in a 350°F oven for 5-7 minutes to restore freshness and moisture.
Can I add fruit or nuts to this recipe?
Fold in ½ cup chopped nuts (like walnuts or pistachios) or ½ cup diced fruit (such as berries or apricots) with the butter. For extra flavor, soak dried fruits in warm water for 10 minutes first. Just be gentle when folding to avoid deflating the batter.

- Braised Beef Short Ribs Recipe: Crock Pot Fall-Off-Bone Magic in 6 Hours - November 1, 2026
- Crock Pot Cocoa Recipe: Velvety Warmth With Hidden Spice Magic - November 1, 2026
- White Queso Crock Pot Recipe: Ultra-Smooth Melt Without the Grain - November 1, 2026