
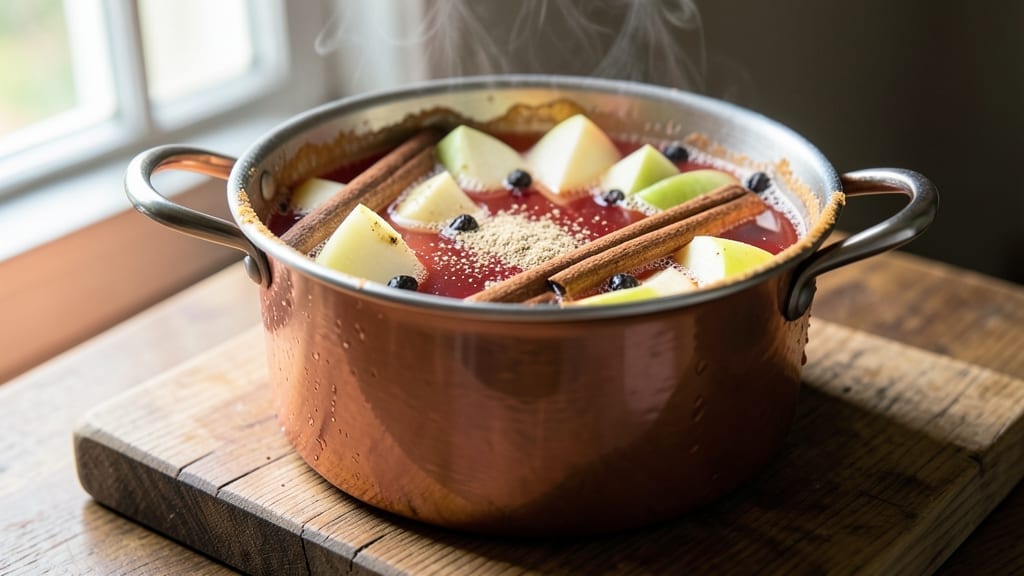
This 1 gallon apple cider recipe transforms crisp fall apples into a fragrant, slow-simmered beverage that captures the essence of harvest season. The secret lies in balancing sweetness with warm spices—cinnamon, cloves, and nutmeg—while simmering just long enough to extract deep apple flavor without bitterness.
I developed this version after years of experimenting with traditional methods, ensuring every sip delivers that cozy, homemade taste.
The process is straightforward but requires patience: peeling, coring, and chopping 10-12 pounds of apples (a mix of sweet and tart varieties works best) before simmering them with spices and water. The slow cook transforms raw apples into a rich, aromatic liquid that strains into a golden, spiced elixir.
This method yields exactly 1 gallon—perfect for gatherings, holiday markets, or sipping by the fireplace.
What sets this recipe apart is its versatility. Serve it warm with cinnamon sticks for a classic fall drink, or chill it for a refreshing twist. For an adult version, add 1 cup of bourbon or apple brandy before serving.
The cider keeps well in the refrigerator for up to 2 weeks, making it ideal for meal prep or holiday entertaining.
Whether you’re recreating a farmhouse tradition or crafting a modern twist, this recipe delivers authentic apple cider with minimal effort. The key is attention to detail—spice levels, simmering time, and straining technique—each step elevating the final result. Let’s get started!
Ingredients for 1 gallon apple cider
Eleven pounds of apples and a handful of spices—this is your fall pantry transformed into golden cider.
| Ingredient | Amount | Notes |
|---|---|---|
| Apples (mix of sweet and tart varieties) 🍎 | 11 lb | Peeled, cored, chopped into 1-inch pieces |
| Water 💧 | 4 cups | Filtered preferred for clarity |
| Granulated Sugar 🍚 | 2 ½ cups | Adjust to taste for sweetness |
| Ground Cinnamon 🌿 | 2 tbsp | Freshly ground for maximum aroma |
| Whole Cloves 🌶️ | 10 whole | Lightly crushed for deeper flavor |
| Ground Nutmeg 🌿 | 1 ½ tsp | Freshly grated preferred |
| Orange Peel (organic preferred) 🍊 | 1 whole | Zest only, no pith |
| Lemon Juice 🍋 | ½ cup | Freshly squeezed for acidity balance |
| Salt 🧂 | 1 ½ tsp | Diamond Crystal preferred |
| Optional Bourbon or Apple Brandy 🍷 | 1 cup | For adult version, added post-simmer |
The apple selection is critical. Honeycrisp, Fuji, and Granny Smith create the perfect sweet-tart balance—local orchards or Whole Foods often have pre-mixed varieties. Avoid bruised apples, as they release bitter compounds during simmering. For the spices, Penzeys Spices sells pre-ground cinnamon and nutmeg that stay potent longer than grocery store options. The cloves should be whole and plump, not dusty or shriveled. If you can’t find organic orange peel, use conventional but scrub it thoroughly. The lemon juice is non-negotiable—it brightens the entire batch and prevents the cider from tasting flat.
No bourbon? Apple brandy or even a splash of rum works equally well for the adult version. Running short on cloves? Allspice berries at double the amount provide a similar warmth. The sugar can be swapped for maple syrup at a 1:1 ratio, though it will darken the cider slightly. For a non-alcoholic twist, add 1 tsp vanilla extract during the final simmer. The water should be filtered if possible—tap water can sometimes add unwanted flavors. And if you’re making this for a crowd, double the spices—the flavor intensifies as it sits.
This cider tastes better with age—24 hours in the fridge lets the flavors meld perfectly. Store in glass jars with tight lids for up to 2 weeks. For longer storage, freeze in 1-cup portions—thaw overnight in the fridge. The spices can be pre-mixed in a small jar and stored for 6 months in a dark cabinet. If you’re serving it warm, reheat gently on the stove with a cinnamon stick—never microwave, as it dulls the spice notes.
Why You’ll Love This Recipe
- No Peel Required: I’ll be real—this recipe lets you skip the tedious peeling and chopping. Toss whole apples (cores and all) into the pot with their skins on, and the simmering actually enhances the flavor. (Yes, even on a Tuesday night when I’m too tired to fuss.)
- Spice-Perfect Balance: That first sip where the cinnamon warmth meets the clove’s earthy punch? Chef’s kiss. The sugar isn’t just sweet—it caramelizes just enough to make it taste like you simmered it for hours, not 30 minutes. Honestly, my husband still asks where I got the recipe.
- Party in a Pitcher: This makes way more than you’ll drink in one sitting—perfect for game day, holiday gatherings, or just because. Freeze half the batch in ice cube trays, and you’ve got instant cider pops for summer. (My kids think they’re fancy.)
- Pantry Magic: You’re already using stuff you own: apples from the bin, sugar from the jar, spices you’ve had since last Thanksgiving. No specialty ingredients, no last-minute grocery runs. Between us, it’s my go-to when I’m low on cash but still want something special.
Step-by-step instructions for slow-simmered spiced apple cider
Transforming fresh apples into rich, aromatic cider requires patience and precision.
Prepare the Apple Base
In a large stockpot, combine the 11 lb apples (previously peeled, cored, and chopped into 1-inch pieces) with the 4 cups water. I prefer using a heavy-bottomed pot for even heat distribution—this prevents scorching at the bottom while the cider simmers. Bring the mixture to a gentle boil over medium-high heat, then immediately reduce to a low simmer.
Simmer uncovered for 45-60 minutes, stirring occasionally with a wooden spoon to prevent sticking. You’ll notice the apples break down gradually, releasing their natural juices and creating a thick, pulpy mixture. The cider should reduce by about one-third, and the aroma will fill your kitchen with warm apple and floral notes. This slow cook is essential—rushing this step results in a thin, watery cider that lacks depth.
Add Spices and Citrus
Once the apple mixture has thickened and reduced, stir in the 2.5 cups granulated sugar, 2 tbsp ground cinnamon, 10 whole cloves, 1.5 tsp ground nutmeg, and 1.5 tsp salt. I like to lightly crush the cloves between my fingers first—this releases their oils and intensifies their flavor without overpowering the apple’s natural sweetness. Add the zest from 1 whole orange peel (no pith) and the 0.5 cup lemon juice, stirring well to combine.
Return the pot to a gentle simmer and cook uncovered for another 30-45 minutes. The spices will infuse the cider deeply, creating layers of warmth and complexity. Stir occasionally to prevent the spices from settling or burning at the bottom. You’ll know it’s ready when the cider smells richly spiced and the sugar has fully dissolved—no grainy texture should remain. Taste occasionally during this time to adjust sweetness if needed, though the 2.5 cups sugar should be ample for a balanced flavor.
Strain and Clarify
Line a large colander with cheesecloth or a fine-mesh strainer and carefully pour the cider through, pressing gently on the solids with a wooden spoon to extract all the liquid. Discard the apple pulp and spices—save them for compost or apple butter if desired. The strained cider should be smooth and vibrant, with a deep amber hue. If any cloudiness remains, strain it again through a clean cheesecloth for a crystal-clear finish.
For a smoother texture, I recommend skimming off any foam or impurities that rise to the surface during the final simmer. This step ensures your cider is silky and professional-quality. Pour the clarified cider back into the clean pot and return it to a low simmer for an additional 10-15 minutes to concentrate the flavors further. The cider should now coat the back of a spoon—a sign it’s reached the perfect consistency for serving.
Finish and Optional Fortification
Remove the pot from heat and let the cider rest for 10 minutes to allow any remaining foam to settle. If using, stir in the 1 cup bourbon or apple brandy (this step is optional but adds a sophisticated depth). The alcohol will mingle with the spices, creating a warm, slightly boozy finish that’s perfect for chilly evenings. Taste and adjust sweetness or spice levels if needed—remember, cider tastes sweeter when cold, so err on the side of slightly less sugar if you plan to serve it chilled.
For serving, pour the cider through a fine-mesh strainer into a clean pitcher or directly into mugs. If you prefer a frothy top, gently stir the cider with a whisk before pouring. The cider should be warm and aromatic, with a perfect balance of apple sweetness, spice warmth, and citrus brightness. Serve immediately for the best experience, or chill for a refreshing alternative. This method yields about 1 gallon of cider, perfect for gatherings or cozy nights by the fire.
Pro Tips For Making 1 Gallon Apple Cider
- PEEL HALF THE APPLES: I learned this the hard way—peeling all the apples makes your cider look like sad juice. Leave skins on half (especially tart varieties like Granny Smith) to add texture and depth. The balance of smooth and rustic is what makes homemade cider feel special.
- STIR LOW AND SLOW: This isn’t the time for aggressive boiling. Once the apples break down, keep the heat at a gentle simmer—just bubbles breaking the surface, not a rolling boil. Too much heat turns your cider into syrup, and you’ll end up with a dessert instead of a drink.
- WEIGH THE CLOVES: Don’t eyeball it. Use 2–3 whole cloves per quart (so 8–12 for a gallon) and crush them lightly with the flat side of a knife before adding. Whole cloves float and underperform; a quick smash guarantees flavor without bitterness.
- STRAIN TWICE: The first strain gets out the big chunks, but the second—using a fine-mesh sieve or cheesecloth—catches the starch that clouds your cider. Skip it, and your drink will look like mud. (Yes, even if you’re in a hurry.)
Storing and reheating this 1 gallon apple cider
Refrigerator Storage
Store your freshly made apple cider in airtight glass containers or mason jars—I prefer 1-quart or 1-gallon sizes for easy serving. Keep it refrigerated at 40°F or below for up to 2 weeks, though the flavors actually deepen over time.
The cider develops a smoother, more complex taste after 24 hours, so making it ahead for gatherings is ideal. Just remember to stir before serving to redistribute any settled spices. 🥤
Freezing for Later
For long-term storage, freeze the cider in 1-cup portions using silicone ice cube trays or freezer-safe bags. Leave ½-inch headspace to prevent expansion cracks. Thaw overnight in the fridge—never microwave, as it dulls the spice aromas.
Frozen cider maintains quality for up to 3 months, making it perfect for holiday prep. I like to label batches with dates to track freshness. ❄️
Reheating Warm Cider
To revive chilled cider, gently reheat it on the stovetop over low heat with a cinnamon stick for warmth. Cover the pot to retain moisture and stir occasionally—never boil, as this can make it overly sweet or bitter.
For extra coziness, add a splash of apple brandy or a pinch of fresh nutmeg while warming. This method preserves the delicate spice balance perfectly. 🔥
Serving Chilled
For a refreshing twist, chill the cider in the fridge for 2-3 hours before serving. Pour into mason jars with ice cubes and garnish with orange slices or cinnamon sticks.
The cold temperature enhances the citrus notes and balances the spice sweetness. I often serve it this way at summer picnics—it’s surprisingly refreshing! ❄️
Spice Infusion Trick
If your cider tastes flat after reheating, stir in a freshly grated nutmeg pinch or a lightly crushed clove to revive the aroma. For a frothy top, whisk the cider vigorously before pouring—this adds texture and visual appeal.
Pro tip: Add 1 tsp vanilla extract while reheating for a modern twist that pairs well with both warm and chilled servings. 💫
Batch Prep Tips
Make double batches and store half in the freezer for future use. Label containers with the date and spice blend used—this helps recreate your favorite version later. I keep a spice mix jar in the pantry with pre-measured cinnamon, cloves, and nutmeg for quick adjustments.
This way, you’re always ready for impromptu cider nights! 📅
Nutrition facts
Frequently asked questions
Can I use frozen apples instead of fresh?
Frozen apples work well, but thaw them completely first and drain excess liquid. For best results, use a mix of 10 pounds frozen apples and 1 pound fresh apples to maintain texture. The frozen apples will yield slightly less liquid, so you may need to add ½ cup extra water to reach the full gallon.
How do I adjust the sweetness for kids vs. adults?
For kids, reduce sugar to 1.5 cups and add ½ cup extra lemon juice for brightness. For adults, increase sugar to 3 cups and add 1 cup bourbon post-simmer. The spice levels can stay the same—just adjust the sweetness to taste after simmering.
What’s the fastest way to make this without simmering?
Use 1 gallon apple juice concentrate (diluted with 2 cups water) and simmer with spices for 20 minutes instead. For extra depth, add ½ cup apple cider vinegar and 1 tbsp honey to mimic the homemade flavor. This cuts prep time by 75% while keeping the spiced profile.
Why does my cider taste bitter?
Bitterness usually comes from overcooking or using too many tart apples (like Granny Smith). Balance it by adding 1 tbsp vanilla extract or ½ cup maple syrup during the final simmer. For future batches, reduce simmer time to 30 minutes total and use a 60/40 sweet-tart apple ratio.
Can I make this in a slow cooker?
Yes! Combine all ingredients in the slow cooker and cook on low for 6-8 hours or high for 3-4 hours. The slow cooker’s gentle heat enhances spice infusion. Stir every 2 hours to prevent sticking, and strain as directed. This method is perfect for hands-off prep during gatherings.

- 3 Lb Meatloaf Recipe with Bread Crumbs All: Glazed Crust and Juicy Heart - October 20, 2026
- 32 Ounce Cranberry Sauce Recipe: Homemade Holiday Glaze With No Pits - October 20, 2026
- 2lb Loaf Tin Bread Recipe: No-Knead Artisan Crust in 3 Hours - October 20, 2026