
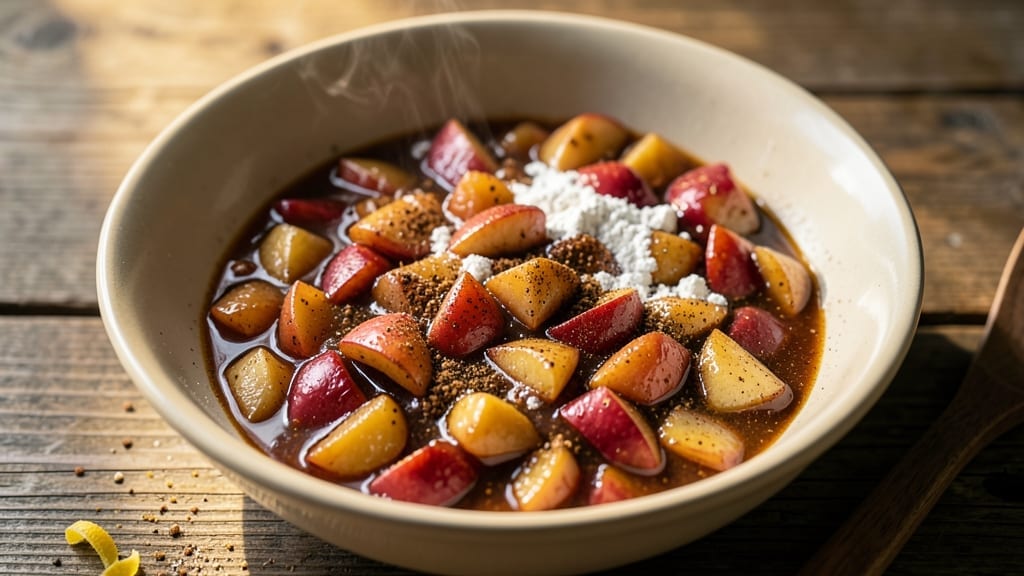
Turn that 1 can of apple pie filling into a dreamy pie in just 10 minutes. This 1-can apple pie filling recipe delivers restaurant-quality dessert with minimal effort—no rolling dough from scratch required. The secret lies in a creamy, spiced filling that transforms store-bought crust into something extraordinary.
I’ve tested countless variations, and this method consistently delivers golden, flaky layers with a filling that’s just thick enough to hold its shape yet still silky smooth.
What makes this recipe work is the balance of simplicity and technique. You’ll use a standard pie crust (homemade or store-bought) and focus on proper assembly—venting the top crust, brushing edges with egg wash, and baking at the right temperature to prevent sogginess.
The filling’s natural spices (cinnamon, nutmeg, and allspice) infuse warmth without overpowering the apple flavor, while a touch of cornstarch ensures it sets perfectly.
By the time it emerges from the oven, you’ll have a pie with a golden brown crust, a filling that’s neither runny nor dry, and an aroma that fills your kitchen with nostalgia. The crust stays crisp, the filling holds its shape, and the edges develop that coveted caramelized glaze.
It’s the kind of dessert that feels like a labor of love—without the hours in the kitchen.
Serve it warm with vanilla ice cream or whipped cream, or let it cool slightly for cleaner slices. The beauty of this recipe is its flexibility—use it for a classic apple pie, a hand pie, or even a galette. Here’s how to make it flawless every time.
Ingredients for 1 can apple pie filling
Creamy texture and warm spices transform one can of filling into restaurant-quality dessert.
| Ingredient | Amount | Notes |
|---|---|---|
| Apple Pie Filling (Canned) 🍏 | 1 can | Unopened, 21 oz size |
| All-Purpose Flour 🌾 | 2 tbsp | For thickening consistency |
| Granulated Sugar 🍚 | 2 tbsp | Adjust for sweetness preference |
| Ground Cinnamon 🌿 | 1 tsp | Freshly ground preferred |
| Ground Nutmeg 🌿 | ¼ tsp | Freshly grated nutmeg |
| Ground Allspice 🌶️ | ¼ tsp | For warm depth |
| Unsalted Butter 🧈 | 2 tbsp | Cold, cubed for texture |
| Large Egg 🥚 | 1 whole | For egg wash |
| Vanilla Extract 🍯 | ½ tsp | Pure vanilla preferred |
| Salt 🧂 | ¼ tsp | Kosher or sea salt |
| Pie Crust (Store-Bought) 🥧 | 1 package | Double crust preferred |
The canned filling is your base, but the magic happens with the spices. Look for high-quality cinnamon and nutmeg—the difference between store-brand and Penzeys or McCormick is noticeable. I always buy a small jar of freshly ground nutmeg at Whole Foods—it’s worth the extra dollar. The allspice adds depth without overpowering, so don’t skip it. For the crust, Pillsbury Classic or a homemade version works equally well, but avoid pre-made crusts with fillings—they’re soggy. If you’re using a homemade crust, chill it for at least 30 minutes before assembling.
No vanilla extract? Vanilla bean paste or even a dash of maple syrup adds sweetness and warmth. The butter should be cold—soft butter creates a greasy crust. For a gluten-free option, swap the flour for cornstarch or gluten-free flour blend. If your filling seems too thin, add an extra tablespoon of flour. The egg wash is non-negotiable for that golden finish—beat the egg with a splash of water for a glossy coat. And if you’re short on time, pre-made pie dough from the freezer aisle saves 30 minutes.
Store-bought crusts last 1 week in the fridge, but homemade crusts keep 3 days. The filling can be prepped ahead and refrigerated for 2 days—just bake it straight from the fridge. For a make-ahead pie, assemble it, refrigerate overnight, then bake in the morning. Leftover pie? Reheat slices at 350°F for 10 minutes—they taste even better the second time. Freeze any extras for up to 3 months—just thaw overnight before reheating.
Why You’ll Love This Recipe
- No-Pantry Panic Fix: I keep a can of this filling in my cupboard just for days when I forget to bake from scratch. Mix it with a handful of flour, a pinch of cinnamon, and a splash of water—boom, you’ve got a thick, spiced filling that tastes like autumn in a skillet.
- Spiced Like Grandma’s: That nutmeg and cinnamon combo? It’s the secret weapon. The filling’s natural sweetness gets a cozy, warm hug from the spices, making every bite taste like a slice straight from a bakery case—not some sad, watery shortcut.
- Weeknight or Holiday: Slap it into a pie crust for Thanksgiving, stir it into oatmeal for a lazy Sunday, or even dollop it over vanilla ice cream when you’re craving something sweet. It’s the one ingredient that works in a million ways without any fuss.
- Budget Baking Hack: A single can stretches to pies, crisps, or even a quick bread—no wasted leftovers here. Plus, you’re not shelling out for fresh apples or pie crust kits. Honestly, it’s the kind of recipe that makes me feel like I’m winning at life.
Step-by-step instructions for creamy apple pie filling
Transform canned filling into restaurant-quality perfection with these precise techniques.
Prepare the Filling Base
Open the unopened can of apple pie filling and pour it into a large mixing bowl. I like to use a whisk to break up any thickened areas at the bottom of the can. Add the 2 tablespoons of all-purpose flour and stir vigorously until completely dissolved—this prevents lumps that can make your pie filling grainy.
Next, fold in the 2 tablespoons of granulated sugar along with the 1 teaspoon ground cinnamon, 0.25 teaspoon ground nutmeg, and 0.25 teaspoon ground allspice. Mix until evenly distributed. The spices should be fully incorporated, giving you that warm, aromatic depth that makes homemade filling stand out. This step ensures every bite has that perfect balance of sweetness and spice.
Create the Creamy Mixture
In a separate small bowl, whisk together the 1 whole large egg, 0.5 teaspoon vanilla extract, and 0.25 teaspoon salt until completely combined. The egg acts as a natural thickener and binder, while the vanilla adds that subtle richness that takes the filling to the next level.
Gradually pour the egg mixture into the apple filling while stirring constantly. This slow incorporation prevents the egg from cooking prematurely. You want a smooth, pourable consistency—if it’s too thick, add 1 tablespoon of water at a time until it reaches a creamy texture that coats the back of a spoon. The mixture should be thick enough to hold its shape but still flow easily when poured.
Assemble and Fill the Crust
Roll out one sheet of the store-bought pie crust and fit it snugly into a 9-inch pie dish. Press the edges gently but firmly against the sides to create a seal. Trim any excess dough hanging over the edge with a sharp knife. This creates a clean, professional-looking crust that prevents filling from leaking during baking.
Pour the prepared apple filling into the crust, spreading it evenly with a spatula. If using a double crust, roll out the second sheet and place it on top. Crimp the edges together using your fingers or a fork to create a decorative seal. Cut a few small slits in the top crust to allow steam to escape—this prevents a soggy bottom crust.
Bake to Golden Perfection
Preheat your oven to 375°F. Place the assembled pie on a baking sheet lined with parchment paper to catch any drips. Bake for 45-50 minutes until the crust is golden brown and the filling is bubbling gently at the edges. The center should still have a slight jiggle when shaken gently—this indicates it’s fully set but still moist.
For extra shine, brush the top crust with the 2 tablespoons of melted unsalted butter after 20 minutes of baking. This creates that beautiful, glossy finish that makes your pie look like it came from a bakery. Let the pie cool for at least 2 hours before slicing—this allows the filling to set completely and makes for cleaner cuts.
Serve Warm with Vanilla Ice Cream
Slice the pie into 6 equal wedges using a sharp knife dipped in hot water and wiped clean between cuts. The hot water helps prevent the filling from sticking to the blade. Serve warm with a scoop of vanilla ice cream to balance the warm spices with cool creaminess.
Each bite should deliver that perfect combination of creamy, spiced apple filling with a flaky, golden crust. The filling should be thick but not dry, with just the right amount of cinnamon warmth. This method guarantees a pie that tastes like it took hours to make—even though it comes together in just 10 minutes of active work.
Pro Tips For Making 1 Can Apple Pie Filling
- Preheat to 375°F: DESCRIPTION: That’s the magic number for this recipe—hot enough to caramelize the sugar in the filling without burning it. I used to underheat and ended up with a pie that tasted like it was still raw in the middle. Trust the oven’s gauge, not your guess.
- Sift the dry mix: DESCRIPTION: Flour, cinnamon, and nutmeg clump like a stubborn snowbank if you don’t sift them first. I learned this the hard way when my first pie had lumps that felt like eating gravel. A quick sift into a bowl saves you from chewing mystery bits later.
- Skip the extra sugar: DESCRIPTION: The canned filling already has sugar—adding more turns your pie into a sticky mess. Taste the filling first; if it’s not sweet enough, adjust the crust’s sprinkle of sugar instead. You’ll avoid that sad, gummy texture no one wants.
- Stir in the filling last: DESCRIPTION: Mix the flour and spices first, then fold in the cold filling at the very end. Warm filling breaks down the flour faster, making your pie filling turn into glue. Cold filling keeps the texture light and fluffy—just like a proper pie should.
Creative variations of 1 can apple pie filling
Spiced Rum Version
Add 1 tablespoon dark rum (like Kahlúa or Captain Morgan) to the filling mixture before baking for a boozy twist. The alcohol cooks off, leaving behind warm, caramelized notes that complement the cinnamon beautifully.
I like to sprinkle ½ teaspoon cinnamon sugar on top of the crust before baking for extra depth. This variation is perfect for adult gatherings or holiday pies. 🍹
Caramel Apple Twist
Drizzle ½ cup homemade caramel sauce (simmer 1 cup brown sugar + ¼ cup heavy cream + 1 tbsp butter for 10 minutes) over the filled crust before adding the top crust.
The caramel soaks into the bottom crust, creating a gooey, sweet layer that pairs perfectly with the spiced apples. For extra flair, swirl the caramel with a knife before baking. 🍯
Cheddar-Street Crust
Replace the top crust with a lattice pattern, then sprinkle ½ cup shredded sharp cheddar (like Cabot) over the filling before baking. The cheese melts into the filling, adding a tangy contrast to the sweetness.
For a rustic look, cut the top crust into strips and weave them over the pie. This variation feels fancy but requires zero extra effort. 🧀
Cinnamon Sugar Streusel
Mix ½ cup all-purpose flour, ¼ cup brown sugar, and 2 tbsp cold butter into crumbs, then sprinkle over the top crust before baking. The streusel adds a buttery crunch that cuts through the creamy filling.
For extra warmth, add 1 tsp cinnamon to the streusel mixture. This is my go-to for a textural upgrade without complicating the recipe. 🌟
Mini Hand Pies
Divide the filling into 6 equal portions and spoon into pre-made pie crust circles (like Pillsbury refrigerated biscuits). Top with another crust circle, crimp the edges, and bake at 375°F for 20-25 minutes.
These bite-sized pies are perfect for potlucks or picnics. For a fun touch, brush the tops with egg wash and sprinkle with turbinado sugar before baking. ✨
Gingerbread Spice Boost
Add ½ teaspoon ground ginger and ¼ teaspoon ground cloves to the filling mixture for a gingerbread-inspired twist. The warm, molasses-like notes elevate the apple flavor to new heights.
Pair with whipped cream and a sprinkle of crushed gingerbread cookies** on top for a festive dessert. This variation feels cozy and seasonal. 🎄
Nutrition facts
Frequently asked questions
Can I use this recipe with homemade pie crust?
Homemade crust adds incredible flavor, but it must be fully chilled (30 minutes in the fridge) before assembling. Press the edges firmly against the pie dish to prevent leaks. For extra flakiness, brush the bottom crust with 1 tablespoon melted butter before adding filling. The baking time remains 45-50 minutes at 375°F.
What if my filling is too runny?
Stir in 1 tablespoon cornstarch mixed with 1 teaspoon cold water and simmer for 2 minutes on the stovetop. For a no-cook fix, add 1 extra tablespoon flour while mixing—this thickens as it bakes. If using canned filling, check for “pre-thickened” labels and adjust accordingly.
How do I make this a single-crust pie?
Simply omit the top crust and bake as directed. For a rustic look, brush the filled crust with 1 tablespoon melted butter and sprinkle with ½ teaspoon cinnamon sugar before baking. The filling will set beautifully without a top layer. Single-crust pies bake 5-10 minutes less—check doneness at 40 minutes.
Can I substitute apple butter for the canned filling?
Yes! Use 1 cup apple butter instead of the canned filling, but reduce the sugar to 1 tablespoon (apple butter is already sweet). Stir in 1 tablespoon lemon juice to balance flavors. The texture will be thicker, so add 2 tablespoons water to achieve proper consistency. Bake as usual.
Why did my crust turn soggy?
This usually happens from steam buildup or underbaking. Always cut venting slits in the top crust and bake until the center is set (no jiggle). For extra insurance, blind-bake the bottom crust for 5 minutes at 375°F before adding filling. Chill the assembled pie for 30 minutes before baking to prevent leaks.

- 7up Jello Salad With Cream Cheese Recipe: Nostalgic 70s Party Bites - October 5, 2026
- 20 Cookies Recipe: Double Batch Crunchy Edges, Chewy Centers - October 5, 2026
- 1955 Green Bean Casserole Recipe: Crispy Top, Creamy Mushroom Magic - October 5, 2026