
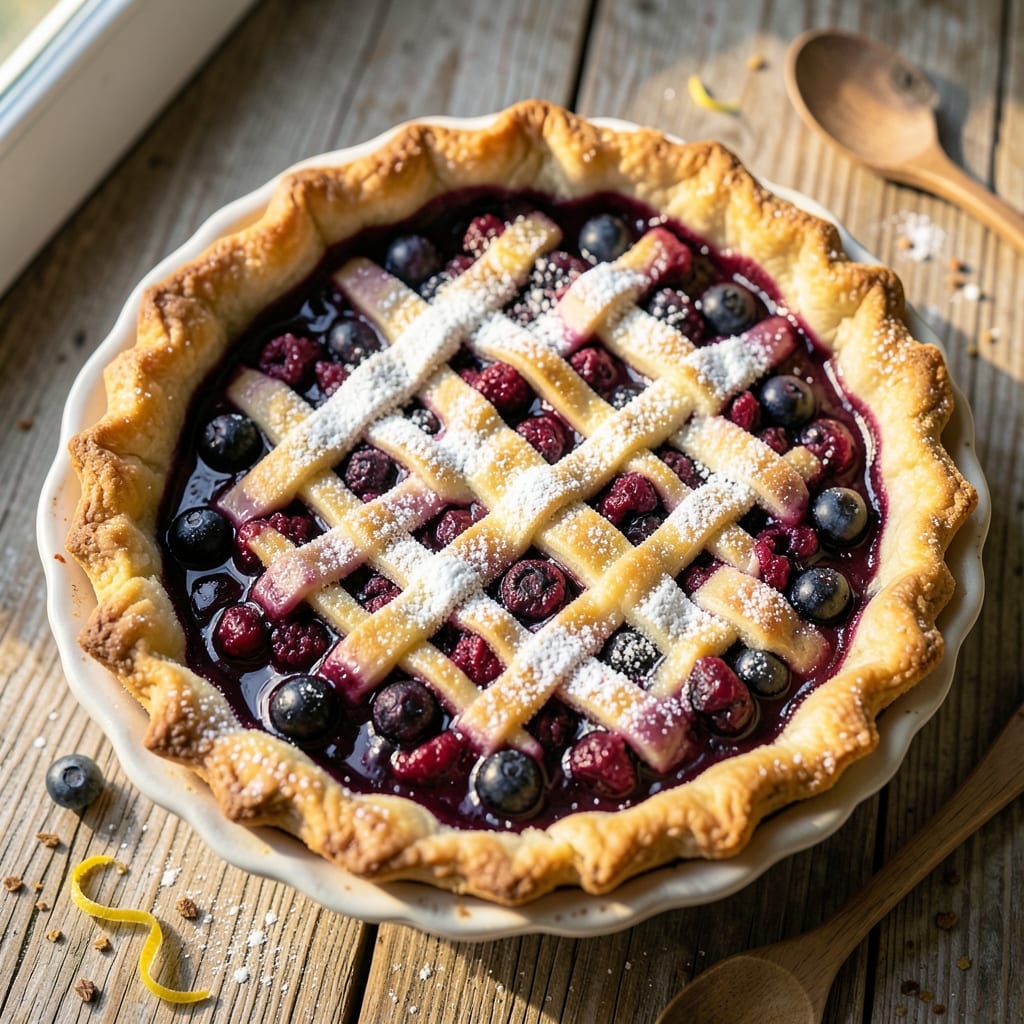
This 1-crust blueberry pie recipe delivers a golden, crackly top and juicy, bubbling filling—the perfect summer dessert for weeknights or guests. The secret lies in a cold butter crust that layers like delicate pastry paper and a filling thickened just enough to hold its shape without turning to syrup.
I’ve perfected this recipe over years of trial and error, learning which berries to use, how to balance sweetness, and why chilling the pie before baking prevents a soggy bottom.
The crust starts with cold, cubed butter cut into the flour until it resembles coarse meal—this ensures maximum flakiness when it bakes. Meanwhile, the filling combines fresh blueberries (or frozen, thawed and drained) with a mix of sugar, cornstarch, and lemon juice to create a balance of sweetness and tang.
A sprinkle of cinnamon adds warmth that complements the berries perfectly.
What you’ll end up with is a pie that looks like it came from a bakery: a golden, crisp-edged crust that shatters slightly under the fork, and a filling that’s just thick enough to hold its shape while still bursting with juicy berries.
The aroma alone—warm berries mingling with buttery crust—will have everyone gathering in the kitchen long before it’s ready to serve.
Serve it warm with a scoop of vanilla ice cream or whipped cream, or let it cool slightly for cleaner slices. The best part? This recipe delivers restaurant-quality results with just one crust—no fuss, no waste, and all the flavor. Let’s get baking.
Ingredients for 1 crust blueberry pie
The perfect balance of flaky crust and juicy blueberry filling—just 11 ingredients for bakery-quality pie.
| Ingredient | Amount | Notes |
|---|---|---|
| All-Purpose Flour 🌾 | 2 ½ cups | Sifted for flakier crust |
| Unsalted Butter 🧈 | 1 cup | Cold, cubed, high-fat content |
| Granulated Sugar 🍚 | 1 ½ cups | White or light brown |
| Cornstarch 🌾 | ¼ cup | For thickening filling |
| Fresh Blueberries 🫐 | 4 cups | Or frozen, thawed/drained |
| Lemon Juice 🍋 | 2 tbsp | Freshly squeezed |
| Ground Cinnamon 🌿 | 1 tsp | For filling warmth |
| Salt 🧂 | ½ tsp | Kosher or sea salt |
| Ice Water 💧 | ¼ cup | For crust binding |
| Vanilla Ice Cream 🍦 | 1 ½ cups | For serving (optional) |
| Heavy Cream 🥛 | ½ cup | For whipped topping (optional) |
The butter is non-negotiable—European-style unsalted butter like Plugrá or Land O’Lakes works best, but any cold, high-fat butter will do. Look for at least 82% fat content for that signature flakiness. The flour should be all-purpose, not self-rising, and kept in the freezer to prevent rancidity. Blueberries? Local, in-season berries have the best flavor, but frozen works perfectly if you drain and dry them first. I always buy extra—blueberries shrink when cooked, and you want that juicy, bubbling filling.
No fresh blueberries? Frozen berries are a great substitute, but make sure to thaw and drain them thoroughly to avoid a watery filling. Running short on cornstarch? Arrowroot powder works 1:1, though it has a slightly different texture. The crust can be made a day ahead and stored in the fridge—wrap it tightly in plastic to prevent drying. For a deeper flavor, add a pinch of salt to the filling along with the cinnamon. The lemon juice is key—it brightens the berries and balances the sugar, so don’t skip it.
The crust keeps best in the fridge for 2 days if unbaked, wrapped in plastic. Once baked, store the pie at room temperature for up to 4 hours or refrigerate for 3-4 days. For serving, let it sit at room temperature for 10-15 minutes—this makes slicing easier and enhances the aroma. The filling reheats beautifully in the microwave for 20-30 seconds if you want it warm. Freeze the pie (without the crust) for up to 3 months—just thaw overnight in the fridge before serving.
Why You’ll Love This Recipe
- No-Roll-Out Crust: I swear by this trick—just toss the flour and butter together until it looks like wet sand, then press it in. No chilling, no stress, and the crust still turns out golden and flaky. (Yes, even if I forget to take it out of the fridge.)
- Blueberry Bliss: That cornstarch-thickened filling? It’s the secret weapon—juicy berries with just the right bite, not too watery, not too mushy. The sugar caramelizes in the oven, giving every slice a little crunchy edge that makes it ridiculous good.
- Weekend or Weeknight: Honestly, this pie is my lazy Sunday go-to, but it’s also the star of my potlucks. Serve it warm with vanilla ice cream or let it cool for a picnic—either way, it disappears fast. (My coworkers keep asking for the recipe.)
- Budget-Friendly Luxury: Fresh blueberries might seem pricey, but a single pint stretches into two pies if you’re smart about it. The crust uses pantry staples, and leftovers? They reheat beautifully in the microwave or oven. Basically, dessert that doesn’t break the bank.
Step-by-step instructions for 1 crust blueberry pie
Here’s how to create a golden, flaky crust with a perfectly balanced blueberry filling.
Prepare the Flaky Crust
In a large bowl, combine the 2.5 cups all-purpose flour and 0.5 teaspoon salt. Cut in the 1 cup unsalted butter using a pastry cutter or your fingers until the mixture resembles coarse crumbs with pea-sized butter pieces. This texture is crucial for flaky layers.
Gradually add the 0.25 cup ice water, 1 tablespoon at a time, mixing gently with a fork just until the dough comes together. Avoid overmixing—this develops gluten and makes the crust tough. Form the dough into a disk, wrap in plastic, and chill for at least 1 hour (or up to 24 hours).
Make the Blueberry Filling
In a large bowl, gently toss the 4 cups fresh blueberries with the 1.5 cups granulated sugar, 0.25 cup cornstarch, 1 teaspoon ground cinnamon, and 2 tablespoons lemon juice. The lemon juice brightens the berries while the cornstarch ensures a thick, glossy filling. Let the mixture sit for 15 minutes—this allows the juices to release and the flavors to meld.
Real talk: If using frozen blueberries, thaw and drain them thoroughly first. Excess moisture makes the filling watery and prevents that perfect set we’re aiming for.
Roll and Fit the Crust
On a lightly floured surface, roll out the chilled dough to a 12-inch circle, about ⅛-inch thick. Transfer to a 9-inch pie dish, pressing gently to fit. Trim and crimp the edges with a fork or your fingers for a decorative finish. The crust should extend slightly above the rim of the dish.
Preheat your oven to 375°F while the crust rests. This gives the butter time to firm up slightly, which prevents shrinking during baking. Line the crust with parchment paper, fill with pie weights or dried beans, and bake for 15 minutes. This pre-baking step, called blind baking, ensures a crisp crust that won’t sog under the filling.
Fill and Bake the Pie
Remove the parchment and weights, then pour the blueberry mixture into the pre-baked crust. The filling should come about ⅔ of the way up the crust’s sides. Bake at 375°F for 45-55 minutes, until the filling bubbles vigorously and the crust turns a deep golden brown.
Here’s the moment that matters: The filling should be thick enough to hold its shape when the pie cools, but still slightly jiggly in the center. If the edges brown too quickly, cover them loosely with aluminum foil to prevent burning while the center finishes baking.
Cool and Serve
Let the pie cool completely on a wire rack for at least 2 hours. This resting time allows the filling to set properly and prevents a runny mess when you cut into it. The contrast between the warm, gooey filling and the crisp crust is what makes this pie extraordinary.
For serving, I like to add a scoop of 1.5 cups vanilla ice cream and a dollop of 0.5 cup whipped heavy cream on the side. The cold cream cuts through the sweet-tart filling beautifully, balancing each bite perfectly.
Pro Tips For Making 1 Crust Blueberry Pie
- Prep Berries First: Toss those blueberries with 1-2 tablespoons of sugar and a splash of water before pouring them into the crust—this keeps them juicy and prevents a soggy bottom. I learned this the hard way after a pie turned into a fruit soup.
- Chill the Dough: Roll out your crust, wrap it tightly, and let it rest in the fridge for at least 30 minutes—this prevents shrinking and makes it easier to handle. Yes, even if you’re impatient like me, give it time.
- Skip the Overmixing: When tossing the filling, stir just until the cornstarch coats the berries—overmixing releases too much juice and turns your pie into a puddle. A few lumps? Doesn’t matter.
- Bake Low and Slow: Start at 375°F (20 minutes), then drop to 350°F for the remaining 30-40 minutes—this ensures a golden crust without burning the filling. My grandmother swore by this, and she was right.
Make-ahead tips for 1 crust blueberry pie
Crust Prep Ahead
Make the crust the night before for foolproof results. After forming the dough disk, wrap it tightly in plastic wrap and refrigerate for up to 24 hours.
The extended chill time enhances flavor and prevents shrinking during baking. I always prep mine the evening before—it’s one less thing to do on baking day. 💫
Filling Prep Timeline
Assemble the blueberry filling up to 6 hours ahead and store it in an airtight container in the fridge. The cornstarch needs time to hydrate properly, and the lemon juice will brighten the berries as they sit.
Just give it a quick stir before pouring into the crust. Trust me, this step saves you from last-minute prep stress.
Blind-Bake Shortcut
Pre-bake the crust (blind baking) a day ahead for a shortcut. After the 15-minute blind bake, let it cool completely, then wrap it in foil and store at room temperature.
When ready to bake, simply add the filling and pop it back in the oven. The crust will be perfectly crisp without any soggy spots. 🌟
Fully Assembled Storage
For a complete make-ahead pie, assemble the crust and filling, then refrigerate the unbaked pie for up to 12 hours. When ready to bake, add the pre-baked crust to a cold oven and increase the temperature to 350°F for 50-60 minutes.
This gentle baking ensures the filling cooks through without over-browning the crust.
Freezer-Friendly Filling
Prepare the filling ahead and freeze it in a single layer in a container for up to 3 months. When ready to bake, thaw it in the fridge overnight.
The texture remains perfect—no need to adjust the cornstarch or sugar. This is my go-to trick for busy weekends or holiday baking. ❄️
Serving Prep
Whip the heavy cream and scoop the ice cream into bowls the night before serving. Store them in the freezer or fridge, respectively, and let them sit at room temperature for 10 minutes before serving.
This keeps everything cool and ready to go, so you’re not scrambling when guests arrive. 🍦
Nutrition facts
Frequently asked questions about blueberry pie
Can I use frozen blueberries instead of fresh?
Yes, but you must thaw and drain them thoroughly first! Frozen berries release more moisture, which can make the filling watery. After draining, pat them dry with a paper towel or let them sit in a colander for 10 minutes. This step is non-negotiable for that perfect thick texture.
Why is my crust soggy instead of crisp?
Most likely, your crust wasn’t pre-baked (blind baked) long enough or the filling was too wet. Always blind bake for 15 minutes with pie weights, and ensure your filling has the right cornstarch-to-sugar ratio. If using frozen berries, double-check that they’re completely drained.
How do I prevent the filling from leaking?
Use a thickener like cornstarch (or arrowroot) and cook the filling until it reaches a gentle boil for 2-3 minutes before pouring into the crust. This helps the juices set properly. Also, avoid overfilling—the mixture should come only ⅔ of the way up the crust edges.
Can I make this pie ahead of time?
Bake it a day ahead and store it at room temperature for up to 4 hours or refrigerate for 3-4 days. The flavors actually improve as the pie sits. For best texture, let it sit at room temperature for 15 minutes before serving to enhance the aroma.
What’s the best way to reheat slices?
Microwave for 20-30 seconds on medium power to warm the filling without drying the crust. For a restaurant-style touch, broil for 1-2 minutes—watch closely to avoid burning. The crust stays crispy while the filling gets that warm, bubbly texture.
