
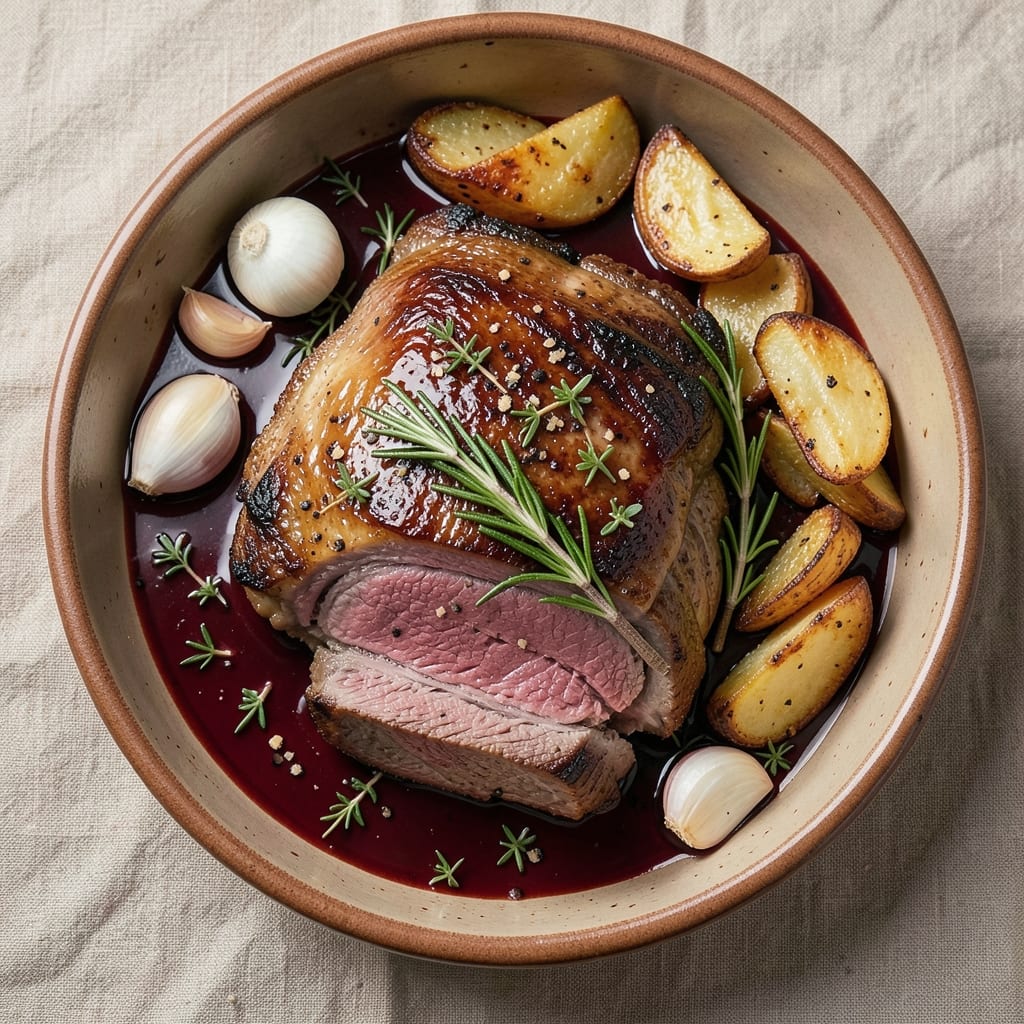
A 12-hour roast beef transforms tough cuts into melt-in-your-mouth perfection through slow, even cooking—this is the method that elevates home-cooked roasts to restaurant-quality. The secret lies in patience: low-and-slow roasting breaks down collagen for tender, juicy results while developing deep, caramelized flavors in the crust.
This isn’t just a recipe; it’s a technique that turns a simple cut of beef into a showstopping centerpiece for gatherings, holidays, or special dinners.
The process begins with dry-brining the beef overnight, which enhances flavor and moisture retention—no fancy equipment required. A steady 275°F oven for 12 hours ensures even cooking without drying out the meat, while occasional basting with its own juices builds that signature glossy crust.
The key? A resting period of at least 30 minutes before slicing, allowing juices to redistribute for every bite to be succulent. This method works equally well with chuck roast or bottom round, making it versatile for any occasion.
What you’ll achieve is a roast beef so tender it practically falls apart, with a rich, aromatic crust that smells like a holiday feast. The juices are deep and flavorful, perfect for making a classic au jus or simply pouring over slices.
Serve with roasted root vegetables, creamy mashed potatoes, or a fresh green salad to balance the richness. The result? A dish that feels like a labor of love—without the stress of last-minute cooking.
Whether you’re hosting a dinner party or treating your family to a special meal, this 12-hour roast beef delivers restaurant-quality results at home. The slow cooking process is forgiving, and the end result is always impressive. Here’s how to make it happen step by step, from prep to plating.
Ingredients for 12 hour roast beef
Six ingredients transform tough beef into melt-in-your-mouth perfection through slow, patient cooking.
| Ingredient | Amount | Notes |
|---|---|---|
| Chuck Roast 🥩 | 4 lb | Well-marbled, bone-in preferred |
| Kosher Salt 🧂 | 1 ½ tbsp | Diamond Crystal preferred |
| Freshly Ground Black Pepper 🌶️ | 1 tbsp | Coarse grind for texture |
| Garlic Cloves 🧄 | 8 cloves | Smashed, not minced |
| Fresh Rosemary 🌿 | 1 tbsp | Chopped, stems removed |
| Fresh Thyme 🌿 | 1 tbsp | Leaves only, stems removed |
| Yellow Onion 🧅 | 1 whole | Quartered, skin on |
| Carrots 🥕 | 4 whole | Whole, scrubbed clean |
| Celery Stalks 🌿 | 4 whole | Whole, trimmed |
| Dry Red Wine 🍷 | 1 cup | Bold Cabernet or Merlot |
| Beef Broth 💧 | 2 cups | Homemade or quality store-bought |
| Olive Oil 🫒 | 2 tbsp | Extra-virgin for basting |
| Fresh Parsley 🌿 | ¼ cup | Chopped, for garnish |
The beef is non-negotiable here—chuck roast with good marbling is your best bet. Costco or Whole Foods usually carry well-marbled cuts, but check the butcher section for the best quality. If you’re buying a whole roast, trim off any large silver skin or excess fat—just leave the marbling intact. The herbs? Fresh is ideal, but dried works in a pinch (use half the amount). I always grab extra rosemary because it holds up better to the long cooking time. For the wine, any bold, dry red works—Cab Sauv, Merlot, whatever’s open.
No red wine? Beef broth with a splash of balsamic gets you close. Fresh thyme and rosemary are ideal, but dried works at one-third the amount. The aromatics—onion, carrots, and celery—can be prepped ahead and stored in the fridge for up to 3 days. If you’re short on time, those pre-cut veggie mixes at Trader Joe’s work in a pinch. The beef broth should be homemade if possible, but Swanson or Pacific Foods are solid store-bought options. Just avoid the low-sodium versions—they lack depth.
This roast tastes even better the next day, so plan ahead. The beef keeps for 4-5 days in the fridge, wrapped tightly in foil. For longer storage, freeze portions for up to 3 months. I like to portion it into individual servings so I can reheat just what I need. The au jus? Strain it and freeze in ice cube trays for later use—perfect for deglazing pans or adding richness to soups.
Why You’ll Love This Recipe
- Here’s what sold me: this recipe actually improves the next day. Shred that beef for tacos, sandwiches, or a hearty stew—it’s just as delicious cold as it is hot. I make a double batch on Sundays and eat it all week. No sad, dry reheats here; the slow cook transforms tough cuts into something so versatile, you’ll wonder why you ever bought takeout.
- Set-and-Forget Magic: Honestly, the name alone should sell it—12 hours? Sounds intimidating, but it’s the opposite. Toss the chuck roast in a Dutch oven with garlic, rosemary, and a sprinkle of salt, then walk away. No hovering, no stress. My slow cooker does all the work while I’m at work, and by dinner, it’s fall-apart tender. That’s the beauty of low-and-slow—minimal effort for maximum reward.
- Herb-Packed Punch: Between us, this roast isn’t just good—it’s ridiculously good. The rosemary and garlic seep into every bite, while the crust of kosher salt and pepper turns the outside into edible armor. I’ll be real: the first time I sliced into it, my husband stole half my plate. That’s the kind of flavor that doesn’t just fill you up—it makes you remember the meal.
- Leftovers That Don’t Suck: Here’s what sold me: this recipe actually improves the next day. Shred that beef for tacos, sandwiches, or a hearty stew—it’s just as delicious cold as it is hot. I make a double batch on Sundays and eat it all week. No sad, dry reheats here; the slow cook transforms tough cuts into something so versatile, you’ll wonder why you ever bought takeout.
Step-by-step instructions for perfectly tender 12-Hour roast beef
Here’s how to transform a tough chuck roast into melt-in-your-mouth perfection through slow, careful cooking.
Prepare the Roast with Herb Rub and Aromatics
Start by trimming any excess fat from the 4 lb chuck roast, leaving about ¼-inch layer to protect the meat during cooking. Pat it completely dry with paper towels—this ensures the seasoning adheres and helps create a flavorful crust. In a small bowl, combine the 1.5 tbsp kosher salt, 1 tbsp freshly ground black pepper, 1 tbsp chopped rosemary, and 1 tbsp thyme leaves. Rub this mixture all over the roast, pressing firmly so the spices penetrate the surface. Let it sit at room temperature for 30 minutes while you prepare the aromatics.
In the same bowl, gently smash the 8 garlic cloves with the flat side of a knife (don’t mince them—this releases more flavor). Quarter the 1 whole yellow onion, leaving the skin on for color. Scrub the 4 whole carrots and 4 whole celery stalks clean, leaving them whole. These vegetables will form the flavor base for your roast, creating a rich, aromatic broth as they cook.
Sear the Roast for Maximum Flavor
Heat a large Dutch oven over medium-high heat. Add the 2 tbsp olive oil and let it get hot but not smoking. Place the chuck roast in the pot, fat-side down, and sear for 4-5 minutes until deeply browned. Flip the roast and sear the other side for another 3-4 minutes. This step develops the Maillard reaction, creating complex flavors that will carry through the long cook.
Remove the roast and set it aside. In the same pot, add the smashed garlic cloves and cook for 30 seconds until fragrant. Add the quartered onion, whole carrots, and celery stalks, stirring to coat with the fond at the bottom of the pot. Pour in the 1 cup dry red wine and scrape up any browned bits—this deglazing captures all the flavor you worked so hard to create. Let it simmer for 2 minutes until the wine reduces by half.
Slow Cook with Liquid for Moisture
Return the roast to the Dutch oven, fat-side up. Pour in the 2 cups beef broth, making sure the roast is about 75% submerged. The liquid should come about halfway up the roast—this ensures even cooking and prevents drying. Bring the liquid to a gentle simmer, then reduce heat to low. Cover the pot and transfer to a 300°F oven.
Here’s the key: patience. Cook the roast for 10-12 hours (yes, that long), checking occasionally to ensure the liquid doesn’t evaporate completely. Every 2 hours, spoon some of the cooking liquid over the roast to keep it moist. The internal temperature should reach 200-205°F—this is when the collagen breaks down and the meat becomes fork-tender. If you don’t have a meat thermometer, check by inserting a knife into the thickest part; it should slide in easily with no resistance.
Rest and Slice for Perfect Texture
Once the roast reaches the proper temperature, remove it from the oven and transfer to a cutting board. Tent loosely with foil and let it rest for 30-45 minutes. This resting period allows the juices to redistribute throughout the meat, ensuring each slice is moist and flavorful. During this time, skim any excess fat from the cooking liquid and strain it if you prefer a cleaner presentation.
Slice the roast against the grain into ½-inch thick pieces. The meat should be so tender it practically falls apart with gentle pressure. Serve the slices over the strained cooking liquid (reduced slightly if desired) and garnish with the ¼ cup chopped fresh parsley. Each bite should deliver rich, beefy flavor with subtle notes of rosemary, thyme, and garlic—all thanks to that long, slow cook.
Pro Tips For Making 12 Hour Roast Beef
- SEAR FIRST, THEN SLOW: Chuck roast needs that crust to hold up during 12 hours, so don’t skip the initial sear. Hit 450°F for 10 minutes on each side—yes, even if it looks messy—before dropping to 275°F. I used to skip this and ended up with a bland, gray slab instead of rich, caramelized edges.
- SALT THE NIGHT BEFORE: Chuck roast soaks up salt like a sponge, so sprinkle that kosher salt generously 12 hours before cooking (or at least 4 hours). This keeps the meat juicy and flavors deep—no last-minute salting or you’ll end up with a dry exterior. Trust me, your future self will notice.
- DON’T CROWD THE PAN: If you’re roasting in a Dutch oven or pan, leave space between the garlic cloves and rosemary sprigs. Too tight, and they’ll steam instead of crisp up. I learned this after pulling out mushy garlic that tasted like soup.
- CHECK TEMP TWice: At 12 hours, that internal temp might still be 160°F—not done. Let it ride until it hits 195°F for true melt-in-your-mouth tenderness. I used to pull it early, thinking “close enough,” and regretted it every time. A meat thermometer is your friend here.
Troubleshooting perfect results
Uneven Cooking
If your roast has cold spots or uneven doneness, it’s usually due to improper liquid levels or oven temperature fluctuations. The roast should be about 75% submerged in liquid to ensure even heat distribution.
If your oven runs hot, reduce the temperature to 275°F and add ½ cup extra broth every 2 hours to maintain moisture. I’ve found that placing a water bath (pan of water on the lower rack) helps stabilize temperature in older ovens. 🌡️
Dry or Tough Meat
Overcooking is the #1 culprit for dry roast beef. The 200-205°F internal temp is your target—never exceed 210°F or the meat will toughen. If your roast feels dry, it likely cooked too long.
Next time, check the temp hourly after 8 hours and remove it when it hits 195°F, then let it rest longer (up to 1 hour) to redistribute juices. A meat thermometer is non-negotiable here—I swear by the Thermoworks Smoke for accuracy.
Pale or Bland Crust
A lackluster crust usually means insufficient searing or basting. For maximum flavor, sear the roast until deeply browned on all sides before slow cooking.
During the 12-hour cook, baste the roast every 2 hours with its own juices (or a mix of ½ cup broth + 1 tbsp olive oil). If the crust still looks pale, broil the roast for 3-5 minutes at the end for a quick caramelization.
Pro tip: Add 1 tsp smoked paprika to your herb rub for extra depth. 🔥
Overly Greasy Au Jus
Excess fat in your au jus happens when you don’t skim it properly. After removing the roast, skim fat off the surface while the liquid is still hot (use a fat separator or spoon).
For a cleaner finish, strain the liquid through a fine-mesh sieve lined with cheesecloth or a coffee filter. If the au jus is too thin, reduce it on the stovetop over medium heat until slightly thickened.
I like to add 1 tsp cornstarch to 2 tbsp cold water, stir into the liquid, and simmer for 2 minutes for a glossy finish.
Roast Stuck to Pot
If your roast refuses to release from the Dutch oven, it’s likely due to insufficient searing or dried-on fond. Next time, pat the roast completely dry before seasoning and sear it until deeply browned on all sides.
For stuck roasts, run a spatula around the edges to loosen, then place the pot on the stovetop over low heat for 5 minutes to warm the bottom.
If all else fails, transfer the roast to a cutting board and slice it directly in the pot—the fond will add flavor to your au jus. 💡
Nutrition facts
Frequently asked questions
Can I use a different cut of beef instead of chuck roast?
Yes, but with adjustments! A bottom round works well—it’s leaner so you’ll want to add 1 cup extra broth to prevent drying. Avoid ribeye or sirloin; they’re too tender for this long cook and will become mushy. For best results, stick with chuck roast or top round, which have the right fat-to-lean ratio for this slow method.
How do I adjust this recipe for a smaller crowd?
For 4 servings, reduce the beef to 2-2.5 lbs and halve all other ingredients (except salt and pepper). Keep the same cooking time but check the internal temp at 9 hours—it should reach 200-205°F by then. The key is maintaining the 75% liquid submersion ratio, so scale the broth accordingly. A 3-quart Dutch oven works perfectly for this size.
Can I make this in a slow cooker instead of the oven?
Sear the beef first, then transfer it to a 6-quart slow cooker with all ingredients. Cook on LOW for 10-12 hours, adding ½ cup broth every 4 hours to maintain liquid. The slow cooker method is even more forgiving—just avoid opening the lid during cooking to prevent heat loss. The texture will be slightly more tender than oven-roasted, but equally delicious.
What’s the best way to reheat leftover roast beef?
Slice the roast and reheat in a skillet with 1 tbsp beef broth over medium-low heat for 3-4 minutes until warmed through. For larger portions, use a bain-marie (water bath) in the oven at 300°F for 20 minutes to keep it moist. Never microwave—it turns the meat rubbery. Pro tip: Add 1 tsp Worcestershire sauce to the reheating liquid for extra flavor.
