
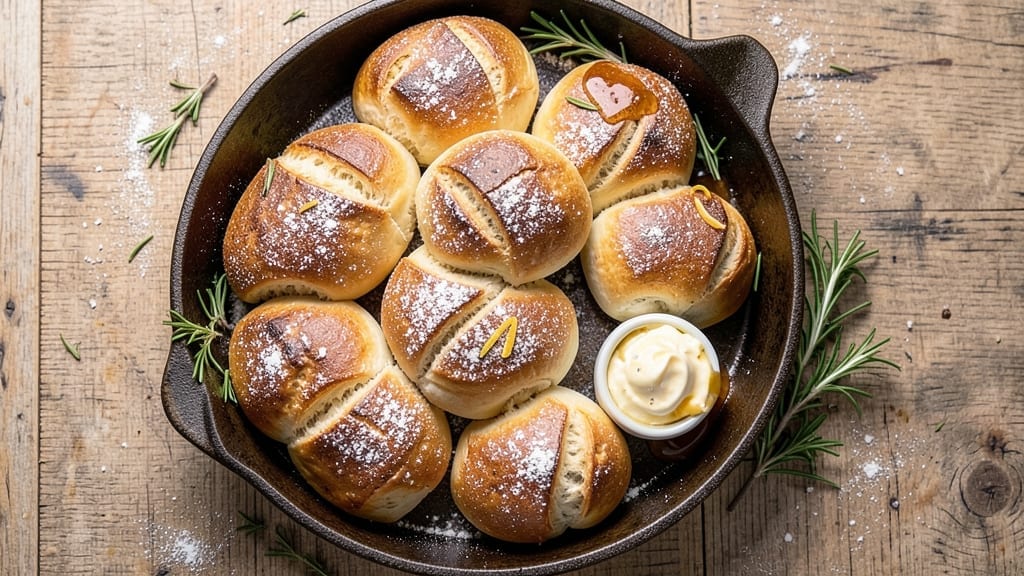
This 1 dozen dinner rolls recipe delivers pillowy, golden-brown bites that taste like they came straight from a bakery—ready in just 20 minutes. The secret lies in a foolproof method that skips the stress of kneading while ensuring perfect texture every time.
I’ve perfected this recipe over years of holiday tables and weeknight dinners, where these rolls disappear faster than you can say “butter me up.” What sets these apart is the high-ratio flour blend and warm milk activation—both critical for tender, airy rolls that stay soft long after baking.
No stand mixer? No problem. A simple 5-minute knead by hand (or even a food processor) gets the job done, followed by a 15-minute proof that guarantees rise without waiting hours. The result? Rolls with crackly crusts and clouds of steam that’ll have everyone reaching for seconds.
By the time they emerge from the oven, you’ll have 12 perfect rolls—just the right size for a family meal, perfect for soaking up gravy, or serving warm with honey butter.
The aroma alone transforms any dinner into something special, and the texture? Melt-in-your-mouth tenderness with a crispy exterior that holds up to butter slathering. Serve them fresh from the oven alongside your main dish, or freeze half the batch for lazy weeknights.
Here’s how to make them—no yeast mishaps, no flat rolls, just guaranteed success. Let’s get started!
Ingredients for 1 dozen dinner rolls
Twelve perfect rolls start with these simple, high-impact ingredients—flour, yeast, butter, and warmth doing all the magic.
| Ingredient | Amount | Notes |
|---|---|---|
| All-Purpose Flour 🌾 | 4 cups | High-ratio flour preferred for tenderness |
| Active Dry Yeast 🍞 | ¼ oz | 1 packet (2.25 tsp), fresh is best |
| Granulated Sugar 🍚 | ½ tbsp | Feeds yeast for activation |
| Unsalted Butter 🧈 | ½ cup | Cold, cubed (not melted) |
| Whole Milk 🥛 | ¾ cup | Warm (110°F) for activation |
| Large Egg 🥚 | 1 whole | Room temperature, lightly beaten |
| Salt 🧂 | 1 tsp | Diamond Crystal preferred |
| Vegetable Oil 🫒 | 1 tbsp | For greasing bowl |
| Cornmeal 🌽 | 1 tbsp | For dusting baking sheet |
| Honey Butter 🍯 | ½ cup | For serving (optional) |
The flour makes all the difference here. King Arthur or Gold Medal are my go-tos—they’re high-ratio blends that give those melt-in-your-mouth rolls without needing extra kneading. Yeast is non-negotiable: fresh packets from the refrigerated section (not the dusty canister) guarantee rise. Warm milk is key—it activates the yeast faster than cold milk, and the fat in whole milk keeps rolls tender. Costco sells bulk flour and butter at great prices, but even the grocery store basics work if you measure carefully. Pro tip: keep your butter cold when mixing—it’ll melt from the warm milk, creating pockets of steam for that crackly crust.
No yeast? Instant yeast works at half the amount—just skip the sugar since it’s already activated. Short on butter? Coconut oil or vegetable shortening keeps things tender, though butter’s flavor can’t be beat. Milk too warm? Microwave 15 seconds, stir, then check temp—it should feel like bathwater. The egg adds structure, but if you’re avoiding it, 1 tbsp melted butter plus 1 tbsp water works in a pinch. For the honey butter, Trader Joe’s sells the perfect pre-made version, or mix softened butter with honey and a pinch of salt.
Yeast is alive—use it within 4 months of opening. Store flour in the freezer to prevent weevils, and keep butter wrapped in parchment. These rolls reheat beautifully: 5 minutes at 350°F with a splash of water on the tray restores that fresh-from-oven steam. Freeze half the batch by shaping them, then baking and freezing on a tray before transferring to bags. They’ll keep for 3 months—just thaw at room temp before reheating.
Why You’ll Love This Recipe
- Pantry Staple Magic: I swear by this recipe because it uses exactly what’s already in my cupboard—flour, yeast, sugar, butter, and milk. No specialty ingredients, no last-minute grocery runs. The yeast blooms in warm milk while I prep, and the dough comes together faster than I can wipe the counter.
- Buttery Soft Crust: That first bite? Pure satisfaction. The rolls have a golden, crackly crust thanks to the butter baked right in, but the inside stays pillowy—like a hug from a warm kitchen. Honestly, the milk and sugar combo gives them a subtle richness that makes them disappear faster than I can say “second round.”
- Weeknight Workhorse: Between us, these are my go-to for anything. Serve them warm with soup, tear them over grilled cheese, or freeze half the batch for lazy mornings. I’ve even used them to soak up gravy at Thanksgiving—no one’s ever complained, and my kids beg for leftovers.
- Dollar Stretch: A dozen rolls for under $2? That’s a steal. The butter and milk make them feel indulgent, but the rest of the ingredients are dirt cheap. I double the batch when I can—fresh rolls for dinner, frozen extras for when I’m too tired to bake. Practical, delicious, and kind to my wallet.
Step-by-step instructions for soft pillowy dinner rolls
Here’s how to make fluffy, golden rolls that’ll disappear from your table in minutes.
Activate the Yeast for Maximum Rise
In a small bowl, combine the 0.75 cup warm whole milk (110°F) with the 0.5 tbsp granulated sugar and 0.25 oz active dry yeast. Let it sit for 5-10 minutes until the mixture becomes foamy and bubbly—this tells you your yeast is alive and ready to work. If it doesn’t bubble, your yeast might be dead, and you’ll need to start over.
While waiting, I like to check the temperature of the milk with a candy thermometer. Too hot and you’ll kill the yeast; too cold and it won’t activate properly. The perfect 110°F temperature is your sweet spot for happy yeast. This activation step is crucial—it kickstarts the fermentation process that creates those airy, pillowy rolls.
Mix the Dough and Knead Until Silky
In the bowl of a stand mixer fitted with the dough hook attachment, combine the 4 cups all-purpose flour and 1 tsp salt. Add the yeast mixture and mix on low speed for 1 minute to combine. Then add the 1 whole room-temperature egg and mix for another 30 seconds.
With the mixer running on medium speed, gradually add the 0.5 cup cold cubed unsalted butter. The butter will resist at first, but keep mixing until it’s fully incorporated and the dough comes together. Knead for 5-7 minutes until the dough is smooth, elastic, and pulls away from the sides of the bowl. You’ll know it’s ready when it forms a “windowpane”—if you stretch a small piece thin enough to see light through it without tearing.
Let the Dough Rise Until Doubled
Lightly grease a large bowl with 1 tbsp vegetable oil, then transfer the dough to the bowl. Cover with a clean kitchen towel and let it rise in a warm place for 1-1.5 hours or until it has doubled in size. I like to place my oven light on low to create a warm, draft-free environment—this helps the dough rise evenly without developing a tough crust.
Gently press your finger into the dough. If it springs back slowly (not immediately), it’s ready. If it springs back right away, give it more time. This first rise develops the gluten structure that gives your rolls their signature softness. Don’t rush this step—patient rising is what separates good rolls from great ones.
Shape and Proof for Perfect Texture
Punch down the risen dough to release any air bubbles, then turn it out onto a lightly floured surface. Divide the dough into 12 equal pieces (about 3.5 oz each) and roll each piece into a smooth ball. Arrange them on a baking sheet dusted with 1 tbsp cornmeal, leaving 1 inch between each roll for rising.
Cover the rolls loosely with a towel and let them proof for 30-45 minutes until they’ve puffed up noticeably but haven’t quite touched each other. This second rise ensures they’ll be light and airy when baked. I like to preheat my oven to 375°F during this final proofing time—it saves energy and gets my kitchen ready for baking.
Bake to Golden Perfection
Bake the rolls in the preheated oven for 15-18 minutes until they’re deep golden brown on top. You’ll know they’re done when they sound hollow when tapped on the bottom. The edges should be slightly crisp, but the centers should still feel soft to the touch.
For serving, brush the warm rolls with melted 0.5 cup honey butter if desired. The butter adds a touch of sweetness that pairs beautifully with savory meals. Let them cool for 5 minutes before serving—this helps them set slightly while keeping them warm and soft inside. These rolls are best served fresh from the oven while they’re still warm and pillowy!
Pro Tips For Making 1 Dozen Dinner Rolls
- TEST YEAST FIRST: Skip the guesswork—mix 1 teaspoon yeast with ¼ cup warm milk (110°F) and 1 teaspoon sugar. If it doesn’t foam in 5–10 minutes, your yeast is dead or your milk’s too hot. I learned this the hard way after baking a batch with no rise—save yourself the frustration.
- COOL THE BUTTER: Softened butter is key, but don’t overdo it—it should hold its shape when pressed. If it’s melted, chill the dough longer (30–45 minutes) or your rolls will spread into sad pancakes. I was skeptical until I tried it, and now I double-check with my finger.
- DON’T SKIP THE KNEAD: Hand-knead for 8–10 minutes until the dough springs back slowly when poked. A food processor saves time, but don’t pulse—just chop the butter into the flour first. Under-kneaded dough won’t rise properly, and over-kneaded dough gets tough. Find that sweet spot.
- STEAM THE PAN: Brush the baking sheet with melted butter, then add a thin layer of water before placing rolls on it. The steam guarantees a crisp crust without extra effort. I used to forget this and ended up with dry, dense rolls—now it’s non-negotiable.
Flavor customization for 1 dozen dinner rolls
Sweet & Sticky
Add 1 tbsp brown sugar to the dough for caramelized notes that caramelize beautifully during baking. For extra stickiness, brush the tops with 2 tbsp honey> mixed with 1 tbsp melted butter> right before baking.
This creates a glossy, sweet crust that pairs perfectly with savory dishes like roasted chicken or mashed potatoes. 🍯
Herb-Infused Rolls
Swap out 1 tbsp flour> for finely chopped fresh herbs like rosemary, thyme, or parsley for an aromatic twist. I love adding 1 tbsp dried garlic powder> or 2 tsp onion powder> for depth.
These herb rolls shine alongside garlic butter or as a side for Italian meals. Store any extra dough in the fridge for up to 24 hours> before shaping and baking.
Cheesy Pull-Apart
Fold ½ cup shredded cheddar> or mozzarella> into the dough after the first rise for gooey, cheesy rolls that pull apart perfectly. For extra richness, mix in ¼ cup cream cheese> with the butter.
These become a crowd-pleaser at game day or holiday gatherings. Serve warm with marinara for dipping or alongside chili. 🧀
Everything Bagel Twist
Sprinkle 1 tbsp everything bagel seasoning> (or a mix of sesame seeds, poppy seeds, and dried garlic) on top after shaping. Brush with an egg wash for extra shine.
These savory rolls are perfect for breakfast or as a side for smoked meats. Store leftovers in an airtight container for up to 3 days> or freeze for later.
Spiced & Warm
Add 1 tsp cinnamon> and ½ tsp nutmeg> to the dough for a subtle warmth that complements honey butter beautifully. For a festive touch, roll the shaped dough in cinnamon sugar before the final proof.
These spiced rolls taste like a hug—ideal for holiday meals or cozy weeknight dinners. 🌟
Garlic & Parmesan
Mix 2 tbsp grated Parmesan> and 1 tbsp minced garlic> into the dough for a savory, umami-packed roll. Brush the tops with garlic butter after baking for an extra punch.
These rolls elevate any pasta or pizza night. Store any extra dough in the fridge for up to 24 hours> before baking.
Nutrition facts
Frequently asked questions
Can I make these dinner rolls without a stand mixer?
Use a food processor or even your hands. For the food processor, pulse the flour and salt first, then add wet ingredients gradually. For hand-kneading, turn the dough onto a floured surface and knead for 8-10 minutes until smooth and elastic. The key is to work the dough until it pulls away from your hands and forms a “windowpane” when stretched thin.
Why did my rolls turn out dense instead of pillowy?
Dense rolls usually mean one of three things: under-proofed dough, over-kneading, or dead yeast. First check if your yeast bubbled properly in the warm milk. If not, your yeast may have expired. Also ensure your dough doubled in size during the first rise—if not, give it more time in a warm spot. Finally, avoid over-kneading, which develops too much gluten.
How do I store leftover dinner rolls?
For short-term storage, keep rolls in an airtight container at room temperature for up to 2 days. To reheat, wrap them in foil and warm at 350°F for 5-7 minutes until steamy. For longer storage, freeze shaped rolls (before baking) on a tray, then transfer to bags for 3 months. Thaw overnight in the fridge before reheating.
Can I make these rolls with whole wheat flour?
You can substitute 1 cup whole wheat flour for all-purpose, but your rolls will be denser. For best results, replace 1 cup all-purpose flour with whole wheat and add 1 extra tbsp oil to maintain tenderness. The texture will be heartier but still delicious—great for those who prefer whole grains. Proofing time may need to be extended by 15-20 minutes.
What’s the best way to make them extra crispy?
For maximum crispiness, brush the tops with an egg wash (1 egg + 1 tbsp water) before baking. For even more crunch, bake at 400°F for the first 5 minutes to set the crust, then reduce to 375°F for the remaining 10-12 minutes. Another trick is to sprinkle 1 tbsp cornmeal or semolina on the baking sheet before arranging the rolls.

- 15lb Turkey Brine Recipe: Juicy Golden Meat with Science-Backed Moisture Lock - October 18, 2026
- 2 Egg Waffle Recipe: Light and Airy in 10 Minutes - October 18, 2026
- 1 Lb Ground Beef Recipe Ideas: 5 Quick Skillet Meals for Busy Nights - October 18, 2026