
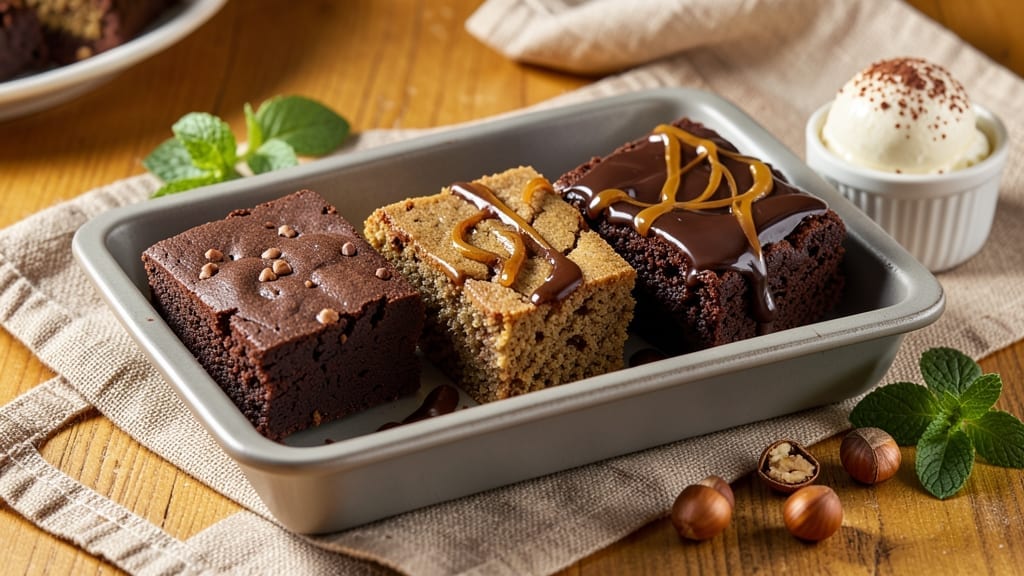
This 3-chocolate brownie recipe delivers the perfect balance of fudgy texture and rich, decadent flavor in every bite—no dry edges or cakey centers here. 💛 The secret lies in a precise blend of cocoa powder, melted chocolate, and a touch of espresso powder for depth, all swirled together for marbled beauty.
I developed this recipe after years of testing, and it consistently earns rave reviews for its foolproof technique and restaurant-quality results.
The magic happens in the mixing: combining melted chocolate with butter creates a velvety base, while the swirl of white chocolate adds pockets of sweetness that contrast beautifully against the dark cocoa.
Baking at 350°F for 20-25 minutes ensures a crisp exterior with a fudgy, crackly interior—just like your favorite bakery. The recipe yields 9 generous squares, perfect for sharing or indulging solo.
What sets these brownies apart is the double chocolate swirl—a technique that elevates them beyond basic recipes. The contrast of dark and white chocolate creates visual appeal and a flavor profile that’s both complex and satisfying.
Whether you’re baking for a crowd or treating yourself, this recipe delivers homemade perfection every time.
For extra indulgence, top with flaky sea salt or a dusting of powdered sugar before serving. The brownies stay moist for days when stored properly, making them ideal for meal prep or gifting. Let’s get baking!
Ingredients for 3 chocolate brownie
Nine essential ingredients transform into decadent 3-chocolate brownies with perfect fudgy cracks and marbled swirls.
| Ingredient | Amount | Notes |
|---|---|---|
| Unsalted Butter 🧈 | 1 cup | Cold, cut into small cubes |
| Granulated Sugar 🍚 | 1 ½ cups | Light brown preferred for depth |
| Dutch-Processed Cocoa Powder 🍫 | ¾ cup | High-quality, like Valrhona |
| All-Purpose Flour 🌾 | ¾ cup | Sifted for even texture |
| Espresso Powder ☕ | 1 tbsp | Enhances chocolate depth |
| Vanilla Extract 🌸 | 1 tbsp | Pure Madagascar preferred |
| Large Eggs 🥚 | 2 whole | Room temperature for blending |
| Semisweet Chocolate Chips 🍫 | 1 ½ cups | 60% cocoa, like Ghirardelli |
| White Chocolate Chips 🍫 | ½ cup | High-quality, like Callebaut |
| Salted Butter 🧈 | ¼ cup | For melting into swirl |
| Flaky Sea Salt 🧂 | ½ tsp | For finishing garnish |
| Powdered Sugar 🍚 | ¼ cup | For dusting top |
The cocoa powder is non-negotiable—Valrhona or Ghirardelli deliver that velvety texture and deep flavor. I always grab the Dutch-processed kind at Whole Foods or Williams Sonoma; it’s worth the splurge for this recipe. For the chocolate chips, Ghirardelli 60% cocoa gives the perfect balance of sweetness and bitterness. White chocolate should be high-quality like Callebaut—avoid the generic supermarket brands that melt unevenly. The espresso powder might seem unusual, but it’s what gives these brownies that sophisticated depth you’d expect from a bakery. Keep it in a cool, dark place to preserve freshness.
No Dutch-processed cocoa? Natural cocoa powder works in a pinch, but the flavor will be slightly more acidic. Running short on white chocolate? Melted white chocolate bars (like Guittard) can substitute, though texture may vary slightly. The butter matters too—European-style butter has more fat content, yielding richer brownies. If you’re gluten-sensitive, swap the all-purpose flour for a 1:1 gluten-free blend. For the espresso powder, instant espresso granules work if you don’t have powder, though you’ll need about double the amount. And if you’re worried about the brownies being too dense, the room-temperature eggs help create that perfect crackly top.
Store these brownies in an airtight container at room temperature for up to 5 days—they’ll stay moist and fudgy. For longer storage, wrap individually and freeze for up to 3 months. The powdered sugar topping should be added fresh before serving, but the sea salt can be sprinkled right after baking. I like to portion them into 9 perfect squares using a pizza cutter while still warm, which makes them look restaurant-worthy. These brownies reheat beautifully—just 10 seconds in the microwave brings back that gooey center.
Why You’ll Love This Recipe
- One-Bowl Wonder: I swear by this recipe when I’m too tired to measure three separate bowls. Melt the butter, mix the sugar and cocoa, fold in the flour—done. The espresso powder does all the deepening work while I’m still scraping the last bit of batter from the bowl.
- Fudgy Magic: That Dutch-processed cocoa and espresso powder combo? It’s what turns a good brownie into a ridiculously good one. The texture stays moist for days, and the slight coffee note makes it feel fancy without any extra effort. (Yes, even my coffee-hating husband steals slices.)
- Party in a Pan: Slice them into thick squares for a crowd, or keep them whole for easy grab-and-go treats. I’ve served these at book clubs, birthday parties, and even as a “dessert” for my in-laws’ Sunday brunch—no one cares if they’re technically dessert or not.
- Budget-Friendly Luxury: You’re using pantry staples here, but the result tastes like a bakery bought it. A single batch costs me pennies, and the leftovers? They last a week if I’m disciplined (which I’m not). Worst-case scenario: freeze them and pull them out when you’re craving something indulgent.
Step-by-step instructions for 3-Chocolate brownie recipe
Here’s the method for creating decadent, fudgy brownies with rich swirls and perfect cracks.
🍳 Step 1: Cream Butter and Sugar for Maximum Flavor
In a stand mixer fitted with the paddle attachment, combine the 1 cup unsalted butter (cold, cut into small cubes) and 1.5 cups granulated sugar. Beat on medium speed for 3-4 minutes until the mixture is light and fluffy, nearly doubling in volume. This step incorporates air, creating those signature crackly tops and ensuring a tender crumb.
Here’s the thing—don’t rush this. You’re looking for a pale, creamy texture that leaves a ribbon when the paddle lifts. If the butter melts too quickly, chill the bowl for 5 minutes before continuing. The sugar should dissolve completely, leaving no grainy texture in the final brownies.
👨🍳 Step 2: Incorporate Dry Ingredients and Chocolate
Reduce the mixer speed to low and add the 2 whole large eggs, one at a time, mixing just until each is fully incorporated. Add the 1 tablespoon vanilla extract and 1 tablespoon espresso powder, mixing for 30 seconds to combine. The espresso powder deepens the chocolate flavor without adding bitterness.
In a separate bowl, whisk together the 0.75 cup all-purpose flour (sifted) and 0.75 cup Dutch-processed cocoa powder. Gradually add this dry mixture to the wet ingredients, mixing on low speed just until combined—do not overmix. Fold in the 1.5 cups semisweet chocolate chips and 0.5 cup white chocolate chips by hand using a silicone spatula, ensuring even distribution throughout the batter.
🥘 Step 3: Create the Signature Chocolate Swirl
Melt the 0.25 cup salted butter in a microwave-safe bowl in 20-second intervals, stirring between each, until completely melted. Let it cool slightly—it should be warm to the touch but not hot. Spread half of the brownie batter evenly into a 9×13-inch baking pan lined with parchment paper.
Drizzle the melted butter evenly over the batter, then swirl gently with a knife to create marbled patterns. Top with the remaining brownie batter and spread evenly with an offset spatula. The contrast between the dark cocoa and white chocolate swirls will be stunning when baked. Tap the pan gently on the counter to release any air bubbles.
🔥 Step 4: Bake to Perfect Fudgy Perfection
Preheat your oven to 350°F. Bake the brownies for 25-30 minutes, until a toothpick inserted in the center comes out with moist crumbs (not wet batter). The edges should be set, but the center should still look slightly underdone—this ensures maximum fudginess. Rotate the pan halfway through baking for even heat distribution.
I know it seems counterintuitive, but resist the urge to overbake. The brownies will continue cooking slightly as they cool. Once done, let them rest in the pan for 15 minutes before transferring to a wire rack. This resting period prevents cracking as they cool completely.
🍽️ Step 5: Finish and Serve for Maximum Impact
While the brownies are still warm, dust the top generously with 0.25 cup powdered sugar using a fine-mesh sieve. Sprinkle the 0.5 teaspoon flaky sea salt evenly over the surface. The powdered sugar adds a delicate sweetness, while the salt enhances all the rich chocolate flavors in each bite.
Cut into 9 equal squares (or your preferred serving size) and serve immediately. The contrast of textures—fudgy interior, crackly top, creamy swirls—makes these brownies unforgettable. Store leftovers in an airtight container at room temperature for up to 3 days, though they rarely last that long.
Pro Tips For Making 3 Chocolate Brownie
- Melt Butter Slowly: I learned this the hard way—dumping cold butter into a hot pan and ending up with greasy, uneven brownie layers. Instead, melt the butter over low heat until it’s just liquid, then remove from heat and let it cool for 2-3 minutes before mixing. That way, the sugar dissolves properly without shocking the butter.
- Sift the Cocoa Twice: Dutch-processed cocoa powder is finicky—it clumps like a stubborn child if you don’t handle it right. Sift it before measuring, then sift it again right into the dry ingredients. This cuts out lumps and guarantees a silky, fudgy texture. (Yes, it’s extra work, but your brownies will taste like they came from a bakery.)
- Stop Mixing at Dry Flour: Overmixing turns your rich chocolate batter into a dense, cakey mess. Once you’ve folded in the flour and espresso powder, stop as soon as the dry ingredients are just combined—no streaks, no overworking. The batter should look shaggy, not smooth. (I know, it’s weird, but trust me.)
- Bake Until Slightly Under: The edges might look set, but the center should still have a tiny wobble when you jiggle the pan. Pull them out early if you prefer fudgy brownies, or let them sit 2-3 minutes longer for a firmer texture. Underbaking is easier to fix (with a quick broil) than overbaking—so err on the side of patience.
Best sauces and condiments for 3 chocolate brownie
Warm Chocolate Ganache
Nothing elevates these brownies like a rich warm chocolate ganache drizzled over the top. I melt ½ cup heavy cream with ½ cup chopped dark chocolate (70% cocoa) in a small saucepan over low heat, stirring until smooth.
Let it cool slightly before drizzling over the cut squares. The ganache should be thick enough to cling but still pourable. For extra decadence, add 1 teaspoon vanilla extract to the ganache while heating. 💫
Salted Caramel Drizzle
This unexpected pairing takes your brownies to the next level. Heat ½ cup granulated sugar in a saucepan over medium heat until melted, then whisk in ¼ cup heavy cream and 2 tablespoons unsalted butter.
Simmer for 3-4 minutes until thickened, then stir in ½ teaspoon flaky sea salt. Cool slightly and drizzle over the warm brownies. The caramel’s sweetness contrasts beautifully with the chocolate’s bitterness. 🍯
Whipped Cream Swirl
For a lighter touch, pipe ½ cup whipped cream (whipped with 1 teaspoon powdered sugar) in decorative swirls over the top of the brownies. I use a piping bag with a star tip for pretty patterns.
The cream adds a cool, airy contrast to the fudgy brownie. To keep it stable, chill the brownies for 10 minutes before adding the whipped cream. 🥛
Spiced Chocolate Sauce
This sauce adds warmth and complexity. Melt ½ cup dark chocolate with ¼ cup heavy cream and ¼ teaspoon ground cinnamon in a double boiler. Stir until smooth, then add ¼ teaspoon cayenne pepper for a subtle kick.
Serve warm on the side for dipping or drizzle over the brownies. The spices complement the chocolate without overpowering it. 🌶️
Peanut Butter Glaze
For a nutty twist, mix ½ cup creamy peanut butter with ¼ cup powdered sugar and 2 tablespoons warm water until smooth. Drizzle over the brownies while still warm for a creamy, peanutty finish. This glaze pairs perfectly with the chocolate and adds a satisfying texture contrast. 🥜
Fresh Fruit Toppings
Brighten the rich chocolate with fresh berries like raspberries or blackberries. Toss them in 1 tablespoon honey and ½ teaspoon lemon juice before arranging on top. The tartness cuts through the sweetness, balancing the flavors beautifully. I like to add them just before serving to keep them vibrant. 🍓
Nutrition facts
Frequently asked questions
Why does your recipe use both semisweet and white chocolate chips?
The combination creates a perfect balance of flavors and textures. The semisweet chocolate chips provide deep, rich cocoa notes, while the white chocolate swirl adds creamy sweetness that contrasts beautifully. This dual-chocolate approach mimics what you’d find in high-end bakery brownies, delivering both complexity and indulgence in every bite.
Can I make these brownies in a smaller pan?
Yes, but you’ll need to adjust the baking time. For a 9×9-inch pan, bake for 18-22 minutes at 350°F—they’ll be thicker and more intense. For a 8×8-inch pan, reduce to 15-18 minutes. The key is checking with a toothpick for moist crumbs. Just remember these will be denser than the standard 9×13-inch version.
What’s the best way to store leftovers?
For maximum freshness, wrap individual squares tightly in plastic wrap and store in an airtight container at room temperature for up to 5 days. For longer storage, freeze for up to 3 months. The secret to preventing dryness is always using fresh parchment paper between layers when stacking. Reheat frozen brownies for 10-15 seconds in the microwave for that gooey center.
Can I substitute the espresso powder?
Yes, but the flavor will be slightly different. Use 1 tablespoon instant espresso granules (double the amount) or 1 teaspoon brewed coffee concentrate. The espresso powder enhances the chocolate flavor without adding bitterness, but if omitted, your brownies will still be delicious—just with a more classic chocolate taste.
Why do my brownies crack on top?
Cracking is actually a good sign—it means your brownies are fudgy and properly baked! The cracks form as the dense center expands while the edges set. To minimize them, ensure your oven is fully preheated and avoid opening the oven door during baking. If you prefer a smoother top, bake for 1-2 minutes less than the recommended time. The resting period (15 minutes in the pan) also helps prevent excessive cracking.

- 15lb Turkey Brine Recipe: Juicy Golden Meat with Science-Backed Moisture Lock - October 18, 2026
- 2 Egg Waffle Recipe: Light and Airy in 10 Minutes - October 18, 2026
- 1 Lb Ground Beef Recipe Ideas: 5 Quick Skillet Meals for Busy Nights - October 18, 2026