
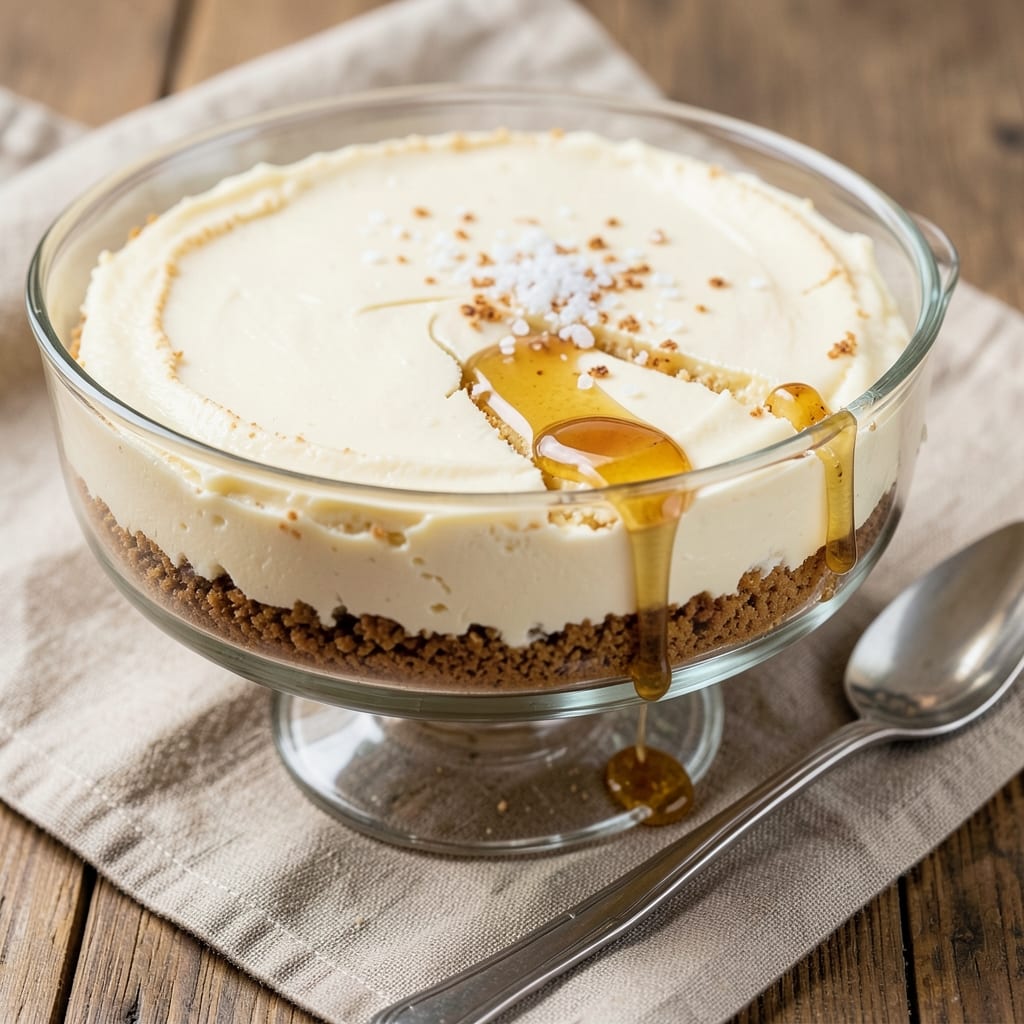
A 1-egg cheesecake recipe that delivers creamy, set layers without the fuss of a water bath—perfect for when you crave rich dessert but need a simpler approach. 💛 The secret lies in whipping the cream cheese until perfectly smooth and light, creating a texture that’s both firm and velvety.
This method eliminates the risk of cracking while still delivering that classic cheesecake satisfaction in just one egg. What makes this recipe work is the room-temperature prep—both eggs and cream cheese must be at the same temperature to blend seamlessly.
A simple graham cracker crust adds structure without overpowering the delicate filling. The key is baking at a precise 325°F for 45-50 minutes, then letting it cool gradually to prevent sinking.
By the time you slice into this cheesecake, you’ll find layers that are creamy yet firm, with no water bath required. The flavor is pure—no artificial shortcuts, just rich cream cheese, a touch of vanilla, and a hint of sweetness.
It’s the kind of dessert that feels indulgent but comes together with minimal effort. Serve chilled with fresh berries or a drizzle of caramel for extra elegance. Here’s how to make it perfectly every time.
Ingredients for 1 egg cheesecake
Room-temperature cream cheese and precise measurements create this silky cheesecake without a water bath.
| Ingredient | Amount | Notes |
|---|---|---|
| Full-Fat Cream Cheese 🧀 | 16 oz | Room temperature, high-fat variety |
| Large Eggs 🥚 | 1 whole | Room temperature, separated |
| Granulated Sugar 🍚 | ¾ cup | Superfine preferred for smoothness |
| Vanilla Extract 🌿 | 1 tbsp | Pure Madagascar or bourbon |
| Graham Cracker Crumbs 🍪 | 1 ½ cups | Finely crushed, plus extra for pan |
| Unsalted Butter 🧈 | ½ cup | Melted, cooled slightly |
| Light Corn Syrup 🍯 | ¼ cup | For stability and gloss |
| Lemon Juice 🍋 | 1 tbsp | Freshly squeezed, for brightness |
| Salt 🧂 | ¼ tsp | Fine sea salt, enhances flavor |
| Heavy Whipping Cream 🥛 | ½ cup | Cold, for topping only |
| Fresh Berries 🍓 | 1 ½ cups | For garnish, optional |
The cream cheese is non-negotiable—full-fat Philadelphia-style works best for that velvety texture. Store-bought crumbs are fine, but crushing graham crackers yourself adds better texture. For the sugar, superfine dissolves more smoothly, but regular granulated works if pulsed in a food processor. Room temperature is critical: both the cream cheese and egg should sit out for 30-45 minutes before mixing, or the batter will curdle. Whole Foods or Trader Joe’s carry excellent quality cream cheese if your local store’s selection is lacking.
No vanilla extract? Almond extract at half the amount adds depth, though it alters the profile. Substituting corn syrup with agave nectar works, but it may slightly darken the crust. For the crust, butter-flavored shortening can replace butter if you’re avoiding dairy entirely (though this isn’t vegan). The lemon juice is essential—it balances the richness and prevents bitterness. If you’re short on time, store-bought graham cracker crust mix (like Keebler’s) saves 10 minutes, though homemade is superior. For the berries, frozen works in a pinch—just thaw and drain well.
Prevent cracking by letting the cheesecake cool gradually in the oven after baking—crack the door and let it sit for 15 minutes before opening fully. Store wrapped tightly in the fridge for up to 5 days, though it’s best enjoyed within 3 days for peak texture. For make-ahead prep, bake the crust a day ahead and refrigerate the filling mixture overnight—it blends more smoothly. The crust can be prepped up to 3 days ahead and stored in an airtight container. Serve chilled for 2-3 hours before slicing to achieve clean cuts.
Why You’ll Love This Recipe
- No Mixer Needed: I beat the cream cheese and sugar by hand—no fancy equipment, just elbow grease for five minutes. The egg and vanilla blend right in without a trace of lumps, and that buttery graham cracker crust? Just press it in. Honestly, my blender’s been collecting dust since I discovered this.
- Creamy Without Guilt: Full-fat cream cheese makes this rich but not heavy—just one egg keeps it light enough to eat for breakfast or dessert. That first bite? Silky texture with a whisper of vanilla that lingers. Between us, I’ve made this for book clubs and potlucks, and no one questions why it’s on the menu.
- Weeknight or Party: Bake it for a last-minute dinner (yes, even on a Tuesday night) or slice it for a crowd—it’s the same effort either way. The crust stays crisp, the filling stays firm enough to cut neatly, and the leftovers? Still perfect the next day. My daughter picks out the graham cracker pieces, but still asks for seconds.
- Budget-Friendly Indulgence: Three ingredients do the heavy lifting: cream cheese, eggs, and sugar. Graham crackers add that crunch for pennies, and the whole thing costs less than takeout. I’ll be real: this is my go-to when I want something special without breaking the bank. The first time I made it, I thought, “Why haven’t I been doing this all along?”
Step-by-step instructions for whipped cream cheese layers without a water bath
Here’s the professional method for creating a silky, crack-free cheesecake with minimal equipment.
👨🍳 Step 1: Prepare the Crust and Whipped Cream Cheese Filling
First, melt the 0.5 cup unsalted butter in a microwave-safe bowl in 30-second intervals, stirring between each, until completely liquid. Mix in the 1.5 cups graham cracker crumbs and 0.25 tsp salt until evenly coated. Press this mixture firmly into a 9-inch springform pan, creating an even base. Chill in the refrigerator while you prepare the filling.
In a separate large bowl, beat the 16 oz full-fat cream cheese with the 0.75 cup granulated sugar and 1 tbsp vanilla extract using an electric mixer on medium speed until completely smooth and creamy. This should take about 2-3 minutes—you’re looking for a texture that’s light and airy, with no visible lumps. The reason we whip the cream cheese is to incorporate air, which prevents cracking during baking.
🍳 Step 2: Incorporate Eggs and Stabilizers
Add the 1 whole large egg to the cream cheese mixture, beating on low speed for 30 seconds to combine. Then gradually add the 0.25 cup light corn syrup and 1 tbsp lemon juice while mixing on medium speed. The corn syrup acts as a stabilizer, preventing the cheesecake from becoming too dense, while the lemon juice adds brightness that balances the richness.
Continue mixing for another 1-2 minutes until the batter is completely smooth and ribbon-like. Here’s the thing—if you see any streaks of egg white, keep mixing until fully incorporated. The batter should be thick but pourable, with a glossy sheen that indicates proper emulsification. This is your signal that the filling is ready for the next step.
🥘 Step 3: Assemble and Bake Without a Water Bath
Pour the prepared filling over the chilled crust, spreading it evenly to the edges. Tap the pan gently on the counter to eliminate any air bubbles. Place the assembled cheesecake in a preheated 325°F oven and bake for 45-50 minutes. The edges should be set and just beginning to pull away from the pan, while the center should still appear slightly jiggly—this indicates it’s not fully cooked yet.
I’ve found that baking at this lower temperature prevents the cheesecake from overcooking on the outside while the center remains underdone. The key here is patience—resist the urge to open the oven door during baking, as temperature fluctuations can cause cracking. When the edges are set but the center still wobbles slightly, remove it from the oven.
⏰ Step 4: Cool and Finish with Whipped Cream Topping
Allow the cheesecake to cool in the oven with the door slightly ajar for 15 minutes to prevent sudden temperature changes. Then transfer it to a wire rack and cool completely at room temperature for 2 hours. This gradual cooling process is crucial for preventing cracks as the cheesecake sets.
While the cheesecake cools, whip the 0.5 cup heavy whipping cream to soft peaks. Spread this lightly over the top of the cooled cheesecake, then garnish with the 1.5 cups fresh berries. The whipped cream adds a light contrast to the dense filling, while the berries provide freshness and visual appeal. Serve chilled for the perfect texture contrast between the creamy filling and the crisp crust.
Pro Tips For Making 1 Egg Cheesecake
- Whip Cream Cheese Cold: DESCRIPTION: Take the cream cheese straight from the fridge—no thawing, no room-temperature nonsense. I learned this the hard way after a batch turned grainy because I rushed. Beat it until it’s smooth and pale, then add sugar gradually. Cold fat emulsifies better, and you’ll avoid that dreaded curdled texture.
- Prep Eggs at Room Temp: DESCRIPTION: Crack those eggs into a measuring cup first, then pick out any shells. Room-temperature eggs blend in more evenly, and skipping the shell hunt saves time. (Yes, even if you’re impatient like me.) Cold eggs can make the batter lumpy, and we’re not making a science experiment here—just cheesecake.
- Bake Low and Slow: DESCRIPTION: Forget the high heat—300°F (150°C) is your friend. I used to blast it at 350°F and ended up with a cracked top every time. Bake it for 35–40 minutes until the edges are set but the center still jiggles slightly. Overbaking is the enemy of that perfect, creamy slice.
- Press Crust Firmly: DESCRIPTION: Don’t just dump the graham cracker crumbs—press them hard into the pan with your fingers or a glass. Add a thin layer of melted butter (about 1 tablespoon) and press again. This isn’t the time to be gentle; a well-sealed crust means no soggy bottom, and we all know that’s a dealbreaker.
Creative variations of this recipe
No-Bake Cheesecake Twist
Skip the oven entirely by using 14 oz cream cheese, 1 cup cold heavy cream, and 2 tbsp powdered sugar blended until smooth. Fold in 1 cup whipped cream and pour over a chilled graham cracker crust.
Freeze for 4 hours—no baking required! This version stays perfectly creamy and is ideal for hot days. 🌞
Spiced Vanilla Bean
Infuse the filling with warmth by adding ½ tsp cinnamon and ¼ tsp cardamom to the whipped cream cheese base. Swap the vanilla extract for 1 vanilla bean scraped and seeds added directly.
Garnish with a sprinkle of toasted coconut flakes for a tropical-inspired twist. The spices deepen the flavor without overpowering the classic taste.
Citrus Zest Variations
Brighten the cheesecake with 1 tbsp lime zest or orange zest mixed into the filling. For a tangy kick, add 1 extra tbsp lemon juice and top with a berry compote made from simmering 1 cup mixed berries with 2 tbsp sugar and 1 tsp cornstarch.
This variation works especially well with a gingersnap crust for a spiced contrast.
Chocolate-Dipped Crust
Melt ½ cup dark chocolate chips with the butter for the crust, then mix in 1 tbsp cocoa powder for a rich chocolate base. After baking, dip the cooled cheesecake’s edges in melted chocolate for a decadent look.
Pair with a raspberry coulis drizzled on top for a restaurant-worthy presentation. This version satisfies chocolate lovers while keeping the creamy texture intact.
Protein-Packed Version
For a lighter take, replace ½ cup cream cheese with ½ cup Greek yogurt (full-fat for best texture) and use 1 scoop vanilla protein powder in place of ¼ cup sugar. Add 1 extra tbsp lemon juice to balance the protein flavor.
Top with whipped coconut cream and fresh mango slices for a tropical protein boost. This version keeps the creamy texture while adding nutritional benefits.
Seasonal Fruit Swaps
Summer calls for peach or mango slices with a drizzle of honey, while fall works with cranberry sauce and a sprinkle of pistachios. Winter versions shine with poached pears and a dusting of cinnamon.
Spring can feature strawberry-balsamic reduction for a bright, tangy contrast. Each seasonal topping enhances the cheesecake’s natural flavors while keeping it fresh and exciting. 🌸
Nutrition facts
Frequently asked questions
Why does this recipe use only 1 egg?
The single egg creates a lighter, airier texture while still providing enough structure to hold the filling. Whipping the cream cheese first incorporates air, which helps create that signature creamy-yet-firm consistency without needing extra eggs. This method also reduces the risk of cracking during baking.
Can I make this cheesecake without a water bath?
Yes! This recipe is designed specifically to skip the water bath. The key is baking at 325°F for 45-50 minutes and letting it cool gradually in the oven first. The whipped cream cheese filling and corn syrup stabilize the texture, preventing sinking or cracking.
What if my cheesecake cracks?
Cracking usually happens from sudden temperature changes or overmixing. To prevent it: let the cheesecake cool gradually in the oven with the door slightly open for 15 minutes after baking, then cool completely at room temperature. If it does crack, cover with whipped cream or fruit topping to disguise it.
How do I know when it’s fully baked?
The edges should be set and pulling away from the pan, while the center should still jiggle slightly—like Jell-O. If it wobbles too much, bake 5-10 more minutes. Overbaking leads to dryness. The internal temperature should reach 150°F for perfect doneness.
Can I use a different crust?
Try a chocolate cookie crust (replace graham crackers with crushed Oreos) or a nut-based crust (like almond flour + melted butter). For extra flavor, add 1 tsp cinnamon or ½ tsp espresso powder to the crust mixture. Just ensure it’s fully chilled before adding the filling.

- 6 Oz Chocolate Chip Cookie Recipe: Perfectly Balanced Crispy Edges and Chewy Hearts - September 25, 2026
- 6-Inch Coffee Cake Recipe: Vanilla Bean Swirls and Buttery Streusel Topping - September 25, 2026
- 1 Hour Soup Recipe: Velvety Richness Without the Wait - September 25, 2026