
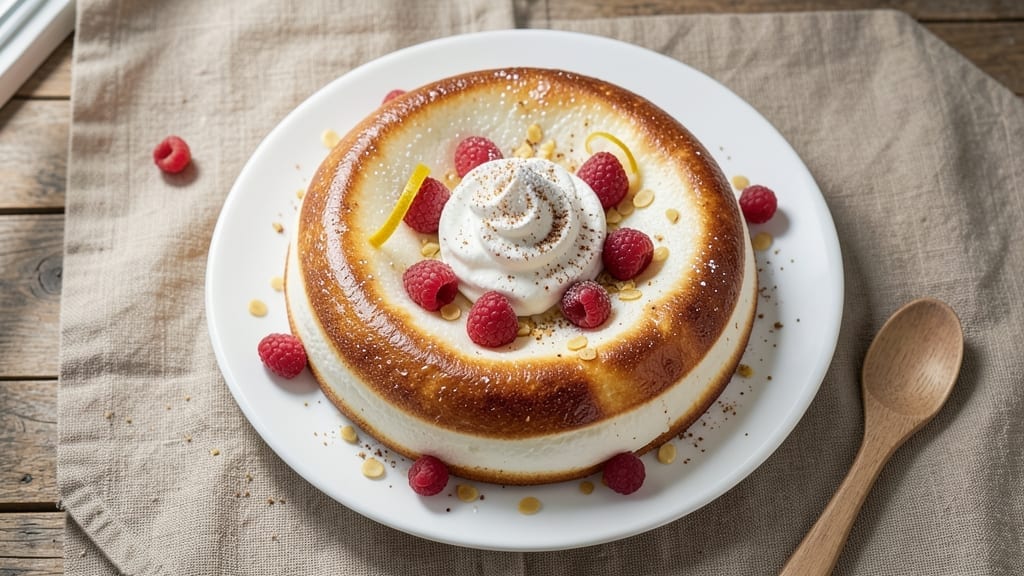
A single egg can create a masterpiece with this 1-egg pavlova recipe—where delicate crispness meets marshmallow magic in every bite.
The secret lies in precise technique: whipping egg whites to stiff peaks while incorporating sugar gradually, then baking at just the right temperature to achieve that signature crackly shell and cloud-like interior.
I’ve perfected this method after years of trial and error, ensuring even small batches deliver restaurant-quality results without requiring multiple eggs.
What makes this recipe truly special is its balance of texture and simplicity. The meringue develops a crisp exterior that shatters satisfyingly while maintaining a soft, marshmallow center—all from just one egg.
We’ll use a combination of cornstarch and vinegar to stabilize the structure, allowing you to achieve professional results even if you’ve never made pavlova before. The key is patience during both the baking and cooling phases, which we’ll cover in detail.
Once baked to golden perfection, your pavlova will transform into a stunning dessert platform ready for toppings. We’ll guide you through creating fluffy whipped cream and arranging fresh fruit in an artistic presentation that’s as beautiful as it is delicious.
The result is a dessert that feels luxurious yet requires minimal ingredients and effort—ideal for special occasions or when you want to impress without spending hours in the kitchen.
This recipe also includes adjustments for those who prefer their pavlova slightly softer or more crisp, along with tips for handling humidity variations.
Whether you’re serving this as a centerpiece for a dinner party or treating yourself to a special dessert, the technique remains the same—just one egg at a time creates something extraordinary. Let’s get started on crafting your perfect pavlova.
Ingredients for 1 egg pavlova
Six essential ingredients transform one egg into a showstopping dessert masterpiece.
| Ingredient | Amount | Notes |
|---|---|---|
| Large Egg 🥚 | 1 whole | Room temperature, separated |
| Granulated Sugar 🍚 | ¾ cup | Superfine preferred for smoothness |
| Cornstarch 🌾 | 2 tbsp | For structure and stability |
| White Vinegar 🍶 | 1 tsp | For acidity and crispness |
| Heavy Cream 🥛 | 1 cup | Cold for whipped cream |
| Powdered Sugar 🍚 | 2 tbsp | For whipped cream sweetness |
| Vanilla Extract 🌿 | ½ tsp | Pure vanilla preferred |
| Fresh Berries 🍓 | 1 ½ cups | Strawberries, raspberries, or mixed |
| Lemon Juice 🍋 | 1 tsp | Freshly squeezed for brightness |
| Unsalted Butter 🧈 | 1 tbsp | Optional for extra richness |
The egg is your canvas—room temperature makes all the difference for smooth whipping. Grab the freshest egg you can find (the yellow carton at grocery stores usually has the best). Superfine sugar dissolves better than regular granulated, but if you only have granulated, pulse it in a food processor for 30 seconds. The cornstarch and vinegar duo is non-negotiable for that signature crackly shell—Diamond Crystal kosher salt works if you want to add a pinch for stability. For toppings, Whole Foods or local farmers markets have the freshest berries, but any mix works. Pro tip: Pat them dry before arranging to prevent sogginess.
No superfine sugar? Pulse regular granulated sugar in a blender for 30 seconds—game changer. Swapping vinegar? Lemon juice works 1:1, but vinegar gives that classic tang. Heavy cream too rich? Whipped coconut cream is a lighter alternative. The butter is optional but adds luxurious richness—skip it if you prefer a lighter texture. For the berries, frozen works in a pinch (thaw and drain well), but fresh is always better. Need extra stability? Add 1/4 tsp cream of tartar to the egg whites before whipping. Trust me on this—it prevents weeping.
Whipped cream keeps best in an airtight container with parchment between layers for up to 3 days. The pavlova shell? Room temperature for 2 hours before serving—this is when the magic happens. Store leftovers in an airtight container for 2-3 days, but honestly, it’s best fresh. For freezing, wrap tightly in plastic and thaw overnight in the fridge. The berries? Add them last—they bruise easily. This dessert shines at room temperature, so serve it within 3 hours of baking for that perfect texture contrast.
Why You’ll Love This Recipe
- No Whisk Arm Fatigue: I swear by this recipe because it’s the only pavlova that doesn’t require me to beat egg whites until my arms give out. That vinegar trick? It stabilizes the meringue in half the time—no overcooking, no deflating disaster.
- Single Egg Magic: Between us, one egg is all you need for a cloud-like center. The sugar and cornstarch blend cuts through the richness of the cream, so it’s not cloying—just crisp edges, marshmallow middle, and that tangy vinegar kick that keeps it interesting.
- Crowd-Pleaser Without Stress: This is my go-to for potlucks or lazy weekends. The meringue holds up for hours (yes, even in summer heat), and the whipped cream topping lets everyone customize—berries, honey, even a sprinkle of cinnamon. Zero fuss, all wow.
- Budget Dessert Win: I make this when I’m broke but craving something special. One egg, a splash of vinegar, and a handful of sugar stretch to feed four. The heavy cream adds luxury without breaking the bank—plus, leftovers? They’re even better the next day.
Step-by-step instructions for crisp shell and marshmallow magic
Let’s create a pavlova that balances a crispy meringue shell with a soft, marshmallow center—here’s the exact method.
Prepare the Meringue Base
Preheat your oven to 350°F and line a baking sheet with parchment paper. In a clean, grease-free bowl, beat the 1 whole Large Egg at room temperature using a stand mixer fitted with the whisk attachment. Increase the speed to medium-high and gradually add the 0.75 cup Granulated Sugar while continuing to beat.
Beat for 8-10 minutes until the meringue is glossy, thick, and holds stiff peaks when the whisk is lifted. This step is critical—underbeating results in a flat pavlova, while overbeating can make it tough. You’ll know it’s ready when the meringue forms a thick ribbon that slowly falls back into the bowl.
Fold in Stabilizers and Shape the Pavlova
Gently fold in the 2 tbsp Cornstarch and 1 tsp White Vinegar using a spatula, being careful not to deflate the meringue. Transfer the mixture to a piping bag fitted with a large round tip. Pipe the meringue onto the prepared baking sheet, forming a 9-inch round with slightly raised edges—this creates the signature hollow center.
Use the back of a spoon to smooth the top and create a slight well in the center. Bake for 10-12 minutes until the meringue is light golden brown and crisp to the touch. Immediately reduce the oven temperature to 250°F and bake for another 1 hour, leaving the oven door slightly ajar to allow moisture to escape.
Create the Marshmallow Center
While the pavlova bakes, prepare the filling by whipping the 1 cup Heavy Cream in a chilled bowl until it forms soft peaks. Gradually add the 2 tbsp Powdered Sugar and 0.5 tsp Vanilla Extract, continuing to whip until the cream is thick and holds firm peaks. Fold in the 1 tsp Lemon Juice for brightness and the optional 1 tbsp Unsalted Butter for richness, if using.
Once the pavlova is completely cooled (about 2 hours), carefully invert it onto a serving plate. Spoon the whipped cream mixture into the hollow center, creating a mound. Gently press the cream down slightly so it stays in place.
Assemble and Garnish
Arrange the 1.5 cups Fresh Berries around the base of the pavlova, leaving the center exposed. Use a spoon to gently press the berries into the whipped cream, creating a decorative border. For extra flair, top with additional berries or a drizzle of reduced berry juice.
Serve immediately for the best texture contrast—crisp edges, marshmallow-like cream, and fresh berries. The pavlova will hold its shape for about 30 minutes before the cream begins to soften, so enjoy it while it’s at its peak!
Pro Tips For Making 1 Egg Pavlova
- Whisk Until Ribbon Stage: That egg-white foam needs to hold its shape like a meringue—whip it until the beaters leave a stiff peak that doesn’t wobble. I used to stop when it looked “fluffy,” but it’ll collapse faster than a soufflé if you skip this. A stand mixer helps, but hand-whipping works if you’ve got the patience (and a strong wrist).
- Sift Sugar First: Dump that granulated sugar straight into the whites? Bad idea. Sift it in while whipping to dissolve it evenly—no grainy surprises. I learned this after scraping clumps off my first pavlova. A fine-mesh sieve or even a forked whisk works in a pinch.
- Vinegar in Stages: Add the white vinegar after the sugar’s dissolved, a teaspoon at a time. Too much too soon makes the meringue weep like a sad dessert. Start with half the recipe’s amount, taste it—if it’s still bland, add the rest. Trust your tongue, not the recipe.
- Chill Before Slicing: Cut that pavlova fresh out of the oven, and it’ll crumble like a biscuit. Wait at least 2 hours (overnight’s better) to let it set. I know, you’re hungry now—but patience here means the perfect slice, not a sad pile of meringue dust. Room temp works, but a cool rack speeds it up.
Dietary considerations for this recipe
Gluten-Free Adaptation
This pavlova is naturally gluten-free since it relies on egg whites, sugar, and stabilizers like cornstarch—but always check your brands. King Arthur brand cornstarch is certified gluten-free. For extra stability, replace 1 tbsp of the cornstarch with ¼ tsp xanthan gum (like Bob’s Red Mill).
The vinegar and sugar remain unchanged, so your crisp shell stays intact. Just ensure your berries and vanilla extract are also gluten-free certified if avoiding cross-contamination. 🌾
Dairy-Free Options
Skip the heavy cream and butter entirely for a dairy-free version. Use 1 cup coconut cream (chilled overnight) whipped with 2 tbsp maple syrup and ½ tsp vanilla extract. For extra stability, add 1 tsp arrowroot powder while whipping.
The texture will be slightly lighter but still delicious. Serve with fresh fruit or a drizzle of dairy-free chocolate sauce for richness. 🥥
Nut-Free Considerations
This recipe is inherently nut-free, but always verify ingredient labels. The vanilla extract and powdered sugar brands should be nut-free certified (like Wholesome Sweeteners).
For extra caution, use sunflower seed butter (like SunButter) instead of regular butter if needed—just reduce the amount to ½ tbsp to avoid overpowering the flavor. The meringue and cream toppings remain safe for nut allergies. 🌻
Lower Sugar Adjustments
Reduce the granulated sugar to ½ cup (still superfine) and add 1 tbsp erythritol or monk fruit sweetener to maintain structure. For the whipped cream, use 1 tbsp honey instead of powdered sugar.
The texture will be slightly less crisp but still stable. Pair with unsweetened berries (like blackberries) to balance the flavor. 🍯
Egg Allergy Substitutes
If you must avoid eggs, this recipe isn’t adaptable—but try a meringue-free alternative. Whip 1 cup aquafaba (chickpea brine) with ¼ tsp cream of tartar until stiff peaks form.
Fold in ½ cup superfine sugar and 1 tsp cornstarch, then pipe and bake as directed. The texture will be softer, but it’s a great egg-free dessert option. 🥜
Nutrition facts
Frequently asked questions
Can I make this pavlova without a stand mixer?
Use a hand mixer or even a whisk with strong arm muscles. For best results, whip the egg whites in a grease-free bowl for 10-15 minutes until stiff peaks form. Work in short bursts to avoid overheating the bowl—this prevents the meringue from becoming grainy. The key is patience and consistent speed.
Why did my pavlova collapse after baking?
Collapse usually happens from trapped moisture or underbaked meringue. First, ensure your oven door stays slightly open during the 1-hour low-and-slow bake—this helps moisture escape. Also, make sure the meringue is fully baked (no jiggly center) before cooling. For extra stability, add ¼ tsp cream of tartar to the egg whites before whipping.
How do I store leftovers to keep them crisp?
Store the pavlova shell separately from the toppings in an airtight container at room temperature for up to 2 days. Re-crisp the shell by placing it on a baking sheet at 300°F for 3-5 minutes before adding fresh whipped cream and fruit. The cream should always be added fresh to maintain its fluffy texture.
Can I use this recipe for a smaller pavlova?
Yes! Scale down to ½ egg white (separated) and reduce sugar to ⅓ cup. Use a 6-inch round shape and bake at 325°F for 8-10 minutes, then 225°F for 45 minutes. The smaller size bakes faster—keep an eye on it to avoid over-browning. Perfect for individual servings!
What’s the best way to test if my meringue is ready?
Turn off your mixer and lift the whisk—if the meringue forms a stiff peak that stands straight up (not flopping), it’s ready! Another trick: Draw the whisk through the meringue—if it leaves a thick ribbon** that slowly falls back, you’re golden. Overbeating can make the meringue tough, so stop just before it reaches this stage.

- 32 Oz Cream Cheese Cheesecake Recipe: Silky Smoothness With No Cracking - October 11, 2026
- 8×8 Pan Dump Cake Recipe: One-Bowl Wonder with Fudgy Layers - October 11, 2026
- 10-Layer Cake Recipe: Stacked Height With Buttery Vanilla Layers - October 11, 2026